Image

Archive for Recipe – Page 9

Recipes for CSA Week 14

Posted by csa on
 August 26, 2013

photo (5)

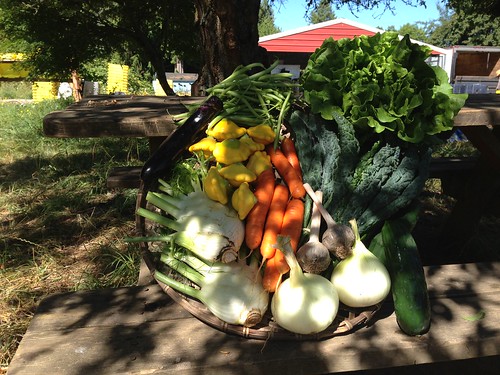
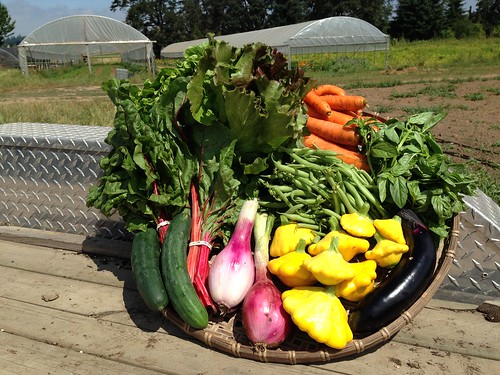
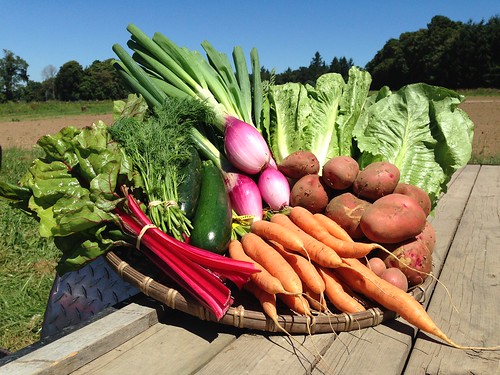
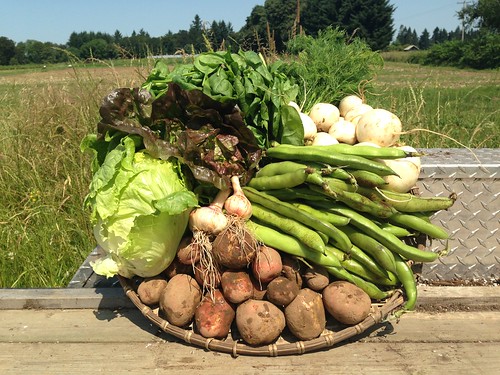
A few more stews and slightly cooler weather meals here this week. These episodic showers have brought me back into the kitchen for some more slowly-cooked dishes. As usual I call for a variety of herbs (mint, tarragon, parsley and dill) in the below recipes so pick some of those up if you’re tempted by any of the ideas. The Potatoes Gribiche (calling for tarragon and parsley) are an all-time favorite. By all means try the German braised cucumbers. It’s an unusual treatment for Americans but was a childhood favorite and may just convince you to cook cucumbers more often.

Eggplant and Chickpea Stew
Green Sauce
Roasted Carrots and Potatoes with Green Sauce
Eggplant and Green Sauce Sandwiches or Wraps
Roasted Potato Salad (Gribiche)
Cucumber Sesame Salad with Peanuts
Schmorgurken (German Braised Cucumbers)
Pasta “Carbonara” with Greens

Eggplant and Chickpea Stew

With the occasional showers these days I’m starting to feel like cooking a bit more and this stew fits the bill. I imagine you have a few tomatoes lying around even if you don’t have them in your share yet.

3 tablespoons olive oil
2 medium eggplants (best with Italian Globe eggplants but works with Japanese as well)
1 large onion, finely diced
¾ teaspoons cumin seeds
Salt
5 cloves garlic
1-2 teaspoons Aleppo pepper flakes (to taste) or ½ teaspoon red pepper flakes
2 tablespoons pomegranate molasses (or 1 tablespoon honey and 2 teaspoons lemon juice)
2 ½ cups vegetable or chicken broth or water or chickpea cooking liquid
2 cups cooked chickpeas (rinsed, from a can or home-cooked)
2 bay leaves
1 ½ – 2 cups diced tomatoes
1 small bunch kale, de-stemmed, washed and finely chopped
Hot bulgur or rice for serving (optional)
Greek yogurt for serving

Preheat oven to 450 degrees. Cut eggplants in half and score deeply with a knife a couple of times. Put on a sheet pan and roast until very tender about 25-30 minutes. Let cool and scoop the flesh out of the skin and roughly chop. Discard skin.

Heat oil, onion, cumin seeds and a few generous pinches of salt in a large Dutch oven or pot over medium heat. Cook, stirring frequently for about 10 minutes until the onion is quite soft and starting to brown. Add the garlic and pepper and stir and cook for another minute until fragrant. Stir in the pomegranate molasses or alternatively honey and lemon juice (not a perfect substitution but it will work fine) and cook for another 2 minutes. Add the broth or water or chickpea cooking liquid, bay leaves, tomatoes and reserved eggplant. Increase heat and bring to a simmer. Partially cover and turn heat down again and simmer for about 30 minutes. Add the chickpeas and kale and cook for another 20-30 minutes. Taste and adjust seasoning with salt, more Aleppo or red pepper flakes and a bit of lemon juice or honey to keep the slightly sweet tart flavor in balance. Serve as is or over rice and either way, topped with Greek yogurt. This is even better the next day!

Green Sauce
–inspired by Cook Republic

Handful of mint leaves
Handful of basil leaves
1 cup of packed cilantro leaves and stems (and roots if you have them) well washed and dried
juice of a quarter lemon
1/3 cup roasted, unsalted peanuts
1/4 cup olive oil
2 tablespoons water
1 teaspoon raw sugar
Salt to taste
Freshly ground black pepper

Process all the ingredients in a blender or food processor until smooth.

Roasted Carrots and Potatoes with Green Sauce

Not really a recipe. . . roast potatoes and carrots until tender (or boil if you’re in a hurry) and dress generously with green sauce. A wonderful side for fish, beef, . .. you name it!

Eggplant and Green Sauce Sandwiches or Wraps

Slice eggplant ½-inch thick and broil or panfry or grill until browning and tender.

Layer the eggplant with some thinly sliced Walla Walla Sweet, a slice of tomato if you have it, a bit of feta or goat cheese if you’d like and generous amount of green sauce in pita bread, between slices of regular bread or tortillas or any other vehicle you can think of.

Roasted Potato Salad (Gribiche)
–inspired by Super Natural Every Day by Heidi Swanson

This is a wonderful dish with bold flavors. If you have tarragon (or remember to pick some up) by all means use it but it’s lovely with the parsley and capers or just parsley if you don’t have capers. If you don’t have capers but have anchovies, mash a couple up and add them to the dressing instead.

Preheat oven to 400 degrees

2 – 2 1/2 lbs potatoes, scrubbed but not peeled, and cut into thumb-sized pieces
4 tablespoons olive oil
kosher salt
4 hard-boiled eggs, peeled
2 tablespoons red wine vinegar
1 teaspoon Dijon-style mustard
1 tablespoon capers, rinsed and chopped
¼ cup very thinly sliced onion
3 tablespoons chopped parsley
1 tablespoon chopped, fresh tarragon (optional but wonderful if you have it)
Freshly ground black pepper

Toss the potato chunks with 1 tablespoon of the olive oil and several generous pinches of salt and spread onto a baking sheet. Roast until tender and starting to brown about 30 minutes.

To make the dressing, mash one of the yolks of the hard-boiled eggs in a medium bowl. Slowly add the remaining oil, whisking constantly to create an emulsion. Add the vinegar and mustard and whisk until smooth. Then stir in the capers, herbs, ¼ teaspoon salt and some freshly ground black pepper. Coarsely chop the remaining eggs and egg white and add to the dressing. Gently toss the dressing with the warm potatoes. Adjust seasoning.

Cucumber Sesame Salad with Peanuts

This is a very addictive, fun salad.

1 large cucumber, thinly sliced
1 large or 2 smaller carrots, well scrubbed and very thinly sliced
1 jalapeno pepper, minced (Remove the seeds for a milder salad.)
1 clove garlic, finely minced
½ teaspoon fresh ginger, grated or finely minced
1 lime, zest and juice
1 tablespoon rice vinegar
½ teaspoon fish sauce
2 teaspoons sesame oil
1 teaspoon honey
1 teaspoon black sesame seeds (regular are just fine—the black ones look great but the flavor is very similar)
2 tablespoons salted and roasted peanuts, roughly chopped
1/3 cup cilantro, chopped

Place the cucumber slices, carrot and chile pepper in a large bowl, toss to mix. In a small bowl whisk together the garlic, ginger, lime zest and juice, rice vinegar, fish sauce, sesame oil, and honey. Drizzle the vinaigrette over the cucumbers and toss until thoroughly mixed. Refrigerate for 30 minutes to allow the flavors to deepen. Before serving add the sesame seeds, peanuts, and herbs and toss again

Schmorgurken (German Braised Cucumbers)

There are many variations of this dish in Germany and I grew up with this simple, sweet and sour vegetarian one. Often ground beef or small meat balls are added to the mix and sometimes also tomato. I don’t know of any cooked cucumber dishes in the states but having grown up with this one it doesn’t seem odd to me and is well worth a try. The quantities are squishy for this recipe, confirmed by my mother when I called her about the recipe this week. Just scale up or down to taste and depending on what you have.

Olive oil
2 large or 3 medium cucumbers, peeled and cut in half lengthwise and seeds removed with a teaspoon
½ cup sour cream
1 tablespoon white wine or cider vinegar
2 teaspoons sugar
Salt and lots of freshly ground pepper
2-3 tablespoons chopped fresh dill
Cooked rice for serving.

Put your rice on to cook—we grew up eating this over long grain white rice but you could by all means use brown as well.

Cut the halved cucumbers into ½-inch half rounds. In a large, heavy skillet sauté the cucumber slices in a bit of olive oil over medium to medium-high heat, stirring frequently. They will release quite a bit of liquid, which is great. It will add to the sauce. When they are translucent and softening (about 10 minutes) add the sour cream, vinegar, sugar, salt and pepper. Simmer for about 5 minutes more until the cucumbers are completely tender and the sauce has thickened a little. Add the dill, taste and adjust for salt and pepper and serve hot over rice.

Pasta “Carbonara” with Greens

Serves 4 as an entrée, generously.

This is another twist on the classic Pasta Carbonara, which typically includes pancetta (or bacon). Here we use lots of thinly sliced greens and sweet onions to great effect. And by all means use bacon or pancetta here if you’d like. You can then skip the pimeton and just cook the bacon with the onions.

The brilliance of Carbonara is that it’s very quick and so satisfying. Adding all these greens makes it a much more virtuous dish, though the original is so darn good it is virtuous in its own way.

1 medium onion, halved and cut into thin slices
3 tablespoons extra virgin olive oil
1 large bunch kale, well washed and stems removed and cut into thin ribbons
¾ teaspoon smoked paprika (pimentón), or to taste (see headnote)
12 ounces spaghetti or other long pasta
3 eggs
½ cup Parmesan cheese, grated (or more, to taste)
2 tablespoons cream
Salt and black pepper, to taste

In a large sauté pan, heat the oil over medium heat and add the onion. Let it sweat slowly. No need to caramelize, just soften well. Add the pimenton and a few generous pinches of salt.

Meanwhile bring a large pot of generously salted water to a boil.

In a bowl, beat together the eggs with the cheese, cream, a pinch of salt, and plenty of black pepper.

Cook the pasta until 4 minutes shy of being al dente. Add the kale and cook for 4 more minutes until the pasta is done. Save 1/2 cup of the cooking water and then drain the pasta and greens all together and return to cooking pot. Immediately toss the pasta with the onions and egg mixture—really mix it well to incorporate it all. The heat from the pasta will “cook” and thicken the eggs. Add a little of the cooking water to loosen things up and form a smooth sauce. Taste, adjust seasoning with salt, pepper, and serve hot.


Categories : Recipe

Recipes for CSA Week 13

Posted by csa on
 August 19, 2013

photo (4)

I don’t think you’ll need any ideas for the delicious corn this week. And I’ve included so many cucumber salad ideas the last few weeks that today you’re just getting a wonderful cucumber and smoked salmon spread in that department. The celery is a new treat and be sure to use the leaves as well. They add a fresh, savory bite to salads, egg dishes and anything you’re using the celery in. I do use dill, parsley and oregano in the recipes below so pick up some of those if you’re out. Happy cooking!

Pesto
Smoked Salmon and Cucumber Spread
Zucchini Fingers
Summer Squash Tian
Celery, Torpedo Onion and Carrot Salad with Blue Cheese Dressing (and a vegan alternative)
Chicken Salad with Celery and Scallions/Torpedo Onions (link)
Thai Green Curry with Eggplant and Basil

Pesto

I used to be a purist about pesto and I’m not anymore. I use almonds, walnuts or hazelnuts since I never have pine nuts. I use aged, Asiago Stella (available at Pastaworks and City Market) because it’s much cheaper than Parmesan and still very good. I also use the food processor. And you can scale this up or down very easily. It keeps well in the fridge, topped off with a thin layer of good olive oil, for about a week. And you can put it on so many things—use it as a sandwich spread; stir it into deviled eggs or a frittata thin it out for a salad dressing . . . .

1 bunch basil, leaves picked (about 3 cups leaves, loosely packed)
2-3 smallish cloves of garlic, peeled and roughly chopped
Generous handful of almonds, walnuts, hazelnuts or pine nuts
About 2 ounces of Parmesan or aged Asiago (Asiago Stella available at Pastaworks/City Market)
1/3 cup of good-tasting extra virgin olive oil (or more)
Salt and freshly ground pepper

If you have a mortar and pestle, a strong arm and some time, by all means make the pesto by hand. I almost always now make it in a food processor and it’s very good that way too.

Put the nuts and cheese in the processor and pulse until finely ground. Add the basil, garlic and salt and process until well chopped. Then slowly add the oil. Don’t over process. Adjust for salt and oil. Then store in the fridge until ready to use.

Smoked Salmon and Cucumber Spread
-adapted from The Kitchen Diaries by Nigel Slater

1  cucumber, peeled
Salt
2 teaspoons capers, rinsed
Generous ½ cup sour cream or Greek yogurt
½ teaspoon Dijon-style mustard
1 teaspoon lemon juice
2 tablespoons finely chopped dill
Freshly ground pepper

Cut the cucumber in half lengthwise and scoop out the seeds with a teaspoon. Then cut the cucumber into thick match-sticks and set in a colander. Sprinkle with a little salt and let sit for 20 minutes. Pat dry with a kitchen towel or paper towels.

Put the sour cream or yogurt in a medium bowl. Add the slightly chopped capers, mustard, lemon juice, pepper, dill and gently mix. Shred the salmon into thin strips and stir it into the mixture with the cucumber. Chill briefly before serving on any kind of crisps or bread you like. Rye bread is of course wonderful.

Zucchini Fingers

Summer Squash Fingers

You need a big, heavy duty skillet for this and plenty of heat. You’ll be rewarded with a very delicious side dish that may trump your main dish.

However many zucchini or summer squash you have/want to use. Wash and trim them and then cut them in to finger-like pieces, about 3-inches long.

Coat the bottom of your pan with olive oil and heat over high to medium-high heat. Add the squash in a single layer, if you can, they can be packed tightly together. Sprinkle with a little salt and cook undisturbed for about 5 minutes or until you smell them or peak at the undersides and see that they’re nicely browning. Turn the pieces over and let the other side (I realize there are four sides to each of these but browning 2 of them suffices) brown as well.

Meanwhile, finely chop some oregano and basil—more or less is fine. I used about 3 tablespoons of chopped herbs for three medium squash. Mince and mash a clove or two of garlic with some coarse see salt. Mix the herbs, garlic and another splash of olive oil in a small bowl. Add some minced jalapeno or a pinch or two of red pepper flakes if you’d like, as well as some black pepper. Toss this mixture gently with the browned squash and serve, topped with finely grated Parmesan.

Summer Squash Tian
–adapted from by Julia Child via Food52

This is a brilliant dish—it really is. Julia Child would have been101last week and in honor of her I made it again. It takes a little bit of time but is well worth it and uses a little over 2 lbs of summer squash. We had this for dinner with sliced tomatoes, basil and feta. Perfect summer food.

Serves 6

2 to 2 1/2 pounds zucchini or other summer squash, well washed (about 4 medium to large-ish squash)
1/2 cup long grain white rice
1 cup minced onions
3 to 4 tablespoons olive oil
2 large cloves garlic, mashed or finely minced
2 tablespoons flour
About 2 1/2 cups warm liquid: zucchini juices plus whole milk, heated in a pan (watch this closely so that it doesn’t curdle)
About 2/3 cups grated Parmesan cheese (save 2 tablespoons for later0
Salt and pepper
2 tablespoons olive oil

Preheat oven to 425.

If squash are large, halve or quarter them. Grate the squash on the large holes of a box grater into a large bowl that you’ve lined with a clean, cotton dish towel. Toss the grated squash with about 1 ½ – 2 teaspoons of sea salt and let sit while you continue with the dish.

In a large (11-inch) ideally ovenproof (cast iron or All-clad) frying pan, cook the onions and rice slowly in the oil for 8 to 10 minutes until tender and translucent. The rice may brown a bit which is just fine. Raise heat slightly and stir several more minutes until lightly browned.

Now bring the ends of the towel together and twist and squeeze all the liquid you can out of the squash and into the bowl it’s been resting in. You will get about 1- ½ cups of salted liquid. Add milk to make 2 ¼ – 2 ½ cups liquid and warm gently in a saucepan. Don’t boil.

Now stir the grated and dried squash and garlic into the onion and rice mixture. Toss and turn for 5 to 6 minutes until the zucchini is almost tender. Sprinkle in the flour, stir over moderate heat for 2 minutes, and remove from heat. Gradually stir in the hot liquid, being sure the flour is well blended and smooth. Return over moderately high heat and bring to the simmer, stirring. Remove from the heat again, stir in all but 2 tablespoons of the cheese.

Taste very carefully for seasoning. Now if you’re skillet isn’t oven proof turn the mixture into a buttered baking dish, top with remaining cheese and drizzle the olive oil over the cheese.

Bake in preheated 425-degree F oven until tian is bubbling and top has browned nicely. The rice should absorb all the liquid. It will take between 20 – 35 minutes. Serve hot or at room temperature.

Celery, Torpedo Onion and Carrot Salad with Blue Cheese Dressing
–inspired by Food52

1/2 head celery (about 6-7 stalks), peeled and thinly sliced, leaves picked and reserved
2 medium carrots, scrubbed and very thinly sliced
½ – 1 torpedo onion, very thinly sliced (depending on how much onion you like)
1/2 cup parsley, chopped

For the dressing:

3 tablespoons Gorgonzola Dolce blue cheese, at room temperature
1/2 cup sour cream or Greek yogurt
Zest and juice from one big lime
1 teaspoon sea salt
Freshly ground black pepper
2 teaspoons sugar

In a medium mixing bowl, whisk together the blue cheese, sour cream or yogurt, lime juice and zest, sugar, salt and pepper until well combined. Cover and chill until ready to serve. Just before serving in a large bowl toss all the vegetables, chopped parsley and celery leaves; add the sauce and mix well to combine. Taste for seasonings and serve.

** Vegan alternative:

For a very different but very good variation on this make this dressing.

2 teaspoons orange zest
1/3 cup fresh orange juice
1/4 cup fresh lime juice
1/2 cup olive oil
1 jalapeño pepper, seeds and membranes removed, minced
2 tablespoons chopped fresh dill or any herb of your choice
Sea salt and freshly ground black pepper to taste

Whisk orange juice, lime juice, jalapeño, 2 tablespoons dill, and zest in a medium bowl. Gradually whisk in 1/2 cup oil; season the vinaigrette with salt and pepper to taste. Pour into a mason jar with a tight lid; keep in refrigerator and use as much as you need for the salad.

Chicken Salad with Celery and Torpedo Onions

This is a great recipe from my dear friend (and cookbook author) Ellen Jackson. Substitute torpedo onions for the scallions in the recipe and feel free to use more celery than she calls for and toss in a bunch of the celery leaves along with some torn lettuce.

Thai Green Curry with Eggplant and Basil (and Carrots)

I’ve included a similar dish earlier in the season but am doing so again because it’s wonderful with eggplant and it’s best with lots of fresh basil. It is not quite an authentic Green Curry but a tasty, quick adaptation. You can easily add chicken or tofu to it for an even heartier dish though it’s wonderfully rich and satisfying without as well.

Serves 4 (generously)

2 carrots, well scrubbed (but no need to peel) and sliced thinly on the bias
2 eggplant, sliced into 1/3-inch half-rounds or cubed
1 – 2 inch piece of ginger, peeled and minced
2 cloves of garlic, minced
1 1/2 heaping teaspoon (or to taste) green curry paste (Thai & True is a great local brand and Mae Ploy is also readily available brand)
4-6 Kafir Lime leaves (optional) (New Seasons, Whole Foods and most Asian markets have them and they freeze beautifully so if you happen to see some buy lots and freeze-they add an incomparable fragrance to this dish though it’s certainly good without too)
2 teaspoons soy sauce (more to taste)
2 teaspoons fish sauce (can omit to make it vegetarian/vegan) (more to taste)
1 can coconut milk (full fat preferably but light will work too)
1/3 cup basil, packed and roughly torn
Juice of half a lime (optional)
White or brown cooked Jasmine or other long grain rice

Heat wok or large sauté pan over medium-high heat. Add ½ cup of coconut milk (use the thickest, part usually at the top of the can) and bring to a boil. Stir occasionally for 2-3 minutes. Add the curry paste, garlic, ginger and carrots and fry it all for about 3-4 minutes until the paste is fragrant. Then add the remainder of the coconut milk plus ½ can’s worth of water, soy sauce and fish sauce. Bring to a boil and then turn down to a simmer and add the eggplant and basil and simmer for about 10 minutes until the vegetables are tender. Adjust seasoning with a bit of salt or more soy sauce and/or fish sauce if needed and finish with a generous squeeze of lime juice, if using. Serve hot over rice.


Categories : Recipe

Recipes for CSA Week 12

Posted by csa on
 August 12, 2013

photo (3)

Update: I used both of my jalapeños today in a cooking class and they were so mild, even with all the seeds. So taste yours first and use more than you think you might if yours are also that mild. 

There are two dishes with toasted almonds this week and in both cases they are critical to the dish’s success. And you might as well toast more than you need if you’re anything like me—they’re a wonderful snack. In fact toast some pumpkin or sunflower seeds for the carrot salad while you’re at it.

Lots of fun salads this week and a bit more time consuming (but straightforward) recipe adapted form my current favorite cookbook Jerusalem. Enjoy!

Fried Tofu with Cucumbers (and Carrots?) and Peanuts
Eggplant, Summer Squash and Potatoes with Chermoula, Bulgur and Yogurt
Raw Summer Squash Salad with Toasted Almonds and Oregano (or Basil)
Green Rice (with Parsley and Jalapenos)
Sweet Onion and Parsley Salad
Porky Potato Salad
Carrot and Seed Salad

Fried Tofu with Cucumbers and Peanuts
–inspired by Sundays at Moosewood

A dear friend shared this recipe and swears by it. It’s a perfect summer dish when cucumbers are prolific.

It serves quite a few so halve the recipe if you’d like. I like to make it with cucumbers and green beans but carrots cut into matchsticks or thin half rounds, briefly cooked, would make a great substitute and take advantage of this week’s produce.

Sauce:
3/4 cup soy sauce
3-4 medium garlic cloves, minced
2-3 tablespoons minced onion
1 small jalapeno, minced (seeded if want it less spicy)
1/4 cup fresh lemon or lime juice
1 teaspoon sugar

Salad:
1 package firm tofu, cut into 3 slabs, pressed and patted dry
Sunflower or other oil for frying
4-5 servings cooked rice—hot, warm or at room temperature but not cold
2-3 cucumbers, cut in half lengthwise, seeded and sliced about 1/4 inch thick on a severe diagonal
2 cups green beans, cooked in salted boiling water for 3-4 minutes and cut into 2-inch lengths (optional)
or 2 cups carrots, thinly sliced and cooked in boiling, salted water until just tender (see headnote)
1/3 – ½ cup toasted peanuts, roughly chopped

In a small bowl, mix together sauce ingredients and taste to get a good balance of hot, salty, and sour. Sweeten with sugar if you like. Everything else in this dish is fairly bland, so the sauce should be strong.

Cut each slab of tofu diagonally both ways to form triangles. Pat the tofu dry again. Heat about 3 tablespoons or a bit more of oil in a wok or frying pan and, when it is hot, fry the tofu until golden brown. Drain on paper towels. Don’t crowd them or they’ll stick together and cook more slowly.

On a platter or individual plates, place first some rice and then the fried tofu with a drizzle of the sauce. Add the cucumber and carrots or beans and pour on some more of the sauce and garnish it with the peanuts.

Eggplant, Summer Squash and Potatoes with Chermoula, Bulgur and Yogurt
–adapted from Jerusalem by Yotam Ottolenghi and Sam Tammimi

IMG_8701_2

I took some distinct liberties with this recipe from one of my favorite cookbooks. You can also just roast the vegetables with the spice mix (chermoula) and enjoy those as a side and skip the bulgur salad and yogurt or just make the veggies and top with the yogurt and cilantro. It is a fun take on plain roasted vegetables in any case. And I think it is best with eggplant (what the original recipes uses exclusively), though my six-year-old definitely preferred the potatoes.

I don’t think this is a case where substituting parsley for the mint and cilantro is a good idea so pick up those herbs if you can.

2 cloves garlic, crushed and minced
1 ½ teaspoons salt
2 teaspoons ground cumin
2 teaspoons ground coriander
1/2 teaspoon chili flakes
1 teaspoon sweet paprika
grated zest of one lemon
2/3 cup olive oil, plus extra to finish
2 medium-large eggplants (or more if you have them), cut into bite-sized pieces (no need to peel)
2 medium summer squash, halved and then cut into bite-sized pieces
4 potatoes, scrubbed and cut into bite-sized chunks

1 cup bulgur
1 cup boiling water
1/3 cup golden raisins soaked for 10 minutes in warm water, then drained
2 tablespoons cilantro, chopped, plus extra to finish
2 tablespoons mint, chopped
1/3 cup sliced almonds, toasted
3 green onions, chopped
1 1/2 -3 tablespoons freshly squeezed lemon juice
1/2 cup Greek yogurt
Salt

Preheat oven to 400 degrees.

To make the chermoula, mix together in a small bowl the garlic, cumin, coriander, chili, paprika, salt, lemon zest and two-thirds of the olive oil.

In a large bowl toss all the cut vegetables with the chermoula until evenly coated with the spice mixture. Spread on a large sheet pan so that the vegetables are in one layer (or use two if you need to). Put in the oven and roast for 40 minutes, tossing occasionally, or until the vegetables are tender and browning in places.

Meanwhile, place the bulgur in a large bowl and cover with the boiling water and cover with a plate. After about 15 minutes the bulgur should be tender but still have a good bite. If it’s too hard still add more boiling water and steam for a bit longer and then drain out any extra water.

Chop the raisins up a bit and add to the bulgur, along with the remaining oil herbs, almonds, green onions, lemon juice and a pinch of salt and stir to combine. Taste and add more salt if necessary.

Stir together the yogurt with a bit of salt.

Serve the vegetables topped with the bulgur and then some yogurt and some more chopped cilantro.

Green Rice

This is a variation of a dish I grew up eating and my mother still makes. I used to think it odd to cook rice in milk (for a savory dish) but it is delicious and a one-pot meal. Or add a simple cucumber salad.

2 tablespoons olive oil
2 cloves of garlic, minced
1 onion, finely diced
2 jalapenos, finely chopped and deseeded (unless you like a lot of heat)
1 large bunch parsley, rinse well and bottom half of stems removed. Chop the remaining stems and leaves fairly finely
2 cups long grain white (or brown—will take longer to cook) rice
4 cups milk (2% or whole – not skim)
Salt
1 ½ cups grated sharp cheddar

Heat olive oil in a large pot or Dutch oven over medium-high heat. Add the rice to the pan and stir well to coat with oil and cook for 2-3 minutes, stirring occasionally. Add onion, garlic, jalapenos and parsley and mix well and sauté for 2-3 more minutes. Add the 4 cups of milk and a generous 1 teaspoon of salt (you may still need more—it takes quite a bit) and bring to a boil but be careful, milk boils over easily and makes a big mess so stay close by. Turn down to very low and cook, covered for 12- 15 minutes.

After the rice has ben cooking for about 20 minutes (if you’re using white rice otherwise 35 minutes) and much of the milk has been absorbed, stir in the grated cheese. Cover and cook for another 5-10 minutes until the rice is tender. I like to turn the heat up again at the very end to create a bit of a crust on the bottom of the pan. This is a bit risky since you don’t want to burn the rice.

Serve immediately with a simple cucumber salad on the side.

Raw Summer Squash Salad with Toasted Almonds and Oregano (or Basil)

I am not generally a fan of raw zucchini or summer squash but I have to say this salad is a keeper. I’ve made it several times and enjoy it more each time. The toasted almonds are key to the success, offering a nice crunchy contrast to the soft vegetables.

3 small or 2 medium zucchini or other summer squash (use the smallest, densest ones you have)
1 shallot, finely chopped (or a chunk of any other onion)
1/3 cup chopped toasted almonds
2 tablespoons (more or less) chopped fresh oregano (or marjoram or basil)
Juice of 1 lemon (might need a little less so start with ½ a lemon)
Good olive oil
Salt and freshly ground pepper

Trim the squash and depending on what shape/kind they are, you have various options of cutting them. You can use a vegetable peeler which takes some time but gives you lovely, thin ribbons. Or if you have a box grater with a single slicing blade on one side you can use that or you can just use a sharp knife and cut them as thinly as you can by hand.

Put the thinly sliced squash in a colander and toss with a little salt. Let sit for 15 minutes. Gently squeeze out any liquid you can but don’t try too hard or you’ll break down the pieces. Put the squash in a bowl and loosen it up a bit. Add all the remaining ingredients and toss well and taste and adjust seasoning with more lemon juice, salt and/or olive oil.

Sweet Onion and Parsley Salad
–inspired by Saveur

This is refreshing and very good.

2 tablespoons finely chopped mint
1 medium onion, halved and thinly sliced lengthwise
Sea salt and freshly ground black pepper, to taste
2 cups lightly packed parsley leaves
¼ cup salt-packed capers (or brined), rinsed and drained
¼ cup best olive oil you have
2 tablespoons fresh lemon juice
Zest from one lemon, finely grated on a micro-plane
Grilled or toasted crusty bread, to serve

In a medium bowl, toss together mint, onion, lemon juice and salt and pepper; let sit until onion softens, about 10 minutes. Add parsley, capers, oil and zest, and toss until evenly combined. Serve immediately with grilled or toasted bread.

Porky Potato salad
–adapted from Elizabeth Minchilli

3 cups cubed boiled or steamed potatoes, room temperature
1/2 cup cubed pancetta or bacon
¼ (or more depending on size of onions) medium sweet onion diced
3 tablespoons olive oil
2 tablespoon red wine vinegar
Salt and freshly ground pepper
Plenty of finely chopped parsley

Place the cooked potatoes in a serving bowl.

Heat a small frying pan and 1 tablespoon of the olive oil and pancetta or bacon. When the pancetta is cooked through, and starts to crisp at the edge, add the chopped onion and about a half teaspoon of salt and some freshly cracked pepper. Cook for one minute, turn off heat and add the vinegar.

Toss potatoes with hot pancetta or bacon mixture, adding the rest of the olive oil. Toss with parsley and adjust seasonings.

Carrot and Seed Salad with Cumin and Parsley
–adapted from Breakfast Lunch Tea by Rose Carrarini

With a simple frittata and a piece of good bread, this makes a lovely dinner.

Serves 6 ore more as a side (this makes a lot of salad—feel free to halve the recipe)

1 cup sunflower seeds or pumpkin seeds
1 tablespoon sunflower or olive oil
2 generous pinches of salt
a bit of minced jalapeno (to taste)
5 or so carrots, grated (on large holes of a box grater or with grating blade of food processor)
3 tablespoons finely chopped parsley

Dressing:
1/3 cup lemon juice (or more to taste)
½ teaspoon ground cumin
1 teaspoon sea salt, plus possibly more to taste
1/2 teaspoon ground black pepper
About 3 tablespoons sunflower or olive oil (I use a good olive oil)

Preheat oven to 350.

Toss the sunflower seeds with the tablespoon of oil and several pinches of salt and roast on a baking sheet for about 15 minutes, turning frequently, until they are crisp and golden. Set aside to cool.

Place the grated carrots and jalapeño in a serving bowl. To make the dressing whisk together the lemon juice, salt, pepper, cumin and oil. Pour the dressing over the carrots and mix well. Sprinkle with parsley and the seeds, mix again, and adjust seasoning and serve.


Categories : CSA Newsletter, Recipe

Recipes for CSA Week 11

Posted by csa on
 August 5, 2013

photo (32)

Lots of onion and cucumber ideas this week and coincidentally two recipes with lentils–good year-round in my opinion. And I included another Italian-style vegetable ragout in which the vegetables get soft and tender and sweet–kind of the Italian version of a stir-fry and equally delicious and useful when it comes to using various CSA treasures lurking in your crisper. And that beautiful garlic is being put to use in almost every recipe this week. Pick up some cilantro this week if you want to make a couple of the recipes, the red lentil dish and the cucumber, ginger sesame salad. Enjoy!

Summer Squash with Lentils, Parsley and Bacon
Spiced Red Lentils with Cucumber Yogurt
Summer Vegetable Ragout
Cucumber Salad with Garlic and Ginger
Fennel Notes
Grilled or Roasted Sweet Onions
Onion Sauce for Steak (or anything else)
Carrot Cake Pancakes (link)

Summer Squash with Lentils, Parsley and Bacon

This is so good! Lentils get overlooked a bit in the summer but I especially love salads with small green lentils in the summer. You can make them ahead of time and then have a robust, room temperature dish for whenever you need it.

1 cup small French green lentils or other small lentils that keep their shape when cooked
Splash of olive oil
1 Walla Walla Sweet, diced
4 cups summer squash, cut into small chunks –for zucchini I quarter them lengthwise and then cut them into 1/3-inch chunks (more or less depending on how much you need/want to use)
4 slices bacon, diced
2 ½ tablespoons sherry vinegar or red wine vinegar or a combination (or more to taste)
2 small-ish garlic cloves, crushed and then minced
3 (or more) tablespoons good olive oil
Sea salt and pepper (to taste)
¼ cup chopped parsley

Cook the lentils until tender, about 15-20 minutes (this will vary depending on the kind of lentil you have). You want them to be tender but keep their shape so check frequently.

Drain them and immediately toss them with the vinegar, garlic and olive oil. Set aside.

In the largest skillet you have, heat a splash of olive oil over high heat and add the bacon and onion and sauté for 5-7 minutes, stirring frequently. You want the onion softened and bacon rendered but not crisp. Remove the onions and bacon from skillet and add to lentils.

Add another splash of olive oil and the summer squash and a few generous pinches of salt. Cook the squash over high heat for about 7-8 minutes until browned and beginning to soften.

Add the warm squash to the lentils along with the chopped parsley and the additional olive oil. Taste and adjust seasoning with salt and/or vinegar.

Summer Vegetable Ragout

I wrote a spring version of this Italian-esque approach to vegetables earlier this season. Sweet onions, carrots, beans, squash, fennel or eggplant, kale and garlic all keep good company here. Again, it’s more of a technique than a recipe. The important thing is to cook them gently for quite a while and that all the vegetables are cut more less the same size. This is not an al dente dish and trust me it’s better that way.

Olive oil
1 medium or ½ a large sweet onion, diced
2 carrots, scrubbed, trimmed and diced
½ lb green beans, trimmed and cut into ¾-inch pieces
1 bulb fennel, any fibrous outer layers removed and trimmed and diced or
1 eggplant, diced (no need to peel or salt and drain)
1-2 summer squash, diced
1 bunch kale, leaves only, finely chopped
2 cloves garlic, minced or minced and then mashed with some coarse salt with the side of a chef’s knife until you get a coarse paste
Salt and freshly ground pepper
Handful of chopped basil
More good olive oil for drizzling

Heat a couple of tablespoons of olive oil in the largest skillet you have over medium-high heat. Add the onion and carrots and a couple pinches of salt. Toss and cook for about 5 minutes. Add the green beans, kale, fennel or eggplant and summer squash and a little more salt and a splash of water and cover the pan and cook for about 15 minutes on medium heat, stirring fairly frequently. If things start sticking add a little water. Keep cooking and stirring. A little browning is fine but try to avoid.

When all the vegetables are tender add the mashed garlic and the basil and stir well and cook for another minute or two until the garlic is fragrant. Adjust for salt and add pepper.

Serve with a generous drizzle of the best olive oil you have. With a fried or poached or hardboiled egg and a good slice of bread this is dinner.

Spiced Red Lentils with Cucumber Yogurt
–adapted from Plenty by Yotam Ottolenghi

Yes, two lentil recipes this week. This may seem like a cool-weather dish but I made a red lentil curry last week with the rest of my homemade green curry paste (from last week’s recipe packet) and loved it in this heat. We ate it barely warm with a generous dollop of cool cucumber yogurt topping and it was delish.

1 cup red lentils
1 small bunch cilantro (stems and roots and all if possible)
½ or ¼ (if it’s a huge one) Walla Walla, roughly chopped
2 1/2 inches ginger
3 cloves garlic
1 mild-ish green chili (like serrano or jalapeno), seeds removed
1½ tsp black mustard seeds
4 tbsp sunflower oil
1½ tsp ground coriander
1 tsp ground cumin
½ tsp ground turmeric
1 ¾ cups tomatoes, peeled and chopped
Salt

¾ cup Greek yogurt
1 cup finely diced cucumber
1½ tbsp olive oil

3 tablespoons butter
1½ tbsp lime juice
Reserved chopped cilantro leaves

Cut the cilantro bunch somewhere around the center to get a leafy top half and a stem/root bottom half. If you don’t have a bunch with roots just use all the stems for this part. Roughly chop the leaves. Put the stem half in the bowl of a food processor (reserve the leafy half), add the onion, ginger, garlic and chilli – all roughly broken – and pulse a few times to chop up without turning into a paste.

Put the mustard seeds in a heavy-based pot and place over medium heat. When they begin to pop, add the onion/cilantro mix and sunflower oil, stir and cook on low heat for 10 minutes. Add the spices and continue cooking and stirring for five minutes longer. Now add the lentils and 1 ½ cups water, the tomatoes and a couple of pinches of salt. Cover and simmer for about 30 minutes, until the lentils are fully cooked.

Before serving, whisk together the yogurt, cucumber, oil and some salt. Stir into the lentils the butter, lime juice and chopped cilantro, taste and season generously with salt. Divide into bowls, spoon yogurt on top. You can serve this over rice if you’d like or enjoy as is.

Cucumber Salad with Smashed Garlic and Ginger

Another salad inspired by Yotam Ottlenghi and his wonderful book Plenty.

This salad is fresh, nutty and delicious and good with most anything this time of year. It needs a little marinating time so start the dressing right away if you have other things to prepare.

If you don’t have a mortar and pestle chop the garlic and ginger as finely as you can and then mash it a bit with some salt on your cutting board with the side of a chef’s knife.

3 tablespoons rice vinegar
2 teaspoons sugar
2 tablespoons olive oil or sunflower oil
2 teaspoons toasted sesame oil
½ cup of onion, very thinly sliced
1 ½ inches fresh ginger, peeled and chopped (see headnote)
2 large garlic cloves, peeled, and chopped
1 teaspoon sea salt
2 large or 3 medium cucumbers, washed
1 tablespoon toasted sesame seeds
3 tablespoons chopped cilantro

In a medium bowl, whisk together the rice vinegar and sugar until the sugar is mostly dissolved. Whisk in the oils. Add the sliced onion, and toss to coat. Refrigerate for at least 30 minutes and for as long as 4 hours.

Now either mash the ginger with some salt in a mortar and pestle until it breaks down a bit and then add the garlic and mash a bit more until it’s a rough paste or put the ginger, salt and garlic on a cutting board and smash with the side of a chef’s knife until well-smashed. Scrape the contents from the board or mortar into the bowl with the onion and dressing. Stir to combine.

Slice the cucumbers in half lengthwise, place them cut-side down on the cutting board, and slice at an angle into ¼ inch slices. Add the cucumber, sesame seeds, and cilantro to the bowl and stir to combine. Let sit ten minutes, then pour off some of the liquid that has accumulated. Stir, season again with salt if desired, and serve.

Fennel Notes

Add very thinly sliced fennel to a green salad with thinly sliced cucumber and thinly sliced onion. Make a lemony dressing and/or add some chopped capers or olives and a few croutons and some shaved Parmesan and have yourself a lovely salad.

Add some ¼-inch fennel slices to the pan of onions below and grill/roast them too.

Dice and sauté fennel in olive oil until browning and al dente. Then toss with some cooked faro, lots of chopped parsley or mint or a combination, plenty of lemon juice, olive oil and minced garlic and salt and pepper.

Grilled or Roasted Sweet Onions

I eat half of these standing at the stove before they ever make it to the table.

Preheat the oven to 425 or light a grill.

Wash and remove the outermost layer of 2 Walla Walla Sweets. Cut them on “the equator” into ½-inch slices/rings. Toss the onions gently with olive oil and sea salt and spread on a sheet pan or in a grill pan. Roast or grill, turning once, until charred around the edges and tender—about 20 minutes. The time can very greatly based on your stove/grill and how big your sheet pan is.

Serve as is as a side or on sandwiches or burgers. You can also drizzle with a touch of balsamic or sherry vinegar. You can also chop them up and add them to salads of any kind.

Onion Sauce for Steak (or anything else)

Wash and remove outermost layer of 2 Walla Walla Sweets, cut in half and slice into thin half-rounds
Olive oil
Salt and freshly ground pepper
2 teaspoons Dijon-style mustard
2 tablespoons heavy cream

Cook the onions with a couple pinches of salt over medium heat in a large skillet and bit of olive oil until very soft and beginning to brown. You’ll want to stir regularly. It could take 20 minutes or so to get to this stage. Then add the mustard and cream and pepper and stir well and cook for a few more minutes. Serve with any kind of grilled or seared beef or pork.

Carrot Cake Pancakes

If per chance you find yourself with some time in the morning and if you want to make something fun for anyone–old or young–these Carrot Cake Pancakes are fun and decadent seeming.


Categories : Recipe

Recipes for CSA Week 10

Posted by csa on
 July 29, 2013

photo (31)

The chickpea and greens recipe might sound plain but it’s a lovely and complex dish especially when made with home-cooked chickpeas. And the Bruschetta with grilled peaches and basil is so simple and rather impressive looking and tasting. I make dinner of it these days. Happy cooking!

Bruschetta with Goat Cheese, Grilled Peaches and Basil
Summer Vegetable Curry (Greens Beans or Eggplant, Carrots, etc.)
Chickpeas with Greens
Chard Stem Gratin
Cucumber and Onion Salad
Summer Squash “Butter” with Herbs
Roasted Torpedo Onions with Bay and Thyme

Bruschetta with Fresh Goat Cheese, Basil and Grilled Peaches

Peaches and basil are a great combination and it’s simple, gorgeous and delicious.

Serves 5 as a side/starter

5 good crusty slices of bread, toasted or grilled
3-4 ounces fresh goat’s cheese (or fresh ricotta or some other mild, spreadable cheese)
Handful of whole basil leaves
1-2 large peaches, washed but not peeled
Salt and freshly ground pepper
Good olive oil
A little balsamic vinegar

Set your oven to broil or turn on/light your grill. Slice the unpeeled peaches into 1/4-inch thick slices, working your way around the peach vertically. Spread the peach slices on a cookie sheet and broil for about 5minutes until browning in a few spots. You don’t want them to fall apart or burn so watch closely. Alternatively grill on foil on a grill.

Cut your slices of toasted bread in halves or thirds. Spread generously with goat cheese and cover cheese with slices of grilled peaches. Salt and pepper the bruschetta at this point and drizzle with a little good olive oil. Then top with the basil leaves and a very light drizzle of balsamic vinegar. Enjoy!

Summer Vegetable Curry
–adapted from 101cookbooks.com

This is similar to my standard green curry and if you by chance made the green curry paste last week and have some leftover it would be perfect here. Otherwise use a store bought version (Thai and True is a good local brand). This recipe is a great way to use the small-ish quantity of beans or eggplant in this week’s share.

1 14-ounce can coconut milk (full fat preferably but lite will work)
1 onion, finely chopped
1-2 tablespoons green curry paste depending on your taste and desired heat level
1/2 teaspoon sea salt
2 small potatoes, washed and sliced 1/2-inch thick (optional)
1/4 pound green beans, trimmed and cut into thirds or 1-2 Japanese eggplants, cut into ½-inch dice
2 carrots, halved lengthwise if thick and sliced thinly into half-rounds
1 summer squash, trimmed and cut into ½-inch dice or ¼-inch half rounds
8 ounces extra firm tofu, cut into 1/4 inch cubed
1 lime, halved or quartered
small handful of basil leaves, torn

Spoon a few tablespoons of thick coconut cream from the top of the coconut milk, place it in a large pot over medium-high heat and bring to a simmer.

Add the onion and saute until it softens a bit, 2-3 minutes. Stir in the curry paste and salt, and cook for another minute or two. Have a taste, and decide if you want to adjust the flavor – adding more curry paste or salt if needed.

Add the rest of the coconut milk to the pot along with the potatoes (if using) and carrots, cover, and simmer until they are just starting to get tender – about 10 minutes. At this point add the beans or eggplant, squash and tofu. Let simmer for a about 6 more minutes or until all the vegetables are tender. Add the basil and remove from the heat.

Serve with a squeeze of lime juice and enjoy as is or over rice or rice noodles.

Chickpeas with Greens
–Adapted (slightly) from The River Cafe Cook Book via racheleats.com

This is so delicious with some good bread and cheese for a simple supper.

serves 6

2 bunches chard (you can halve the recipe if you have a half share or supplement with any other braising greens you have to have the equivalent of 2 bunches), stems removed and saved for another purpose (like the squash stem gratin-below
5 tablespoons extra virgin olive oil
1 torpedo onion or other onion, finely diced
2 medium carrots, diced finely
salt and freshly ground black pepper
1 dried chilli, crumbled or ¼ teaspoon red pepper flakes or a small fresh Serrano, minced
250 ml / 8 fl oz white wine
1 medium tomato, diced (optional but very good)
3 cups cooked chickpeas
a generous handful of chopped parsley
the juice of half a lemon
more extra good olive oil to serve

In a large pan of well-salted fast boiling water, blanch the greens briefly. Drain them and then once they are cool enough to handle, chop them coarsely and set aside.

Warm the oil in a large heavy skillet, add the onion, carrot and a pinch of salt and cook them slowly for 15 minutes or until they are tender. Season with a little more salt, pepper and the crumbled chilli or red pepper flakes.

Add the wine to the pan and allow it to bubble away until it has almost completely reduced. Add the tomato, greens and chickpeas, stir and cook, stirring every couple of minutes for 10 minutes.

Add 3/4 of the chopped parsley and the lemon juice to the pan, stir, turn off the heat and allow the pan to sit for 10 minutes.

Transfer to a large platter or serving dish, sprinkle with the remaining parsley and a little more extra virgin olive oil and serve.

Chard Stem Gratin

I collect my chard stems in a bag in the fridge if the dish I’m making only takes advantage of the leaves. I usually either dice the stems and add them to soups or sauces but have also made a gratin when I have enough of them. It’s worth the effort and will make you think twice about composting them (which I have been known to do). If you’re shy on the quantity you can round it out with thinly sliced carrots or thickly sliced summer squash.

Chop half an onion. Cut 2 bunches worth of chard stems into 2-inch lengths and sauté both in olive oil for a few minutes with a few pinches of salt. Add 1/2 cup of water and cover the pan and braise them for about 10 minutes until the stems were tender.

For the béchamel:

Melt 4 tablespoons of butter in a saucepan, add 4 tablespoons of flour, whisk and cook over medium heat for 3-4 minutes. Add 1 cup of hot milk and 1 cup of hot vegetable or chicken broth, (feel free to heat up together) and several pinches of salt and freshly ground black pepper. Whisk in the hot liquid and cook over medium heat until thickened, about 7-10 minutes. Add a bit of grated/ground nutmeg and handful of grated sharp cheddar or Parmesan or other hard cheese. If there is any liquid left in the chard pan, drain it off and add it to the béchamel as well.

Then I added about 1/4 teaspoon of freshly grated nutmeg to the bechamel and grated some sharp cheddar. Oh and I added the liquid left in the chard pan to the bechamel.

Put the chard stems and carrots (and/or squash – if using) in a small-ish casserole dish, cover them with bechamel, sprinkle over some bread crumbs if you have some and a bit more grated cheese. Bake in a 400-degree oven for about 20 minutes until nice and bubbly, finish under the broiler. Serve with the below cucumber and onion salad for a simple supper.

Cucumber and Onion Salad

Halve the recipe if you have a half-share and feel free to substitute basil for the dill for a different but equally good salad.

2 cucumbers, scrubbed and peeled if the skin is tough, halved lengthwise and thinly sliced on the diagonal
1/2 Torpedo onion or quarter of a sweet onion if you have it and have run out of Torpedos, thinly sliced
1/2 cup fresh dill, coarsely chopped (or basil—see headnote)
3 tablespoons olive oil
3 tablespoons fresh lemon juice
2 tablespoons white-wine vinegar
Sea salt and ground pepper

In a large bowl, toss together cucumbers, onion, dill, oil, lemon juice, and vinegar; season with salt and pepper.

Summer Squash “Butter” with Herbs
–inspired by Amanda&Merril.com

Whenever you have a lot of squash this is the prefect thing to do. Grated fine, it cooks down quickly, turning into a sweet and savory side dish or spread. Spread it on toast in place of actual butter or add a thick layer in a sandwich with salted tomatoes or soft cheese. You can use it as a pizza topping or a pasta sauce or a side dish.

About 4-5 medium zucchini or any kind of summer squash (feel free to use less or add extra — cooking times will vary)
1/4 cup olive oil or butter (I prefer butter in this one)
½ a medium onion, minced
2 tablespoons chopped fresh oregano, mint, basil or parsley
Salt and freshly ground pepper
Squeeze of lemon juice or drizzle of vinegar

Coarsely grate the squash on the large holes of a box grater. Squash is really the easiest thing to grate so it won’t take much time at all.

In a deep skillet, heat the olive oil/butter. Sauté onion for about 3 minutes on medium heat. Add the squash and a few generous pinches of salt and toss and cook and stir over medium to medium-high heat until the zucchini reaches a spreadable consistency, about 15 minutes. If you scorch the bottom, turn the burner down a bit but don’t worry about the browned areas. They will add flavor and be sure to scrape them up and reincorporate. Just before the end of the cooking time add the herbs and incorporate well. Cook another minute or two, taste and adjust seasoning with salt and pepper and a little lemon juice—you don’t need much but just a little brightens it up nicely.

Roasted Torpedo onions
–adapted from Elizabeth Minchilli

I wish I would have come across this recipe when you were getting more of these in your share but I’m still including it, if per chance you have collected a few more or can acquire a few more Torpedo onions or other similarly sized onions this week. It’s a lovely recipe.

4 Torpedo onions
8 bay leaves, plus about 10 more for the pan
16 sprigs of fresh thyme
olive oil
1/2 cup white wine
salt & pepper

Preheat oven to 350F

Cut the green tops off the onions. Slice the onions in half, length wise.

Generously rub the onions with olive oil, and season with salt and pepper.

Slip a bay leaf and two sprigs of thyme, into each onion.

Place the extra bay leaves on the bottom of an oven pan just large enough to hold the onions. Place onions on top, and pour in about a half-cup water and the wine. Drizzle onions with a bit more olive oil, cover with tin foil and put the pan in the oven.

Keep checking about every 20 minutes, to make sure there is still some liquid in the bottom of the pan. If needed add a bit more wine and/or water. Baste the onions every so often, and take the tin foil off after about 45 minutes.

The onions should take about an hour and a half to cook, and should be nicely browned at the edges.

Serve hot, or room temp.


Categories : Recipe

Recipes for CSA Week 9

Posted by csa on
 July 22, 2013


photo (30)

The difference between fresh cilantro from a farm, root and stems on and cilantro from a grocery store is noteworthy. A) you get the roots which is wonderful because they are delicious and used in many Thai and Vietnamese dishes (and maybe other, Indian, etc?), see the homemade Green Curry Paste below, B) the cilantro will stay fresh much longer—you’re not likely to get a slimy mess for weeks by which time it will be long gone, and C) the flavor is just better, fresher and more vibrant. And the cilantro inspired many of the recipes in this week’s packet.

Roasted Summer Squash with Parsley (or Cilantro) Garlic Dressing
Rice Noodles with Vietnamese-inspired Cilantro Dressing (and carrots and turnips)
Thai Green Curry (with home made Curry Paste) with Turnips and Carrots
Black Beans with Cilantro and Walla Walla Sweets and Lime
Beet Cilantro and Avocado Salad
Onion Rings (link)
Tzatziki
Summery Carrot Soup with Cilantro Cream

Roasted Summer Squash with Parsley (or Cilantro) Garlic Dressing

I typically make this with parsley but cilantro is a good substitute.

However many summer squash you want to use, washed, trimmed and cut into ¾-inch dice or chunks
Olive oil for toasting
½ cup parsley or cilantro, finely chopped (see headnote)
1 large clove garlic, minced
1-2 tablespoons lemon juice
¼ – 1/3 cup good olive oil
Salt & freshly ground pepper

Preheat your oven to 425 degrees.

Toss the diced squash with a bit of olive oil and salt and spread it on a sheet pan, preferably in one layer. Roast, turning occasionally until browning around the edges and tender about 20 minutes. You can also broil the squash to speed things up a bit but watch it carefully as it can quickly burn.

Mix together the parsley or cilantro, garlic, lemon juice, olive oil and salt and pepper. Taste and adjust seasoning. Toss the squash with the dressing. Let rest for 15 minutes if you can before serving. Serve warm or at room temperature.

Rice Noodle and Fresh Herb Salad with Vietnamese-inspired Dressing
–adapted from Tea&Cookies

This is a very herb-heavy variation on my favorite Asian noodle salad. I could eat this every week all summer long. I wrote lots of variations into this recipe so you can make it throughout the year with different herbs and vegetables. For this week’s share I would just cilantro for the herb (if you have basil or mint then by all means add some but just cilantro will be good too), carrots (grated), cucumber (finely chopped) and turnips (grated) and some diced Walla Walla Sweets.

Dressing:

This is a Vietnamese-inspired dressing, tart with lime juice and salty with fish sauce and a bit of spice from chili paste. You don’t have to use this dressing, you can make your own (a simple soy sauce, rice vinegar, and sesame oil will do the trick), but this is a good starting point. You can adapt as you like. And this makes enough to keep a jar around in the fridge for your next batch of cold noodles (it will last at least a week).

½ cup freshly squeezed lime juice
1/3 cup fish sauce
½ cup rice vinegar
3 cloves garlic, finely minced and then mashed with some salt with the side of a chef’s knife
2 tablespoons sugar
2 tablespoons water
2 tablespoons sambal oelek chili sauce (or less if you’re sensitive to spice) or ½ teaspoon red pepper flakes or a Serrano chili, minced (seeds and all if you like spice)

Whisk all dressing ingredients together in a bowl or shake in jar, until smooth. Taste and add more sugar or lime juice, as desired (you may also like sesame oil or soy sauce in this dressing, play around and find your favorite mix).

Noodles:

You can use different noodles. I use rice noodles, but you can use Japanese soba noodles made from buckwheat, thin somen noodes, or thinner rice noodles. The rice noodles hold up really well over time and soak up the dressing, the soba noodles add their own nutty flavor. Experiment and see what you like best. I use 8 ounces of noodles typically for four people.

Herbs:

I add 3-4 cups of herbs in varying ratios when I have that much on hand this time of year. I love the trio of basil (Thai especially but regular Genovese works well too) mint and cilantro, Green onions are a lovely addition too. I leave the basil and mint leaves whole (just picked off their stems) and very roughly chop the cilantro since I’m too lazy to pick off the leaves. Cilantro stems are tender so you can just chop off the bottom few inches of the bunch and use the rest.

Cilantro
Mint
Basil
Chives—can throw a bunch of chives in if you have them on hand (especially if you are missing green onions)
Green onion—sliced thin on a diagonal, I use two or three per batch of noodles or chunk of diced Walla Walla

Vegetables:

There is a wide range of vegetables you can use, some listed below. The one trick I rely on is to use a mandoline to slice the harder vegetables into matchsticks, which works well with the noodles and allows the flavor of the dressing to permeate.

Pick the combination that appeals to you.

Cucumber—adds a refreshing crunch, slice with mandolin (or finely chop with a knife)
Zucchini—I use this when I have no cucumber, or need to use up my squash
Carrots—more crunch, definitely use a mandoline (or grater, if you don’t have one)
Hakurei Turnips, peeled and julienned or grated
Radish—gives a nice peppery kick, refreshing crunch, nice color
Green beans—blanch these for 3 minutes, slice thinly
Peas—shelled or in their pods, also slice thin
Corn—I toss in fresh corn cut off the cob
Tomatoes—cherry tomatoes or larger ones cut into dice

Pick two to four vegetables you think would taste good together and add them to your cold noodles. Remember to slice them thin, if they are sliceable, so they don’t drop out of the mix and fall to the bottom.

Instructions:

Cook 8 ounces of noodles according to directions, rinse with cold water and set aside. Can be cooked ahead. Then toss the cold noodles with the herbs and vegetables to mix (you may want to use a knife or scissors to cut the noodles into smaller pieces for ease of mixing and eating). Add dressing and toss again. You might want to add the dressing shortly before serving, or be prepared to taste and add more dressing later. The noodles and vegetables have a way of sucking up the flavor.

Thai Green Curry (with home made Curry Paste) with Turnips and Carrots
–adapted from multicuriosity.com

There’s good store bought green curry paste to be found in town (Thai and True) but homemade is still a notch above and with your beautiful cilantro this week you might give it a go.

This makes quite a bit of curry paste so feel free to save some for another meal. It keeps in the fridge for several days and freezes well.

In a food processor combine:

1 stalk lemongrass (trimmed of the outer, fibrous layers and roughly chopped),
1 or 2 hot chili peppers (jalapenos or serranos),
1/4 cup minced onion
4 cloves garlic, chopped
1-inch chunk peeled ginger
1 1/2 cups cilantro stems and leaves and roots (washed and roughly chopped. Make sure you get the dirt out of the stems where they come out of the root—dirt tends to get stuck in there)
1/2 teaspoon ground cumin
1/2 teaspoon ground coriander
3 Tablespoons fish sauce or soy sauce or a combination
2 Tablespoons lime juice
Zest of 1 lime
1 teaspoons brown sugar
3-4 tablespoons coconut milk or water (enough to blend ingredients together)

Process everything until it forms a paste—it doesn’t have to be perfectly smooth.

2 carrots, scrubbed and thinly sliced
3 turnips, scrubbed and diced
Remainder of the can of coconut milk
Water

Sauté paste in 2 tablespoons sunflower, coconut or sesame oil over medium high for 5 minutes, stirring constantly. Add the carrots and turnips.

Stir and cook 3-5 minutes then add 1 1/2 cups coconut milk—more or less what you’ll have left in the can or 1 1/2 cups chicken or vegetable broth and about 1 cup of water and bring to boil. Reduce heat and simmer another 5 minutes or so until the vegetables are tender. Taste and adjust seasoning. It may well need salt. Serve with Jasmine or Basmati or other long grain rice.

You can also make the paste in advance and store it in the fridge for up to a week before using it.

Black Beans with Cilantro and Walla Walla Sweets and Lime

This is a fresh, lovely combination for a summer supper. If you have any cherry tomatoes ripe in your garden, cut those in half and toss them in too. Quantities are completely up to you. Use what you want, taste and adjust. It’s great with pretty much an ratio.

Black beans (home-cooked or canned-rinsed if canned)
Cilantro leaves and stems, washed and roughly chopped
Diced or thinly sliced Walla Walla Sweets
Lime juice and a little lime zest if you want (a little goes a long way)
Salt and freshly ground pepper
Olive oil
A little ground cumin and cayenne if you’d like

Toss everything together. Taste, adjust seasoning, enjoy.

Beet, Cilantro and Avocado Salad

When I get a bunch of beets, as you know, I almost always roast the whole batch and then have the pleasure of having roasted beets on hand to use however I want. So, I highly recommend roasting all at once while you’re doing something else in the kitchen since they do take some time.

3 medium beets, roasted and peeled and cut into bite-sized pieces
1 avocado, diced (optional)
2 slices of good, crusty bread, toasted and cut into bite-sized squares (optional- but makes it nice and hearty)
1/2 cup roughly chopped cilantro, leaves and stems and finely minced roots
2 tablespoons finely diced Walla Walla sweet
2-3 tablespoons toasted pumpkin or sunflower seeds
Juice of half a lemon or about 1 ½ tablespoons red wine or sherry vinegar
2-3 tablespoons good olive oil
Salt and freshly ground pepper

Toss everything together. Taste and adjust seasoning.

Beet Cilantro Bread Salad

Onion Rings

Onion rings are not something I typically make but when one of my favorite food bloggers, David Lebovitz, writes about onion rings I pay attention. So, here is his recipe (adapted from Hooters☺) in case you want to make some this week with the gorgeous Walla Walla Sweets. 

And here’s an onion tart recipe from Edible Portland which will use up a good amount of your onions this week.

Tzatziki

This cool, creamy Greek side/spread/dip is one of my all time favorite foods. I pile it on toasted bread and I add it to pita or regular sandwiches. I eat it with boiled potatoes or thinly sliced grilled beef or salmon.

2 medium cucumbers, peeled, seeds scooped out and fairly finely chopped
1 1/2 cups Greek yogurt or plain whole milk yogurt strained in cheese cloth for 2-3 hours to remove the whey and make it dense and richer (you can skip this step too but it will be a bit runnier but still delicious)
2 cloves garlic, minced
2 tablespoons olive oil
2 tablespoons chopped dill (for an inauthentic substitute add chopped parsley, chives or basil—it will still be delicious)
1 tablespoon white wine, cider or champagne vinegar (or lemon juice)
Salt and freshly ground pepper

Scooping out the cucumber’s seeds may seem silly but you want to remove as much moisture as possible for this dish and keep the firm, fleshed part.

Mix all the ingredients together. Taste and adjust seasoning. Chill for at least an hour if you can. It keeps well for about 3 days and gets a bit stronger (from the garlic) as it sits.

Summery Carrot Soup with Cilantro Cream

I don’t make many soups in the summer but the carrots are so gorgeous that I’m inspired.

3-4 carrots, scrubbed and chopped
1 cup diced Walla Walla Sweet
4 cups (or more) vegetable broth
Salt and freshly ground pepper
Finely chopped cilantro
Greek yogurt or crème fraiche or sour cream
Lemon juice

Sauté the onion in some olive oil or butter—carrots like butter a lot—for 5 minutes or so and then add the carrots and the broth. Simmer for about 15 minutes or until the carrots are very tender. Now you can use an immersion blender or regular blender or food processor to process to your desired consistency. Season with salt and pepper. If the soup tastes very sweet stir in some lemon juice or vinegar at this point. And if it’s too thick thin it a bit with more broth or water.

Stir together the yogurt or crème fraiche, cilantro, lemon juice and some more salt and maybe a little olive oil. Taste and adjust seasoning. You want it to be nice and bright.

Serve soup with a generous dollop of the cilantro cream.


Categories : Recipe

Recipes for CSA Week 8

Posted by csa on
 July 15, 2013

photo (29)


Summer is here! The colors in your share are getting brighter and more varied. Lots of quick and salad or salad-like recipes again this week as it’s going to be hot. Enjoy!

Carrot, Dill and White Bean Salad
Carrot and Seed Salad
Simple Zucchini Sauté

Torpedo Onion Notes
Torpedo Onion and Potato Frittata
Green Salad with Torpedo Onions and Dill Buttermilk Dressing
Chard Pesto
Braised Chard

Carrot, Dill and White Bean Salad
–adapted from 101cookbooks.com

A beautiful and delicious combination.

Serves 6 as a side

1/4 cup good olive oil
3 tablespoons fresh lemon juice
1/4 teaspoon salt
1/2 cup thinly sliced onions

More olive oil for cooking
3 cups sliced carrots, cut 1/4-inch thick at an angle
3 cups cooked white beans (home-cooked or canned)
generous 1/4 cup chopped dill
2 tablespoons brown sugar (or honey)
1/3 cup sliced almonds, toasted

Combine the olive oil, lemon juice, salt and onions in a small bowl. Stir and set aside.

In your largest skillet over medium high heat, toss the carrots with a splash of olive oil and let them cook in a single layer (if you can)- they’ll give off a bit of water at first. Keep cooking, tossing every three or four minutes until the carrots are deeply browned, probably about twelve minutes.

Add the beans and dill to the skillet and cook for another five minutes, or until the beans are well heated through.

Place the contents of the skillet in a large mixing bowl, sprinkle with the brown sugar and pour the 3/4 of the lemon-olive oil mixture over the top. Toss gently. Let sit for ten minutes. Toss gently once again, taste and adjust with more salt or sugar or lemon juice if needed to balance the flavors. Serve warm or at room temperature and finish by sprinkling with the almonds just before serving.

Carrot and Seed Salad
–inspired by Breakfast Lunch Tea by Rose Carrarini

Serves 6 as a side

I’ve included versions of this salad before but usually with other herbs. Dill and carrots get along so well though that I’m including the “dill” version this week.

With a simple frittata, like the Torpedo onion an potato one below, this makes a lovely dinner.

1 cup sunflower seeds (or pumpkin seeds)
1 tablespoon olive oil
2 generous pinches of kosher salt
6 medium carrots, grated
2-3 tablespoons finely chopped dill

Dressing:

3-4 tablespoons lemon juice
1 teaspoon kosher salt, plus possibly more to taste
1/2 teaspoon ground black pepper
2 teaspoons honey or sugar
about 3 tablespoons sunflower or olive oil (I used a good olive oil)

Preheat oven to 350.

Toss the sunflower seeds with the tablespoon of oil and several pinches of salt and roast on a baking sheet for about 15 minutes, turning frequently, until they are crisp and golden. Set aside to cool.

Place the grated carrots in a serving bowl. To make the dressing whisk together the lemon juice, salt, pepper and oil. Pour the dressing over the carrots and mix well. Sprinkle with the dill and the seeds, mix again, and adjust seasoning and serve.

Simple Zucchini Sauté

I either make this when the first zucchini arrive each summer. This is not really a recipe, just a technique that I never tire of.

3-4 zucchini/summer squash (however many you have/want to use
Olive oil
Salt
Grated Parmesan, for serving (optional)

Wash the zucchini and trim the ends. Cut them into ¼-inch rounds at an angle. Heat 1-2 tablespoons of olive oil over high heat in the largest skillet you have (you don’t want to crowd them too much as they’ll steam instead of browning if you do). Add the zucchini and couple of pinches of salt. Toss them around in the hot oil a bit and then let them cook on high heat for just a few minutes and then turn the heat down to medium-high or a bit lower. You want to get a good bit of browning right away. Continue cooking and gently flipping/stirring occasionally until they’re nice and tender. Adjust seasoning with salt, drizzle with a little more good olive oil if you’d like and enjoy. A good grating of Parmesan would not be amiss here either.

Torpedo Onion Notes & Torpedo Onions Roasted under Salt

This delicious crisp sweet onions are from Southern Italy and are also called Tropea Onions (after the town in Calabria where they originate). They are wonderful grilled simply with olive oil and salt. They are also delicious made into an onion jam, cooked slowly and then finished with a little balsamic or sherry vinegar. They would also be delicious on a burger or any sandwich or salad.

I found this fun blog post and cooking technique while brushing up on these wonderful onions. I haven’t tried this method but it sounds wonderful.

Torpedo Onion and Potato Frittata

As usual, please adjust the ingredient quantities to your liking as this can easily be scaled up or down and you can change the ratio–more onion/potato per egg or vice versa.

Coupled with the Carrot and Seed Salad above this would make a lovely dinner.

1-2 tablespoons olive oil
2 (or more) Torpedo onions, trimmed, cut in half lengthwise and then sliced into thin half-rounds
3 medium potatoes, well-scrubbed (no need to peel) and cut into small (1/2-inch) chunks or dice
6-8 eggs (or whatever you have or want to use)
some crumbled feta (optional)
Salt, pepper

Heat the oil in a heavy sauté pan or well-seasoned cast iron pan or non-stick (if it’s heatproof and can go in the oven). Add the onions and potatoes and a few generous pinches of salt and sauté them over med-high heat, stirring often so as not to burn, until the potatoes are tender when pierced with the tip of a knife, about 10 minutes.

Set your oven to broil.

Lightly whisk the eggs until they’re just broken up—no need to get them frothy or really well mixed. Add a few more pinches of salt and several grinds of pepper. Add the feta, if using. Pour eggs over the potatoes and onions and tilt the pan to evenly distribute the eggs. Cover and cook on medium heat for a few minutes. When the eggs are beginning to set take the pan off the heat and set under the broiler until the eggs are cooked and slightly puffed and golden.

Let sit for a few minutes before cutting and serving. It will come out of the pan much more easily that way and is more flavorful. Serve with a slice of good, crusty bread and salad.

Green Salad with Torpedo Onions and Dill Buttermilk Dressing

This is a simple, fresh salad with the sweet, juicy onions and the tangy dressing.

However much lettuce you want/need to use, well washed and dried and torn into bite-sized pieces
½ Torpedo onion (or 1 whole one if you like onion!), very thinly sliced and soaked in ice water for 10 minutes

Dressing:

1/2 cup buttermilk
1/3 cup mayonnaise, sour cream or Greek yogurt
Good squeeze of lemon juice or splash of white wine or champagne vinegar
2 tablespoons chopped fresh dill
1 teaspoon sea salt
½ clove garlic, finely minced or mashed
Freshly ground pepper

Drain the onion and pat dry and put in a large salad bowl with the lettuces.

Whisk the dressing ingredients together and toss the salad with some of it. Add more as needed and adjust seasoning. You’ll likely have leftover dressing.

Chard Pesto

Give chard leaves a quick blanch and make a savory treat you’ll want to spread on/dress everything or just eat by the spoonful.

It’s a very adaptable recipe. It will be wonderful, loosened a bit with warm water, tossed with boiled or roasted potatoes and/or carrots in this week’s share. I also use the pesto, stirred in to scrambled eggs or a savory bread pudding, as a sandwich spread, on quesadillas, as a dressing for pasta of course or for rice salads (be sure to loosen it with about 1/3 cup of hot pasta cooking water before tossing it with pasta). You can spread it on fish or meet before grilling or baking. You can mix it with goat cheese for a lovely little crostini.

Like many of my recipes, the quantity of ingredients can be adapted to your taste and what you have on hand. This pesto keeps well in the fridge for 4-5 days so feel free to make a bigger batch if you have everything on hand.

1 large bunch chard, well washed and stems removed and saved for another purpose (you can add them to the onion and potato frittata above for instance)
1-2 small cloves garlic
1 good-sized handful of hazelnuts, almonds, walnuts or pine nuts (either raw or toasted—but cooled first if you toast)
2 oz of hard, aged cheese such as Parmesan or Asiago Stella
1/3 cup extra virgin olive oil (or more)
Salt and freshly ground pepper
Squeeze of lemon juice (not too much as it can easily overwhelm the delicate chard flavor)

Roughly chop the chard leaves. Bring a large pat of salted water to a boil. Add chard and cook for a 2 minutes. Drain, let cool and squeeze out all the water with your hands. Place cheese and nuts in food processor and process until finely chopped, add chard and garlic and salt & pepper, process until well integrated. Drizzle in the oil and periodically check for consistency and flavor. Add a little lemon juice, to taste. Adjust for salt – it takes a good amount of salt!

Braised Chard

This is a bit of an atypical way to cook chard since you cook it for a quite a long time. It is well worth it though—silky and rich.

Wash a large bunch of chard. Separate the leaves from the stems and reserve stems for another use. Cut the leaves into 1-2 inch ribbons. Slice 2 Torpedo onions into thin half-rounds and begin stewing them in some olive oil in a good-sized pot or pan. When the onion has softened a bit add the chard, season with salt and pepper, cover and stew, stirring occasionally for 20-30 minutes. You can add garlic, bacon, or lemon zest but just by itself it is sweet and wonderful.

I’ve used this as a pizza topping with some feta, as a pasta sauce or just a side to whatever else I made for dinner. Also wonderful with eggs.


Categories : Recipe

Recipes for CSA Week 7

Posted by csa on
 July 9, 2013

photo (28)


I’ve included the fava bean cooking techniques again as well as a new recipe for the favas, one of my favorites this week (see photo). And again, there are lots of salad recipes. Enjoy the slightly cooler week!

Beet Notes
Grated Beets in Salads
Carrot Salad with Harissa and Feta
Kale “Caesar” Salad
Fava Bean Notes
Fava Bean Pasta “Risotto”
Fava Bean Burgers With Beet Greens
Summer Vegetable Ragout with Favas, Carrots, Fennel and Summer Squash

Beet Notes

Typically I like to roast, boil or steam (if they’re small) all my beets at once. That way they’re ready to go for salads or sandwiches (yes, very good sliced and put on crusty bread with some goat cheese, green onions or chives, hardboiled egg, etc. (see photo). Alternatively you can leave some raw to use in the below fashion.

And by all means use the greens. They don’t keep well so use them as soon as you can. Quickly sautéed with a bit of garlic and then dressed with a little vinegar they are lovely as is, or add them to a frittata or stir fry.

Grated Beets in Salads and other Dishes

I do love to grate them raw and then marinate them in a dressing of minced and mashed garlic, lemon juice, salt and olive oil. All they need is a 20-minute soak, but longer is fine too. Then you can toss a cup of them into any green salad, add a bit of crumbled feta and maybe a few handfuls of toasted, coarse breadcrumbs and you have a lovely salad.

You can mix them with grated carrots and marinate the whole thing and then stir in lots of parsley leaves for a wonderfully refreshing side/salad.

You can mix the grated marinated beets into Greek yogurt for a sort of (very pink) beat tzatziki and serve that with lamb burgers or dolloped on plain, cooked chickpeas or chickpea burgers.

Carrot Salad with Harissa, Feta and Mint


This salad is complexly flavored and delicious and would be perfect with lamb. Harissa is a Moroccan spice paste available at many stores. I like Mustapha’s, which is usually available at New Seasons. You can also make your own. http://mideastfood.about.com/od/dipsandsauces/r/harissa.htm

3/4 pound carrots, peeled, trimmed and coarsely grated
4 tablespoons olive oil
2 garlic 
cloves, crushed and finely chopped
1/2 teaspoon caraway seeds or about half as much, ground
3/4 teaspoon cumin seeds or about half as much, ground
1/2 teaspoon paprika
¾ – 1 teaspoon harissa (for a solid kick of heat; adjust yours to taste, and to the heat level of your harissa)
½ teaspoon sugar
3 tablespoons lemon juice
2 tablespoons parsley, finely chopped
2 tablespoons mint, finely chopped
2 ounces feta, crumbled

In a small sauté pan, cook the garlic, caraway, cumin, paprika, harissa and sugar in the oil until fragrant, about one to two minutes. Remove from heat and add the lemon juice and a pinch of salt. Pour over the carrots and mix. Add the herbs and mix. Leave to infuse for an hour or so and add the feta right before serving.

Kale “Caesar” Salad

This dressing is also delicious with kale instead of romaine. If you don’t have anchovies you can substitute some chopped capers for an equally great dressing.

Serves 4-6 depending on appetites and what else is being served

1/2 cup grated Parmesan cheese
2-3 tablespoons freshly squeezed lemon juice
3 tablespoons good olive oil
4-5 garlic cloves, finely chopped
4-5 flat anchovy filets (or more to taste) or 1 ½ tablespoons capers, rinsed and finely chopped (see headnote)
1 egg yolk
1/2 teaspoon sea salt (or more to taste)
Freshly grated black pepper
1/4 teaspoon dry mustard (optional)
1 bunch kale, washed, leaves cut in half lengthwise and then cut into ½-inch ribbons
1 cup croutons or toast a slice or two of good crusty bread and tear it into bite-sized pieces

You can either use a food processor or a mortar and pestle. If using the latter, put the garlic, anchovy, pepper and salt in it and pound it into a smooth-ish paste. Scoop the paste out of the mortar and put it into a bowl. Then whisk in the lemon juice and egg yolk and then slowly add the oil and finally the Parmesan. If using a food processor start with the garlic, anchovy, lemon juice and salt and then add the ingredients in the same order. Stir the Parmesan at the end after you’ve removed the dressing from the processor.

Toss the dressing with kale and croutons and let sit for a few minutes before serving.

Fava Bean Notes

There are three primary cooking techniques:
And I’ve found that I get about 1 ½ cups shelled (using technique #1) fava beans from 2 pounds of pods.

1. Shell and blanch and peel: Shell the beans, removing them from their squishy pods and then blanch the beans in boiling water for 2-4 minutes or so and then pinch the skin off each individual bean. (I often split up the prepping, shelling the beans right when I get them and then cooking them later and pinching them out of their skins. This method results in delicious, tender, bright green beans and you can eat them as is with some olive oil and salt, add them to pasta or risotto or soup, etc. Or you can use the Middle Eastern method described below where you cook them in heavily salted water in their big, squishy pods and don’t shell each bean. It’s much less work and also delicious though a very different kind of dish. Experiment and see what you like.

2. Grill the whole pods and if they’re quite young and tender you can eat the beans, pods and all or if a bit larger, shell them at this point and enjoy them without further removal of the skin around each bean.

3. Cook the whole pods in heavily salted boiling water (Iranian method detailed in the recipe below and then drain and shell. Again with this method there is no need to peel the individual beans.

Fava Bean Pasta “Risotto”
–inspired by Around my French Table by Dorie Greenspan

Fava and New Potato pasta risotto

Serves 3-4

I heavily adapted this dish from Dorie Greenspan’s wonderful book Around my French Table last winter with cauliflower and then I made it with Brussels sprouts and bacon and then with winter squash and sage. I remembered the technique this week when I had 25 minutes to get dinner on the table and I had fava beans and new potatoes and basil. It was fantastic.

You can use just favas or some diced carrots and/or fennel as well. The bacon is optional. Just make it! And finally, as cookbook author Dorie Greenspan notes, “this is risotto” the way that finely sliced apples are carpaccio, which means not at all. . .” but the technique is just enough reminiscent of risotto that appreciate the reference and continue to use it. My version might not be recognizable to Dorie but it’s a keeper in our household.

1 – 11/2 cups shelled blanched, shelled fava beans using technique #1 above
½ large onion, diced
1 cup diced carrot or fennel or both (optional –see headnote)
1 ½ tablespoons olive oil
1-2 slices bacon, diced (optional)
1 1/3 cup tubetti (or ditalini or other small pasta)
4 cups flavorful vegetable broth (homemade veggie bouillon-recipe below) or chicken stock
1/2 cup heavy cream
1/2 cup grated Parmesan or other hard, grating cheese (Asiago Stella is a good, cheaper alternative)
Salt
Plenty of freshly ground black pepper
1-2 tablespoon basil or mint (optional)

Prepare the fava beans using technique #1.

Heat the olive oil in a large skillet over medium-high heat. Add the onions, carrots and/or fennel (if using) and a few pinches of salt and cook for 7 to 8 minutes, stirring often. You may need to reduce the heat a bit. Now add the broth or stock and bring to a boil. Add the pasta, stirring well and then simmer for about 10 minutes uncovered. Now add the blanched, shelled fava beans, and cook for another 3-4 minutes until most of the liquid has been absorbed. At this point add the cream and a generous amount of freshly ground black pepper. Cook uncovered for about 3 minutes until it thickens slightly.

Stir in the Parmesan and the herbs, if using, and adjust salt and pepper to taste. Serve immediately.

Fava Pasta Risotto

I made my version with fava beans and new potatoes (which was excellent) and in case you have some leftover potatoes you can certainly use some (add them to the onion, cut into small-ish dice) at the beginning.

Summer Vegetable Ragout with Favas, Carrots, Fennel and Summer Squash

This is a classic Italian preparation for a variety of spring/early summer vegetables. It’s a bit of work but definitely worth it. You want all the vegetables to be cut fairly small and about the same size. You can toss it with pasta or gnocchi and top with some aged pecorino or Parmesan or enjoy as a side with fish or meat or egg dishes or top it with a fried or poached egg.

1 onion, diced
1 ½ cups blanched and shelled fava beans (using technique #1)
2-3 carrots, well scrubbed but no need to peel and diced
1 fennel bulb, trimmed of any tough layers and cut into ½-inch dice
1 summer squash, diced
2 cloves garlic, minced
Olive oil
Salt and pepper
Lemon juice

Technique #1: Shell the fava beans and then cook the beans in a pot of boiling water for just a minute or two. Drain them and rinse with cold water. Then pierce the skin surrounding each bean with your fingernail and pop out the beans.

Heat about 1 tablespoon olive oil in a large skillet and the onions and carrots and cook for about 3 minutes then add the beans, fennel and summer squash and ½ cup of water, garlic and several pinches of salt. Bring to a simmer, cover and cook for about 7 minutes until all the vegetables are tender. The vegetables should be quite soft and not at all al dente for this dish. Add more liquid if you need to. The true sweetness of this dish comes from longer cooking time. Taste and adjust Finish with a squeeze of lemon juice.

Fava Bean Burgers
–adapted from Plenty by Yotam Ottolenghi

In included this recipe last week to use your favas and spinach. You can use beet greens instead of spinach and since you have favas again I’m keeping it around. These are a little bit of work but so, so good and they deliciously combine a few of you share ingredients this week.

If you have a half share and not enough fava beans for the below quantity you can increase the number of potatoes a bit.

Serves 4

1 bunch beet greens, stems removed and well washed
3 tablespoons olive oil
About 2 ½ cups shelled fava beans (using technique #1)
3 (or 4—see headnote) medium potatoes, scrubbed and cut into small dice
1 small Serrano chile, seeded and finely chopped (optional – can use 1/8 – 1/4 teaspoon red pepper flakes instead)
2 garlic cloves, minced
3/4 teaspoon ground cumin
3/4 teaspoon ground coriander
1/4 teaspoon turmeric
Salt and freshly ground pepper
3 tablespoons chopped cilantro
6 tablespoons fine breadcrumbs
1 egg
Olive, sunflower or grapeseed oil for frying

Wilt the beet greens in a hot pan with 1 tablespoon of the olive oil. When cool enough to handle, squeeze out any liquid, then chop roughly and set aside.

Blanch shelled fava beans in boiling water for 3 minutes, drain and run under cold water and pinch skins of beans (technique #1 above).

Cook the potatoes in boiling water for about 15 minutes, or until tender. Drain and put into a large mixing bowl. Immediately add the fava beans, spices, chile, garlic, remaining 2 tablespoons of olive oil and some salt and pepper. Use a potato masher to mash it all up roughly; don’t worry if some beans are not totally crushed. You can alternatively quickly pulse in food processor.

Next, add the beet greens, chopped cilantro and breadcrumbs. Taste to check the seasoning. Lastly, mix in the egg.

Wet your hands and shape the mix into fat patties that are roughly 2 inches in diameter and 3/4 inch thick. Chill them for at least half an hour.

To cook, heat up the oil and pan fry the burgers on high or medium high heat for 5 minutes on each side, or until golden brown. Serve warm, with lemony yogurt sauce.

1/3 cup Greek yogurt
1 tablespoon good olive oil
about 1 teaspoon lemon juice
1 tablespoon chopped cilantro
Salt and pepper

Stir the above ingredients together and dollop on the burgers.


Categories : Recipe

CSA News: Week 7- July 9 to July 11

Posted by csa on
 July 8, 2013

This Week’s Share

photo (28)

Crop

Family Share

Half Share

Beets (with tops) 3 pounds 1 ½ pounds
Carrots 2 pounds 1 pound
Fava Beans 4 pounds 2 pounds
Fennel 2 bulbs 1 bulb
Garlic 2 bulbs 1 bulb
Kale, Red Ursa 2 bunches 1 bunch
Lettuce, Romaine 2 heads 1 head
Summer Squash 2 pounds 1 pound

Share Notes

  • Summer Squash: Our first planting of summer squash has both Yellow Scallopini and Green Zucchini, and you will see both in your shares for the next several weeks. They can be used interchangeably in nearly any recipe, and will be in your share regularly for the summer stretch ahead.

CSA Split Payment Reminder

This is a friendly reminder that those of you set-up for split payments, your second installation is due by July 15.

Please send checks to:

Sauvie Island Organics LLC.
20233 NW Sauvie Island Rd
Portland, OR 97231


Member Submitted Recipes

Have you found a great recipe or cooked something new with your share items recently and thought, “Wow! Other CSA members may really enjoy this?” We want to hear about your culinary successes  and share them with our members. Email your recipes to us at csa@sauvieislandorganics.com and we’ll post them to the blog the next time that crop shows up. For the Facebook savvy you can go ahead and post the links directly to our Facebook page.

Elizabeth from our Lincoln Street Church pick-up site sent us this recipe (http://www.cuesa.org/recipe/beet-hummus-fava-bean-hummus) just in time for the beets and fava beans in your share this week. She noted, “I made these two kinds of hummus – fava bean and beet – for a barbecue yesterday and they were delicious.” Thanks for sharing Elizabeth.


Categories : Blogroll, CSA Newsletter, Farm News & Updates, Recipe, Uncategorized

Recipes for CSA Week 6

Posted by csa on
 July 1, 2013

photo (27)

New potatoes and dill are a wonderful combination, as are favas and dill. I’m not giving you any potato recipes since they are just so delicious no matter what you do with them—roasted, boiled for salads,. . . add butter and herbs and little minced garlic or add them to a simple frittata or curry. You can’t go wrong. And you got lots of spinach ideas last week!

Fava beans are an annual treat. There are three recipes for them this week in addition to notes about general cooking techniques. Enjoy them while they last. And speaking of “lasting” as I imagine you’ve observed, the tender leafy greens and herbs need to be used first (though dill tends to be a good keeper when sealed in a bag in the fridge) where as things like turnips, beets, and potatoes keep well. So this week be sure to use your spinach in the first half of the week and read about and lettuce storage (see lettuce management below) to make the most of it. There’s nothing worse than finding a gorgeous bag of spinach turning to slime in the fridge.

Fava Bean Notes
Fava Bean Burgers
Fava Bean Bruschetta with Ricotta
Favas with Yogurt and Dill
Soft Boiled Egg with Spinach on Toast & Other Variations
Japanese Turnips with Miso
Lettuce Management and Salad Variations

Fava Bean Notes

There are three primary cooking techniques:

1. Shell and blanch and peel: Shell the beans, removing them from their their squishy pods and then blanch the beans in boiling water for 2-4 minutes or so and then pinch the skin off each individual bean. (I often split up the prepping, shelling the beans right when I get them and then cooking them later and pinching them out of their skins. This method results in delicious, tender, bright green beans and you can eat them as is with some olive oil and salt, add them to pasta or risotto or soup, etc. Or you can use the Middle Eastern method described below where you cook them in heavily salted water in their big, squishy pods and don’t shell each bean. It’s much less work and also delicious though a very different kind of dish. Experiment and see what you like.

2. Grill the whole pods and if they’re quite young and tender you can eat the beans, pods and all or if a bit larger, shell them at this point and enjoy them without further removal of the skin around each bean.

3. Cook the whole pods in heavily salted boiling water (Iranian method detailed in the recipe below and then drain and shell. Again with this method there is no need to peel the individual beans.

Fava Bean Burgers
–adapted from Plenty by Yotam Ottolenghi

These are a little bit of work but so, so good and they deliciously combine three share ingredients this week.

Serves 4

½ lb spinach (the amount a half share gets), washed
3 tablespoons olive oil
About 2 ½ -3 cups shelled fava beans
3 medium potatoes, scrubbed and cut into small dice
1 small Serrano chile, seeded and finely chopped (optional – can use 1/8 – 1/4 teaspoon red pepper flakes instead)
2 garlic cloves, minced
3/4 teaspoon ground cumin
3/4 teaspoon ground coriander
1/4 teaspoon turmeric
Salt and freshly ground pepper
3 tablespoons chopped dill (or cilantro—the original recipe calls for cilantro but dill is a great substitute)
6 tablespoons fine breadcrumbs
1 egg
Olive, sunflower or grapeseed oil for frying

Wilt the spinach in a hot pan with 1 tablespoon of the olive oil. When cool enough to handle, squeeze out any liquid, then chop roughly and set aside.

Blanch shelled fava beans in boiling water for 3 minutes, drain and run under cold water and pinch skins of beans.

Cook the potatoes in boiling water for about 15 minutes, or until tender. Drain and put into a large mixing bowl. Immediately add the fava beans, spices, chile, garlic, remaining 2 tablespoons of olive oil and some salt and pepper. Use a potato masher to mash it all up roughly; don’t worry if some beans are not totally crushed. You can alternatively quickly pulse in food processor.

Next, add the spinach, chopped dill (or cilantro) and breadcrumbs. Taste to check the seasoning. Lastly, mix in the egg.

Wet your hands and shape the mix into fat patties that are roughly 2 inches in diameter and 3/4 inch thick. Chill them for at least half an hour.

To cook, heat up the oil and pan fry the burgers on high or medium high heat for 5 minutes on each side, or until golden brown. Serve warm, with lemony yogurt sauce.

1/3 cup Greek yogurt
1 tablespoon good olive oil
about 1 teaspoon lemon juice
1 tablespoons chopped cilantro
Salt and pepper

Stir the above ingredients together and dollop on the burgers.

Bruschetta with Ricotta and Fava Beans

Favas on toast with ricotta

This is a beautiful and delicious dish. And it’s a nice way to stretch those precious beans that always seem so few after you’ve shelled them.

Shell enough favas to measure 1 ½ cups of beans and cook them in salted boiling water for about 5-6 minutes. Drain and rinse under cold water. Pinch the skins off each bean and set beans aside.

1 ½ cups cooked, shelled fava beans (see above)
1 clove garlic, minced
½ an onion, diced finely
1 slice bacon, diced (optional)
2/3 cup whole milk ricotta (Calabro is a good brand)
1 tablespoon good olive oil
Salt and freshly ground pepper
1 teaspoon lemon juice
A bit of grated lemon zest from about ¼ of a lemon (you just want a little, just to give a stronger hint of lemon)
Good bread, thickly sliced and toasted

In a medium skillet cook the bacon in a little olive oil with the garlic and onion for about 5 minutes until the bacon is rendered and the onion is softening. Add the cooked, shelled fava beans and a few pinches of salt and cook for about 3 minutes to marry the flavors.

Meanwhile, toast some slices of good, crusty bread. Spread the toast with ricotta and top with the fava bean mixture.

Fava Beans with Dill and Yogurt

Serves ~4 as a side

A local farmer (Carol Boutard of Ayers Creek Farm) taught me about this method of cooking fava beans which eliminates the time consuming step of peeling each individual bean. This is a Persian/Iranian way of cooking favas that is not only easy but also very nutritious since many of the nutrients are in the fava bean skins. This dish is also good with parsley, basil, mint or cilantro or a combination.

2 pounds fava beans in their pods (or however much you have)
2-3 tablespoons kosher salt (yes, this is the right quantity, not a misprint)
1/3 cup Greek yogurt or plain, whole milk yogurt (or more if you want it saucier)
1/3 cup finely chopped dill (or other herbs—see headnote)
1 -2 teaspoons lemon juice (to taste)
Zest of one lemon, finely grated
1 medium clove garlic, minced
1 tablespoons olive oil
salt & freshly ground black pepper to taste

Bring a six-quart (or larger) pot of water, to which you’ve added the salt, to a boil. Put the whole fava bean pods into the boiling water and bring back to a boil. Reduce the heat so the water stays at a rapid simmer and cook covered, until the pods start falling apart, between 20 and 30 minutes. Taste an individual fava bean after 20 or so minutes. If the skin on the bean is still a little tough keep cooking. If you have the time you can let the fava beans cool in the water once they’re tender. That further softens the skins. If not, drain off of the hot water fill pot of beans with cold water to speed the cooling. Remove beans from pods without peeling each bean. The skin should be tender and the beans perfectly seasoned. Toss beans with the remaining ingredients. Adjust seasoning to your liking. Enjoy as a side dish or with crusty bread or tossed with cold pasta for a hearty salad.

Fava beans cooked this way (and without the dressing) are delicious with pasta and a bit of Parmesan, with boiled potatoes and parsley. I’ve added them to Israeli couscous with some mint and grated, hard cheese.

Soft Boiled Egg with Spinach on Toast & Other Variations
–inspired by smittenkitchen.com

With this hot weather I’m cooking as little as possible and doing as much assembly and quick prep dishes as I can. This falls in that category. Adjust the quantity to see your needs.

4 eggs
½ lb of spinach (the amount a half share gets), well washed
4 slices of good, crusty bread
1 clove garlic, minced
½ onion, minced (optional)
Butter or olive oil
Dijon-style mustard (optional)

Gently cook the garlic and onion in a little butter or olive oil until softened but not colored. Add the spinach and cook for just a minute or two until wilted and tender. Season with salt and pepper.

Meanwhile bring a saucepan of water to a boil. Lower the eggs into the boiling water and cook for 5 minutes at a rapid boil. If your eggs are medium-sized this will give you a perfectly soft boiled egg, in my opinion, which is a runny yolk and whites that are just set but not rubbery. By all mean cook them 30 seconds longer or another minute if they are very large eggs or you like them firmer. Remove eggs from the boiling water. Rinse briefly in cold water.

Toast the bread. Spread each slice with just a little mustard (if you’re using it) or a little butter or a drizzle of good olive oil and divide the spinach between the slices.

Peel the eggs and top each toast with an egg and break it open and roughly chop it up so it spread out over the bread. Season liberally with salt and pepper and dig in!

Variations:

Skip the spinach and top the toast with the egg and a generous sprinkling of chopped dill, a few capers and some minced onion.

Japanese Turnips with Miso
–adapted from Gourmet

This recipe is written to use the full 3lbs a full share member will be getting, but the recipe is easily halved so if you just have 1 ½ lbs by all means still make it.

2 1/2 tablespoons white miso
3 tablespoons unsalted butter, softened, divided
3 pounds turnips, scrubbed and trimmed. You likely don’t need to peel them but taste and see if the skin is at all fibrous or tough and peel if it is.
generous 1 cup water
2 tablespoons mirin (Japanese sweet rice wine)
¼ lb spinach or lettuce, well washed and roughly chopped (about 4-6 cups packed)

Stir together miso and 2 tablespoon butter.

Halve or quarter the turnips and put in a large heavy skillet along with water, mirin, remaining tablespoon butter, and 1/8 teaspoon salt. Bring to a boil over medium-high heat, then boil, covered, about 10-12 minutes.

Add greens by handfuls, turning and stirring with tongs and adding more as volume in skillet reduces. Cover and cook 1 minute. Uncover and continue boiling, stirring occasionally, until turnips are tender and liquid is reduced to a glaze, about 3 minutes. Stir in miso butter and cook 1 more minute.

Lettuce Management

Staying on top of lettuce takes a little work. It’s completely worth it but here are a few tricks/methods I employ to keep things interesting on the salad front. . and keep those beautiful heads from going slimy and brown.

Washing and storing:

If you’re having a hard time staying on top of the lettuce, wash enough for two big salads soon after you pick up your share. My preferred way to store the washed lettuce is rolled up in clean, dishtowels. This is actually my preferred drying technique and it stores well that way, or a couple of days. You can put the rolled up lettuce-filled towels in a plastic bag and store in the fridge.

Crunchy additions:

Keep sunflower and/or pumpkin seeds, and/or walnuts or hazelnuts on hand. Pumpkin seeds take just a few minutes to toast in a dry skillet and sunflower seeds toast best in a 300 degree oven with some salt and olive oil. Walnuts and hazelnuts toast well in an oven—no salt or oil needed—as well. And they all add so much to salads.

If you have a slice or two of nice crusty bread that needs using you can toast it and then tear it into little pieces and add it your salad for a little chew and heft.

Dressing variations:

Add a couple of teaspoons of mayo (homemade or store bought) or Greek yogurt to a typical vinaigrette made with a little Dijon-style mustard, red wine vinegar or lemon juice, and a little good olive oil, s & p for a slightly creamier dressing. Dress your lettuce with this, add ½ cup of toasted sunflower seeds and some thinly sliced onions and you’re in business.

Add ground cumin, lime or lemon zest and some red pepper flakes to a typical vinaigrette or the creamy version above.

Add a couple of tablespoons of smashed avocado to your dressing. Lime or lemon juice and some minced garlic is a good combination for this one.

Fruity additions:

Add chopped sweet cherries, sliced strawberries or blueberries to your green salads. If you have a little goat cheese or feta, that would be a good combo as well.


Categories : Recipe
« Previous Page
Next Page »

Recent Posts

  • CSA Week #22: October 31st & November 2nd
  • CSA Week #21: October 24th & 26th
  • CSA Week #20: October 17th & 19th
  • CSA Week #19: October 10th & 12th
  • CSA Week #18: October 3rd & 5th

Archives

Sauvie Island Organics | © 2025 All Rights Reserved
iThemes Builder by iThemes | Powered by WordPress | Site by LRP