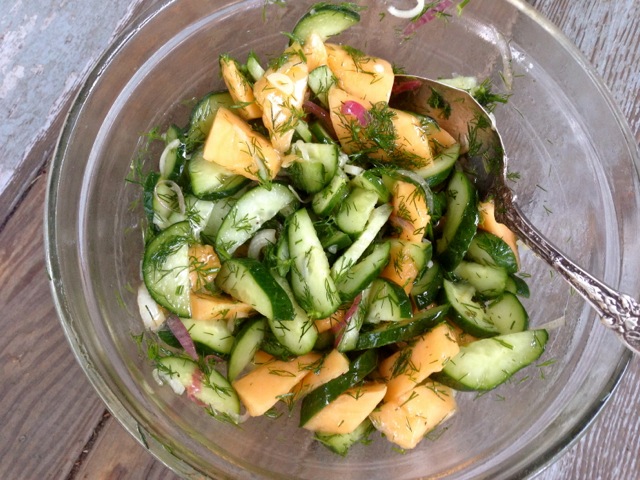
What a treat to get celery this week, leaves and all. A simple chopped salad of tomatoes, cucumbers, celery, celery leaves and some sweet onion and a little feta or fresh mozzarella would be delicious. Dress it with plenty of red wine vinegar and good olive oil. And by all means try the braised cucumber dish, a German classic, with all our beautiful cucumbers this week. Happy cooking!
Broiled Eggplant and Tomato Rounds with Basil and Parmesan
Fennel and Onion Salad (with Fish?)
Celery and Chickpea Salad
Pasta with Chickpeas, Celery and Rosemary
Summer Squash “Butter” with Herbs
Pesto
Rigatoni with Pesto and Browned Zucchini
Cucumber Salad with Peanuts and Sesame
Schmorgurken (German Braised Cucumbers)
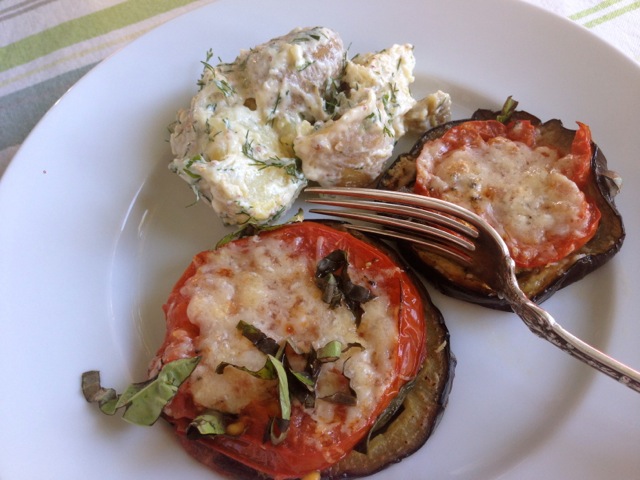
Broiled Eggplant and Tomato Rounds with Basil and Parmesan
There are many variations on this theme, most use mozzarella or another gooey cheese. I made these when I had just one medium-sized globe eggplant to use. It comes together quickly and is good hot and at room temperature. You could use Japanese eggplants here as well but cut them lengthwise into slabs rather than into rounds to give yourself more surface for the tomatoes and basil and just cut the tomato in batons rather than rounds to more or less fit the eggplant.

Serves 4
1 medium globe eggplant (or Japanese–see headnote)
2-3 medium-large slicing tomatoes
1/2 cup basil leaves (save a few to garnish)
Salt
Olive oil
1/3 cup grated Parmesan
Turn on the broiler
Slice the eggplant into 1/2-inch thick rounds. Heat a little olive oil in a large skillet. Cook the rounds, sprinkled with salt over high heat until brown on both sides, about 5 minutes for the first a bit less for the second side. Put the browned rounds on a baking sheet.
Top each round with a few basil leaves, then a slice of tomato, a sprinkle of salt and drizzle of olive oil. Set the pan under the broiler and broil until the tomatoes have softened and are bubbling a little. Remove from the oven and divide the Parmesan between all the rounds. Return to the broiler for another minute or two until melted and browning. Garnish with chopped basil and serve.
Fennel and Onion Salad (with Fish?)
This salad is a perfect accompaniment to some very simply grilled or pan-fried fish of your choosing. Scale the recipe according to how much fennel you have.
Serves 3-4
1 medium fennel bulb, trimmed, halved and sliced as thinly as you can
1/2 torpedo onion (if you have some leftover from last week) or other onion, sliced as thinly as you can
2 ounces feta
2 teaspoons capers (optional), chopped up a bit
1/3 cup fennel fronds, chopped
Juice of 1 lemon
Good olive oil
Salt and pepper
Put the sliced vegetables in a large bowl. Toss with lemon juice, olive oil, salt and pepper and optional capers. Taste and adjust seasoning remembering that the feta will add saltiness. Add feta and fennel fronds gently toss and taste again.
Celery and Chickpea Salad

Heidi Swanson, the author of the incomparable 101cookbooks blog, comes up with the loveliest combinations. I love her cooking philosophy and her intuition around flavors and textures. This is, in true Heidi style, simple, a bit surprising and delicious–not to mention a nutritious dish. You can skip the Parmesan and add a few more nuts and raisins to make it vegan.
Serves 4-6
8 celery stalks, any strings removed (I just made this with the celery from the share and didn’t remove any strings), cut into thin slices (1/4-inch or so)
1 jalapeno, minced (seeds and membranes removed if you don’t want much heat)
3 tablespoons good olive oil
2 tablespoons lemon juice, more to taste
4 tablespoons grated Parmesan (see headnote for alternative)
1 1/2 cups cooked garbanzo beans, heated (home-cooked is best if you have them)
3 tablespoons golden raisins
1/2 cup chopped almonds, toasted until nice and dark
Salt
½ cup chopped cilantro or parsley or a combination
1/2 cup celery leaves, chopped
Mix together the olive oil, lemon juice, and Parmesan in a small bowl. In a large bowl toss the heated beans with the olive-Parmesan mixture. When well combined, add the celery, raisins, herbs and almonds. Mix again and taste and adjust seasoning, if needed. This salad does not hold very well. It loses its crunch and brightness. You can prep everything ahead of time but dress and toss it right before serving.
Pasta with Chickpeas, Celery and Rosemary

This is delicious, fast (if you have cooked chickpeas on hand or if you use canned), easy and nutritious. The rosemary, garlic, celery, carrot and hot pepper combine for a surprisingly rich flavor base. The shape of the pasta is important so if you can find little tubes (tubetti or ditalini) use those. If not, small elbow macaroni can work.
Serves 4-6
1 onion, peeled and finely chopped (or 2-3 shallots, thinly sliced)
2-3 stalks celery, trimmed and finely chopped
2 carrots, scrubbed but not peeled and finely chopped
2 cloves garlic, peeled and minced
1/4 teaspoon red pepper flakes
Olive oil
1 sprig of rosemary, leaves picked and finely chopped (about 1 ½ teaspoons chopped)
1 quart cooked chickpeas or 2 14-oz. cans of chickpeas, rinsed and drained but cooking liquid reserved if home-cooked
3 1/2 cups vegetable broth or combination vegetable broth and chickpea cooking liquid
5 ounces (1 generous cup) Tubetti or Ditalini, sometimes also called Short Salad Macaroni (Barilla and DeCecco brands both have these. I’ve seen them at Safeway and Fred Meyer) or other small pasta.
Sea salt and freshly ground black pepper
Chopped celery leaves
Heat 1-2 tablespoons olive oil in a large pot over medium-high heat. Add the onion and celery and sauté just until tender, about 6 minutes. Add the garlic, rosemary, and red pepper flakes. Sauté for 2 minutes, then add the chickpeas and the broth and chickpea cooking liquid. Bring to a boil, then lower heat to simmer and add the pasta and cook until pasta is tender, about 10-15 minutes.
Season to taste with salt and pepper, stir in the celery leaves and drizzle with some good olive oil.
**Note: you can remove a portion of the chickpeas with some liquid (before you add the pasta) and blend it and return to the pot, for a thicker, creamier dish. It’s lovely either way.
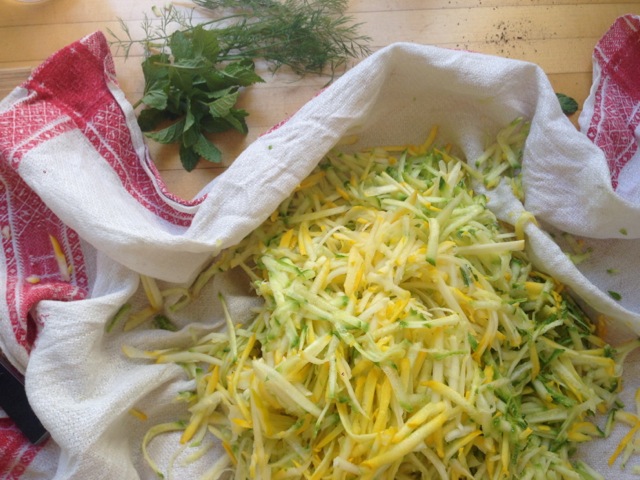
Summer Squash “Butter” with Herbs

Whenever you have a lot of squash this is the prefect thing to do. Grated, it cooks down quickly, turning into a sweet and savory side dish or spread. Spread it on toast in place of actual butter or add a thick layer in a sandwich with tomatoes and/or soft cheese. You can use it as a pizza topping or a pasta sauce too.
Serves 4 as a side, 2 as more of main with an egg or a hearty salad, etc.
About 4-5 medium zucchini or any kind of summer squash (feel free to use less or add extra — cooking times will vary)
1/4 cup olive oil or butter (I prefer butter in this one)
½ a medium onion, minced
2 tablespoons chopped fresh oregano, mint, basil or parsley
Salt and freshly ground pepper
Squeeze of lemon juice or drizzle of vinegar
Coarsely grate the squash on the large holes of a box grater. Squash is really the easiest thing to grate so it won’t take much time at all. If you feel like it you can sprinkle the pile of grated squash with a little salt and let it sit while you sauté the onions. Even in just a couple of minutes it will release a bit of liquid. Before adding the grated squash to the pan you can then squeeze handfuls of the squash over a sink to release some extra liquid which will speed up the cooking a bit. But don’t worry if you don’t–it will be just fine.
In a deep skillet, heat the olive oil/butter. Sauté the onion for about 3 minutes on medium heat. Add the squash and a few generous pinches of salt and toss and cook and stir over medium to medium-high heat until the squash is nice and soft and almost spreadable, about 15 minutes. If you scorch the bottom, turn the burner down a bit but don’t worry about the browned areas. They will add flavor and be sure to scrape them up and reincorporate. Just before the end of the cooking time add the herbs and incorporate well. Cook another minute or two, taste and adjust seasoning with salt and pepper and a little lemon juice—you don’t need much but just a little brightens it up nicely.
Rigatoni with Pesto and Browned Zucchini

I like a high vegetable to pasta ratio so use about 3/4 lb of pasta here but by all means make the full pound and cook more squash or vary the ratio. You could also toss use rice or another grain instead of pasta or just dress the browned zucchini with the pesto for a rich side dish.
3/4 lb rigatoni or penne or fusilli pasta
4 medium zucchini or other summers squash, halved lengthwise and sliced into thin half moons
Olive oil
Sea salt
1/2 cup pesto (see below)
Grated Parmesan
Saute squash in some olive oil in a heavy skillet until browned and tender.
Cook pasta in salted boiling water until al dente. Scoop out and reserve 1/3 cup, or more, hot cooking water right before you drain the pasta.
Put the pesto in a serving dish and thin with about 2-3 tablespoons pasta cooking water. Toss in the pasta and sautéed squash. Mix well, taste and adjust seasoning and serve with grated Parmesan.
Pesto
I used to be a purist about pesto and I’m not anymore. I use almonds, walnuts or hazelnuts since I rarely have pine nuts. I use aged, Asiago Stella (an aged Asiago available at Pastaworks and City Market) because it’s much cheaper than Parmesan and still very good. I also use the food processor. And you can scale this up or down very easily. It keeps well in the fridge, topped off with a thin layer of good olive oil, for about a week.
And you can put it on so many things—use it as a sandwich spread; stir it into deviled eggs or a frittata thin it out for a salad dressing . . . . A classic Genovese dish is pasta, boiled potatoes (diced small and cooked right with the pasta) and sauced with pesto. Remember to save a little bit of hot, starchy pasta cooking water to thin the pesto just a bit before tossing with the pasta. You can easily thin too much so start with just a couple of tablespoons of cooking water.
3-4 cups basil leaves, loosely packed
2 smallish cloves of garlic, peeled and roughly chopped
1/4 cup almonds, walnuts, hazelnuts or pine nuts
About 2 ounces of Parmesan or aged Asiago (Asiago Stella available at Pastaworks/City Market)
1/3 cup of good-tasting extra virgin olive oil (or more)
Salt and freshly ground pepper
If you have a mortar and pestle, a strong arm and some time, by all means make the pesto by hand. I almost always now make it in a food processor and it’s very good that way too.
Put the nuts and cheese in the processor and pulse until finely ground. Add the basil, garlic and salt and process until well chopped. Then slowly add the oil. Don’t over process. Adjust for salt and oil. Then store in the fridge until ready to use.
Cucumber Salad with Peanuts and Sesame

This slightly unusual combination of ingredients and flavors is crunchy, cool, sweet/tart and rather addictive.
Serves 2-3
1 large cucumber, halved, seeds removed and thinly sliced or diced
1 jalapeno pepper, minced (Remove the seeds for a milder salad.)
1 clove garlic, finely minced
½ teaspoon fresh ginger, grated or finely minced
1 lime, zest and juice
1 tablespoon rice vinegar
½ teaspoon fish sauce
2 teaspoons sesame oil
1 teaspoon honey
1 teaspoon toasted black sesame seeds (regular are just fine—the black ones look great but the flavor is very similar)
2 tablespoons salted and roasted peanuts, roughly chopped
1/3 cup roasted, flaked coconut (optional)
Fresh basil, chopped
Place the cucumber slices or dice and hot pepper in a large bowl and toss to mix. In a small bowl whisk together the garlic, ginger, lime zest and juice, rice vinegar, fish sauce, sesame oil, and honey. Drizzle the vinaigrette over the cucumbers and toss until thoroughly mixed. Refrigerate for 30 minutes to allow the flavors to deepen. Before serving add the sesame seeds, toasted coconut (if using) peanuts, and herbs and toss again. Taste and adjust seasoning and serve.
Schmorgurken (German Braised Cucumbers)
I include this favorite of mine again this year, unusual as it is to cook cucumbers here in the US. There are many variations of this dish in Germany and I grew up with this simple, sweet and sour vegetarian one. Often ground beef or small meat balls are added to the mix and sometimes also tomato. The quantities are squishy for this recipe, confirmed by my mother when I called her about the recipe. Just scale up or down to taste and depending on what you have.
Serves 4
Olive oil
2 large or 3 medium cucumbers, peeled and cut in half lengthwise and seeds removed with a teaspoon
½ cup sour cream
1 tablespoon white wine or cider vinegar
2 teaspoons sugar
Salt and lots of freshly ground pepper
2-3 tablespoons chopped fresh dill
Cooked rice for serving
Put your rice on to cook—we grew up eating this over long grain white rice but you could by all means use brown as well.
Cut the halved cucumbers into ½-inch half-rounds. In a large, heavy skillet sauté the cucumber slices in a bit of olive oil over medium to medium-high heat, stirring frequently. They will release quite a bit of liquid, which is great. It will add to the sauce. When they are translucent and softening (about 10 minutes) add the sour cream, vinegar, sugar, salt and pepper. Simmer for about 5 minutes more until the cucumbers are completely tender and the sauce has thickened a little. Add the dill, taste and adjust for salt and pepper and serve hot over rice.