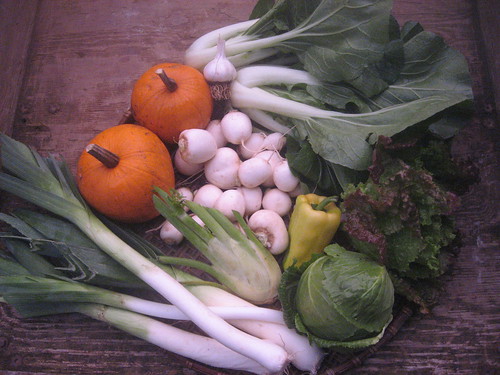
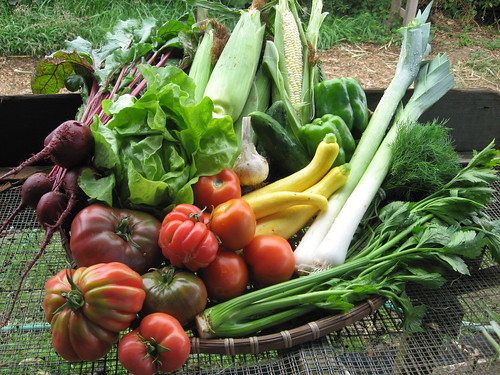
Image

Archive for Recipe – Page 22

CSA Newsletter: Week 27- November 17, 2008

Posted by csa on
 November 17, 2008

This Week’s Share


  • Brussels Sprouts
  • Carrots
  • Celeriac (Celery Root)
  • Escarole
  • Garlic 
  • Kale
  • Leeks
  • Winter squash, Butternut 

Declare Your Commitment to Local and Healthy Food

We at Sauvie Island Organics (SIO) know that healthy, locally grown, organic food is important to you, your family, and the environment. It is now time to let food policymakers hear your voice by endorsing the Declaration for Healthy Food and Agriculture. By visiting http://www.fooddeclaration.org you can read over the Food Declaration and click the link at the bottom to endorse and/or comment on the Draft Declaration.

Recipes


Celeriac Recipes


Quick and Simple Celeriac and Carrot Slaw
Adapted from the pallets of the SIO Crew


This is a favorite of Scott, Field Manager here at SIO. He likes to eat this with a sandwich or just on its own. This preparation lets the vegetables speak for themselves and takes less than 10 minutes.

1 head celeriac, grated
2 carrots, grated
Juice of 1 lemon (or 2-3 tablespoons bottled lemon juice)
2 tablespoons mayonnaise (optional)
1 tablespoon fresh herbs, chopped (or 1 tsp dried)

Salt and pepper (to taste)


Grate the celeriac and carrots in a medium size bowl. Add the lemon juice, mayonnaise, fresh or dried herbs, and salt and pepper to the bowl and mix until well combined. That’s it, you’re done!

Celeriac Rémoulade
Adapted from Gourmet, found at www.epicurious.com


This recipe is a favorite of Tanya, Farm Manager at SIO, and she enjoys the fresh flavors of this raw root crop dish. This rémoulade recipe speaks to the slaw above, but is a traditional French preparation using only celeriac. This recipe is used as a salad or side dish.

1/4 cup mayonnaise (or peanut oil)
2 tablespoons crème fraîche or sour cream (crème fraîche is a soured cream and is of French origin, it is less sour and thicker than traditional American sour cream)
1 tablespoon minced fresh parsley leaves (1 teaspoon dried)
2 teaspoons fresh lemon juice (may use bottled if you don’t have fresh lemons)
2 cornichons (sour gherkins), minced, or 1 tablespoon minced dill pickle (optional)
1/2 teaspoon drained bottled capers, minced (optional)
1/2 teaspoon Dijon mustard
1 pinch dried tarragon, crumbled
Salt and pepper (to taste)
2 celeriac heads, peeled and cut into matchstick pieces or shredded coarse


Place a large saucepan of salted water on the stove on high and bring to a boil.


While bringing water to a boil stir together in a small bowl mayonnaise, crème fraîche/sour cream, minced pickle, parsley, lemon juice, capers, mustard, tarragon, and salt and pepper to taste until combined well.


In the large saucepan of salted boiling water cook already cut/grated celery root 2 minutes. Drain celery root and refresh under cold water. Dry celery root completely. Add celery root to already prepared sauce and stir together. Chill until ready to serve.

Brussels Sprouts Recipe

Brussels sprouts, also called mini cabbages, are one of the crops that really tastes sweeter after a hard frost. Most of the commercial Brussels sprout production in this country is done in coastal California, where temperatures are cool, but where it also rarely frosts. This is too bad because it means most people will never get to experience the frost sweetened sprouts you have in your share this week.


Brussels Sprouts with Leeks

Adapted from Simply in Season, by Mary Beth Lind and Cathleen Hockman-Wert


Brussels sprouts are one of my (Francesca’s) personal favorites, especially when paired with some crisp bacon pieces. For vegetarians this recipe is equally as delicious without the addition of bacon, so omnivores and vegetarians alike indulge yourselves.

1 pound Brussels sprouts (about half your share this week) sliced in thirds       

2 leeks, thinly sliced (or 1 onion chopped) 

2-3 cloves of garlic minced
1 tablespoon olive oil

1 tablespoon butter
1/4 cup water
2 tablespoons mixed fresh seasonal herbs such as thyme, rosemary, sage, and/or parsley chopped (or 2 teaspoons dried blend of basil, oregano, thyme, and rosemary).
2-4 strips of bacon, chopped into smaller pieces (optional)

1 tablespoon lemon juice (optional)


Start by slicing the Brussels sprouts and leeks. In a large frying pan add 1 tablespoon olive oil and 1 tablespoon of butter together and heat to medium-high. Add the sliced sprouts and leeks, herbs and water and cook until the sprouts are tender, about 10 minutes. If including bacon add in for the last 5 minutes of cooking and turn heat to high for the last two minutes. If adding lemon juice do that in the last 2 minutes as well.

Winter Squash Recipe


Squash Gratin
Adapted from Bon Appétit, found at www.epicurious.com

I discovered this recipe last winter when I had an over abundance of winter squash and wanted to try something new. I brought the dish to a potluck and it was gone in a flash. I have made it for family and friends in different variations and using different squash types since then and had the same ‘quickly emptied pan’ response. This is a warm and cozy recipe, good for the cold days ahead!


1 large butternut squash peeled, seeded, quartered and sliced into 1/4 inch thick slices (you can use the Acorn or Delicata varieties if you still have them around)

1 tablespoons olive oil
4 tablespoons (1/2 stick) butter

1 medium-large leek, sliced
2 cloves minced garlic (optional)
2 tablespoons chopped fresh sage (2 teaspoons dried)
1 log (5.5 oz. ) soft fresh goat cheese (can use a blend of any cheese you have around as well, about to 2 cups grated)
1 cup heavy cream
Salt and pepper to taste
1/2 cup fresh or prepared bread crumbs
1/2 cup hazelnuts, toasted, husked, coarsely chopped (optional)


Place butternut squash slices and olive oil in large bowl; sprinkle with salt and ground pepper and toss to coat. Set aside.


Use 1 tablespoon of butter to grease an 11×7-inch baking dish or casserole. Set aside.


Melt the remaining 3 tablespoons butter in heavy medium skillet over medium-low heat. Add sliced leeks and chopped sage; sprinkle with salt and pepper. Sauté until tender but not brown, about 15 minutes. Coat 11×7-inch baking dish with remaining 1 tablespoon butter. Spread half of leek mixture over bottom of prepared baking dish. Layer half the prepared squash on top of leek layer and sprinkle half of cheese. Repeat layering with leeks, squash, and cheese. (Can be made 1 day ahead. Cover and chill. )


Preheat oven to 375°F. Pour cream evenly over gratin. Sprinkle with toasted chopped hazelnuts and bread crumbs. Bake uncovered until gratin is heated through, browned and crisp on top and and cream is bubbling, about 45 minutes (about and hour if previously chilled).

Farm News and Updates

Thoughts for Thanksgiving

The big meal is just around the corner and in preparation we here at Sauvie Island Organics have some thoughts to share. As a member of a local CSA you may already be aware that you are helping support a local food system, and the 100-Mile Thanksgiving encourages you to join and share with other people and families around the country who are also eating local this holiday season. Visit http://100milediet.org/thanksgiving to join the movement and show your support for delicious local food and passionate local farmers this Thankgiving.


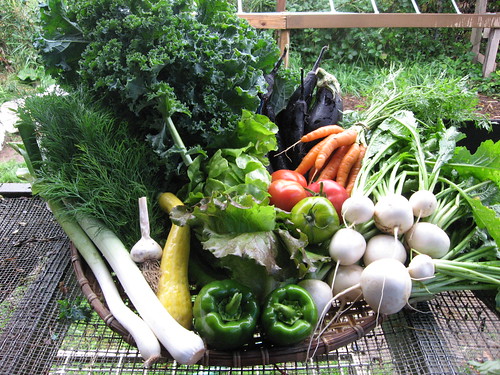
And now you are wondering what is in my share for the week of Thanksgiving? For those of you menu planning and making your shopping lists we are providing a preview of the share.


Carrots (1 pound)
Collards (10 leaves)
Garlic (1 head)
Onions, Copra (2)
Potatoes (4 pounds)
Pie Pumpkins, Baby Bear variety (2)
Shallots (4 minimum)
Squash, Hubbard (1)
Turnips, Scarlet Queen (1 pound)


We would like to remind you of the changes to all CSA pick-ups for the week of Thanksgiving.

At the Farm: Tuesday, November 25- by 4:30pm  

SE Ankeny: Tuesday, November 25- 5:00pm-7:00pm

SE Elliot:  Tuesday, November 25- 5:30-6:30pm

Friendly House: Tuesday, November 25- 5:00-7:00pm

Ecotrust Building: Wednesday, November 26- by noon

Metro Building: Wednesday, November 26- by noon

Portland State Office Building: Wednesday, November 26- by noon

St John’s: Wednesday, November 26- by noon

Dry Beans Available

Select from 15 varieties of beautiful and tasty heirloom bean (descriptions below) organically grown on Sauvie Island by former SIO apprentice Amber Baker. Each variety has been carefully grown and processed by hand and comes in a one-pound bag. $6.00/bag. Email SIO (siorganics@aol.com) with your order including varieties you would like and how many pounds of each by November 28. We will have them available for pick-up the week of December 1, 2007. Please make checks payable to Amber Baker and mail to 8955 N Portsmouth Ave Portland, OR 97203.


Golden Appaloosa
This full kidney shaped bean comes to our farm from a seed exchange in California. Enjoy its rich golden color and hearty flavor.
Black Calypso
Sometimes called “yin-yang” for its distinct markings or “Orcas” for its signature “eyes.” A round coco-shaped bean, perfect in cold salads or baked.
Vermont Cranberry Mix
A usual standard, this season’s Vermont cranberries mixed with several of our trial varieties yielding a beautiful array of beans you’ve never seen before. A ready-made mix of soup beans.
Black Coco
A large oval round very shiny black bean. This variety is good for making a rich and hearty black bean soup.
Tongue of Fire
A large kidney-shaped bean with a fresh green bean flavor. Try this one as a bed for your next meat or vegetable entrée.
Monos Negros
A smaller bean than the Black Coco, this variety is more of a deep dark purple. Use this in your fresh corn and bean salad or blended into a black bean spread.
Lowe’s Champion
A round red bean brighter than the normal kidney. Try this variety in place of kidneys in all of your favorite recipes.
Indian Woman Yellow
A round red bean brighter than the normal kidney. Try this variety in place of kidneys in all of your favorite recipes.
Peregion
A native to Oregon this bean has a full nutty flavor that makes it one of our favorites. These multi-patterned beans hold their markings through cooking.
Jacob’s Cattle Bean
With a creamy texture this burgundy and white mottled bean is known for its ability to absorb flavors.
Main Yellow Eye
New Variety for 2008! A white bean with a golden eye. These beans hold their shape well and have a subtle sweet flavor.
Black Valentine
New Variety for 2008! This small black bean is one of our favorites with its meaty texture. A go-to chili bean or good mashed into a black bean dip.
Norwegian Yellow
New Variety for 2008! A slender golden brown bean to add to your favorite winter soup or served cold in a bean salad.
Carioka
New Variety for 2008! A Brazilian heirloom similar to Perigion but slightly smaller and pink in color.
Blue Tepary
New Variety for 2008! Tepary beans are native to the southwest but this variety has been growing well for us here in Portland. Tepary beans are known for their anti-diabetic properties and are wonderful in a fresh bean salsa or used as a bean spread.

Help the Farm, Return Your Bins!

It is almost the end of the CSA season and as such we ask that all box members please return any and all bins you may have at home. Thanks.

Categories : CSA Newsletter, Farm News & Updates, Recipe

CSA Newsletter: Week 26- November 10, 2008

Posted by csa on
 November 9, 2008


This Week’s Share


  • Beets
  • Braising Mix
  • Collard Greens
  • Garlic
  • Onion, Copra
  • Parsnips
  • Turnips, Hakurei
  • Winter Squash, Acorn


As the rain establishes its presence and the coming of the winter season the farm crew has been busy making sure the bounty continues for the last four weeks of the CSA. This week’s share includes three new arrivals and several delicious repeat appearances. In your share you might at first be overwhelmed by the amount of greens, but have no fear both the braising mix and collard  greens cook down to a more manageable sizes (1 lb. fresh = approx. 1 cup cooked). The braising mix is a beautiful blend of mustard greens and Asian greens and the Hakurei turnips compliment the mix well in a stir-fry.

Recipes


Collard Recipes

Collard greens can be used similarly to both chard and kale, and substituting them freely in recipes is appropriate.

Collard Green Olive Pesto
Adapted from Gourment and UCSC Farm and Garden CSA Field Notes


This recipe makes a large quantity of pesto. Use half the pesto for 1 pound of cooked pasta and chill the rest in an airtight container for up to 3 days (or freeze for up to 6 months).

10 leaves collard greens
7 large brine-cured green olives (2 ¼ oz.), pitted
2 garlic cloves, chopped
1/3 cup water
½ teaspoon balsamic vinegar
½ teaspoon salt
¼ teaspoon black pepper
½ cup extra-virgin olive oil
1 oz. finely grated Parmigiano-Reggiano


Bring a 6- to 8-quart pot of salted water to a boil. Meanwhile, cut stems and center ribs from collard greens and discard. Stir collards into water in batches, then simmer, uncovered, stirring occasionally until tender, about 15 minutes. Transfer collards with tongs to a colander and drain, gently pressing on greens to extract excess water. (If making pasta, reserve water in pot for cooking pasta.) Coarsely chop collards. Blend olives and garlic in a food processor (or blender) until finely chopped. Add collards, water, vinegar, salt, cayenne, and pepper and pulse until finely chopped. With processor running, pour in oil slowly until evenly blended. Turn off processor, then add cheese and pulse to combine.

Sautéed Collard Greens
From Jim Leap, Farm Manager at UCSC Farm and Garden

10 leaves fresh collard green
2 tablespoons olive oil
½ teaspoon hot pepper oil (a few drops)
½ teaspoon sesame oil (a few drops)
Garlic, chopped (choose amount according to your own preference)
Dash of salt or soy sauce
Sesame seeds
1-2 teaspoons water


Prepare collard greens by removing lower portion of the stem. Carefully stack and roll up the leaves and cut into ½ inch strips. In a cast iron frying pan or wok heat up the olive oil on medium-high (hot enough to lightly brown, but not burn garlic). Add the chopped garlic to the oil, and add the hot pepper oil and sesame oil as well. Quickly sauté the garlic until lightly browned. Throw in the collard greens and under fairly high heat toss to uniformly heat and mix. While sautéing greens add a dash of salt or soy sauce and toss in sesame seeds. Uniformly mix, lower heat, add water, and cover and steam for 5 minutes. May be eaten alone our served as a side dish, either way it is delicious.

Parsnip Recipes
If you are not familiar with parsnips prepare to enjoy yourself. Their sweet and nutty flavor lends well to a variety of dishes, and we have two recipes to start you off.

Maple Glazed Parsnips
Adapted from Simply in Season by Mary Beth Lind and Cathleen Hockman-Wert

This a great recipe for introducing parsnips to children or other skeptical tastebuds!

2 cups parsnips, peeled, cut in ½ rounds (about 1 ½ large parsnips or 2 medium parsnips)
1 tablespoon maple syrup
½ teaspoon butter, melted
2 tablespoons walnuts, chopped and toasted


Combine maple syrup and butter and pour over the cooked parsnips. Top with walnuts and serve.

Whipped Parsnips and Potatoes
Adapted from Fresh from the Farmers Market by Janet Fletcher

2 parsnips (1 lb.)
¾ lb. baking potatoes (Cannella’s from last weeks share work great)
½ cup heavy cream
1 clove garlic, minced
¼ onion, minced
2 tablespoons unsalted butter
salt (season to taste)
freshly ground black pepper (season to taste)


Peel parsnips and potatoes and cut into ½ inch chunks. Bring a large pot of salted water to a boil over high heat. Add parsnips and potatoes and cook until tender, 8 to 10 minutes. While vegetables are boiling, combine cream, garlic and onions in a small saucepan and bring to a simmer; simmer 1 minute, then adjust heat to keep warm without simmering.

Drain parsnips and potatoes. Either mash the vegetables with a potato masher or pass them through a food mill. This can be done directly in the pot. With a wooden spoon, beat in butter and warm cream mixture. Season well with salt and pepper. Serve immediately.

Braising Mix Recipe

The braising mix is a beautiful blend of mustard greens and Asian greens and the Hakurei turnips compliment the mix well in a stir-fry.


Quick and Tasty Young Winter Greens
Adapted from Field of Greens by Annie Somerville

2 pounds braising mix (in your share this week)
1-2 tablespoons olive oil
2 cloves garlic, minced (more if you desire)
2 quarter-size slices fresh ginger, peeled and cut into matchstick size pieces (about 2 tablespoons)
1 tablespoon soy sauce


Heat olive oil to medium-high heat in a large sauté pan or cast iron skillet. Add the garlic and ginger and sauté for 1 minute. Add the braising mix in portions until evenly combined and sauté for another 2-3 minutes. Add the soy sauce and continue to sauté for another minute. Greens should be wilted, but still crunchy toward the stem bases. Serve immediately.

Sauvie Island Organics is Growing


As the bounty for this season continues we are already planning for 2009. We will be expanding our CSA program from 250 members strong to 400 members. We will be adding an additional CSA pick up night and are hoping to venture into SW Portland. We will let you know when we decide on a site (we are open to suggestions). To make sure we continue to serve you to the best of our ability we have added a new year-round position to the Sauvie Island Organics’ crew. Below meet Francesca SIO’s new CSA Assistant.

We hope to continue growing for you in 2009. Please take a moment to fill out our 2009 Community Farm Agreement. Filling out this form and sending in your $100 deposit will ensure you a spot for 2009.

A New Face Joins the Sauvie Island Organics Crew


Hello CSA Members! My name is Francesca and I am the newest addition to the wonderful crew out at Sauvie Island Organics. I had the chance to meet many of you last week at your pick-up sites, and look forward to getting to know all of you through the end of this season and all of next season as the CSA Assistant. I moved to Oregon in June, and before making my way to Sauvie Island I was working as a youth educator at Zenger Farm in outer Southeast Portland. I recently completed my undergraduate degree in Environmental Studies at University of California, Santa Cruz and focused in agroecology and sustainable food systems. Although I am not a native Oregonian, I grew up in Spokane, WA and feel a strong connection with the Pacific Northwest. During and after my time in California I felt strongly about returning to the Pacific Northwest and found Portland the perfect place to set my roots and flourish. My large Italian family in Seattle, Tacoma, and Spokane are also excited to have me back within their grasp, and I owe the ability to follow my dreams to their unending love and support. Again, I look forward to working with all of you and thank you for your warm welcome to Portland and Sauvie Island Organics.

Categories : CSA Newsletter, Farm News & Updates, Recipe

CSA Newsletter: Week 25- November 3, 2008

Posted by csa on
 November 3, 2008


This Week’s Share


  • Carrots
  • Cilantro
  • Escarole
  • Garlic
  • Kale, Lacinato
  • Onions, Red Storage
  • Peppers, Sweet Nardello & Gypsy
  • Potatoes, Russet
  • Winter Squash, Sugar Loaf


Recipes


What a wonderful fall we have been having on the farm. The mild fall means one more bunch of pungent cilantro and a chance for the sweet Nardellos to redden up a bit. The cycle of the season spirals in and we are pushing all the popped garlic into the ground.

This year we are growing 4 different varieties of kale. This week you will be receiving. Lacinato; or for the kids you can call it Dino Kale or for your Italian dish, Cavolo Nero. It is more tender and has a more delicate flavor.

Creamy Kale

1 bunch Kale chopped
1 onion (You can use red or white), sliced in half moons
Minced garlic, as much as you like
1 cup chicken or vegetable stock
2 cups plain yogurt
1 sweet pepper, chopped (Your Nardello or Gypsy would work)
2 tbs. olive oil


Sauté onions in olive oil slowly and caramelize for about 15 minutes. Add Nardello and garlic, sauté 5 minutes more. Add kale and stock and gently simmer till liquid is reduced by half. Remove from heat and gently stir in yogurt. Season with salt and pepper.

This week instead of lettuce you will get a crunchy head of escarole. For people who enjoy using endive in various dishes, escarole is a form of endive that is both versatile and tasty.

Citrus Salad with Bitter Greens
Inspired from Fields of Greens, Annie Sommerville

1 head of escarole, washed and torn into bite size pieces
1 apple thinly sliced
¼ cup shelled walnuts, toasted
6 oz. goat cheese


Citrus Vinaigrette

½ tsp minced orange zest
2 tbs. Orange juice
1 tbs. Champagne or white wine vinegar
¼ tsp. salt
3 tbs. light olive oil


Toss the escarole and apple together with the dressing. Sprinkle with goat cheese, crumbled and the walnuts.

A Great Pizza Recipe

Pizza is a great way to use lots of vegetables. Included is a recipe for dough, but if you are not a DIY dough maker there are lots of stores that sell a ball ready to be rolled out. Here is a suggestion again from the Fields of Green cookbook. It is a great way to use you Gypsy peppers too.

Pizza Dough

Adapted from the The Joy of Cooking

1 1/3 cups warm (105° to 115°F) water
1 package (2 1/4 teaspoons) active dry yeast
3 1/2 to 3 3/4 cups all-purpose flour
2 tablespoons olive oil
1 tablespoon salt
1 tablespoon sugar (optional)


Combine in a large bowl or the bowl of a heavy-duty mixer and let stand until the yeast is dissolved, about 5 minutes:


1 1⁄3 cups warm (105° to 115°F) water
1 package (2 1⁄4 teaspoons) active dry yeast
Add:
3 1⁄2 to 3 3⁄4 cups all-purpose flour
2 tablespoons olive oil
1 tablespoon salt
(1 tablespoon sugar)


Mix by hand or on low speed for about 1 minute. Knead for about 10 minutes by hand or with the dough hook on low to medium speed until the dough is smooth and elastic. Transfer the dough to a bowl lightly coated with olive oil and turn it once to coat with oil. Cover with plastic wrap or a clean cloth and let rise in a warm place (75° to 85°F) until doubled in bulk, 1 to 1 1⁄2 hours. Preheat the oven to 475°F. Grease 2 baking sheets and dust with cornmeal; or place a baking stone in the oven and preheat it for 45 minutes.


Punch down the dough and divide it in half. Roll each piece into a ball and let rest, loosely covered with plastic wrap, for 10 to 15 minutes. Prepare the desired toppings.


One at a time, flatten each ball of dough on a lightly floured work surface into a 12-inch round, rolling and stretching the dough. Place each dough circle on a prepared baking sheet, or, if using a baking stone, place them on rimless baking sheets or baker’s peels dusted with cornmeal. Lift the edges and pinch to form a lip. To prevent the filling from making the crust soggy, brush the top of the dough with olive oil.


Use your fingertips to push dents in the surface of the dough, to prevent bubbling, and let rest for about 10 minutes. The pizza is now ready to be topped and baked. Makes two 12-inch crusts.

Pizza with escarole, Roasted Peppers and Olives

1/2 tbs. olive oil
3 cups chopped and rinsed escarole
Salt and pepper
Splash of sherry vinegar, or balsamic
2 peppers, sliced and sautéed
1 to 2 cloves garlic, minced
1 red onion
10-15 Nicoise Olives pitted and coarsely chopped
5 oz. cheese of your choice, they recommend a combination of Fontina and Provolone
½ oz. grated parmesan cheese
2 tsp. chopped Italian parsley (or perhaps try it with your cilantro)


Heat olive oil in pan and add the escarole, pinch of salt and pepper and quickly sauté on high heat for 1-2 minutes. Add a splash of vinegar and set aside to cool. Toss the peppers in more olive oil and garlic and another pinch of salt and pepper. Preheat oven to 500°F. Roll out dough and brush with olive oil and spread out onions, then escarole, followed with the peppers and olives. Sprinkle with cheese and bake for 8-12 minutes. Remove from oven and sprinkle with Parmesan cheese and parsley (or cilantro).


Winter Squash and Feta Enchiladas En Pipian
Adapted from A Cook’s Book by Delphino Cornali

2 cups cubed winter squash
1 clove garlic
1 medium onion
¼ lb fresh feta
½ cup cilantro, chopped
12 corn tortillas


Pipian Sauce

1 ½ cups raw squash seeds (scooped from your winter squashes)
1 ½ cups chunky tomato sauce
1 teaspoon salt
A dash of cayenne if you like
4 tablespoons canola oil or corn oil


Cut winter squash in half and clean out the seed cavity. Clean the seeds of any pulp and set aside to dry. Cut the squash into 1 inch cubes. Put 2 cups of cubed squash in a pot with a clove of peeled garlic. Boil in 1 inch of water for 15 minutes until the squash becomes tender. Set aside the squash.

For the pipian sauce, first toast the squash seeds in a cast-iron skillet, turning them constantly to prevent burning. Cool the seeds for a few minutes. Grind toasted seeds in a coffee grinder with 1 teaspoon salt and a dash of cayenne if you like your enchiladas spicy. Put the seed mixture in a bowl and mix with the tomatoes. Heat the oil in a skillet at medium/high and add the contents of the bowl. Sauté for 5-10 minutes, stirring constantly. Add ½ cup of water to the sauce and stir in. Set aside.

Pre-heat the oven to 350º. Finely mince the onion. Chop the cilantro. Warm the tortillas until they become soft and pliable. Oil a baking dish. Stuff a small portion of squash, minced onion, feta, and chopped cilantro into a tortilla. Roll tightly and place in the oil baking dish. Continue stuffing tortillas and adding to the baking dish, tucking the rolled tortillas together so that they stay rolled up. Spoon the pipian sauce over the tortillas. Bake covered for 30 minutes. Serves 4.

Categories : CSA Newsletter, Recipe

CSA Newsletter: Week 24- October 27, 2008

Posted by csa on
 October 27, 2008

This Week’s Share

Asian Greens, Bok Choi
Cabbage
Fennel
Garlic
Leeks
Lettuce
Peppers
Pumpkins, Snack Jack
Turnips, Hakurei

Pepper Notes: True, this year will not go down in SIO history as the year of the pepper.  In early June, when we usually start getting our pepper plants in the ground, night time temperatures were hovering at or below 50 degrees.  These cool nights send the pepper into shock – greatly slowing and stunting growth.  And so we waited, and waited, until we finally saw a rise in those night temperatures.  It wasn’t until the last week of June that we planted the peppers.  By September there was a field full of pepper plants, with fruits abounding, but no colored peppers.  When October arrived we knew that the green bell peppers didn’t stand a chance of coloring up.  They just hadn’t had a long enough warm season to reach full maturity that brings yellow, oranges, reds, and sweetness.  Rather than lose the green bells to an early frost, we harvested them all.  We stopped and sighed, and then hung our hopes on the two varities left that still stood a chance – Gypsy and Nardello.   With a frost threatening on the night of October 10th, we harvested Gypsies and Nardellos with any bit of color.  Once these peppers have some color, they will continue to ripen off the plant.  Then we pulled sheets of floating row cover over the plants, two layers thick, and wished them good night.  We’ve left them tucked in for the past few weeks, still hopeful that they would color up.  We’re giving the Nardellos one more week, but this week we’re harvesting the rest of the Gypsy peppers.  Some are yellow, some are orange, a few are red.  If you like, let them ripen up a bit more on your countertop.  

Recipes


You will be enjoying two different varieties of pumpkin this season. The first one this week is called Snack Jack, and it has a hull-less seed that is perfect for roasting and snacking on. Pumpkin seeds are also delicious in muffins of breads. You can carve out a little jack-o-lantern or enjoy the flesh in a pie soup or stew.


Pumpkin Muffins
Adapted from Mom-A-Licious by Domenica Catelli via Oprah.com

3 tablespoon pumpkin seeds , ground (use a coffee or spice grinder)
Whole Pumpkin seeds for topping muffins (tossed in a salt and sugar combo mix)
1 cup whole wheat or whole grain flour
1/2 cup white unbleached flour
2 teaspoons cinnamon
1/2 teaspoon nutmeg
2 teaspoons baking soda
1/2 teaspoon salt
2 cups cooked pumpkin
2 eggs
1/4 cup high-quality extra-virgin olive oil
1 cup pure maple syrup or 1/2 cup agave nectar or a combination of the two
1 tablespoon vanilla
1/2 cup chopped walnuts or pecans , optional
Salt and pepper to taste


Pre-heat oven to 350°. Mix dry ingredients together in a bowl. In a separate bowl, mix all wet ingredients.


Fold the wet ingredients (fold in nuts now if you are using them) into the dry ingredients and spoon into paper-lined muffin or greased muffin tins. Top with whole seeds (you can toss the seeds in a tiny bit of oil with salt and sugar mix). Bake for 25–30 minutes or until a toothpick inserted into the middle of a muffin comes out clean.


Hakurei Turnips
You will be getting another generous amount of these sweet turnips this week and the last for this season. There are quite a few recipes for these from previous blog entries and you can do a keyword search of the blog to find them.


Here is a great and simple recipe from share member Jessica Roberts…
Cut turnips into wedges and toss with olive oil, salt, and pepper. Arrange on cookie sheet and put in 425 degree oven for 10 minutes. Toss once, and then return to oven, checking at 5 minutes intervals until they are fork-tender and golden.


Bok Choi


These succulent greens have a great wide stem that can be eaten raw and is happily converted into a vehicle for peanut butter or cream cheese snacks. Bok Choi is the perfect stir fry green because it cooks fast and light and has a very tender taste..


Chinese Bok Choi with Oyster Sauce

3 Tbs. vegetable oil (olive oil is too heavy)
2 Heads Choi washed and roughly chopped
1 onion thinly sliced
2 cloves garlic finely chopped
1 cup mushrooms of choice, shitakes preferred
1 cup thinly sliced Hakurei turnips
Soy Sauce
You can throw some tofu in here too…


Oyster Sauce
Adapted from the Joy of Cooking


Make a roux: Melt 2 tbs. Butter and blend over low heat 1 ½-2 tbs. flour for 3-5 minutes. Add 1 cup milk (room temperature to prevent lumping). Stir till smooth and add a few whole cloves and a whole bay leaf. Now, stir in 3 more tbs. butter 3 tbs. flour and 1 cup Oyster juice (in your tuna fish aisle) and few dashes Worcester sauce (optional). You can add chopped oysters to this if you like that too. Set sauce aside while you prepare the stir fry.


Sauté onions in oil till translucent, add mushrooms and turnips and 2 tbs. soy sauce. Stir fry for bout 5 minutes, add garlic and Choi and Oyster sauce and simmer for 5 minutes or so. Serve with rice


Risotto with Leeks, Fennel and Carrots
Adapted from From Asparagus to Zucchini a MACSAC publication


½ tsp. salt
3 carrots, thinly sliced, save trimmings
1 fennel bulb, sliced up, save trimmings
3 small leeks, sliced in thin rounds, save trimmings
2 tbs. olive oil or butter
1 cup uncooked Arborio Rice
½ cup dry white wine
1 tsp. Italian herb of your choice
¼ cup fresh parsley
Copious amount of parmesan cheese


Bring 4 cups water to boil in large sauce pan and add salt. Reduce to low heat. Add carrots, fennel and leek trimmings to water and keep to a low simmer. In a soup pot, sauté vegetables in olive oil about 2 minutes, stirring constantly. Add rice and sauté 2 more minutes. Add wine and stir gently till all liquid absorbed. Add broth (strain out big chunks) 1/2 cup at a time, stirring constantly till liquid is absorbed before adding more broth. Continue cooking till rice is done and consistency is not soupy. Add herbs and cheese and serve hot.

Categories : CSA Newsletter, Recipe

CSA Newsletter: Week 23- October 20, 2008

Posted by csa on
 October 20, 2008


This Week’s Share


  • Carrots
  • Garlic
  • Kale, Winterbor
  • Lettuce
  • Onions, Copra storage
  • Parsley
  • Peppers, Green
  • Potatoes
  • Winter Squash, Acorn


We have been enjoying a nice dry stretch of weather creating excellent conditions to clip, windrow, cure and pick up an acre of winter squash. This week’s squash feature stars the beautiful Acorn Squash.

Recipes


Winter Squash Recipes


Macaroni and Squash “Cheese”
Adapted from Recipes from America’s Small Farms by Haynes, Stein and Webber

3 to 4 lbs. Acorn Squash, Halved Cored and seeded
1 lb. Pasta of choice for baking
1/2 cup olive oil
2 tbs. butter
2 Leeks or 1 large onion coarsely chopped
Garlic (as much as to your taste) coarsely chopped
1/2 cup white wine (or water or stock)
1/3 cup parmesan cheese
1 tbs. chopped parsley
Salt and fresh black pepper to taste


Preheat oven to 350˚ F. Place squash face down in a glass baking dish with 1 inch of water and bake until tender, about 30 minutes. Set aside until cool enough to handle and scoop out the flesh.


Meanwhile cook the pasta al dente (it will finish cooking through when you bake it. Drain and set aside.


Sauté leeks, garlic, salt and pepper olive oil and butter till translucent. Add the squash and white wine and simmer till the consistency of a thick sauce. Mix noodles and squash and fold back into the glass baking dish. Sprinkle with cheese and bake for 20-30 minutes. Sprinkle with parsley and serve.

Yellow Split Pea soup with Autumn Squash and Kale
Adapted from Fresh from the Farmers Market by Janet Fletcher
This recipe is a meal in itself complete with all 4 food groups. Make it vegetarian and you still get a great serving of protein from the lentils.

2 Tbs. olive oil
2-3 ounces Pancetta or bacon or 2 tbsp butter
1 large onion or 2 leeks, minced,
4 cloves of garlic, minced
2 cups dried yellow split peas
1 fresh Rosemary sprig
4 cups chicken or vegetable broth
Salt and fresh ground pepper to taste
1/2 lb peeled, cubed 1/4 inch chunks of winter squash, acorn, kobocha or butternut (You will be getting a selection of these squash over the next few weeks)
½ lb. sauce tomatoes, diced
1/2 lb. kale or chard roughly chopped


Heat oil in a large pot over medium heat. Add pancetta or bacon and sauté until some of the fat is rendered off. Add onion, garlic and gently sauté about 10 minutes till soft. Add split peas, whole rosemary, broth, plus 4 cups water and bring to a simmer. Simmer gently for 45 minutes till peas are thoroughly cooked. Remove rosemary sprig.


Season soup with salt and pepper. Stir in squash and tomatoes and simmer 20 minutes more. Stir in kale and simmer till soft and add more water or stock to thin to desired consistency. Garnish with chopped parsley.


Kale Recipes
Yay more leafy greens! Rejoice in the infinite kale possibilities. You know those cookbooks of 1001 ways to cook a chicken, well; I think we should do one for kale…


Chop greens and mix into any ground meat dish, Stir into soups and stews, sauté into stir fry or simmer in coconut milk, or…


Kale Chips
A CSA member recently shared this amazingly simple kale snack. Her kids love it and now they eat kale without a fuss…


Tear kale into roughly chip size pieces. Toss with Olive oil and salt. You could spray with one of those aerosol oil things since you don’t want to soak the leaves in too much oil. Place kale ‘chips’ in a single layer on a baking sheet and put in a hot oven, 400˚-450˚F. Bake watching closely, you may have to turn a few chips to make crisp on each side…Voila, Salty Kale chip snacks!


Parsley Recipe


Salsa Verde
Adapted from Fields of Greens by Annie Sommerville
This is a great green sauce that would go great with a mild fish or tossed with a grain or bean salad…

1/2 cup olive oil
2 tbs. finely chopped onion or leek
1 small clove of garlic, chopped
1 cup packed parsley
1 cup packed watercress or kale leaves (no stems)
1/2 tbs. fresh lemon juice
1 tsp champagne, white wine or rice vinegar
1/2 tsp drained capers
Salt and pepper to taste


Combine all ingredients in a blender and puree until smooth. Sever this salsa fresh.

Garlic Popping


We are getting closer to our goal of 29,000 garlic cloves. This Friday we will again be dividing heads of garlic into their individual cloves. Join us Friday, October 24 anytime from 9-12 or 1-4. Again all you need to bring is a warmly dressed self.

Categories : CSA Newsletter, Recipe

CSA Newsletter: Week 22- October 13, 2008

Posted by csa on
 October 13, 2008


This Week’s Share


  • Carrots
  • Celery
  • Chard
  • Eggplant, last one
  • Garlic
  • Lettuce
  • Onions, Copra yellow storage
  • Peppers, Green & Sweet
  • Winter Squash, Delicata


Recipes


Chard Recipes

At pick-up last week there was much excitement about the return of leafy greens. We had our first frost out here on the island this week and the touch of frost bring the sugars out in the chard, kale and collards that you will be seeing in the share till December. They are wonderfully versatile and incredibly nutritious. This week you will get Chard and it could be the last since it is the least hardy of the greens. You can substitute almost any greens in these recipes.

Eggs and Greens Frittata – not just for the breakfast set…
Don’t underestimate the delicious simplicity of egg and greens.

Preheat oven to 300˚F. Slice one whole onion and caramelize slowly while you prepare the rest. In a separate pan (preferable cast iron), sauté chopped chard with minced garlic and salt. You can sauté in olive oil or butter, or a little bacon grease! When soft add one chopped tomato. Continue to sauté till tomato is broken up and juices start to dry up. Whisk 6-8 eggs with cracked black pepper and a little cream (or milk) and pour into pan with greens. Pour egg mixture into greens, top with caramelized onions and transfer to a hot oven. Bake for about 20-30 minutes till cooked through.

Fettuccini with Swiss Chard, Currants, Walnuts and Brown Butter
Adapted from Fields of Greens by Annie Somerville

1/2 lb unsalted butter – Melt butter in a small saucepan over low heat. As butter simmers the solids will separate out and sink and the clear fats will begin to turn a lovely amber color. Pour off the clear part that will be on top into a cup and save for later in the recipe. This takes about 8 minutes
3 tbs, dried currants
1 bunch chard cleaned and roughly chopped
1 tbs. olive oil
1 cup thinly onion
Salt and pepper
2 cloves garlic finely chopped
1/2 lb. fettuccini
1/3 cup crushed walnuts, toasted
Grated parmesan cheese


Boil a large pot of salted water and cook fettuccini. Plump the currants in 1/4 cup of hot water and set aside. Sauté onions in olive oil with salt and pepper for 5 minutes, add garlic and chard, and sauté for 4-5 minutes more till chard is just barely wilted.

Toss hot pasta with chard mixture (the heat from the pasta will finish cooking the chard). Add drained currants, walnuts and brown butter. Season with more pepper and salt to taste and top with freshly grated cheese.

Delicata Squash Recipes

Simple Baked Squash
You can eat the tender skins on these squash.

Preheat oven to 400˚F
3-4 Delicata squash, halved lengthwise with seeds and fibers removed
Butter or Olive oil
Salt or a little brown sugar


Brush cut side with oil or butter and place squash cut side down on baking sheet or casserole dish. Bake for 30-40 minutes until you can pierce with a fork. Flip up and sprinkle with brown sugar or salt.

Variations on a Theme…

Stuffed Delicata
Turn squash cut side up and fill with sautéed ground Lamb or Pork. Season the meat with onions, garlic, celery and carrots and a pinch of curry powder and sauté all together before filling squash to bake. Fill squash and bake for 30-40 minutes till squash is soft. Or make a vegetarian stuffing:

2/3 cup raisins and/or dried currants
1/2 cup hot water
1 cup wild (or regular) rice
1 tbs. olive oil
1 cup sliced onion
1 clove garlic minced
2 cups chopped chard or other greens
1 cup sliced celery
1/4 cup dry white wine
2 tbs. toasted pine nuts or other nuts of your choice


Cook the Rice and set aside. Soak dried fruits in hot water to plump up. Meanwhile Sauté onions till soft, then add garlic and celery, chard and salt. After 5 minutes add wine and simmer till the pan is dry. Toss the rice with sautéed mixture and season with salt and pepper. Fill squash and bake 30-40 minutes.

Celery Recipes
The hearty bunch of celery you will get this week is perfect for your classic ‘Ants on a log’ or generous enough to try something more…I think that either of these dishes would be a great side dish to baked Salmon or a juicy Pork Chop… Both of these recipes are adapted from Vegetarian Cooking for Everyone by Deborah Madison

Braised Celery

1 head of celery
1 onion, cut into 8 pieces
1 carrot, thinly sliced
A selection of fresh or dried herbs including: bay leaves, thyme, 1/2 tsp peppercorns, a pinch of celery seeds
3 tbs. Butter
Salt


Remove the leafy ends of the celery (but save for larger garnish). Cut all the ribs into 3- to 4- inch lengths. Put the onion, carrot, aromatics, 1/4 tsp. salt, 1 tbs. of the butter, and 3 cups of water in a wide skillet. Bring to boil and add the celery, cover and lower to a simmer. Simmer until tender enough to be pierced with a knife, about 30 minutes. Arrange celery on a plate and leave behind the liquid. Boil until 1/2 a cup remains and whisk in the remaining butter to make a sauce. Pour it over the celery and garnish with chopped celery leaves.

Gratinéed Celery
Put the braised celery and its sauce in a casserole dish and dust with grated Parmesan, Jack, or Gruyere, or any other cheese that will melt well. Broil until the cheese melts and serve right away!
 

Pepper Recipes
Well, this has not been the best summer for riping peppers. The cool spring, cool summer and an average fall (we can still hope for one last warm blast) means that there will be more crisp greens in the share and less reds and yellows than we had hoped for. This week you will get  both green peppers and one sweet pepper, either a Gypsy pepper, which is a bell-ish shape or a Nardello which looks like a large beefed up cayenne. It is NOT a cayenne. It is sweet and totally delicious.

Bell Peppers and Sardines with Balsamic Vinegar
Adapted from Vegetable Love by Barbara Kafka

2 large peppers & 1 sweet pepper
4 whole small sardines packed in oil , split and boned or left whole, your preference, reserve 4 tsp. of the oil
1 tbs. dry thyme or oregano
4 tsps. Balsamic vinegar
1 clove of garlic, smashed, peeled and minced
Fresh ground pepper to taste


Core, peppers and remove seeds and ribs, slice into 1/2 inch strips. Lightly steam for 5 minutes and remove to drain. Gently mix peppers with cleaned sardines. Whisk together reserved sardine oil, balsamic, garlic, herbs, and black pepper and drizzle over pepper mix. Serve room temperature. This recipe would be great with tuna as well for those not in love with sardines, just make sure you get tuna packed in oil.

Onions and Green Peppers
Adapted From The Joy of Cooking
Serve it with grilled steak or chicken

2 onions, sliced into thin rounds
3-4 green peppers coarsely chopped with skins and membranes removed
Melt in a large skillet butter, ham fat (ahhh the Joy) or olive oil.
Sauté onions and peppers for 10 minutes
Add 1/2 cup white wine
And continue simmering until dry
Season with Sslt and pepper and serve hot.

 Garlic Popping

Week one of garlic popping was very successful with a handful of folks joining us to help us reach our goal of 29,000 garlic cloves. There are still two more Fridays- October 17 & October 24 to come and help. Join our crew anytime from 9-12 or 1-4 on those Fridays. Again all you need to bring is a warmly dressed self.

Categories : CSA Newsletter, Recipe

CSA Newsletter: Week 21- October 6, 2008

Posted by csa on
 October 6, 2008


This Week’s Share


  • Carrots
  • Dill
  • Eggplant
  • Garlic
  • Kale, Winterbor 
  • Leeks
  • Lettuce
  • Peppers, Green
  • Summer Squash
  • Tomatoes, Heirloom, Slicing and/or Saucing,
  • Turnips, Hakurei


This week begins our transition into fall crops. Turnips, kale and leeks are a nod to the colder, wetter days ahead. Winter squash will be in your shares next week. And this week we are saying goodbye to tomatoes and summer squash. We are still hoping for a little more sun to finally turn all the green peppers red, yellow or orange.

Recipes


Hakurei Turnips make wonderful pickles. Here are two different pickle dishes both from Madhur Jaffrey’s World of the East Vegetarian Cooking. Pickle dishes are a great way to preserve foods. These raw foods also have wonderful pro-biotic qualities. Just keep them covered and press the air out of the jars. You will know if your pickles turn because bad pickles smell bad. You can always cure your pickled in your refrigerator but they will take much longer to pickle.

Carrot and Turnip Pickles- from India 

½ lb carrots washed and trimmed to ¼-inch think rounds
½ lb turnips quartered lengthwise
5 tsps whole black mustard seed coarsely ground
¾ to 1 tsp hot pepper (you can use your Jalapeño or Serrano is you still have one)
2 tsps salt
1 cup mustard oil
About 3 tsp brown sugar


Bring 3 cups water to a boil and throw in carrots and turnips. Return to a rapid boil and blanch for just 5 seconds. Drain thoroughly and allow to completely dry on a towel. Make a paste out of the mustard seeds, hot pepper, ½ cup of the mustard oil and salt. Add the vegetables and mix. Put the contents into a quart jar, and pack down to get out air pockets and cover with a breathable lid (non-metallic). Place the jar in a warm spot stirring once a day for 3 or 4 days. Add the remaining mustard oil and mix well and continue to let the pickle sour for 3 or 4 days more. Don’t worry, your pickle won’t rot if you are keeping it well stirred. Then stir in sugar to taste and store in the refrigerator. This pickle can keep for several weeks.

Spicy Turnip Pickle- from Korea

½ lb turnips cleaned and slices into 1/16 inch thick half moons
2 tsp salt
½ to 1 whole hot pepper (dried red preferred but you could use Jalapeño or Serrano)
1 tbs minced leek, scallion or other onion
3 cloves of garlic peeled and minced
¼ tsp sugar


In a bowl toss turnips with 1 ½ tsp salt and set aside for 2 to 3 hours. Drain slices and rinse with cold water and drain again. Add the remaining ½ tsp salt and as well as the hot pepper, onion, garlic, and sugar to the turnips and mix well. Put the mix in a small jar and add enough water to just cover (pushing out the air bubbles with a butter knife) and loosely cover with a small saucer and set aside in refrigerated for 6-8 days. Taste, and if the pickle has soured to your liking then put in refrigerator and keep for weeks.


Both of these pickle recipes are delicious with plain while rice.

Dried Dill

Divide your bunch into 2 or 3 smaller bunches and hang inside of a small paper bag. Use a rubber band to cinch the dill stems at the opening of the paper bag. Hang the bag with the dill in it in a warm dry place (like a window). Gently shake the bag every few days, you don’t want the air in the bag to get too humid and stale. After 5 or 7 days open the bag and check on moisture. The dill is well dried when it is easily crumbled. Crumble and store in a glass jar out of the light. Now you have perfectly dried dill for use in salad dressings, marinades etc…

Smetana Sauce
Adapted from the Book of Sauces by Gordon Grimsdale

Use some of your fresh dill in this sauce. It is delicious over baked salmon or chicken

1 large or 2 small leeks, finely chopped
2 tbs butter
1/3 cup dry white wine
1tsp white flour
1 cup sour cream
2 tbs lemon juice
2 tbs fresh chopped dill
Salt and pepper to taste


Sauté leeks in butter till golden. Add wine and increase heat and boil till reduced to half original volume. Stir flour into sour cream. Stir in Dill. Slowly add sour cream mix to hot liquid stirring constantly. Bring to a boil very briefly then remove from heat. Add lemon and slat and pepper to taste and serve immediately.

Japanese Eggplant
A traditional Japanese preparation by Sayaka Terada

Up to 1 cup Canola Oil
3-5 Eggplants sliced into ¼ inch think rounds
Dark red Miso Paste
1 tbs. ginger
3 tbs. tamari or soy sauce
2 tsp sugar


Heat oil in a frying pan and fry eggplant pieces until soft. Set aside to drain. Whisk together tamari, sugar, and ginger and set aside as a dipping sauce. Set eggplant out on a dish and smear top side with a generous swipe of miso. Serve room temperature and dip bites in to sauce. Serve with white rice.

Help us get Ready to Plant Garlic


The garlic we plant each October is not harvested until the following July. It is amazing to think that the garlic cloves we planted last October and harvested this July will now start the cycle again, becoming food for all of you next summer.

We save 25% of the garlic we grow for seed. Each head of garlic needs to be separated into individual cloves for planting. We call this “popping” garlic. Since we plant about a 1/2 acre of garlic we need about 29,000 cloves to plant. Heads of garlic will yield an average of six seeds so you can see we have a lot of garlic to “pop”. 

For the next 3 Fridays you are invited to help us “pop” the garlic. This is a relatively cushy farm job for we do it sitting down under cover. Please join us on Friday October 10, 17 and/or 24 from 9-12 or 1-4 to be part of this amazing cycle. All you need to bring is a warmly dressed self.  Hope to see you on the farm.

Categories : CSA Newsletter, Recipe

CSA Newsletter: Week 20- September 29, 2008

Posted by csa on
 September 29, 2008


This Week’s Share


  • Basil, last week of this summer herb
  • Carrots
  • Chard
  • Cilantro
  • Cucumbers
  • Garlic
  • Lettuce
  • Onions, Sweet
  • Peppers, Poblanos & Hot peppers are in your share this week. Tiburon, are the poblano pepper variety, see the recipe section for some delicious chili rellenos! There is also a serrano and/or jalapeño this week.
  • Potatoes
  • Summer Squash
  • Tomatoes, Heirloom & Slicing


Rotations

Beans, eggplants, melons and saucing tomatoes (this is the 2nd round of 5#) are all still on rotation.

 Recipes


This is the week to experiment with salsa recipes. Take your tomatoes, onions, hot peppers & cilantro and combine to your preference. Add a little salt and lemon or lime juice and you are sure to find perfection. Here is a little inspiration.

CHILIES RELLENOS DE QUESO
Adapted from Cooks.com

2 chilies, roasted and peeled
1 1/3 oz cheese, Monterey jack
oil, for frying
1 eggs, separated
1 cup flour, all purpose


Tomato Sauce

1 1/3 pounds (about 2 or 3) tomatoes, peeled
1 medium onion
3-4 garlic cloves, minced
3 tablespoons olive oil
1 cup chicken broth
1 teaspoon salt
1/4 teaspoon cinnamon, ground
pinch of cloves, ground


For the preparation of the tomato sauce, combine tomatoes, onion and garlic in blender or food processor and blend to a puree. Heat oil in a medium saucepan, add tomato mixture. Cook 10 minutes, stirring occasionally. Add broth, salt, cloves and cinnamon. Simmer gently 15 minutes.

Cut a tiny slit in one side of each pepper to remove seeds, leaving stems on and then dry on paper towels. Cut cheese into long thin sticks, one for each pepper and place one stick in each. If the peppers are loose and open, wrap around cheese and fasten with a wooden toothpick.

Pour oil 1/4″ deep into large heavy pan and heat to 365 F.

Beat egg whites in a medium bowl until stiff. Beat egg yolks lightly in a small bowl and fold into the beaten egg whites, gently but thoroughly.

Roll peppers in flour, and then dip in egg mixture to coat. Fry in the hot oil until golden brown, turning with a spatula. Drain on paper towels. Serve immediately topped with tomato sauce.

Roasted Poblano-Tomato Salsa
Adapted from Rick’s Roasted Poblano-Tomato Salsa, marthastewart.com/recipe

Makes 3 cups

1 pound ripe tomatoes
2 medium fresh poblano chiles
1/2 onion, sliced 1/4 inch thick
4 garlic cloves
1/2 cup water
2 tablespoons chopped fresh cilantro
2 teaspoons chopped fresh thyme
2 teaspoons coarse salt


Preheat the broiler. Place tomatoes and poblanos on a rimmed baking sheet. Set the baking sheet as close to the broiler as your oven allows, and broil tomatoes and poblanos until darkly roasted and splotchy black on one side, about 6 minutes. Using tongs, turn, and roast the other side. The poblanos may be completely blistered and blackened before the tomatoes are. If so, remove them as soon as they are done. 

Reduce oven temperature to 425 degrees. Separate the onion into rings. On a second rimmed baking sheet, mix together onion and garlic. Roast in the oven, stirring every few minutes, until onions are richly browned and garlic is soft and browned in spots, about 15 minutes. Cool to room temperature.

Cut out the cores from the tomatoes. Peel, discarding skins and reserving any juices; set aside. Remove the skins and seeds from the poblanos and discard. Chop into 1/4-inch pieces and place in a large bowl.

In the bowl of a food processor fitted with the metal blade, pulse onion and garlic until finely chopped, scraping down the sides. Transfer to the bowl with poblanos. Without washing the processor, coarsely puree the tomatoes with their juice, and add them to the poblano mixture. Stir in enough water to give the salsa a saucy consistency. Stir in cilantro and thyme. Season with salt. The salsa may be kept in a covered container in the refrigerator for up to 5 days.

Swiss Chard and Lentil Soup
Adapted from The Best of Bloodroot Volume Two by Selma Miriam & Noel Furie

1/2 C French Lentils
1 medium onion

2 cloves garlic, chopped
1/3C olive oil
2 bay leaves
1/2 teaspoon paprika
1/2 teaspoon cayenne
2 large potatoes
1 bunch chard
2 tablespoons Tamari
Salt & pepper


Pick over 1/2 C French Lentils to remove any stones. Put in a pot, cover with 2 cups water, and bring to a boil. Simmer until tender. Set aside.

Meanwhile finely chop 1 medium onion. In a soup pot, add 1/3C olive oil and sauté the onion. Add 2 bay leaves, 1/2 teaspoon paprika, and 1/2 teaspoon cayenne. When onions are soft and golden, add 2 cloves chopped garlic. Cook briefly, then turn off heat and set aside.

Peel and dice 2 large potatoes. Add to soup pot with 2 quarts water and bring to a boil. Cook until potatoes are almost done.

Meanwhile shred 1 bunch chard. Add chard and lentils to the soup pot. When chard and lentils are quite cooked, season with 2 tablespoons tamari. Add salt and pepper to taste.

Brooke’s Universal Hearty Soup

1/4 to 1/2 C Olive or other vegetable oil
2 C onion, diced
3 C potatoes, chopped into bite size chunks (cut smaller if short on time)
1 C carrots, chopped
2 C chard, chopped
Any amount of any other vegetable (e.g. squash), chopped and added with thought for how long it will take to cook, relative to the other vegetables.
1 T Italian seasonings (this is the only use I have discovered for that jar, if you don’t have the Italian seasoning mix, just add some dried oregano, basil, and thyme)
Cayenne to taste
Salt, pepper to taste


Pour enough oil into a soup pan to generously cover the bottom of the pan and heat on medium. Add the onion and cook, covered until it begins to soften. (If you want to add leeks or garlic, throw them in with the onion at the beginning so the flavor will carry throughout the soup). Turn the heat down low and add the Italian seasoning, a hefty dash of salt, and a pinch of cayenne. The secret to my favorite soups is to let the onion and other seasonings cook in oil for as long as I can stand (and to always add enough salt). After 10-15 minutes of cooking seasonings on low (during which time you can be prepping the other vegetables) you can begin to add the potatoes, carrots, and any other hearty vegetables. Add 1/2 C of water to the pot and turn up to medium/high heat until it boils, at which point you can bring it back down to a simmer. Simmer stirring occasionally. Add water if soup is sticking to the bottom of the pan. After about 20 minutes, add the less hearty vegetables (chard, summer squash, etc.) and bring back to a boil. Cook for another 10-20 minutes (keep the lid on to cook faster, but if the soup has gotten watery, leave the lid off), until all vegetables are thoroughly cooked. Salt and pepper to taste. Be sure to add enough salt that you can taste all the flavor you waited so patiently for. You can serve with a bit of fresh dill on top if you have it.

Categories : CSA Newsletter, Recipe

CSA Newsletter: Week 19- September 22, 2008

Posted by csa on
 September 22, 2008


This Week’s Share


  • Beets
  • Celery
  • Corn, last week of this summer delight
  • Cucumbers
  • Dill
  • Garlic
  • Leeks
  • Lettuce
  • Peppers, green
  • Summer Squash
  • Tomatoes, heirloom & slicing


Rotations

Melons, beans, eggplants and sauce tomatoes (5 pounds) continue on rotation.

Meet the Melons

Now that melons have made their rounds through the CSA pick up locations a few times, we thought we should better acquaint you with what we are growing this year. And hopefully – despite the rain this week – we’ll be able to harvest a melon or two more before fall settles in.


Maverick
An old standard for us, Maverick is a muskmelon with a yellow-orange rind and orange flesh inside. It is the first of the melons we planted this year and ripens earlier than the others. Its slightly ribbed rind distinguished it from Galias and San Juans.


San Juans
San Juans are an Ananas type melon. The word “Ananas”, is present both in the French and Italian languages – both literally translate to mean “Pineapple” in English, so another common name for this variety is Pineapple Melon. These melons are renowned for their sweet, aromatic, and slightly spicy flavor. Medium sized, oval, and heavily netted looking rind. The melon is ripe when the skin is mostly yellow-orange and the flesh is a very pale yellow, almost white. Their more oblong shape distinguishes them from Galia.


Galia
Galia melons are similar to muskmelons, although they are slightly larger with a yellow-green flesh, surrounded by a lightly netted orange rind. These melons are particularly beautiful when ripe, they seem to glow orange making them easy to spot when harvesting.


Noir de Carmes
A few CSA members mistook this melon to be a winter squash – so if you were one – you were not alone. We apologize for not introducing you sooner. Noir des Carmes is a French heirloom named for the Carmelite monks. The smooth, ribbed skin ripens from almost black to very dark green to orange mottled with green. The orange flesh inside is sweet and very aromatic. When the melon is ripe it tends to be very soft, making it unsuitable for shipping, and therefore hard to find in the grocery store.

Recipes


Gazpacho
Gazpacho is one of my favorite foods for late summer.

Adapted from Fields of Green by Annie Somerville
Makes about 10 cups.

Cucumber – 1 medium
Tomatoes – 5 pounds
onion – 1 cup dices
Green Bell Pepper – 1 chopped
Fresh Basil – 1/4 cup chopped
Salt and pepper
Vinegar – 2 or 3 tablespoons
Fresh Lime Juice – 2 or 3 teaspoons


Peel the cucumber, cut it in half lengthwise, and scoop out the seeds; cut into small cubes and set aside.


Bring a medium-size pot of water to a boil. Core the tomatoes and drop into the water a few at a time, for about 10 seconds, just long enough to loosen their skins. Scoop the tomatoes out of the water and continue with the rest. Rinse under cold water to cool them, then slip off their skins. Place a mesh strainer over a bowl. Cut the tomatoes in half crosswise and, over the strainer, squeeze out the juice and seeds. Save the juice to add to the soup and discard the seeds.


Puree half the tomatoes in a blender or food processor and coarsely chop the rest. Combine all of the tomatoes, the onion, cucumber, pepper, and basil in a large bowl. Season with 2 teaspoons salt, 1/4 teaspoon pepper, 2 tablespoons vinegar, and 2 teaspoons lime juice. Refrigerate and let sit for at least 1 hour before serving, to allow the flavors to develop. Add salt, pepper, lime juice, and vinegar if needed. Serve chilled.


Sautéed Zucchini with Dill
Adapted from Vegetable Love by Barbara Kafka
Serves 6 to 8 as a side dish.

5 tablespoons unsalted butter
2 pounds summer squash, trimmed and cut into 1/4 inch-thick rounds
1/2 cup chopped fresh dill
Juice of 1 lemon
Salt to taste


Heat the butter in a 12-inch sauté pan. Add the zucchini, dill and lemon juice. Cook over medium heat, stirring, until the zucchini is cooked but slightly crisp. Add salt to taste.


Corn & Feta Cheese Omelet

Adapted from Vegetable Love by Barbara Kafka

4 tablespoons unsalted butter

2 cups peeled, seeded & chopped tomatoes

2 cups fresh corn kernels

1 cup leeks

1 teaspoon kosher salt

Freshly ground black pepper to taste

6 ounces feta cheese, cumbled


Melt the butter in a large skillet and add the leeks. Cook until tender. Then add tomatoes and cook over medium-high heat for about 3 minutes, or until the tomatoes begin to give off liquid.  Add corn, salt and pepper and cook for 1 more minute over low heat. Remove the pan from the heat and stir in the cheese.


One at a time, make four 3-egg omelets in a 9-inch skillet. Befoe folding them ove, spoon in some of the filling. Slide the omelets onto plates and spoon the emaining filling over the tops.

Categories : CSA Newsletter, Recipe

CSA Newsletter: Week 18- September 15, 2008

Posted by csa on
 September 15, 2008


This Week’s Share


  • Basil 
  • Carrot
  • Cucumbers
  • Fennel
  • Garlic
  • Kale
  • Lettuce
  • Onions
  • Summer Squash
  • Tomatoes, heirlooms & slicing


On Rotation


Melons, beans, sauce tomatoes (5 pounds) and eggplant are still all making the rounds.

Recipes


Italian Tomato and Bread Soup
Adapted from Chez Panisse Vegetables by Alice Waters

2 small onions, diced
4 to 6 cloves garlic, chopped
Salt
2 pounds very ripe tomatoes
¼ pound basil
2 to 2 ½ cups bread crumbs
Reggiano Parmesan cheese


Saute the onions in about ½ cup o the olive oil until soft. Add the garlic and some salt and cook a few minutes more.


Core and chop the tomatoes. When the onions and garlic are done, remove and set aside one third o the mixture. Add the tomatoes to the remaining onion mixture, along with the basil stems (reserving the leaves), and cook for about 15 minutes to make a nice tomato sauce. Pass through a food mill or a fine mesh strainer to remove skins and seeds. Return sauce to pan.


Add the reserved onions and garlic to the tomato sauce. Over very low heat, stir in about 11/2 cups of the bread crumbs. After 10 minutes, turn off the heat and let the soup site for 10 minutes. As the bread crumbs absorb liquid, the soup will slowly thicken. The dryness and density of the bread crumbs, the soupiness of the tomatoes, and your own personal preference will dictate how much bread to add. The denser the crumbs, the longer the soup takes to thicken and the less you will need. If you have very dense bread, make finer crumbs and cook the soup more slowly. If the soup thickens too much, thin it out with a little water.


Chop a handful of the reserved basil leaves and stir them into the soup, with a little more olive oil if you like, and adjust the seasoning. Serve hot or cold, garnished with a thread of olive oil, grated Parmesan, and a whole basil leaf if you wish.


Gingered Fennel with Garlic
Adapted from Moosewood Restaurant Low-Fat Favorites by the Moosewood Collective

2 medium fennel bulbs
2 garlic cloves, sliced
2 teaspoons vegetable oil
2 tablespoons grated fresh ginger root
½ cup orange juice (or sherry)
2 teaspoons sugar
Salt and ground pepper to taste


Thinly slice fennel and in a large skillet, sauté garlic, fennel and oil on medium-high heat for about 7 minutes (until the fennel is golden brown) while stirring frequently. If necessary, add a splash or two of water to prevent sticking. Add the ginger and orange juice, cover, lower the heat and simmer for about 5 minutes- until the fennel is tender. Sprinkle on salt, sugar and pepper to taste.


Squash and Kale Risotto
Adapted from Moosewood Restaurant Low-Fat Favorites by the Moosewood Collective

4 ½ to 5 cups vegetable stock
1 cup minced onions
2-3 teaspoons olive oil
1½ cups Arborio rice
½ cups dry white wine (optional)
2 tablespoons butter
2 cups cubed squash (¾ to 1-inch cubes)
3 cups steamed and chopped kale, packed (about ½ pound before steaming)
1/8 to ¼ teaspoons nutmeg
1 teaspoon freshly grated lemon peel
Salt and ground pepper to taste
¼ cup grated Pecorino or Parmesan cheese


Heat 2 tablespoons of butter in a heavy sauté pan and then sauté the squash until golden brown. Set aside.


Bring vegetable stock to a boil, and then reduce it to a simmer. In a heavy saucepan sauté onions and 2 teaspoons oil for about 5 minutes until softened, but not browned. Then add the rice and stir with a wooden spoon (to prevent breaking the grains) until well coated with oil. If using wine, add it to the rice and onions. When it is absorbed (this shouldn’t take too long), ladle in 2 ½ cups of the simmering stock, ½ cup at a time, stirring frequently for 2-3 minutes between each addition until rice has absorbed the liquid. Add the steamed kale and sautéed squash and stir.


Continue adding ½ cup of broth every couple minutes for about 10 minutes and stir often until all stock has been added and the rice is tender yet firm. Add nutmeg, lemon peel, salt and pepper to taste. Remove the risotto from the heat stir in the cheese and serve immediately.


Beer Batter-Fried Kale
Adapted from JustVegetableRecipes.com

1 cup plus 2 tablespoons beer (not dark)
1 cup All-purpose flour
1/2 teaspoon Table salt
1/2 teaspoon Freshly ground pepper
Vegetable oil for deep-frying the kale leaves
8 medium sized Kale leaves; washed and cut to smaller size if necessary
Coarse salt for sprinkling the leaves
Lemon wedges


In a blender combine the beer, the flour, the table salt, and the pepper until the batter is smooth, transfer the batter to a bowl, and let it stand, covered, for 1 hour.


In a large deep skillet heat 1 inch of the oil until it reaches 360F. Dip each leaf into the batter, coating it thoroughly and knocking off the excess batter on the side of the bowl, and fry it in the oil for 30 seconds on each side, or until it is golden. Transfer the kale as it is fried to paper towels to drain and sprinkle it lightly with the coarse salt. Serve with the lemon wedges.

Field Notes

In addition to our weekly CSA harvest, we have been busy harvesting our storage onions. These are the onions that some of you joined us in planting back in late April. Now, over four months later, the onions have formed bulbs and the tops have started to dry indicating that they are reaching maturity. Storage onions require ideal curing conditions. When onions “cure” the leaves dry and shrivel and ultimately create a seal so that disease doesn’t make its way into the succulent onion. Ideal conditions for curing are temperatures in the 75-85 degree range and humidity at 65-70%. Once the skins and tops are dry, we’ll clip the tops off, clean the onions, and then bring them your way over the months to come.

Categories : CSA Newsletter, Farm News & Updates, Recipe
« Previous Page
Next Page »

Recent Posts

  • CSA Week #22: October 31st & November 2nd
  • CSA Week #21: October 24th & 26th
  • CSA Week #20: October 17th & 19th
  • CSA Week #19: October 10th & 12th
  • CSA Week #18: October 3rd & 5th

Archives

Sauvie Island Organics | © 2025 All Rights Reserved
iThemes Builder by iThemes | Powered by WordPress | Site by LRP