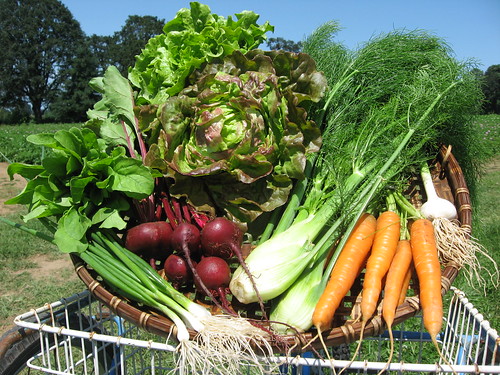
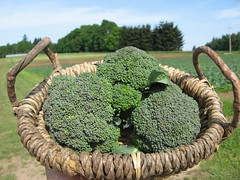
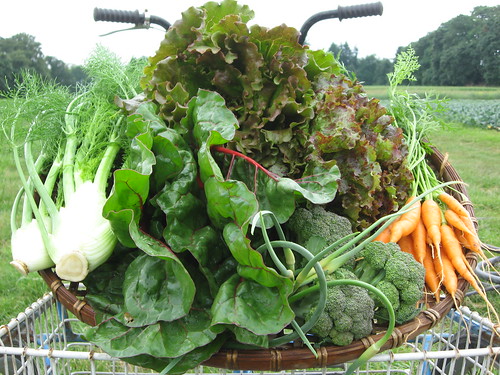
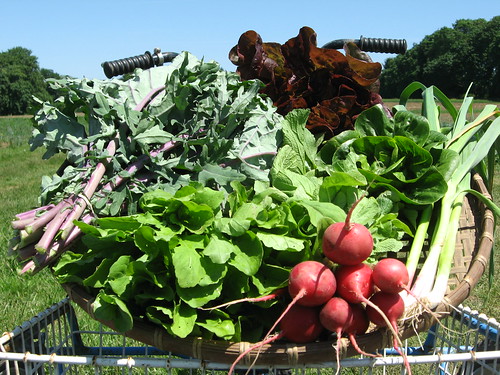
Image

Archive for Recipe – Page 21

CSA News: Week 8- July 7 to July 13

Posted by sio@dmin on
 July 7, 2009

This Week’s Share

  • Carrots
  • Chard
  • Garlic
  • Lettuce
  • Parsley
  • Potatoes, Yukon Gold
  • Summer Squash


On Rotation:

  • Broccoli

Chef’s Corner: July


In addition to the crops SIO grows for our 400 member CSA program, we also grown and sell produce to 30-40 Portland area restaurants and kitchens, and this season at SIO we decided to partner with some of those restaurants for some culinary inspiration. We have been picking the brains of some of the areas most talented chefs and restaurant owners, and have asked them to provide us with recipes and general cooking techniques based on the crops that you receive in your shares. Out at the farm we crop plan separately for both our CSA program and restaurant sales, so you don’t have to worry that part of your share may be going the restaurant down the street. For the month of July our featured restaurant is Park Kitchen, located in the North Park Blocks in the Pearl District.

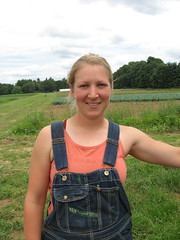
David Padberg, Chef de Cuisine at Park Kitchen, Shares Produce Recipes


Park Kitchen is a small restaurant in Northwest Portland on the serenel green North Park Blocks. The owner, Scott Dolich, and myself are intensely committed to seasonal cooking, and our relationships with our farmers and ranchers. Park Kitchen has been buying produce from Sauvie Island Organics (SIO) since the restaurant opened in 2003. In the early days, the restaurant bought their wonderful lettuces, and gradually started buying more vegetables as the years went on, and SIO increased their acreage and selection. Today, I think SIO is one of the most beautiful and diverse farms in the Portland area.

Summer Squash

Summer squashes are so abundant; the plants are so productive, and their uses are very versatile that you can use them everywhere.  Here are several techniques for raw, cooked and pickled squash.

Zucchini Pickles, great for sandwiches, hamburgers, antipasti platters, or just a simple snack.

2 pounds zucchini
salt
1 pint cider vinegar
1 cup sugar
1 teaspoon ground mustard seed
1 teaspoon turmeric

Slice zucchini lengthwise into 1/4″ ribbons, lightly sprinkle with salt and allow them to rest for 15 minutes to purge off excess water. Rinse and drain, then spread in a casserole dish. Make a brine by dissolving the cider vinegar with the cup sugar, ground mustard seed, and turmeric, then bring to a boil and pour it over the squash. Refrigerate overnight and enjoy.

Long-Cooked Zucchini is delicious on its own, with a simple garnish, or to accompany braised pork or poultry as part of a larger meal.

3 med summer squash
2 spring onions
salt and pepper
olive oil
4 cloves garlic, sliced
1 teaspoon chili flakes
2 teaspoons fresh chopped oregano
3 teaspoons white wine vinegar

Cut the squash in half lengthwise and salt purge. Meanwhile, cut the spring onions into thin slices, season with salt and black pepper, and gently simmer in a little olive oil until tender. Spread the zucchini, cut side down, in a casserole, then cover with the onions, the sliced garlic, chili flakes, oregano, white wine vinegar, and olive oil. If the squash is closely packed in the casserole, this should just cover them. Place in a 275 degree oven for one hour. They are going to be very tender, so remove them carefully. You can reuse the oil for future cooking or making dressings.

Summer Squash Carpaccio is the quickest and easiest way to enjoy a wide variety of shapes and sizes. Slice them thinly (use a mandolin if you have one) and sprinkle with salt. After a few minutes, drain off the excess water. Chop a few leaves of basil and toasted pine nuts or hazelnuts, toss them with the squash, along with a dash of white wine vinegar or fresh lemon juice, then spread them out flat on a platter. Drizzle some nice olive oil over the squash and grate a hard cheese over them with a box grater or micro plane (grana padano, parmigiano, or redmondo are great).

Cucumbers

Chilled Cucumber Soup is a summer favorite at Park Kitchen. I often use nuts to thicken chilled soups in the style of ajoblanco. It is so popular that I always bring it back, although I change the garnishes every year.

2 qt Chopped Cucumber
1/2 bulb Chopped Spring Onion
2 cloves Minced Garlic
1 1/2 cups Chopped Almonds
1/2 bunch Chopped Parsley
Lime Zest & Juice from 3  fruits

2/3 cup Olive Oil
Salt

Toast the almonds. The rest of the ingredients will be raw. Toss them all together (except the oil), sprinkle with some salt and place them in the refrigerator for thirty minutes to macerate their flavors. Puree the ingredients in batches in the blender, adding a little olive oil to each batch, and adjusting the salt as you go. Make sure your batches are small enough that the blender can puree the soup very smooth. Serve cold with your choice of garnish; yogurt, herbs, radish, seafood, tofu, or avocado are tasty choices.

Green Beans

Green Bean Salad, Stone Fruits and Almond Crunch

For this salad, you can simply toast and chop some almonds (which are a cousin of the stone fruits) to go with the salad, or you can go the extra step and make a fun, crunchy tuile to sprinkle over the top.

Fill a pot with boiling salted water, and prepare a bowl of ice water nearby. Add the cleaned green beans to the boiling water for a few minutes, just until they are tender enough to bite through with a little resistance. They should still be bright green. The timing will be from two to six minutes, depending on the size of the beans. Then plunge them in the ice water to stop the cooking. If the beans are thick, cut them in half lengthwise, then cut them into two inch lengths.

Choose your stone fruit; peaches, plums, apricots, or a little of each. If they are freestone varieties, you can cut them in half and roast them, then remove the stone afterward. If they are clingstone, you should quarter them and remove the stone first, then roast. In either case, place the fruits in an enamel casserole, lightly drizzle with your choice of vinegar (it can be balsamic, red or white wine vinegar) and a dash of sugar, and roast at 350 degrees just until the fruit softens. These rich juices will be the dressing. Drain this nectar from the casserole and whisk with an equal portion of olive oil. Toss together the green beans and fruits with the dressing, and season with salt and pepper. If you are adding chopped almonds, do so now. If you are making the almond crunch, go ahead and place the salad on a serving platter. Scoop a few tablespoons of fresh goat cheese over the salad and crumble or scatter the almond crunch over the top.

Almond Crunch

6 oz Butter
3/4 cup Sugar
6 tbsp Corn Syrup
1 cup Flour
1/2 cup Almond Meal
1 1/2 cup Almonds
1 tsp Salt

Melt the butter, sugar and syrup together, then add the flour, almond meal and salt, simmer over low heat for one minute. Fold in the toasted, chopped nuts, then remove from heat. On a sheet pan lined with a silpat (non-stick baking mat) or lightly oiled parchment, form one tablespoon balls of this batter and spread them about 3 inches apart. Gently press the balls to flatten a little, then bake at 350 degrees for about eight minutes. They should look like flat wafers. Allow them to cool and harden.

Recipes


Potato Recipe

Potato Salad with Italian Parsley
Recipe adapted from Vegan Italiano by Donna Klein

1 1/2 pounds new potatoes
3 tablespoons extra-virgin olive oil
1 tablespoon red wine vinegar
1 teaspoon dried oregano (or 1 tablespoon fresh chopped oregano)
1/2 teaspoon coarse salt, or to taste
Freshly ground black pepper, to taste
1/4 cup finely chopped fresh flat-leaf parsley
1-2 large cloves garlic, finely chopped

Place the potatoes in a large saucepan or medium stockpot with salted water to cover; bring to a boil over high heat. Reduce the heat to a gentle boil and cook until the potatoes are just tender, about 15 minutes, depending on size. Drain and set aside to cool slightly.
Meanwhile, in a large bowl, whisk together the oil, vinegar, oregano, salt, and pepper. Stir in the parsley and garlic. Let stand about 5 minutes to allow the flavors to blend.

As soon as the potatoes are cool enough to handle, yet still quite warm, cut them in half or in quarters, depending on size. Stir the reserved dressing a few times, and add the warm potato halves. Toss gently until the potatoes are thoroughly coated. Serve warm or at room temperature. Alternatively, let cool to room temperature and refrigerate a minimum of 3 hours, or up to 2 days, and serve chilled or return to room temperature.

Summer Squash Recipe

Swiss Chard and Summer Squash Frittata
Adapted from Moosewood Restaurant Low-Fat Favorites

1 bunch Swiss chard
1 summer squash, sliced thin
4 cloves garlic, minced or pressed
1 cup onion, chopped
2 teaspoons olive oil
6 egg whites
2 whole eggs
3 tablespoons fresh parsley, chopped
1/4 teaspoon Salt
1/2 teaspoon ground black pepper
grated Parmesan cheese (optional)

Wash the Swiss chard, remove and discard the large stems, and finely chop the leaves. In a 10-inch cast iron skillet, sauté the garlic, summer squash and onions in 1 teaspoon of the oil for 3 minutes on medium heat. Add the Swiss chard, stir, cover, lower the heat, and cook for a bout 10 minutes. Remove the skillet from the heat and drain the Swiss chard if juicy. In a large bowl, beat the egg whites, eggs, parsley, salt, and pepper until blended. Stir in the sautéed Swiss chard and squash. Coat the bottom of the skillet with the remaining teaspoon of oil and return it to medium heat. When the skillet is hot, pour in the Swiss chard-squash-egg mixture. Cook for 5 to 8 minutes, until the edges are firm and the bottom is golden and beginning to brown. Place in a preheated 400 degree oven and cook for about 5 minutes, until the eggs are fully cooked. Serve immediately or at room temperature, topped with grated Parmesan if you wish.

Chard Recipes

Swiss Chard Anitpasto
Adapted from The New Moosewood Cookbook by Molly Katzen

Note: The following instructions are for preparing the chard in two batches, as it is quite bulky until is cooks down. If you have a very large wok or skilled you might be able to fit it all into to one effort.

1 bunch Swiss chard
2-3 tablespoons olive oil
6 medium cloves garlic, minced
salt and pepper, to taste
2 tablespoons balsamic or red wine vinegar

Coarsely chop the chard (include as much of the stems as feasible). Heat a wok or a large heavy skillet. Add 1 tablespoon olive oil and half the chard (or all if you have the capacity). Turn up the heat , and stir-fry for several minutes. When the chard begins to be limp, add half the garlic (or all if you are doing one batch), and stir-fry for just a few minutes. Transfer to a platter or bowl. Sprinkle lightly with salt, heavily with pepper, and toss with 1 tablespoon vinegar.  Repeat with the remaining half of the ingredients if you are doing two batches. Taste to adjust seasonings, you may wish to add a little more olive oil. Serve hot, cold, or at room temperature.

Swiss Chard and Summer Squash Frittata
(see above in Summer Squash Recipes)

Categories : Blogroll, CSA Newsletter, Farm News & Updates, Recipe

CSA News: Week 7- June 30 to July 6

Posted by sio@dmin on
 June 30, 2009

This Week’s Share

  • Arugula
  • Beets
  • Carrots
  • Fennel
  • Garlic
  • Lettuce
  • Scallions (Green Onions)

Field Notes


It’s officially summer and the time of year when we are salivating in anticipation for the summer’s bounty. Soon your share will start to plump up with summer squash, beans, cabbage and parsley. Our tomato plants are starting to fruit, and our corn is as the saying goes “knee high by the 4th of July,” which means it’s right on schedule for arrival in your share later in the season. We hope you are as excited as we are for the season ahead and your share in the harvest.

Recipes


Beet Recipes

Arugula, Roasted Beet and Fennel Salad
Adapted from www.drgourment.com

2 large beets
1 large bulb or 2 smaller bulbs fresh fennel
1 teaspoon olive oil
1 cup arugula
1/4 teaspoon salt
fresh ground black pepper, to taste
1/2 teaspoon ground cumin
1 ounce feta cheese

Cut the stem and tip ends off of the beets. Scrub well and wrap in aluminum foil.
Place in the oven and roast for 45 minutes. Remove and let cool. (This may be done in advance, with the beets placed in the refrigerator overnight.) Remove the leafy ends from the fennel and any stalks that appear too tough. Slice very thinly. Place the olive oil in a small skillet over medium heat. Add the sliced fennel and cook, stirring occasionally, for about 15 minutes. Remove and let cool. Remove the beets from the aluminum foil. The skins will slip off easily after roasting. After they are skinned cut into 1/2 inch cubes. Mix together the beets, sautéed fennel, arugula, salt, black pepper, ground cumin and crumbled feta. Chill well.

Whole Beet Skillet
From Simply in Season by Mary Beth Lind and Cathleen Hockman-Wert

4-6 medium beets with greens
1-2 tablespoons lemon juice
1-2 teaspoons ginger root, peeled and minced
1-2 teaspoons honey (optional)

Cut green off beets, leaving about 1 inch of greens on beets. Place beets in large saucepan, cover with water, and bring to a boil. Reduce heat and simmer until beets are tender when pricked with a fork, 15-30 minutes, depending on size. While beets are cooking, remove stem from beet greens. Chop stems in 1-inch pieces. Chop green separately. Drain the cooked beets and rinse with cold water. When beets have cooled enough to handle, slip off peel with finger. Cut beet in slices. In a sauce pan sauté stems in 1-2 tablespoons butter until tender. Add greens and sauté until bright green and just tender. Add sliced beets and heat through. Stir in lemon juice, ginger root, and honey and serve immediately.

Fennel Recipes

Note: This is the last fennel until the fall, so enjoy the sweet smell and delicious flavor while you have it

Pasta with Golden Fennel
From Local Flavors by Deborah Madison

Note: Member Jessica Roberts, excited for the first taste of fennel in her share, submitted this recipe to us after the first distribution of fennel. She often makes it with bulghur wheat instead of pasta, and says both ways are, “so delicious and easy!”

2 fennel bulbs
2 tablespoons unsalted butter (can use olive oil)
1 tablespoon olive oil
sea salt and freshly ground pepper
grated zest and juice of 1 lemon
1 1/2 cups water, divided
1 garlic glove minced
3/4 to 1 pound fettuccine
Parmigiano-reggiano or dry monterey jack cheese

Set aside the fennel greens. Quarter the bulbs and thinly slice. Heat a large pot of water for the pasta. Melt 1 tablespoon of butter with the olive oil in a wide skillet. Add the chopped fennel and saute over high heat, stirring occasionally, until browned in places, 7 to 10 minutes. Season with 1 teaspoon of salt. Toss with the lemon juice, then add 1 cup of water. Reduce the heat and cook, covered, until the liquid has evaporated. Add another 1/2 cup of water and continue cooking in this fashion until the fennel is very soft and deep gold in color, about 25 minutes in all. Season with pepper. If your fennel still has greens chop a handful of fennel greens (about 1/3 cup) with the garlic and lemon zest and set aside. Add salt and the pasta to the boiling water and cook until al dente. Scoop it out and add it to the pan with the fennel and chopped greens. Taste for salt and season with pepper. Serve with the cheese, finely grated or thinly shaved over the top.

Roasted Beet and Fennel Salad
(see above in Beet Recipes)

Scallion Recipe

Note: Scallions are new this year, we planted them as an trial crop and they showed great results that you will enjoy in your share this week. Scallions (also called green onions) are additions to salads, tacos, baked potatoes, and any other dish you find for them.

Shrimp a la Fein
From the Court of Two Sisters

Note: This recipe is incredibly delicious and very quick and easy. It makes a great 15 minute meal when served over couscous.

1/2 lb medium raw shrimp
2 strips of bacon
3-4 scallions
juice of 1/2 lemon
salt, pepper and paprika to taste
1 tablespoon butter
Tabasco
Worcestershire Sauce

Dice bacon and sauté in a skillet until half cooked. Pour off excess fat. Lower flame. Add butter, peeled raw shrimp, scallions (chopped fine), and season and to taste with salt and pepper. When the shrimp are turning pink, add lemon juice and 2-5 dashes each of Tabasco and Worcestershire Sauce. Serve over couscous, quinoa, or pasta if desired.

Excess Bag-gage


Over the winter SIO decided to do some number crunching and figure out our approximate plastic bag usage so we could place our order for 2009. In the process we were stunned to learn that in the 2008 season SIO and its members used nearly 16,000 bags last season. That breaks down to 64 bags per share for the season, or approximately 2 bags per share per pick-up. Those numbers caused us to think more about our produce bag choices, and as a result we chose to go with US produced plant based bio-plastic produce bags that break down in 1 year in ideal conditions. In exchange for SIO taking a step to reduce its impact, we now challenge SIO members to reduce their produce bag use by 25% by bringing your own bags, using one bag for several items, and reusing produce bags when possible. We will happily continue to provide produce and paper bags and at our bulk sites (and when needed in box shares) for the convenience of our members, but appreciate any efforts in reducing overall bag use at SIO.

Categories : Blogroll, CSA Newsletter, Farm News & Updates, Recipe

CSA News: Week 6- June 23 to June 29

Posted by sio@dmin on
 June 23, 2009

This Week’s Share

  • Carrots
  • Fava Beans
  • Garlic, Fresh
  • Lettuce, Romaine
  • Kale, Red Russian
  • New Potatoes
  • Note: Potatoes may appear somewhat dirty because they are new potatoes, and in order to keep their thin and delicate skin intact we used a gentler washing technique.

On Rotation

  • Broccoli

Recipes

Fava Bean Recipes

Warning: There is a rare genetic deficiency that affects some people and can lead to health problems if they eat fava beans. This condition is relatively rare and usually detected by childhood, but if you have never eaten fava beans before we recommend you check out www.g6pd.org to learn more.

Grilled Fava Beans
Recipe adapted from The Food Section, http://www.thefoodsection.com/foodsection

Olive oil, enough to coat pods generously

Salt, use generously

Fava bean pods, as many as you want to grill (I recommend a large number because they are so delicious and so easy to make)

Season the raw bean pods generously with salt and toss with extra virgin olive oil. Place the pods on the grill and cook until blackened and soft. As the pods pop and blister on the outside, they steam within. When they have sufficiently charred on both sides, remove the pods from the grill, let cool, and then pry them open to reveal the beans, which may be slipped from their thin skins or eaten whole, skin and all. The salty, meaty beans are as tasty as they are easy to prepare.

Spanish Tortilla with Spring Vegetables

Adapted from Fresh from the Farmers’ Market by Janet Fletcher

Note: The tortilla Española or Spanish tortilla is a traditional Spanish dish enjoyed at any time of the day, but is one of the most common dishes offered for tapas. Like an omelette, vegetable ingredients can be interchanged depending on the season (or what you need to get rid of in the fridge), but the tortilla Española’s distinctive olive oil poached potatoes and onions are what provide its delicious flavor and texture and should not be left out.

5 tablespoons olive oil

1½ pounds new potatoes, cut into 1/3-inch dice

salt and freshly ground pepper

3 cups onion, sliced

6 large eggs

1 cup fava beans, shelled

Heat 4 tablespoons olive oil in a large nonstick or well oiled cast iron skillet over moderate heat until hot but not smoking, then reduce heat to moderately low and cook potatoes, onion, 1 teaspoon salt, and a generous amount of pepper, stirring occasionally, until potatoes are tender (10-15 minutes). Drain potatoes and onions over a bowl and let cool. Crack eggs into a bowl and add the cooled potato and onion mixture, as well as the fava beans and mix well. Add 1 tablespoon drained oil to skillet and then add the vegetable and egg mixture and cook over low heat, covered, until sides are set but center is still loose, about 12 minutes. Remove from heat and let stand, covered, 15 minutes.

Shake skillet gently to make sure tortilla is not sticking (if it is sticking, loosen with a wooden or heatproof spatula). Slide tortilla onto a large flat plate or cookie sheet, then invert skillet over tortilla and flip it back into skillet. Round off edge of tortilla with a spatula and cook over low heat, covered, 10 minutes more. Slide tortilla onto a plate and serve warm, cut into wedges.

Lettuce Recipe

Caesar Salad

From Shannon Raider, a former SIO Farmer

Note: If you like a little less intensity you can adjust the taste, just put in less garlic and anchovy.

1-2 head romaine lettuce, washed and torn into salad-size pieces

3 cloves garlic

2 tablespoons olive oil, plus ¾ cup olive oil

½ tin of whole anchovy fillets

1 tablespoon dry mustard

2-6 shakes of Tabasco sauce

2 tablespoons Worcester sauce

1 raw egg yolk or 1 coddled egg yolk*

¼ cup lime juice

¼-½ cup grated parmesan cheese

salt and fresh ground black pepper, to taste

In the bottom of the bowl that you will serve your salad into, work 3 cloves of garlic into a paste with 2 tablespoons olive oil and pinch of salt using two forks. Next, add half a tin (or one of those tiny jars) of whole anchovy fillets into the garlic paste in the same fashion. Adjust anchovy amount to your liking. Then add 1 tablespoon dry mustard, 2-6 shakes of Tabasco sauce and 2 tablespoons Worcester sauce.
 Whisk in the raw egg yolk or coddled egg yolk*. Whisk in 3/4 cup olive oil and 1/4 cup lime juice.
 Stir in grated Parmesan Cheese (at least a 1/4 cup, but I like a lot of cheese).
 Add salt and generous amounts of ground black pepper to taste.
 Pour dressing into a jar and toss salad in the well seasoned bowl, toss with as much dressing as you like.
 Extra dressing can be stored for up to one week in the refrigerator.

*Coddling causes the egg white to cook and leaves the yolk liquid. This sterilizes the egg of any bacteria that could contaminate. Bring egg to room temperature. Place the egg in a small bowl or mug and pour boiling water around the egg until it is covered. Let stand for exactly 1 minute. Immediately run cold water into the bowl.

Kale and Carrot Recipe


Kale and Carrot Slaw
Adapted from Seasoned in the South by Bill Smith

3 cups kale, cut into ¼ in. strips
4 carrots, peeled and shredded
3 large garlic cloves, minced
1 onion, diced (optional, if used sweet onion lends better flavor)
Zest and juice of 1 lemon (about 3 teaspoons zest and 3 tablespoons juice)
1 teaspoon fennel or dill seed (optional)
½ teaspoon salt, plus more to taste
½ teaspoon sugar, plus more to taste
3 tablespoons extra-virgin olive oil
a few splashes of balsamic vinegar

Toss together the first 8 ingredients. Let stand 30 minutes. Stir in olive oil. Taste for seasoning, and add more salt or sugar, if desired. Refrigerate in an airtight container and let marinate for at least a few hours before eating. The slaw will keep for up to 1 week refrigerated in and airtight container.

Farmer In Training (FIT) Spotlight: Meryl

After taking a cross country cycling trip from Michigan to the west coast, and passing through Portland Meryl knew she had to move here. So in 2007 Meryl came to Portland with the goal of starting her own organic farm restaurant where the ingredients for the restaurant are raised and grown on her own farm. She began the Hospitality and Restaurant Management Program at Western Culinary Institute, and after completing the program and receiving her associates degree in Restaurant Management Meryl took time to work at some of the prominent restaurant kitchens in the Portland area, including Lovely Hula Hands, Wildwood, and Aquariva (all of which are SIO buyers). Although she enjoyed the restaurant industry, she still needed to learn more about the farming side for the organic farm restaurant and that is how she made her way to SIO. Through her participation in the FIT program she hopes to learn the skills needed to farm and sustain her own restaurant (hopefully back in Michigan where she is from). Her favorite job at SIO so far is harvesting lettuce because, “its really rhythmic and a good way to wake up in the morning.”

Categories : Blogroll, CSA Newsletter, Farm News & Updates, Recipe

CSA News: Week 5- June 16 to June 22

Posted by sio@dmin on
 June 16, 2009

This Week’s Share

  • Broccoli
  • Carrots
  • Chard
  • Fennel
  • Garlic Scapes
  • Lettuce

Recipes


Fennel Recipes

Pasta with Fennel and Chard
Adapted from Riverland Farm in Sunderland MA, www.riverlandfarm.com

Note: Sweet fennel pairs nicely with bitter greens
Ingredients

1/2 cup olive oil
1 onion, minced
1 medium fennel bulb fronds removed and set aside, halved and thinly sliced
salt and pepper
2 tablespoons balsamic vinegar
1 lb spaghetti
1 bunch chard or (other cooking green), washed and chopped
1 cup grated parmesan cheese

Heat oil in a large braising pan or skillet with a cover. Add onion; sauté over medium heat until softened, about 5 minutes. Stir in fennel; sauté until golden, about 10 minutes. Add 1/2 cup water and season to taste with salt and pepper. Cover and simmer over medium-low heat until fennel is tender, about 8 minutes longer. Stir in vinegar; simmer to blend flavors, 1 minute longer. Season to taste. Meanwhile, bring 4 quarts water to boil in large pot. Add 1 tablespoon salt and the pasta; return to boil. Add the chopped chard to boiling pasta and continue to cook until pasta is al dente, about 7 minutes. Drain pasta and greens, then toss with fennel mixture and cheese. Transfer portions to warm pasta bowls. Garnish with reserved minced fennel fronds. Serve immediately with more cheese passed separately.

Fennel, Mushroom and Parmesan Cheese Salad
Adapted from The Kitchen Garden Cookbook by Sylvia Thompson

Note: You can prepare the dressing an hour or two in advance, but the salad ingredients won’t keep pristine for more than half an hour.

For Dressing:
1/3 cup mild olive oil
2 tablespoons fresh lemon juice
1 tablespoons finely packed fennel leaves, finely chopped
salt & freshly ground white pepper to taste
a tiny pinch of nutmeg

For Salad:
2  fennel bulbs, sliced paper-thin
1 oz. Parmesan cheese, shaved paper-thin
4 plump mushrooms, about 1 oz each, sliced paper-thin
freshly ground white pepper to taste

Use a fork to blend the dressing ingredients in a small bowl.  Taste for seasoning.  Cover and keep in a cool place. Combine the thin sliced fennel and cheese in a mixing bowl.  Beat the dressing to blend it and add 1/4 cup to the bowl.  Blend carefully with your hands – the cheese tends to sink to the bottom, and you don’t want to end up with just crumbles. Spread a handful of this mixture on 4 salad plates, filling the plates.  Heap the mushroom slices lightly over the fennel, leaving a curly border of the fennel.  Beat the dressing again and spoon 1 Tbsp. over the mushrooms on each plate.  Grind pepper over the salads and serve at once as a separate course with bread.

Chard Recipes

Swiss Chard with Raisins and Pine Nuts
Adapted from Food to Live By, by Myra Goodman

1 bunch Swiss chard
2 tablespoons olive oil
3 tablespoons garlic scapes, minced
grated zest of 1 lemon
1/4 cup raisins (golden raisins have a nice flavor, but any kind will do)
1/2 cup toasted pine nuts
coarse salt and freshly ground black pepper

Rinse the chard and cut the ribs off the leaves. Cut the ribs into 1/2 inch dice and set aside. Stack the leaves and cut them into 1/2 inch strips. Set the leaves aside separately. Heat olive oil over medium heat in large, heavy pot or large, deep skillet with a tight fitting lid. Add the garlic scapes and chard ribs and cook, uncovered, until soft, about 5 minutes. Add the chard leaves and cook, stirring frequently, about 1 minute. Add 2 tablespoons water, most of the lemon zest, and the raisins. Cover the pot and cook, stirring occasionally, until the chard is tender and the water has almost evaporated, 4 to 8 minutes. If the water evaporates before the chard is tender, add an additional splash of water. Remove the pot from the heat. Stir in the pine nuts, and season the chard with salt and pepper to taste. Serve immediately garnished with remaining lemon zest.


Pasta with Fennel and Chard

(see above in Fennel Recipes)

Carrot Recipes

Carrot Broccoli Salad
Adapted from allrecipes.com

2 cups fresh broccoli florets
1 cup shredded carrot
1/2 cup sunflower kernels
1/2 cup dried cranberries
1/2 cup coleslaw dressing (recipe below, or you can purchase at the store)

In a small bowl combine all ingredients and mix well. Serve or refrigerate.

Basic Coleslaw Dressing:

Note: This is just a good basic dressing, but you can spice it up however you wish.
Mix it at least 24 hours ahead of time and refrigerate.

1/2 cup mayonnaise
2 tablespoons cider vinegar
1 teaspoon sugar (more or less depending on personal taste)
2 tablespoons milk
1 tablespoon celery seed

Mix all together, preferably in a glass container. Stir and taste a few times in 24 hours of time it is sitting.

Farmer in Training (FIT) Spotlight: Katie

Q: What fruit of vegetalbe would you be and why? A: Cherry, because theyre so sweet.

After finishing her undergraduate degree in Landscape Architecture at the University of Oregon and working with the Urban Farm Program on the U of O campus, Katie went to Arco Santi, an alternative and sustainable living community in the high desert of Arizona, earning her Permaculture Certificate. Katie then returned to Portland and worked as the Youth Educator Coordinator for the Sauvie Island Center. For two years she helped educate first through fifth graders about where their food comes from. During this time she also worked for Pistil’s Nursery. Despite her love for Sauvie Island and the Northwest, the world abroad was calling her, and Thailand is where Katie ended up. In Thailand she had the opportunity to farm, learn seed-saving methods, participate in natural building projects and gain overall skills in rural self-sufficiency. After Thailand Katie made her way back to Portland and decided it was time to gain experience in production farming and learn what it really means to have 400+ people rely on you to bring them their food each week. So far her favorite jobs on the farm are planting tomatoes and making compost piles. She enjoys both because of the way they embody the cyclical nature of life and the ability to experience the process from beginning to end.

Sauvie Island Center Summer Celebration


Sauvie Island Organics is a proud partner of the Sauvie Island Center. Using our farm fields for their field trips, The Sauvie Island Center serves elementary school youth of Portland by providing hands-on
education about food, farming and the land.


On July 26th from 4:30-7:30 the Sauvie Island Center  will host a Summer Celebration at Howell Territorial Park (just adjacent to Sauvie Island Organics).  Come see the farm, experience educational programs, and enjoy live music on the grass.


4:30-5:30 pm Field trips in action. Children’s activities.
5:45 pm Welcome/Introduction of Center’s work
6:00-7:30 pm Picnic, music, dessert
7:30 pm Evening ends


This event is free of charge but donations to the Sauvie Island Center will be accepted.


You bring: friends and family, a picnic supper, a blanket, your checkbook.
Sauvie Island Center will provide: lemonade and dessert, live music, friendly tour guides.


RSVPs appreciated to info@sauvieislandcenter.org or (503) 231-2757.


Categories : Blogroll, CSA Newsletter, Farm News & Updates, Recipe

CSA News: Week 4- June 9 to June15, 2009

Posted by sio@dmin on
 June 8, 2009

This Week’s Share

  • Dill
  • Fuyo Shomi
  • Garlic Scapes
  • Kale
  • Lettuce
  • Spring Onions, Walla Walla Sweets
  • Turnips, Hakurei


On Rotation:

  • Broccoli

Meet Our Farmer In Training Crew

Left to Right: Jeramy, Melissa, Carol, Caitlyn, Katie, Kristin, Justin, and Meryl


The Farmer in Training (FIT) Program at SIO is for individuals with a serious interest in gaining the skills necessary to farm. The program provides each participant with the opportunity to spend a season working and learning on SIO’s well-established 16-acre vegetable farm. The majority of the educational component is based on learning from the experience of working, but the FIT participants also attend monthly workshops covering crop planning, soils and fertility, irrigation, beneficial insects and pests, farm equipment, and business planning and marketing.

This season we have 8 enthusiastic, unique, and energetic Farmers In Training. They started here with us the first week of May and will be here through October seeding, planting, harvesting, weeding, washing in the barn, moving irrigation pipe, and taking part in all the day-to-day work that allows SIO to provide you with your weekly farm share. Throughout the season we will do individual spotlights of each of the FIT participants so you can get a closer look at all the wonderful and hard working people that help grow your food.

Recipes


Kale Recipes

Farm Fresh Kale Salad with Pine Nuts and Raisins
Recipe adapted from The Oregonian: FOODay

Note: This recipe yields ¼ cup dressing and can be prepared 1 day ahead; cover and refrigerate. Bring to room temperature 30 minutes before using.

Dressing:

2 tablespoons olive oil
1 tablespoon lemon juice
2 teaspoons maple syrup
1 teaspoon Dijon mustard
½ teaspoon kosher salt
½ teaspoon (or less) crushed red pepper flakes
¼ teaspoon freshly ground black pepper

Salad:

½ bunch kale
¼ golden raisins (other raisins or dried cranberries also work)
¼ cup pine nuts, toasted

Whisk together olive oil, lemon juice, syrup, mustard, salt, red pepper flakes and black pepper (set aside, or refrigerate if making ahead of time).

To toast the pine nuts place in a heavy dark skillet over medium heat and cook, stirring until light brown (4-5 minutes or less). Watch carefully, as they burn easily. Once toasted set aside.

Remove and discard the stems and center veins from the kale leaves. Then cut the leaves crosswise into ½-inch-wide strips to yield 6 well-packed cups of kale. Place the dressing in a salad bowl and whisk well. Add the kale and toss to coat greens thoroughly with dressing. Garnish salad with raisins and pine nuts.

Kale Chips

Note: This recipe is back by popular demand, so if you are an already seasoned kale chip lover spread the word to the newbies that it is definitely worth a try, especially if you have kale skeptic children in the house.

Kale (as much or as little as you like)
1-2 tablespoons olive oil
salt, to taste,
pepper, to taste (opitional)

Wash kale and remove center stems. Tear kale into roughly chip size pieces. Toss with olive oil and salt. Place kale ‘chips’ in a single layer on a baking sheet and put in a hot oven, 400˚-450˚F. Bake watching closely, you may have to turn a few chips to make crisp on each side…Voila, Salty Kale chip snacks!

Spring Onions Recipe

Grilled Spring Onions . . . Salad
Adapted from The Oregonian: FOODay

Note: These grilled spring onions are delicious as a side dish, but also can be used in fresh salad where they will add some punch and crunch to the mix.

4 tablespoons olive oil, plus more for oiling grill grates
1-2 sweet spring onions (as a side dish halve two onions, for the salad option cut one onion through the root end into 8 wedges.
Coarse salt and freshly ground black pepper
1-2 teaspoons soy sauce (tamari), red wine or balsamic vinegar (for side dish option)

Additions for Salad Option:

2 tablespoons lemon juice (fresh is always better)
1 head lettuce, chopped or torn into salad-sized pieces
2 garlic scapes, minced
2 sprigs fresh dill, chopped
4 ounces soft goat cheese, crumbled

For Grilled Onions:

When grilling onions keeping a bit of the root end and a good portion of the green tops attached prevents the onion layers from falling apart. Heat grill to medium. Lightly oil grill grates. In a small bowl, gently toss the cut onion with 1 tablespoon oil (and soy sauce or vinegar for side dish option). Season with salt and pepper. Grill onion halves or wedges, turning occasionally until soft, 15-20 minutes.

For Salad:

Grill onions as directed above. In a large bowl, whisk together lemon juice, remaining 3 tablespoons oil, minced garlic scapes, and chopped dill. Season with salt and pepper. Add lettuce and toss to coat. Serve topped with grilled onion wedges and cheese.

Dill Recipe

Soft Herb Roll (for Busy Cooks)
Recipe adapted from www.bigoven.com

Note: These rolls are so good you could eat a dozen! So if you are having company double the recipe.

1 package active dry yeast (about 1 tbsp.)
3 tablespoons sugar
1 teaspoon table salt
1-2 tablespoon fresh dill, minced
1 tablespoon fresh rosemary, minced
1 tablespoon fresh chives, minced
1 tablespoon garlic scapes, minced (optional)
1 tablespoon melted butter
1 large egg (for dough)
1 egg, beaten (for brushing rolls before baking)
1 cup milk or half-and-half
3½  cups all-purpose flour
1 tablespoon coarse salt

In a large bowl sprinkle yeast over ¼ cup cool (70°) water. Let stand until dissolved 5 minutes. Stir in sugar, table salt, herbs, butter, whole egg, and milk; add 3¼ cups flour and stir to moisten. Knead dough on a lightly floured board until elastic and not sticky) 15 minutes; add flour as needed to prevent sticking. Shape into 12 equal size balls; place in a well-buttered 9 by 13 inch pan. Let dough rise in a warm place until doubled (45 to 60 minutes). Meanwhile, preheat oven to 350°. Brush rolls with beaten egg and sprinkle with coarse salt. Bake until deep golden, 25 to 30 minutes.

Fuyo Shomi Recipe

Radiant Fuyo Shomi
Adapted from Vegetable Love by Barbara Kafka

1 tablespoon canola oil
2 tablespoons turmeric
1 tablespoon coarse salt
2 heads fuyo shomi, halved lengthwise
1 can coconut milk, plus enough water to make 2 cups liquid
1 tablespoon fresh lime juice or 4 lime wedges (optional)

In an 8- or 9-inch saucepan, heat the oil over low heat. Stir in the turmeric and salt and cook for about 1 minute. Add the pieces of fuyo shomi, laying them on their sides and cramming them in so as to make them as compact as possible. Pour in coconut-water mixture, cover the pan and bring to a boil over medium heat. Cook for 6 minutes. The fuyo shomi should sink into the sauce and cook evenly. If some of the fuyo shomi is not covered with liquid, turn the pieces. Re-cover and cook for 6 minutes. Stir in the lime juice, if using (or serve hot with lime wedges if desired). This is also good tepid.

Categories : Blogroll, CSA Newsletter, Farm News & Updates, Recipe

CSA News: Week 3- June 2 to June 8, 2009

Posted by sio@dmin on
 June 2, 2009

This Week’s Share

  • Braising Mix
  • Green Garlic
  • Lettuce
  • Mizuna
  • Radishes or Turnips
  • Spinach


On Rotation

  • Broccoli

Recipes


Braising Mix Recipes

Our braising mix is one of our signature recipes at Sauvie Island Organics, arriving in your share during the cooler months of spring and fall when the many varieties of kale, mustard, and Asian chois that make up this mix thrive. You will enjoy green and red mustards, red choi, white steamed pac choi, yukina savoy (tatsoi) and Red Russian kale in this flavorful mix of “greens”.

Although all of these leafy greens can be eaten raw, as the name suggests, they are perhaps best lightly braised, steamed, or stir-fried. The recipes below offer ways to use them outside of a standard stir-fry or braised side dish. A quick and easy preparation is to sautee your green garlic until soft, adding in any other vegetables you want to use at the same time as the green garlic. Throw in the braising mix in the last few minutes of cooking with some soy sauce and rice vinegar and any other seasoning that you choose.

White Cheddar Polenta with Braised Greens, Spring Morels, and Pancetta
Recipe from Emily Thomson at Full Circle Farm, http://www.fullcirclefarm.com

½ pound fresh wild morels (or other seasonal mushroom), cleaned and sliced in half
3-4 tablespoons olive oil
1-2 stems green garlic, thinly sliced
¼ pound pancetta (Italian cured bacon), sliced
4 cups water
1½ teaspoons salt
1 cup polenta (coarse cornmeal)
¾ cup grated white Cheddar cheese
¼ cup butter
1 pound braising mix, washed and torn into bite size pieces
Salt and pepper, to taste
¼ cup freshly grated Parmiggiano-Reggiano cheese

Combine 4 cups water and 1½ teaspoons salt in large saucepan. Bring to boil. Gradually whisk in polenta. Reduce heat to low. Cook until polenta thickens and begins to pull away from sides of pan, whisking often, about 25 minutes. Whisk in the grated Cheddar and the butter. Adjust seasoning if necessary. Turn off heat, cover and set aside.

Meanwhile, rinse the braising mix in cold water and set in a colander. In a large, heavy pan, heat the olive oil and sauté the green garlic and pancetta until lightly colored. Toss in the morels and cook for 5-6 minutes. Turn heat to high and add the washed greens; the water that clings to them will create the braising liquid. Toss with tongs until slightly wilted, then turn heat to low, cover, and braise for 5-6 minutes.

Stir the polenta and spoon onto plates. Top with the greens and morel mixture and scatter the rest of the grated cheese over the top. Finish the dish with freshly ground pepper and a drizzle of olive oil.

Mess o’ Greens Salad with Warm Pecan Dressing
Adapted from www.seasonalchef.com

1 lb braising mix
2 tablespoons balsamic vinegar
2 teaspoons honey
1 tablespoon Dijon mustard
2 teaspoons oil (vegetable, olive, peanut, etc.)
½ cup pecans, roughly chopped or broken

Wash greens, dry thoroughly, and remove and discard the long stems. Tear the greens into salad-size pieces and place in a large bowl. In a small bowl, combine the vinegar, honey and mustard. Set aside. Heat the oil in a small skillet until hot but not smoking. Add the vinegar mixture and pecans and cook, stirring regularly, for 2 to 3 minutes. Pour over the greens and serve at once.

Spinach Recipes

Spinach and Lentil Salad with Balsamic Vinaigrette
Recipe adapted from www.1001recipe.com

2 cups spinach
3-5 radishes or turnips, grated (optional)
½ cup mushrooms, sliced
¼ cup lentils
1 tablespoon balsamic vinegar
2 tablespoons olive oil
Salt, to taste
Pepper, to taste

Cook lentils with some salt in boiling water for 20 minutes, or until done. Rinse with cold water. To make the vinaigrette, whisk thoroughly olive oil and balsamic vinegar with some salt and pepper, or use vinaigrette recipe from below. Combine spinach, grated radish or turnip, chopped mushrooms, and cooked lentils. Pour the vinaigrette on and toss before serving.

Spinach and Mizuna Salad with Baked Goat Cheese Rounds
Recipe adapted from the Culinary School of the Rockies Staff

2 cups spinach
½ bunch mizuna
8-ounce goat cheese log
Vinaigrette (recipe below) or bottled Italian dressing
½ cup breadcrumbs

Preheat oven to 400 degrees. Rinse and dry mizuna and spinach and arrange on a platter or place in a salad bowl. Cut goat cheese log into eight ½ inch slices. Lightly brush goat cheese slices with some of the vinaigrette or salad dressing. Place breadcrumbs on a plate and thoroughly coat goat cheese slices in breadcrumbs. Place on a baking sheet and bake in oven for 10 minutes. Remove carefully from baking sheet. Place the baked goat cheese slices around the edges of the salad on the platter or on top of the salad in the bowl. Dress as desired and serve.

Note: Feel free to add whatever fresh sliced vegetables to the salad as you wish. Also try olives, fresh or roasted peppers, walnuts or almonds.

Basic Vinaigrette Recipe
Recipe adapted from the Culinary School of the Rockies Staff

Note: This recipe is given in terms of proportions so you can make as little or as much as you want.

3 parts acid such as vinegar or lemon juice.
1 part Dijon-style mustard
9 parts oil — vegetable (safflower, canola, etc.) or olive oils
Salt and freshly ground pepper, to taste

Whisk the acid, mustard, salt and pepper together until dissolved. Add the oil very slowly, by droplets, whisking continuously until emulsified.

Mizuna Recipes

Soba Noodle Salad with Mizuna
Recipe adapted from Dani Spies, www.danispies.com

2 cups mizuna leaves, washed, stemmed, and chopped
4-5 radishes or turnips, thinly sliced
2-4 scallions, thinly sliced (optional)
2 carrots, cut into diagonal slices (optional)
2 cups of cooked Soba noodles
2 stems green garlic, thinly sliced
1 tsp ground ginger
1 tablespoon of toasted sesame oil
2 tbsp low-sodium soy sauce
2 tbsp sesame seeds

Combine mizuna, radishes or turnips, green garlic, carrots, scallions and noodles in a large bowl. In a separate bowl, combine garlic, ginger, oil, and soy sauce. Whisk together and pour over noodles. Top with sesame seeds and enjoy. Serves 3.

Spinach and Mizuna Salad with Baked Goat Cheese Rounds
(see above in Spinach Recipes)

What can I put in my SIO Compost Bucket?


If you’re at one of the bulk pick-up sites you can participate in our compost bucket exchange. Take a clean bucket and bring it back the following week with whatever compost you generate that week.

Here are the basic guidelines for what can go in the buckets: Any vegetable material, including coffee grounds, citrus, etc., also egg shells, and small amounts of oils, fats, and dairy are fine. Just please no meat in your buckets. We don’t like plastic bags in the buckets; they’re hard to clean out. Please don’t put rubber bands or other non-degradable items in the bucket, we end up having to sift them out and throw them away.

The most important thing is that you don’t hold onto a bucket for more than a week (and try to keep it in a cool place, out of the sun, during the week). After a week they start to get pretty smelly and that means they’re running out of air. This makes the compost from them less valuable.

Categories : Blogroll, CSA Newsletter, Farm News & Updates, Recipe

CSA News: Week 2- May 26 to June 1, 2009

Posted by sio@dmin on
 May 26, 2009

This Week’s Share

  • Arugula
  • Green Garlic
  • Kale, Red Russian
  • Lettuce
  • Radishes, Cherry Belle
  • Tomato Plant, Cherry

Cherry Tomato Plants


Note: This week each share will recieve a cherry tomato plant.  If you are splitting a share you and your share partner(s) can decide which home it will go to.

Cherry tomatoes are wonderful snacks and great on salads. They are easy to grow and fun to pick in small quantities. However, they are very labor intensive to pick on a larger scale. For this reason we are giving you your own plant to enjoy. We concentrate on growing many different varieties of slicing, saucing and heirloom tomatoes, which you will see in your shares starting at the end of July.

Tomatoes appreciate full sun, and plenty of space to climb. Bury the plants deep so that only a little stem and the newest leaves are showing. Water them deeply. This will help to encourage a strong root system. They like a trellis to keep their leaves and fruit off the ground. Once established, tomatoes do not need to be watered more then once a week. Use about 5 gallons of water per plant. Tomatoes don’t like wet leaves so try to keep the leaves dry when you water.

If you do not have room to plant the tomato outside you can plant it in a five-gallon bucket with a drain hole. Keep it in a sunny space and remember to water frequently as container plants tend to dry out quickly.

Recipes


Radish Recipes

Beijing Radish Salad
From Marquita Farm in Watsonville, CA, www.marquita.com

1 bunch radishes
2 tablespoons rice or balsamic vinegar (or a combination)
1 tablespoon soy sauce
1 teaspoon sugar
2 teaspoons sesame oil
1 stem green garlic, finely chopped

Wash and julienne (cut into thin matchstick size sticks) radishes. You can use a mandolin to do the julienning if you have one, you can use a grater, or you can cut them into matchstick size pieces. Mix together the rest of the ingredients in small bowl and dress the radishes with the dressing.

Sauteed Radish and Arugula
Adapted from recipesource.com

4 tablespoons butter

1 bunch radishes, halved or quartered depending on size

2 cups arugula


Wash the radishes and arugula. Melt butter in a sauté pan, add radishes and cook over medium heat about 4 minutes. Transfer cooked radishes to a bowl. Add the arugula to the skillet and sauté 3 minutes, until wilted. Return the radishes to the skillet and toss together with the arugula, heat briefly. Serve hot.

Arugula Recipes

Arugula-Green Garlic Pesto Pasta

Adapted from the Seacoast Eat Local Blog, http://blog.seacoasteatlocal.org

2 cups arugula, washed

3-4 stalks green garlic, root removed

½ cup pine nuts (cashews, almonds, or walnuts also work)

4-6 oz. chevre, gorgonzola or other soft salty cheese

2 tablespoons parmesan cheese

2-3 tablespoons extra-virgin olive oil

1 lb. fresh pasta (found at all grocery stores in the pasta refrigerator case, or make your own if you know how)


Start a large pot of boiling water for pasta. Meanwhile, toast the pine nuts in a dry pan over medium low heat, tossing frequently until mostly golden brown. In a food processor or blender pulse the arugula and green garlic. Add pine nuts, olive oil, and cheese and process until there are no large chunks remaining. Boil pasta per package directions. Before draining, reserve 1 cup cooking liquid. Drain the pasta. Add about ¼ cup of the pasta cooking water to the pesto and pulse one last time. Toss pesto with pasta, adding additional cooking water if desired to achieve a more smooth consistency. Serves 4.

Note: You may also use this recipe as a general use pesto by not adding the additional pasta water at the end of the process. It’s great on sandwiches, in salad dressing, or any other use you may find for it. It will keep fresh covered in the refrigerator for 7-10 days, or freeze for up to 6 months (or freeze up to a year if no cheese is added).

Sauteed Radish and Arugula

(see recipe above in Radish Recipes)

Kale Recipe

Kale & Mushroom Risotto

Adapted from a recipe by Ben Watson at the Riverford Farm Shop in the United Kingdon, http://www.riverford.co.uk/

½ cup mushrooms, sliced (porcini, portobello, or any other kind that is in season at the market)

½ bunch kale, stems removed

½ bottle red wine

2-3 cups vegetable/chicken stock or broth

3 medium onions, finely chopped

2-3 stems green garlic (or 5 cloves garlic), finely chopped

1 tablespoon fennel seeds

2 strips bacon, coarsely chopped (optional)

1 ½ cups Arborio rice

2 tablespoons olive oil

balsamic vinegar, to taste

black pepper, to taste

1-2 cups parmesan cheese, grated (really you can use as much or a little as you like)

1-2 tablespoons butter


Soak the mushrooms in water. Coarsely chop the kale leaves and blanch for 7 minutes. Combine the red wine, the mushroom soaking water, and strengthen with stock/broth to make up to 5 cups total. Heat up the pot of liquid so it will already be hot when you start adding it to the rice.

While the liquid is heating add 2 tablespoons olive oil to a sauté pan and fry the finely chopped onions, green garlic, fennel seeds and chopped bacon for 5 minutes. Add the Arborio rice and stir until well coated. Turn down the heat and start adding the already heated liquid approximately ½ -1 cup at a time . Keep stirring and adding the liquid as it is absorbed by the rice.

After about 10 minutes add the kale and continue stirring and adding liquid as it is absorbed. After another 3-6 minutes add the mushrooms. When all the liquid is gone or the rice is cooked (whichever happens first) add a splash of balsamic vinegar and plenty of black pepper. Stir in the grated parmesan cheese and butter and serve. Serves 4.

Categories : Blogroll, CSA Newsletter, Farm News & Updates, Recipe

CSA News: Week 1- May 19 to May 25, 2009

Posted by sio@dmin on
 May 19, 2009

This Week’s Share

  • Lettuce
  • Asian Greens, Joi Choi
  • Green Garlic
  • Radishes
  • Turnips, Hakurei
  • Mizuna

On Rotation

  • Broccoli

Note: All CSA members will receive the same quantity of broccoli during the course of the season, although some pick-up sites may receive their first share of broccoli during Week 1 and some may receive their first share in Week 2. Throughout the season we distribute several of our crops on a rotation schedule because of how they mature for harvest.

Welcome

Welcome to the first week of the CSA season. Each week we will post a CSA Newsletter to the blog that includes a photo and a list of the share, 3-5 recipes that correspond to the share for the week, and any farm news or community updates. We hope you use the blog as a tool for connecting with the farm, finding new and creative ways to use your share, and looking ahead to what vegetables you will be receiving for the week. If you have any favorite recipes you want to share please email them to siorganics@aol.com and we will include them in the blog when appropriate. In the share list for most items you can click on the name and it will show you a photo and give you general information, cooking and storage tips, history, and any interesting field notes for that vegetable.  Thanks so much for joining us this season, we look forward to growing for you these next 30 weeks.

Recipes

Hakurei Turnip Recipes

These little gems are enjoyed both fresh and cooked. Sliced and mixed in with a lettuce and mizuna salad is a quick and tasty way to use them.

Fresh Greens Salad with Hakurei Turnips
From the Sauvie Island Organics Crew

1 head lettuce (may increase or decrease quantity depending on needs)
1 bunch mizuna (may increase or decrease quantity depending on needs)
2-3 Hakurei turnips, sliced
2 tablespoons sunflower seeds, toasted and chopped nuts (optional)
2-3 tablespoons of Asian Salad Dressing (recipe below) or dressing of your choice

Wash lettuce, mizuna, and turnips. Leave the mizuna whole, and tear or chop lettuce into smaller pieces and place in salad bowl. After slicing the Hakurei turnips place them in the salad bowl as well. Add seeds or nuts as desired, dress, and toss.


All-purpose Asian Salad Dressing/ Marinade

Adapted from Astray Recipes, www.astray.com

This dressing is great with fresh greens, sautéed greens, steamed vegetables, and cold meats as well as any other applications you may create for it.

2 tablespoons white vinegar
1½ tablespoons soy sauce
1 tablespoon plus 1 teaspoon sugar
1½ sesame oil
½ teaspoon fresh ginger, grated
1 tablespoon cilantro, chopped
a few drops of hot pepper oil (optional for those with aversions to spiciness)

Place all ingredients in a container for mixing. You may use a blender or food processor to mix to your desired consistency or shake vigorously in a liquid tight container.

Curried Hakurei Turnips
Adapted from The Veggie Project: Cooking Family-Friendly Meals with Local Produce, http://veggieproject.blogspot.com/2008/07/curried-hakurei-turnips_01.html

2 stems green garlic, chopped
2 tablespoons oil
5-6 Hakurei turnips, sliced thin
2 teaspoons curry powder
1 teaspoon salt
one lemon, cut into wedges

Sauté the chopped green garlic in the oil for a few minutes until translucent. Add the turnips, the curry powder and salt and cook until everything is tender, about 10 minutes. Squeeze some lemon juice over the dish before serving and serve with extra lemon wedges.

Joi Choi Recipe

Joi Choi, Radish, and Broccoli Stir-Fry

Adapted from Aspargus to Zucchini: A Guide to Farm Fresh Produce by the Madison Area Community Supported Agriculture Coalition

2 tablespoons peanut oil
¼ -½ teaspoon hot pepper oil (optional, but good addition if you like spiciness)
1 bunch radishes, topped and quartered
2 stems green garlic, chopped
2 cups broccoli florets and stems (chopped)
1 three-inch piece of ginger, grated
pinch of salt and pepper
2 heads joi choi, shredded
3 tablespoons rice wine vinegar (or 3 tablespoons dry sherry) with 1 teaspoon sugar mixed in
1-2 tablespoons soy sauce
1-2 cups rice, cooked (optional)

If you are serving this with rice get the rice started before making the stir-fry. Heat oil in wok or deep skillet. Stir-fry radishes, green garlic, broccoli, ginger, salt and pepper until radishes and broccoli softens slightly, 3-4 minutes. Add joi choi and rice wine vinegar mixture; cook 2 minutes. Sprinkle with soy sauce. Serve immediately over rice. Serves 4 if paired with rice.

Green Garlic Recipe

Note: Green garlic is featured in some of the other recipes above, but the recipe below calls for the entire 4 stems included in your share for this week.

Green Garlic Pesto
Adapted from www.culinate.com

4 stems green garlic, roots removed
1 cup raw walnuts, or other nuts you have available
1 to 2 oz. hard, salty cheese (romano, ricotta salata, parmesan, etc.)
2/3 cup extra virgin olive oil
½ teaspoon salt (sea salt and kosher have best flavor)

Cut root ends of green garlic and discard. Cut into 1-inch lengths, discarding the tougher green portions on top. In a saucepan over medium heat toast walnuts by cooking for several minutes, stirring constantly until they start browning. Place nuts and green garlic into a food processor or blender and pulse/process on low until roughly chopped. Cut cheese into chunks, add to blender/processor, and process. In a steady stream while blender/processor is running, add olive oil until desired consistency is reached. Salt to taste and keep in an airtight container in the refrigerator until ready to use. Use with pasta, served over fish, spread on bread, or in whatever way pleases your pallet. If you have to much to use for one meal you can keep in a covered container in the fridge for 7-1o days, or freeze for up 6 months (will freeze up to a year with no cheese added).

Categories : Blogroll, CSA Newsletter, Farm News & Updates, Recipe

CSA Newsletter: Week 29- December 1, 2008

Posted by csa on
 December 1, 2008


This Week’s Share


  • Brussels sprouts
  • Cabbage, Savoy
  • Carrots
  • Celeriac
  • Garlic, Silver Rose
  • Kale
  • Onions, Copra
  • Potatoes
  • Winter squash, Acorn
  • Winter squash, Delicata

Prepare for your Last Share

Bring an extra bag or box for this week’s pick-up because there will be some larger quantities of more heavy things and we want to make sure all of it makes it home safely. Also take notice of some tips about storage for produce in this week’s share and from some vegetables that you may still have around.

End of the Season Reflections
(by SIO Farm Manager Tanya Murray)


As farmers, we live each season three times. First there’s the planning life of the season. We look ahead, our hands intimate with the keyboard of the computer. Winter squash and broccoli smile back at us from the glossy pages of seed catalogues, perfect specimens of the vegetables they promise to be. The tillage, seeding, and planting schedule all orchestrated perfectly between the straight gridlines of spreadsheets.

Then there’s the delicious, calloused handed, life of the season. We make plans each day and change them with the weather. Vegetables that had once been innocent lists on seeding charts come to life. There are 32,460 onions to plant; the Arkansas Traveler tomatoes need to be trellised, and eventually the Maverick melons are ready to harvest. We weed and water and eat what we envisioned and planned for months earlier.

Finally there’s looking back, the time that’s upon us now, a vegetable day of reckoning of sorts. We reflect on the season with gratitude, pride, and awe. The seeds that were delivered by the UPS truck in early spring have amounted to meals on our table and yours. We look at records of yields and dates, taking notes on what worked well and what we could have done better at. And then, without much of a pause, we open up the next seasons planning charts and begin again.

The 2008 season came with the usual mix of challenges and successes in the field. The most notable challenge this year was the cool spring that extended into a cool summer. For some crops, there were few repercussions, but peppers and eggplants like it hot. To compound this, the crop rotation put these crops in a field that already has its own cooler micro-climate. And so despite our best efforts, we did not have the bountiful harvest of these crops we had planned on. We are considering our options to insure a better harvest in 2009. Plastic ground cover is used on many northern farms to warm up the soil for heat loving crops. While we are not a plastic-free farm, we put careful consideration into its use. Plastic row cover is not easily re-used after one season, making its life span short. We will experiment in 2009 with planting some peppers in unheated hoop houses. The hoop houses are made of plastic but are multi purpose structures that get many seasons of use. This year we did make the choice to grow heirloom and sauce tomatoes exclusively in unheated plastic hoop houses. After too many seasons of finding ourselves harvesting perfectly ripe tomatoes, split from late summer rains, we enjoyed harvesting over two tons this year.

Alliums were also a big success this year. We saved enough garlic seed to plant our 2009 crop and to distribute a few extra bulbs in our last share. The leek planting method that we experimented with in 2007 was fully implemented in 2008. The leeks were easier to weed and had over ten inches of blanched shaft. We were pleased with the Cipollini onion varieties that we trialed, and plan to grow them again next year.

Spinach is an ever elusive crop for us. We should be able to grow it easily in our cool, damp springs. Struggles with germination led us to starting seedlings in the greenhouse and transplanting 3600 plants per planting. If this was working it might be worth the time it takes, but so far we have still not had the yields we’d like on spinach. Experiments with soaking the seed before planting did seem to increase germination rates. We will continue experimenting with this along with more successive seedings.

A new walk behind seeder that drops seeds with greater precision made our fall Hakurei turnip crop a great success. Last winter’s investment in a root crop washer made our potato and carrot washing system more efficient and it also uses less water.

Our broccoli yields this season were not as high as we had hoped. Our earliest plantings were likely set back by the freezing temperatures we had in early April this year. We have also continued to have challenges with symphylans, an arthropod that is infamous for feeding on the root hairs of young plants. We will be participating in a research project with Oregon State University beginning this December that will likely help us hone our broccoli growing skills and increase our yields in future seasons.

In 2007 we had a big problem with carrot rust fly and the damage this pest did to our carrot crop. This season, we covered each of our carrot seedings with floating row cover to act as a physical barrier between the crop and the carrot rust fly. Although using this strategy has meant more time both covering beds and hand weeding, we have seen little to no damage on the carrots this year.

In summary, when you’re growing over fifty different vegetables any given year is bound to be good for some crops and not for others. There is always more to learn, skills to hone, and improvements to be made based on the previous season. For over 15 years Sauvie Island Organics has been doing just this and we will continue fine tuning our systems to bring you the most bounty nature will allow.

We hope your reflections on the 2008 season conjure up delighted taste buds and a full belly. Maybe you are a new member who was introduced to celeriac for the first time. Or maybe you’ve been with the farm for years and are raising SIO fed kids. While we may not be able to grow the perfect quantity of beets to suit everyone’s tastes, we are always happy to hear your feedback and take it into account as we plan for seasons ahead.

We also hope your reflections on the season will connect you back to the reasons you chose to support a local, organic farm. Because Michael Pollan has provided inspiration for many people to think about how they eat, we’re including a link to a recent letter he wrote to the future president elect.

As you may already know, we are growing an additional five acres of vegetables in 2009. Our increasingly long waiting list suggested that more people want to have the direct relationship with their food that CSA provides. Getting bigger is also an economic decision. There are efficiencies to be gained with increasing acreage. Take seeding carrots for example. The time it takes to get the seeder set up and walk out to the carrot field is about equal to the time to seed a carrot bed. Seeding a couple more beds once you’re set up and out there makes the time spent setting up more worthwhile. These small savings in efficiencies add up. These savings increases the bottom line and allow us to employee more permanent, year round staff on the farm. The longer people stay with us at SIO the smarter and more efficient we get at farming. The more efficient we become, the closer we can come to providing jobs that pay truly livable wages. Now that is sustainable agriculture.

We’ve been asked about our choice to expand in tough economic times. Our hope is that people will continue to invest in our local food economy. A reporter recently interviewed us about this subject and asked if we promote what a savings CSA is when we are selling CSA shares. The answer was a resounding no. Choosing to support a CSA should not be seen as the “cheap” option. We do recognize the cost of a CSA share is not accessible to everyone. We have made efforts to increase it’s accessibility through our CSA Scholarship Fund. Thanks to many of you who have made generous donations to this fund that covers up to half the cost of a share for low-income families. Over the years we have continued to donate foods to local food banks and soup kitchens. These are small solutions to our national problem of food security that cannot be solved by the farmer alone. Cheap food is not the solution. When the fossil fuel dependence, environmental degradation, and health costs that make cheap food possible are taken into account, we have to ask whether cheap food is really worth its ultimately high cost. We recently received a CSA membership renewal check in the mail with a note that said “Even though we are young-ish and poor-ish artists, we feel like it was the best use of our money.” We appreciate that you as CSA members recognize the true value of the food we grow.

We hold on to our values as we take the step of getting bigger and we proceed with caution and limits. We will not become the industrial scale of agriculture that has made food cheap at a high cost. We are committed to growing a wide diversity of high quality vegetables for our local market. The diversity of what we grow means we do not face the challenges of mono cropping that are often met with increased pesticide usage. This diversity of crops also puts a healthy limit on our use of fossil fueled mechanization. While we do use tractors for tillage and cultivation, we still hand harvest everything we grow, with the exception digging potatoes, and those still need to be picked up. We plant cover crops to feed the soil, increase organic matter, and prevent erosion. The food we harvest travels 15 miles or less from the farm to your CSA pick up site – using less fuel and arriving with less packaging, higher nutritional value, and better overall quality. We are committed to having a direct relationship with you, as eaters and community members, and as always welcome you to visit the farm. And as Community Supported Agriculture really is about this relationship, our commitments are only possible with your reciprocal commitment to us. Thank you for your continued support and we look forward to growing for you in 2009.

Recipes


Celeriac Recipes

Celery Root and Wild Rice Chowder
Adapted from Local Flavors by Deborah Madison

½ cup wild rice
2 celery root

2 large leeks, white parts only (or if you don’t have any leeks left you can substitute with 1½ large onions or 2-3 shallots)
2 tablespoons unsalted butter (or butter substitute)
1 cup thinly sliced potatoes (russet variety from this weeks share work great)
¼ cup chopped parsley, plus extra for garnish
1 bay leaf
1 large thyme sprig
sea salt and freshly ground pepper
2 cups vegetable stock, chicken stock, or water
2 cups half-and-half or milk


Cover the wild rice with 5 cups water in a small saucepan. Bring to a boil, then lower the heat. Cover and simmer for about 45 minutes or until tender.

Thickly cut away the celery root skins, then quarter and chop the root into bite-sized pieces. Chop and wash leeks (or onions or shallots).


Melt the butter in a soup pot. Add the vegetables, parsley, bay leaf, thyme, and 1½ teaspoons salt. Cook over medium-high heat for about 5 minutes, then add the stock. Bring to a boil, reduce the head to low, and simmer for 20 minutes. Add the half-and-half and simmer until the vegetables are tender. Taste for salt and season with pepper. To give the soup a creamy background, puree a cup of the vegetables and return then to the pot. If the soup is too thick, thin it with some of the rice water or additional stock.


Divide the soup among 4 or 6 bowls and then add a mound of the wild rice to each. Garnish each bowl with parsley and serve.


Celeriac and Carrot Gratin
Adapted from Taunton’s Kitchen Gardener: The Vegetable and Herb Gardening Journal

1 tablespoon olive oil
2 medium onions
3 to 4 medium carrots
1 large celeriac root, sliced
Acidulated water (2 tablespoons vinegar or lemon juice to 4 cups water)
1 teaspoon dried tarragon
salt and freshly ground pepper
1 to 1 ½ cups half-and-half


Preheat the oven to 375˚F. Heat the olive oil in a large non-stick frying pan over low heat. Peel and slice the onions and sauté them in the olive oil until golden yellow. Set aside.


Peel and cut the carrots into 1/8-inch thick slices, and set aside. Peel and quarter the celeriac and cut into 1/8-inch thick slices, immersing it into acidulated water as you go.


To assemble the gratin, drain the celeriac and rinse it under cold water. Arrange half of it evenly in a 2-quart baking dish and sprinkle with ½ teaspoon of the tarragon and some salt and pepper. Arrange the remaining celeriac evenly over the carrot layer. Sprinkle the remaining tarragon and salt and pepper to taste. Top with onions and add enough half-and-half to come just below the top of the final celeriac layer. Cover the gratin with aluminum foil, place on a baking sheet, and bake for 30 minutes. Remove the aluminum foil and press down the layers to base the top layer. Continue baking for 30 minutes more, or until cooked through. Serve warm. Makes 4 servings


Brussels Sprouts Recipe


Brussels Sprouts with Mustard-Caper Butter
Adapted from Local Flavors by Deborah Madison

Note: This recipe originally calls for 1 pound of Brussels sprouts, 1 small head cauliflower (chopped) and 1 small head of Romanesco (chopped). If you have either cauliflower or Romanesco available please feel free to substitute them in appropriate quantities for an equally delicious dish. The main difference in the cooking process is adding the cauliflower and Romanesco to the boiling water 3 minutes after the Brussels sprouts, then continue to boil for another five minutes. Aside from that all directions are the same.


For the Mustard-Caper Butter:

2 garlic cloves
sea salt and freshly ground pepper
6 tablespoons unsalted butter (or butter substitute), at room temperature
2 teaspoons Dijon-style mustard, can use more or less depending on personal taste
¼ cup drained small capers, rinsed
zest of 1 lemon
3 tablespoons chopped fresh marjoram (3 teaspoons dried marjoram)


Pound the garlic with ½ teaspoon salt in a mortar until smooth, then stir it into the butter with the mustard, capers, lemon zest, and marjoram. Season with pepper. The butter can be made a day ahead and refrigerated. Bring back to room temperature before serving.


For the Brussels Sprouts:

2½ pounds Brussels sprouts (all three stalks from this weeks share, sprouts stripped off the stalk)
sea salt and freshly ground pepper


Trim the base off the sprouts, then slice in half or, if large, into quarters. Bring a large pot of water to a boil and add salt. Add the Brussels sprouts and cook for 6-8 minutes, or until the sprouts are tender. Drain, shake off any excess water, then toss with the Mustard-Caper Butter. Taste for salt, season with pepper and toss again.


Cabbage Recipe


White Beans with Kale and Savoy Cabbage
Adapted from Local Flavors by Deborah Madison

1 cup dried cannelloni, navy or gigantes, soaked for 4 hours or overnight
sea salt and freshly ground pepper
1 large onion, finely diced
2 leeks, white parts only, diced (can omit and use another onion or shallot if you don’t have any leeks)
7-10 leaves kale
1 small Savoy cabbage (or half of a large one), quartered, cored, and chopped
2 plump garlic cloves, minced or pounded with a pinch of salt
½ cup chopped parsley
2 tablespoons olive oil, plus extra to finish


Drain the soaked beans, then put them in a pot and cover with cold water. Bring to a boil, add ½ teaspoon salt, then lower the heat and simmer, partially covered, until the beans are tender, about 1½ hours.


While the beans are cooking, chop all the vegetables. Rinse the leeks (if using), kale, and cabbage, but don’t dry them. Warm 2 tablespoons of the olive oil in a heavy wide skillet. Add the onion and leeks and cook over medium-low heat until the onion is soft but not browned, about 12 minutes. Add the kale, cabbage, garlic, parsley and 2 tablespoons salt. Cook with the heat on low and the pan covered until vegetables are soft and the volume greatly reduced, about 30 minutes.


When the beans are done, add them, along with a cup or two of their cooking liquid, to the pot. Simmer until the greens are completely tender. Taste for salt and season with pepper. This is very tasty served with, or over, garlic-rubbed toast drizzled with olive oil.


Winter Squash Recipes


Quinoa Stuffed Squash

Adapted from UCSC Farm and Garden Field Notes


Quinoa (pronounced keen-wa) is a fluffy, high-protein grain from South America. Look for it in natural foods stores in the grains section or in the bulk bins. You may also substitute a nutty blend of brown and wild rice.

2 Delicata (or Acorn) squash, split lengthwise and seeds scooped out
1 cup quinoa
1 tablespoon olive oil or butter
1 medium onion, chopped
2 cloves garlic, chopped
8 to 10 fresh mushrooms, sliced (optional)
¼ cup chopped parsley (may omit or used dried if you don’t have fresh available)
½ cup chopped walnuts
3-4 pinches of nutmeg
1-2 pinches of thyme
salt and pepper
1 cup grated cheddar cheese


Preheat oven to 350˚F. Place squash cut sides down on a lightly oiled baking sheet. Bake until just tender, about 20-25 minutes. Remove from oven and set aside. While squash is baking, bring 1½ cups water to a boil. Add dry quinoa. Reduce heat, cover and let simmer for 15-18 minutes, until all water is absorbed. Remove from heat and set aside. In a large skillet over medium heat add oil or butter and sauté onions, garlic, and mushrooms until soft and starting to brown. Remove from heat. Stir in parsley, walnuts, quinoa, and seasonings (nutmeg, thyme, salt and pepper). Add ½ cup cheese. Divide mixture between squash, topping each half with a sprinkle of the remaining cheese. Return to the oven for 10-15 minutes, until the stuffing is heated through and the cheese is melted and bubbly. Serves 4 as an entrée.


Baked Acorn Squash with Maple Syrup and Balsamic Vinegar
Adapted from The Oregonian FOODay


Note: Do not try and substitute red wine vinegar for the balsamic in this recipe, it doesn’t work. Although, both younger less expensive and finer aged balsamic vinegars will work. Also, this recipe works well with all winter squash and is easily doubled, so if you are wanting to use up more squash just increase the ingredients to whatever ratio you are using and continue as usual.

2 acorn squash, halved lengthwise and seeds scooped out
¼ cup maple syrup
1/8 cup balsamic vinegar
1 tablespoon fresh lemon juice
4 teaspoons unsalted butter (or butter substitute)
freshly grated nutmeg (or already ground)


Preheat oven to 375˚F. Place the squash halves, cut side up, in a large baking dish. In a small bowl, stir together the maple syrup, balsamic vinegar, and lemon juice. Using a pastry brush, brush some of the mixture over the cut surfaces of the squash. Bake for about 20 minutes, then brush the squash again with the maple syrup mixture. Divide any remaining mixture among the squash cavities and add 1 teaspoon butter to each. Sprinkle nutmeg lightly over squash. Return to the oven and bake until the squash are tender when pierced with a knife, about 1 hour longer, basting two or three times. Serve warm. Makes 4 servings.

Storage Tips

Here are some suggestions about storing the produce you will be receiving in this week’s share. This information, and more, can also be found by accessing the pop-up links provided in the share list.


Brussels Sprouts: Do not wash sprouts prior to storing. Snap sprouts off the stem and discard the stems. Keep the sprouts in a plastic or paper bag in the refrigerator for 4-6 days.

Cabbage: Savoy cabbage is the most tender of cabbages and as such is them most fragile in terms of storage. Tightly wrap the cabbage in plastic and refrigerate, it will keep for under a month. For other less delicate red and green cabbages they keep very well in the refrigerator, or other cool places (like the garage, back porch or the basement). With the outside leaves left on and prevented from drying out, it should do well for many weeks.

Carrots: Run the roots under cold water to clean and store in a bag in your refrigerator. They should store for a couple of weeks in ideal conditions.

Celeriac (Celery Root): Trim off the top leaves if any are still remaining, and store celeriac in the refrigerator (in a plastic bag is good because it creates an environment with higher humidity). Protected by its tough rind, it will keep for several weeks.

Garlic: Don’t refrigerate your garlic heads. The Silver Rose variety is the longest storing of those we grow, so store them in a cool and dry spot in your kitchen away from direct sunlight. If stored well, garlic should keep for many weeks.

Kale: Store kale in a plastic bag in your refrigerator where it will remain moist. If it is not allowed to dry out, kale should keep for about a week. If you are looking to preserve it for a longer period of time you can try blanching and freezing it.

Onions (storage varieties): Whole onions are best kept in a cool, dark part of the kitchen, where they will last for many weeks. Leftover pieces of onion can be stored in the refrigerator for several days, in an airtight container so as not to contaminate other foods with the smell they release.

Potatoes: Potatoes should be stored in a cool dark part of the kitchen away from any light, or in the refrigerator. Potatoes should be wiped clean but not washed before storing. Any moisture will tend to rot them. In ideal conditions, they will keep for many weeks.

Winter Squash: Winter squashes were bred for storage. Most can be stored in a cool place for up to 6 months. Among the exceptions are Delicata, which should keep for several weeks in a cool and dry part of the kitchen away from direct sunlight. Store squashes that have been cut open in the refrigerator for several days. Also the Butternut from this years harvest needs to be used fairly soon due to some freezing damage experienced while out in the fields.

CSA Season Comes to a Close

As the saying goes, time sure flies when you are having fun (and eating well)! That said, this week 29 is the last week of CSA. This season was planned for 29 weeks with the idea of a big finish on Thanksgiving. Because of the long, cool, wet spring we started a week late making our finish the first week of December. In 2009 we have planned for a 30 week season and this is reflected in the price increase for 2009. We look forward to starting the cycle over again with you in May. We have a last few reminders and thoughts for you before saying goodbye for the 2008 season:

  • Please return any and all box bins you may have in your possession so we can put them back to use again for the next CSA season. We will be returing to Metro, PSOB, Ecotrust, and St Johns next Wednesday to pick up bins.

  • We will be opening up the 2009 season with our annual onion planting party in the April, so keep you calendars open because you won’t want to miss it!
Categories : CSA Newsletter, Farm News & Updates, Recipe

CSA Newsletter: Week 28- November 24, 2008

Posted by csa on
 November 24, 2008


This Week’s Share

  • Carrots
  • Collard Greens
  • Garlic
  • Onions, Copra
  • Parsnips
  • Pie Pumpkins, Baby Bear
  • Potatoes
  • Shallots
  • Turnips, Scarlet Queen
  • Winter Squash, Hubbard


We would like to remind you of the changes to all CSA pick-ups for the week of Thanksgiving.


At the Farm: Tuesday, November 25- available for pick-up starting at 4:30pm
SE Ankeny: Tuesday, November 25- 5:00pm-7:00pm
SE Elliot: Tuesday, November 25- 5:30-6:30pm
Friendly House: Tuesday, November 25- 5:00-7:00pm
Ecotrust Building: Wednesday, November 26- available by noon
Metro Building: Wednesday, November 26- available by noon
Portland State Office Building: Wednesday, November 26- available by noon
St John’s: Wednesday, November 26- available for pick-up starting at noon

Recipes

By now you likely have your main dish in order for Thanksgiving Day, but what about all those side dishes to accompany the main attraction? Here are some recipe ideas to assist you while you are creating your beautiful and delicious Thanksgiving feast!

Root Recipes

Here are a few different options for the variety of root crops you will be receiving in your Thanksgiving share this week.


Parsnips and Carrots with Orange Butter

Adapted from UCSC Farm and Garden Field Notes

Note: It is very easy to adjust the size of this recipe to meet your portion requirements, just increase all ingredients to whatever ratio fits your needs.

1 cups water
3 small to medium size parsnips, peeled, halved lengthwise and cut crosswise into ¼ inch thick pieces
3 medium size carrots, halved lengthwise and cut crosswise into ¼ inch thick pieces
1/3 cup fresh orange juice (2-3 oranges juiced)
1/8 teaspoon freshly grated orange zest (after acquiring the zest from the orange you can juice it for the orange juice required above)
1 tablespoon unsalted butter or non-dairy equivalent
salt (to taste)


In a skillet combine the water, already cut parsnips and carrots, and your desired amount of salt. Simmer the vegetables for 15 minutes, or until they are just tender, and stir in the orange juice. Simmer the mixture for another 5 minutes, or until all vegetables are tender. Transfer vegetables to bowl using a slotted spoon so that the water drains and remains in the skillet. Boil the liquid remaining in the skillet until it is reduced to about 2 tablespoons. Remove the skillet from the heat and stir in the orange zest and butter, stirring until the butter is melted. Spoon the sauce over the vegetables and its ready to serve.


Old Fashioned Root Bake
Adapted from UCSC Farm and Garden CSA Field Notes

This recipe is so easy that you may feel selfish having saved yourself so much time and energy in the kitchen this Thanksgiving, but go on treat yourself and your guests to this delicious and simple dish. It is tasty as-is or complemented well with the addition of some Thanksgiving gravy or cranberry sauce!

Note: You may use any combination of the root crops listed below, or all of them together. You also can choose how much of each to use depending on how much you have or which ones you like the most.

parsnips
carrots
potatoes
turnips
onion
beets (if you have any left)
olive oil
salt and pepper


Preheat the oven to 375˚F. Prepare all of the roots the same way by peeling those you want to peel and cutting them into small cube pieces (even sizes are the best for uniform cooking time). Place the cubed roots into a baking sheet and cover them in salt, olive oil, pepper, and/or any other spices and herbs you want to season them with. Mix it around well so there is oil and spice on everything. Bake at for approximately 40 minutes or until roots are soft when poked with a fork.

Oven-Braised Turnips with Garlic
Adapted from Vegetable Love, by Barbara Kafka

Let your Thanksgiving table shine bright this year, because as the author of Vegetable Love Barbara Kafka says, “This takes turnips from a boring slightly woody vegetable to a star.”

1 pound turnips, trimmed and cut into ½-inch wedges
1½ tablespoons olive oil
1 head of garlic, separated into cloves, smashed and peeled
2 bay leaves, whole leaves broken in half
1 cup beef stock (or vegetable broth for vegetarian option)
¼ teaspoon dried thyme (or ¾ teaspoon fresh thyme)
¼ teaspoon rubbed (crumbled) sage (or ¾ teaspoon fresh finely chopped sage)
¼ teaspoon dried oregano (or ¾ teaspoon fresh finely chopped oregano)
½ teaspoon kosher salt, or to taste
Freshly ground black pepper to taste


Place a rack in the center of the oven. Preheat oven to 500˚F. Place the prepared turnips in a roasting pan and coat with oil and spread out in a single layer. Roast for 15 minutes checking once or twice. Flip the turnips and rotate the pan. Add the garlic. Roast for 5 minutes. Flip the turnips and garlic over and rotate the pan. Tuck the bay leaves under the turnips. Add the stock (or broth) and herbs. Roast for 10 minutes. Flip the turnips and garlic over and rotate the pan. Roast for 10 more minutes. The liquid will be mostly absorbed. Remove the bay leaves. Add the salt and pepper to taste. Makes 3 cups.

Squash Recipes

Thanksgiving Squash Muffins
Adapted from Vegetable Love, by Barbara Kafka

1 pound winter squash, this is about ½ of a squash (original recipe calls for Butternut squash, so if you have one use it. Hubbard from this weeks share will work great as well!)
9 tablespoons unsalted butter, slightly softened (can use butter substitute for vegan)
1½ cups plus 2 tablespoons cake flour (if you don’t have cake flour you can create your own using 1½ cups sifted all-purpose flour with the addition of 4 tablespoons of cornstarch)
1 teaspoon baking soda and
½ teaspoon baking powder
½ teaspoon allspice
2/3 teaspoon ground cinnamon
½ teaspoon kosher salt
1¼ cups packed brown sugar (only 1 cup if using Butternut squash)
1/3 cup milk (or soy milk for vegan option)
1 teaspoon vanilla extract
2 large eggs (1/4 cup applesauce per egg for vegan option)


Scoop out the seeds from the portion of squash you are using. Peel the squash and cut into chunks. Place in a food processor and puree until smooth, stopping occasionally to scrape down the bowl. Allow to cool. (Makes 1 cup puree)

Place a rack in the center of the oven. Preheat oven to 350˚F. Grease and flour one 12-cup or two 6-cup muffin tins, using 1-tablespoon butter, margarine or shortening and 2 tablespoons flour. Place in the refrigerator until needed.


In a small bowl whisk together the 1½ cups flour, the baking soda, baking powder, spices and salt.


Using a mixer set on medium speed beat the remaining 8 tablespoons butter and the sugar in a large bowl until fluffy. Add the squash puree, milk and vanilla. Mix until well combined, scrapping down the sides of the bowl as necessary. Add the eggs (or applesauce) one at a time, mixing well after each addition. Stir in the dry ingredients by hand until just combined, being careful not to over mix.


Spoon the batter into the prepared tin(s). Bake for 30 minutes, or until a tester inserted in a muffin comes out clean. Loosen the muffins from the tin(s) while still warm and cool in the tin(s) or on a rack. Serve, or wrap well and freeze. If frozen, defrost and serve at room temperature. Makes 12 muffins.


Winter Squash with Caramelized Onions
Adapted from UCSC Farm and Garden Field Notes

1 winter squash (approximately 2 pounds, your Hubbard from this week’s share is the perfect size), peeled, seeded and cut into 2-inch pieces
3 tablespoons vegetable oil
¼ cup (about 1 ounce) slivered almonds
2 large onions, thinly sliced
2 shallots, thinly sliced
¼ cup sugar
2 teaspoons ground cinnamon
½ cup raisins, plumped in warm water and drained
Salt and freshly ground black pepper


Preheat the oven to 375˚F. Place the squash in a baking dish and bake until tender, 50 to 60 minutes.

Meanwhile, in a skillet, heat the oil over medium-high heat. Add the almonds and fry until golden, 3 to 4 minutes. With a slotted spoon transfer the nuts to paper towels and drain.


Add the onions to the oil in the skillet. Cook 8-10 minutes or until soft, stirring occasionally. Add the sugar and cinnamon, decrease the heat to medium, and continue cooking until the onions turn brown, about 20 to 25 minutes. Add the raisins and season to taste with salt and pepper. Cook, stirring, until heated through. Transfer the squash to a warm serving platter. Spread the onion and shallot mixture evenly over the squash, sprinkle with the fried almonds and serve.


Homemade Pumpkin Pie

Don’t just use those Baby Bear pumpkins as a Thanksgiving table centerpiece (although their beauty merits that honor). Put them to good and tasty use in a homemade pumpkin pie. For this recipe I am including a link to a page I found last year when making my first pumpkin pie from scratch. The directions are very clear and even have a photograph to accompany each step. The pie is delicious! A crust recipe is included below in case you don’t have your own. Click on the link below and scroll down to view the recipe http://www.pumpkinpatchesandmore.org/pumpkinpie.php

Homemade Pie Crust
Adapted from the Joy of Cooking

This is a very basic pie crust recipe, and with some trial and error can be perfected to your own tastes. I prefer to use a blend of vegetable shortening and butter, but I encourage you to figure out what works for you. Joy of Cooking also suggests using lard, which I have yet to experiment with, but have been told makes the best flaky pie crust. This recipe yields 2 pie crusts.

2½ cups all-purpose flour
1 teaspoon white sugar or 1 tablespoon powdered sugar
1 teaspoon salt
1 cup solid vegetable shortening (or ½ cup solid vegetable shortening and 1 stick cold unsalted butter)
1/3 cups plus 1 tablespoon ice water (must be ice water, its important!)


Premix the dry ingredients in medium to large bowl. Add the vegetable shortening and/or butter and cut into flour with a pastry cutter or two knives until pea-sized and cornmeal size chunks are achieved.

Add ice water in tablespoon size portions, cutting in to dry ingredients until small balls form. If the balls stick together when pressed its ready, if not add an additional 1 to 2 tablespoons ice water. Refrigerate at least 30 minutes and for up to 2 days, or crust dough can be wrapped airtight and frozen for up to 6 months.

After dough has chilled separate into two equal size balls. Flour a large flat surface and roll out each ball into a round large enough to cover a pie pan. Continue to fill with pumpkin pie filling (or other pie filling) as directed.

Collard Greens Recipe


Easy Collard Greens with Shallots
Adapted from www.wholefoodsmarket.com/recipes

1½ tablespoons olive oil
3-4 shallots, finely chopped
10 leaves collard greens, thick stems removed and leaves thinly sliced
Salt and freshly ground pepper, to taste


Heat olive oil over medium heat in a large skillet. Add shallots and cook for 3 to 5 minutes or until translucent. Meanwhile, rinse sliced collards under water. Drain but do not dry. Add collards to the skillet with shallots and add salt and pepper. Cover and wilt the collards, stirring occasionally, until bright green and still tender, about 10 minutes. Serve immediately.

Warm Wishes this Thanksgiving

As you get together with friends and family this holiday and give thanks for the bounty that the harvest season has to provide we at Sauvie Island Organics want to give you a BIG THANK YOU for supporting community agriculture. Next week will be the last week of our season together. To sign up for the 2009 season you can go to http://www.sauvieislandorganics.com/join.php, fill out the community farm agreement, pay the deposit and reserve your share of the harvest.

Categories : CSA Newsletter, Recipe
« Previous Page
Next Page »

Recent Posts

  • CSA Week #22: October 31st & November 2nd
  • CSA Week #21: October 24th & 26th
  • CSA Week #20: October 17th & 19th
  • CSA Week #19: October 10th & 12th
  • CSA Week #18: October 3rd & 5th

Archives

Sauvie Island Organics | © 2025 All Rights Reserved
iThemes Builder by iThemes | Powered by WordPress | Site by LRP