Image

Archive for CSA Newsletter – Page 24

CSA News: Week 3- June 1 to June 7

Posted by sio@dmin on
 June 1, 2010

This Week’s Share

  • Bok Choi, Red Choi
  • Chard
  • Mizuna
  • Onions, Siskiyou Sweets
  • Spinach
  • Turnips, Hakurei

Share Notes

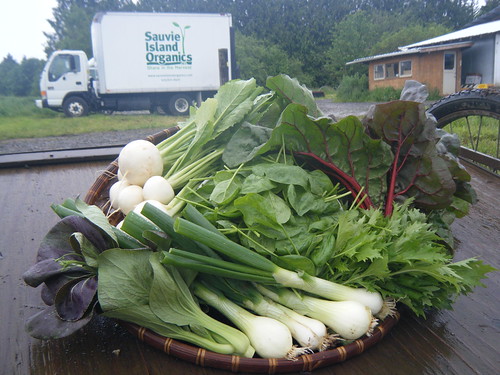
  • Chard: Say hello to your first round of chard. You will see chard in the spring and fall. The chard plant is actually the same species as beets – Beta vulgaris. Chard varieties are bred for their leafy tops, while beets are bred for their roots.
  • Red Choi: These baby heads of red choi are a real spring treat. You may notice some have a budding stem. The stem and flower buds part are both edible, so try it out in your next stir-fry.
  • Onion, Siskiyou Sweets: Spring onions are here! For the first distribution you will receive Siskiyou Sweets (similar to Walla Walla Sweet Onions). Here at SIO your first distributions of onions were planted in early October from transplants started in the greenhouse in July. These onions are over-wintered in our fields so they are ready for early harvest in the spring. The flower stalk has started to form in the center, at the farm we call this bolting. We harvest these bolting onions for an early taste of onions in the share because there is still a usable portion of bulb around the flower stem. We have left a portion of the onion tops because you can use that too.
  • Spinach: You will receive a pound of beautiful and sweet spinach this week in your share. Use this for a delicious spinach salad, or in your favorite cooked spinach recipe. As usual, please be sure to wash thoroughly before eating.

Recipes

Chard Recipes

Chard and Feta Tart
Adapted from Eating Well in Season by Jesse Price

For the crust:

¾ cup whole-wheat pastry flour
¾ cup all-purpose flour
1½ tablespoons chopped fresh thyme or oregano (or ½ teaspoon dried)
¾ teaspoon salt
¾ teaspoon freshly ground pepper
1/3 cup olive oil
5 tablespoons cold water

Combine whole-wheat flour, all-purpose flour, thyme (or oregano), salt and pepper in a bowl. Make a well in the center and add the 1/3 cup oil and 5 tablespoons water. Gradually stir the wet ingredients into the dry to form a soft dough. Knead on a lightly floured surface until the dough comes together. Wrap in plastic and chill for 15 minutes

Pre-heat the oven to 400˚F. Coat a 9-inch tart pan with removable bottom with non-stick cooking spray/shortening/butter. Roll the dough into a 12-inch circle on a lightly floured surface. Transfer to the prepared pan and press into the bottom and up the sides. Trim any overhanging dough and use it to patch any spots that don’t come all the way up the sides. Prick the bottom and sides with a fork in a few places. Bake the crust until firm and lightly browned, 20-22 minutes. Let cool on a wire rack for at least 10  minutes.

For the filling:

2 teaspoons olive oil
6 cups chopped chard, leaves and stem separated
2 tablespoons garlic, minced (use green garlic if you have some)
2 spring onions, sliced
2 tablespoons water
2 large eggs
1 cup part-skim ricotta cheese
1 teaspoon freshly grated lemon zest
1/8 teaspoon freshly ground pepper
½ cup chopped pitted kalamata olives
1/3 cup crumbled feta cheese

While the crust is chilling and pre-baking, you can get started on the filling. Heat 2 tablespoons oil in a large skillet over medium heat. Add chard stems and cook, stirring, until just tender, about 2 minutes. Add garlic and onions and cook, stirring, until fragrant, about 15 seconds. Add chard leaves and 2 tablespoons water and cook, stirring, until leaves the leaves are just tender and the water has evaporated, 2-5 minutes. Transfer the greens to sieve over a bowl and let drain and cool for 5 minutes. Whisk eggs, ricotta, lemon zest and 1/8 teaspoon pepper in to a large bowl. Fold in the greens, olives, and feta. Spread the filling into the crust. Bake the tart until the top is lightly browned and a knife inserted in the center comes out clean, 30 to 35 minutes. Let cool for 10 minutes before cutting into wedges.

Spring Vegetable Braise
Adapted from Local Flavors by Deborah Madison

2-3 spring onions (could substitute green garlic if you have some left)
4 cloves of garlic, minced (use only if you are not including any green garlic)
6 carrots, 3-4 inches long (optional)
1 bunch hakurei turnips, with tops (also can use any radishes you may have left)
1-2 heads red choi, chopped into bite size pieces
8 chard leaves, sliced into strips (you many use the stem if desired)
sea salt and freshly ground pepper
2 tablespoons unsalted butter
2 tablespoons finely chopped parsley
1 tablespoon finely chopped tarragon
1 tablespoon fresh lemon juice

Slice the onions about ¼-inch wide. Cut all but ½-inch of the carrot greens off, peel the carrots, and slice them in half lengthwise. Leave ½-inch of the turnip/radish greens attached. Leave the smaller ones whole, and cut the larger ones into halves or quarters.

Bring 6 cups water to a boil and add 1 ½ teaspoons salt. Blanch the carrots (if using), turnips/radishes for 7 minutes, then scoop out and set aside (no need to rinse them). Keep the cooking water for using later. Melt half the butter in an 8- or 10-inch sauté pan. Add the onions and cover over medium heat for about 2 minutes, stirring frequently. Add ½-cup of the vegetable cooking water, the blanched vegetables, half the herbs, and ½-teaspoon salt. Simmer until the vegetables are fully tender, 10 to 15 minutes, adding water in 1/3 cup increments so that the pan doesn’t dry out. There should be a little sauce.

Add the remaining butter and lemon juice. Then add the red choi and chard and raise the heat and swirl the pan back and forth until the butter has melted in to the juice. Remove from the heat after 3-4 minutes, and add the rest of the herbs, season with pepper, and serve. This is great mixed in with pasta, or as side with fish or chicken.

Hakurei Recipes

Quick-Pickled Turnips
From The Joy of Picking by Linda Ziedrich

1 pound hakurei turnips (half your bunch this week), trimmed at the top and bottom
2 teaspoons pickling salt
1½ cups water
1 fresh red jalapeno pepper, seeded and minced, or 1 tablespoon minced pimiento
3 tablespoons sugar
1½ cups rice vinegar or white vinegar

Score each turnip several times at top and bottom. Put the turnips into a bowl. Dissolve the salt in the water, and pour the brine over the turnips. Let them stand for 30 minutes to an hour. Drain the turnips well, then return them to the bowl with the minced pepper, and toss well. Combine the sugar and vinegar, and stir until the sugar dissolves. Pour the liquid over the turnips. Cover the bowl with plastic wrap, and refrigerate and the turnips for two days, after which they will be ready to eat. Well covered and refrigerated, they will keep for several months.

Fresh Greens Salad with Hakurei Turnips
From the Sauvie Island Organics Crew

3 cups spinach, whole and lightly packed
1 bunch mizuna (may increase or decrease quantity depending on needs)
2-3 hakurei turnips, sliced
2 tablespoons sunflower seeds, toasted and chopped nuts (optional)
2-3 tablespoons of Asian Salad Dressing (recipe below) or dressing of your choice

Wash lettuce, mizuna, and turnips. Leave the mizuna whole, and tear or chop lettuce into smaller pieces and place in salad bowl. After slicing the Hakurei turnips place them in the salad bowl as well. Add seeds or nuts as desired, dress, and toss.

All-purpose Asian Salad Dressing/ Marinade
Adapted from Astray Recipes, www.astray.com

Note: This dressing is great with fresh greens, sautéed greens, steamed vegetables, and cold meats as well as any other applications you may create for it.

2 tablespoons white vinegar
1½ tablespoons soy sauce
1 tablespoon plus 1 teaspoon sugar
1½ sesame oil
½ teaspoon fresh ginger, grated
1 tablespoon cilantro, chopped
a few drops of hot pepper oil (optional for those with aversions to spiciness)

Place all ingredients in a bowl or salad dressing jar and mix or shake vigorously to ensure everything is well blended.  Use as desired.

Spring Vegetable Braise
(see above in Chard Recipes)

Spinach Recipes

Spinach Salad
Adapted from Territorial Seed Garden Cookbook

¼ oil
¼ cup vinegar
¼ cup sugar
1 teaspoon rosemary, chopped
½ teaspoons salt
2-4 turnips, sliced into ¼-inch rounds (could use radishes)
1-2 spring onions, sliced into rings
4-6 cups spinach, lightly packed

Make a marinate of the oil, vinegar, sugar, rosemary, and salt. Slice turnips (or radishes) and onions into rounds/rings, and soak in marinade for as long as possible. Clean spinach and tear into bite-sized pieces if needed. Drain off marinade (it can be reused if kept in the refrigerator) and add turnips and onions to spinach. Toss and serve.

Catalan Spinach
From Fresh from the Farmers’ Market by Janet Fletcher

2 teaspoons dried currants
1 tablespoon pine nuts
1 pound fresh spinach (your share this week)
2 tablespoon olive oil
1 large clove garlic (or 1 stem green garlic), minced
2 dried apricots, diced into 1/8-inch pieces
Salt and freshly ground black pepper

Place currants in a small bowl with warm water to cover and let stand for 30 minutes to soften, then drain. Preheat oven to 325˚F. Toast pine nuts on a baking sheet until they are golden brown and fragrant, 12 to 15 minutes. Wash spinach well in a sink filled with cold water. Remove and discard any thick stems, and drain leaves in a colander. Place spinach in a large pot with just the water clinging to the leaves from washing as the your cooking liquid. Cover and cook over moderate heat, stirring occasionally, until leaves are just wilted, 3 to 5 minutes. Drain in a sieve under cold running water. Squeeze between your hands to remove excess moisture.

Heat olive oil in a 10-inch skillet over moderate heat. Add garlic and sauté until it colors slightly, about 2 minutes. Add spinach, tossing to separate the leaves and coat them with oil. Add currants, pine nuts and dried apricots. Toss to distribute evenly. Season with salt and pepper. Cook, stirring occasionally, until spinach is hot throughout, 2 to 3 minutes. Serve immediately as a side dish.

Categories : CSA Newsletter

CSA News: Week 2- May 25 to May 31

Posted by sio@dmin on
 May 25, 2010

This Week’s Share

  • Arugula
  • Broccoli
  • Green Garlic
  • Kale, Red Russian
  • Lettuce
  • Radishes, Cherry Belle
  • Tomato Plant, Sungold Cherry Tomato

Share Notes

Cherry Tomato Plants: This week each share will receive a cherry tomato plant.
Cherry tomatoes are wonderful snacks and great in salads. They are easy to grow and fun to pick in small quantities. However, they are very labor intensive to pick on a larger scale. For this reason we are giving you your own plant to enjoy. We concentrate on growing many different varieties of slicing, saucing and heirloom tomatoes, which you will see in your shares starting at the end of July.

Tomatoes appreciate full sun, and plenty of space to climb. Bury the plants deep so that only a little stem and the newest leaves are showing. Water them deeply. This will help to encourage a strong root system. They like a trellis to keep their leaves and fruit off the ground. Once established, tomatoes do not need to be watered more then once a week. Use about 5 gallons of water per plant. Tomatoes don’t like wet leaves so try to keep the leaves dry when you water.

If you do not have room to plant the tomato outside you can plant it in a five-gallon bucket with a drain hole. Keep it in a sunny space and remember to water frequently as container plants tend to dry out quickly.

Recipes

Arugula Recipes

Arugula-Green Garlic Pesto
Adapted from the Seacoast Eat Local Blog, http://blog.seacoasteatlocal.org

2 cups arugula, washed
3-4 stalks green garlic, roots removed
1/2 cup pine nuts (cashews, almonds, or walnuts also work)
4-6 oz. chevre, gorgonzola or other soft salty cheese
2 tablespoons parmesan cheese
2-3 tablespoons extra-virgin olive oil

Toast the pine nuts in a dry pan over medium low heat, tossing frequently until mostly golden brown. In a food processor or blender pulse the arugula and green garlic. Add pine nuts, olive oil, and cheese and process until there are no large chunks remaining. Great mixed in with pasta, on sandwiches, or in homemade salad dressings. It will keep fresh covered in the refrigerator for 7-10 days, or freeze for up to 6 months (or freeze up to a year if no cheese is added).

Arugula Salad with Mushrooms
From Recipes from Americas Small Farms by Joanne Lamb Hayes and Lori Stein

1 bunch arugula (about 8 cups loosely packed), rinsed and drained
8 ounces white mushrooms, thinly sliced (you many substitute porcini mushrooms or other specialty mushrooms, but sauté them until tender and let cool to room temperature)
6 tablespoons olive oil (extra virgin recommended)
2 tablespoons balsamic vinegar
1/2 teaspoon Dijon mustard
Salt and freshly ground pepper
1 (6 ounce) piece of Parmigiano-Reggiano cheese, at room temperature

Combine the arugula and mushrooms in a bowl. Whisk together the oil, vinegar, and mustard. Add salt and pepper to taste. Drizzle mixture over the salad and toss to coat well. Shave thin strips of the cheese with a cheese shaver or vegetable peeler. Reserve your best strips for garnish if desired, and throw the rest into the salad and toss lightly. Serve at room temperature.

Green Garlic Recipes

Green Garlic Pesto
Adapted from www.culinate.com

4 stems green garlic, roots removed
1 cup raw walnuts, or other nuts you have available
1 to 2 oz. hard, salty cheese (romano, ricotta salata, parmesan, etc.)
2/3 cup extra virgin olive oil
1/2 teaspoon salt (sea salt and kosher have best flavor)

Cut root ends of green garlic and discard. Cut into 1-inch lengths, discarding the tougher green portions on top. In a saucepan over medium heat toast walnuts by cooking for several minutes, stirring constantly until they start browning. Place nuts and green garlic into a food processor or blender and pulse/process on low until roughly chopped. Cut cheese into chunks, add to blender/processor, and process. In a steady stream while blender/processor is running, add olive oil until desired consistency is reached. Salt to taste and keep in an airtight container in the refrigerator until ready to use. Use with pasta, served over fish, spread on bread, or in whatever way pleases your pallet. If you have to much to use for one meal you can keep in a covered container in the fridge for 7-1o days, or freeze for up 6 months (will freeze up to a year with no cheese added).

Arugula Green Garlic Pesto
(see above in Arugula Recipes)

Kale Recipe

Kale Chips

Note: If you are an already seasoned kale chip lover spread the word to the newbies that it is definitely worth a try, especially if you have kale skeptic children in the house.

Kale (as much or as little as you like)
1-2 tablespoons olive oil
salt, to taste,
pepper, to taste (opitional)

Wash kale and remove center stems. Tear kale into roughly chip size pieces. Toss with olive oil and salt. Place kale ‘chips’ in a single layer on a baking sheet and put in a hot oven, 400˚-450˚F. Bake watching closely, you may have to turn a few chips to make crisp on each side…Voila, Salty Kale chip snacks!

Radish Recipe

Radish Butter for Radish Sandwiches

From Local Flavors by Deborah Madison

A good radish sandwich can be nothing more than sweet butter on bread topped with sliced radishes and sea salt. This recipes gets right to business and brings your radishes and butter to your bread all in one step.

6 radishes
4 tablespoons unsalted butter
1 teaspoon finely grated lemon zest
sea salt

Wash and trim radishes. If the leaves are tender and fresh, set a dozen or so aside, stems removed. Slice the radishes into thin rounds, then crosswise into narrow strips. Each should be tipped with color. Chop the leaves. You should have about ½ cup. Mix the butter with the lemon zest until soft, then stir in the chopped radishes, radish leaves, and a pinch of salt. Spread on slices of crusty baguette and serve.

Categories : Blogroll, CSA Newsletter, Farm News & Updates, Recipe, Uncategorized

CSA News: Week 1- May 18 to May 24

Posted by sio@dmin on
 May 18, 2010

This Week’s Share

  • Bok choi, Joi choi
  • Broccoli
  • Green Garlic
  • Lettuce
  • Mizuna
  • Turnips, Hakurei

Share Notes

  • Green Garlic: This is a wonderful spring treat. Green garlic is tender young garlic harvested before the bulb is formed. Perfect either fresh or cooked, use the entire stem.
  • Lettuce: These small spring lettuce heads will make a wonderful salad. As the weeks go on the lettuce heads will get bigger and bigger.
  • Turnips, Hakurei: These little guys are great to snack on fresh or sliced up in salads, but they also lend themselves well to many cooked dishes. Don’t forget to use the greens, they are tasty as well.

Recipes

Broccoli Recipes

Terrific Teriyaki
Adapted from the Tassajara Recipe Book by Edward Espe Brown

Note: This teriyaki is simple to prepare and great as marinade for tofu, chicken or beef, then used to sauté with any combination of fresh vegetables: this week broccoli, joi choi, hakurei turnips and green garlic would all be great additions to the sauté.

Teriyaki Sauce:

1 cup soy sauce
½ cup sake or white wine
½ cup sugar (or part honey)
1 tablespoon fresh ginger, grated
3 stems green garlic, finely chopped
¼ cup sesame oil
1½ teaspoons dry mustard

For Teriyaki Dish:

1 ½ pounds tofu, chicken, or beef (marinated overnight)
5-6 cups chopped vegetables, try a combination of broccoli, joi choi, hakurei turnips, and green garlic

Combine all ingredients in a saucepan and heat to boiling, then simmer for 10 minutes. Marinate two blocks of drained and cubed tofu or 1 ½ pounds chicken or beef cut into ¾ inch pieces overnight. If using tofu pour the marinade over the tofu while still hot, let cool to room temperature and marinate in the refrigerator overnight. If using meat let the marinade cool some, then pour over uncooked chicken or beef and let marinate in the refrigerator overnight.

When ready to cook pour the marinated tofu/meat and all of the marinade into a large sauté pan or wok. Begin cooking over medium-high heat. When tofu/meat and marinade is completely heated and partially cooked add the vegetables (if using joi choi greens and/or turnip greens add those in the last 5-7 minutes of cooking so they don’t over cook). Cook in marinade for 10 minutes and check tenderness of vegetables. Add greens and cook for another 5 minutes or until all vegetables are tender and ready to eat. We suggest serving this dish over rice or soba noodles.

Cheese and Broccoli Soup
From Vegetables Soups by Deborah Madison

4-5 cups broccoli florets
1 cups chopped broccoli stems
Sea salt and freshly ground pepper
3 tablespoons butter or canola oil
1 onion, chopped
1 celery rib, diced and leaves chopped
½ pound yellow-fleshed potatoes (Yukon Gold or Yellow Finn work well), peeled if desired and diced
1 stem green garlic, chopped
1/8 teaspoon cayenne, or more to taste
1 teaspoon dried marjoram
1 bay leaf
1 pinch of dried thyme
1 tablespoon flour
½ cup light cream, milk, or reserved cooking water from broccoli
2 teaspoons Dijon-style mustard, or to taste
2 cups grated sharp Cheddar cheese
Rye or whole wheat bread, toasted

Separate the crowns from the broccoli stems (reserve stems for use), then separate the crowns into florets. Thickly peel the stems, quarter them, and chop into small pieces. Bring a quart of water to a boil and add 1 scant teaspoon salt and the broccoli florets. Cook for about 3 minutes, then scoop out the florets, reserving water. Rinse under cool water and set aside.

Melt the butter (or heat oil) in a soup pot and add onion, celery, potato, broccoli stems, garlic, cayenne, and herbs. Cook over medium-heat for about 5 minutes, stirring now and then. Add ½ teaspoon salt, stir in the flour, then pour in 3 cups of the reserved water from the broccoli, saving any remainder. Bring to a boil, lower heat, and simmer, covered, until the potato is tender, 10 to 12 minutes. Add the cream or additional broccoli water as needed to thin the soup. During the last few minutes, add the florets and allow them to heat through.

Remove the bay leaf, puree the soup (if desired), and return it to the pot. Stir in the mustard, then taste for salt and season with pepper. Just before serving, stir in the cheese, but don’t let the soup boil or the cheese will toughen. Serve with toast on the side or broken in the soup.

Green Garlic Recipes

Note: Green garlic is featured in some of the other recipes this week, but the recipes below calls for the entire 4 stems included in your share for this week.

Grilled Green Garlic
Recipe from Field of Greens by Annie Somerville

Note: The strong fresh flavor of green garlic hold up well on the grill.

4 stems green garlic, root and loose leaves removed
1 tablespoon olive oil
salt and pepper, to taste

Cut the loose leaves and roots of the green garlic (and save for making veggies stock if you wish). Brush green garlic with olive oil. Sprinkle with salt and pepper. When the grill is ready, brush with olive oil to prevent sticking. Grill until marks appear, then turn and grill the other side.

Terrific Teriyaki
(see recipe above in Broccoli Recipes)

Mizuna Recipe

Mizuna Salad with Roasted Portobello Mushrooms and Gouda
From Gourmet Magazine, August 2009

6 oz. slice Portobello mushrooms
¼ cup olive oil (extra virgin olive oil is recommended)
1 tbsp. plus 2 teaspoons red-wine vinegar
½ teaspoon Dijon mustard
1 bunch mizuna
½ cup coarsely grated aged Gouda cheese
salt and pepper

Preheat oven to 425˚F with rack in middle. Toss mushrooms with 1-2 tablespoons olive oil and 1/8 teaspoon each salt and pepper in a bowl. Roast in 1 layer in 4-sided sheet pan, turning once, until golden-brown and tender, about 15 minutes. Cool mushrooms.

Whisk together vinegar, mustard, 1/8 teaspoon salt, a dash of pepper, and remaining olive oil in a bowl until combined. Toss mushrooms, greens, and cheese with enough dressting to coat.

Hakurei Turnip Recipes

Turnip and Turnip Green Soup
From Chez Panisse Vegetables by Alice Waters

½ yellow onion
1 stem green garlic
2 teaspoons olive oil
½ tablespoon unsalted butter
1 bunch hakurei turnips with greens (about 1¼ pounds)
1 bay leaf
¼ teaspoon chopped thyme leaves
1 small piece prosciutto or smoked bacon (leave out for vegetarian)
4 cups rich chicken or vegetable stock
salt and pepper
Parmesan cheese

Peel and thinly slice the onion and green garlic. Put in a nonreactive pot with the olive oil and butter and 1 tablespoon of water and stew, covered, until they are soft and translucent. Trim off the stems and greens form the turnips and reserve the greens. There is no need to peel the turnips. Trim off their roots, slice he turnips thin and add them to the pot. Stew them for a few minutes, until they begin to soften. Add the bay leaf, thyme, proscuitto or bacon, stock, and salt and pepper. Cover and simmer over low heat form about ½ hour. Wash the turnip greens and cut them into ½ inch wide strips and stir them into the soup. Simmer the soup for another 10 minutes or so, until the greens are soft and tender. Garnish the soup with a few curls of shaved Parmesan.

Terrific Teriyaki
(see recipe above in Broccoli Recipes)

Categories : Blogroll, CSA Newsletter, Recipe

Winter News Update: March 1, 2010

Posted by sio@dmin on
 March 1, 2010

Winter Happenings on the Farm

The Greenhouse Gets a Makeover

Spring is nearly upon us, and as you long for your first share to arrive you can rest at ease knowing we are already busy preparing for your shares out at the farm. Before many of your crops set their young roots in the fields, they take-in their first rays of light in our greenhouse. At Sauvie Island Organics we have one 20ft x 100ft heated greenhouse that we use for all our vegetables starts that we transplant out to the fields in the spring. Up until this winter the watering system for the greenhouse was completely manual, meaning someone had to water everything by hand. For 2010 we decided to take the leap and install an over-head watering system. The new system (pictured above) includes uniform misting nozzles that are attached to the top of the greenhouse and run along the length of the greenhouse tables. You can turn on one or all of the tables for watering with just the turn of a switch, and even set and automatic timer to turn the watering system on and off. With this new system we hope to save several hours a week from what used to be the long process of watering the greenhouse. In addition to the watering system, SIO also expanded the capacity of our greenhouse heat tables. Some plants prefer the soil temperature to be a little warmer than what it might be naturally in the spring and fall, and so in order to create those soil conditions we use a hydro-thermal tubing system on the tables. The new heat tables also include a valve controls (pictured below) so that certain tables can be isolated for heat or no heat.

Wolf Sighting!

Sauvie Island is home to the nearly 12,000 acres of preserved land know as the Sauvie Island Wildlife Area. This network of wilderness area provides habitat for deer, beavers, foxes, and large populations of migratory birds. While Sauvie Island Organics values its close and harmonious relationship with the wildlife in the area, from time to time we still have to take precautions to protect the fields and your crops from damage. As seen above, a silhouette of a wolf cut from plywood and painted black is one method SIO uses to keep large flocks of migratory geese from settling and eating all our winter cover crops from our fields. Thanks to the smart thinking of Field Assistant Brian Wood, SIO tested the wolves last season, and since placing them out we haven’t seen many geese land in the fields to graze. We also use flags (pictured below), metallic mylar ribbon, and other distraction methods to deter wildlife from settling in our fields.

Shares Still Available for 2010!–Sign-up Now

Tell your friends, tell your neighbors, its not to late to share in the harvest for 2010! As we are busy planning and preparing we want to remind you that sign-up for the 2010 season is open and we still have space available at all of our pick-up sites. Signing up is quick and easy! Just complete the Community Farm Agreement and submit on-line, then send in your $100 deposit to reserve your slot for the coming season.

Categories : Blogroll, CSA Newsletter, Farm News & Updates, Uncategorized

CSA News: Week 30- December 8 to December 14

Posted by sio@dmin on
 December 8, 2009

This Week’s Share

  • Carrots
  • Collard Greens
  • Garlic
  • Leeks
  • Onions
  • Potatoes, Sangre
  • Winter Squash, Assorted Varieties

Share Notes

  • Collard Greens/Kale: All shares will be receiving a cooking green this week Due to the sustained cold temperatures and variable thawing conditions in the fields some shares will be receiving collard greens and others may be receiving kale.
  • Leeks/Onions: The photo above shows 4 leeks and 2 onions, but due to the sustained cold temperatures and limited harvesting conditions shares this week will be receiving 2 leeks and 4 onions.
  • Potatoes: You may notice that your potatoes are unwashed this week, and that is because the sustained below freezing temperatures have limited our ability to wash produce without it coating with ice afterward. Simply scrub them clean under running water and use as usual.
  • Winter Squash: This week in your share you will receive 2-3 assorted winter squash. The varieties we will be distributing are Acorn, Butternut, Delicata, and Hubbard.

Recipes

Collard Greens/Kale Recipe

Citrus Collards with Raisins
From Recipes from America’s Small Farms by Joanne Lamb Hayes and Lori Stein

1 large bunch collard greens/kale
coarse sea salt
1/2 tablespoon olive oil
1 garlic clove, minced
1/3 cup raisins
2 medium oranges

Remove the stems from the collards/kale and discard. Stack four or five leaves on top of one another. Roll the leaves into a tight cylinder. Slice, crosswise, cutting the leave into thin strips. Rinse the leaves in cold water and drain in a colander. In a large pot over high heat, bring 3 quarts of water to a boil and add 3 teaspoons salt. Add the collards and cook, uncovered, 10 minutes. Removes, drain, and plunge into a bowl of ice water to stop the cooking and set the color of the greens. Drain. In a medium sauté pan, over medium heat, warm the oil. Add the garlic and sauté for 1 minute. Add the collards, raisins, and a pinch of salt. Saute for 3 minutes, stirring frequently. Section the oranges, reserving the juice. Add the oranges and juice and cook for an additional 30 seconds. Do not overcook  (collards should be bright green).

Potato Recipes

Blue Cheese Smashed Potatoes
From Food to Live By by Myra Goodman

2 pounds potatoes, washed (peeling is optional) and cut into 1/2-inch chunks
4 cloves garlic, peeled
1/4 cup whole or low-fat milk
2 tablespoons (1/4 stick) unsalted butter
3 to 4 ounces crumbled blue cheese (about 1 cup), at room temperature
Salt and freshly ground pepper, to taste

Place the potatoes, garlic, and 5 cups of water in a large saucepan and bring to a boil over high heat. Reduce the heat to  medium-low and let the potatoes simmer, covered, until tender about 15 minutes. Meanwhile, heat the milk and butter in a small saucepan over low heat. Keep warm. Drain the potatoes and garlic in a colander, then transfer them to a large bowl. Using a potato masher or large fork, coarsely mash the potatoes and garlic. Add the warm milk and butter mixture and the blue cheese and mash to combine.

Mashed Potatoes with Carrots and Leeks
From www.epicurious.com

Note: This recipe was inspired by stoemp, a Belgian dish of mashed potatoes with vegetables.

1 leek (white and pale green parts only), coarsely chopped
2 pounds potatoes, washed and cut into 2-inch pieces
2 carrots, cut into 1/2-inch chunks
1/2 stick (1/4 cup) unsalted butter
3/4 cup whole milk
3/4 teaspoon salt
1/4 teaspoon black pepper

Wash chopped leek well in a bowl of cold water, then lift out and drain well. Peel potatoes (if desired) and cut into 2-inch pieces. Cover with cold water in a 3- to 4-quart saucepan. Bring to a boil, then reduce heat and simmer, uncovered, until potatoes are tender, about 18 minutes. Drain and return to saucepan. While potatoes are simmering, cook carrots in a 1- to 1 1/2-quart saucepan of boiling salted water until just tender, 5 to 6 minutes, then drain. Cook leek in butter in a 10-inch skillet over moderately low heat, stirring occasionally, until very tender, about 6 minutes. Add milk, salt, and pepper and simmer, stirring, 2 minutes. Add leek mixture to potatoes and coarsely mash with a potato masher, then stir in carrots. Makes 4 servings.

Winter Squash Recipes

Roasted Butternut Squash and Caramelized Onion Tart
From Gourmet, November 1998

1- 11-inch Pastry dough (recipe below, or could use pre-made dough)
Pie weights or raw rice for weighting shell
1 small (or 1/2 of a large) butternut squash (about 1 pound)
1 1/2 teaspoons olive oil, plus about 2 teaspoons for brushing squash (optional, can just roast with some water in the pan)
2-3 onions, thinly sliced
1 1/2 tablespoons unsalted butter
1 whole large egg
1/2 large egg yolk (1/2 tablespoon)
1/3 cup heavy cream
1 cup grated Italian Fontina cheese (about 3 ounces)
1/2 cup freshly grated Parmesan (about 2 ounce)
1/2 cup crumbled mild soft goat cheese (about 2 ounce)
1 1/2 teaspoons minced fresh herbs such as rosemary, thyme, and marjoram leaves
1/2 teaspoon salt
freshly ground black pepper
1/3 cup fine fresh bread crumbs

On a lightly floured surface roll out dough into a 12-inch round (about 1/8 inch thick). Fit dough into an 11-inch tart pan with a removable fluted rim. Freeze shell 15 minutes.

Preheat oven to 375°F. Line shell with foil and fill with pie weights or raw rice. Bake shell in middle of oven until edge is pale golden, about 20 minutes. Carefully remove foil and weights or rice and bake shell 10 minutes more, or until bottom is golden. Leave oven on. Cool shell in pan on a rack.

Halve squash and scoop out seeds. Lightly brush each cut side with about 1 teaspoon oil and on a baking sheet roast squash, cut sides down, in middle of oven 40 minutes, or until soft. While squash is roasting, thinly slice onions and in a heavy skillet cook in 1/2 tablespoon butter and remaining 1 1/2 teaspoons oil over moderate heat, stirring occasionally, until soft and golden brown, about 20 minutes. Cool squash and scoop out flesh. In a food processor purée squash. Add whole egg, egg yolk, and cream and blend well. Transfer mixture to a large bowl and stir in cheeses, herbs, onion, salt, and pepper to taste. Pour filling into shell, smoothing top.

In a small skillet melt remaining tablespoon butter and stir in bread crumbs until combined well. Sprinkle breadcrumb mixture evenly over filling. Bake tart in middle of oven 40 minutes, or until filling is set. Cool tart in pan on rack 10 minutes and carefully remove rim. Serves 6 to 8.

Pastry Dough
From www.simplyrecipes.com

Note: This recipe makes enough for a double pastry crust, so you will only need to use one of the two disks of dough right away. You can save the other disk in the fridge for up to 2 days or in the freezer for much longer (weeks to months).

2 1/2 cups all purpose flour
1 1/2 teaspoon salt
1 Tablespoons sugar
3/4 cup (a stick and a half) unsalted butter, chilled, cut into 1/4 inch cubes
1/2 cup of all-vegetable shortening (8 Tbsp)
6-8 Tablespoons ice water

Combine flour, salt, and sugar in a food processor and pulse to mix. Add the butter and pulse 4 times. Add shortening in tablespoon sized chunks, and pulse 4 more times. The mixture should resemble coarse cornmeal, with butter bits no bigger than peas. Sprinkle 6 tablespoons of ice water over flour mixture. Pulse a couple times. If you pinch some of the crumbly dough and it holds together, it’s ready. If the dough doesn’t hold together, keep adding water, a tablespoon at a time, pulsing once after each addition, until the mixture just begins to clump together.

Remove dough from machine and place in a mound on a clean surface. Divide the dough into 2 balls and flatten each into 4 inch wide disks. Do not over-knead the dough! Dust the disks lightly with flour, wrap each in plastic, and refrigerate for at least an hour, or up to 2 days before rolling out.

After the dough has chilled in the refrigerator for an hour, you can take it out to roll. If it is too stiff, you may need to let it sit for 5-10 minutes at room temperature before rolling. Sprinkle a little flour on a flat, clean work surface and on top of the disk of dough you intend to roll out. Using a rolling pin, apply light pressure while rolling outwards from the center of the dough. Every once in a while you may need to gently lift under the dough to make sure it is not sticking. Roll to desired thickness and size. Makes 1 double 9 or 10-inch pie crust.

Easy Sautéed Winter Squash Recipe
From www.recipetips.com

Note: Remember that roasted squash seeds make a nutritious and tasty snack. Just wash and scatter on a baking sheet to dry. Sprinkle with olive oil salt and pepper (or any other preferred spices) and pop in a 400°F oven for 10 minutes, or place in the toaster oven on medium-dark setting. They are done with just crisp and golden.

1 winter squash, about 2 lbs, preferably smooth skinned (butternut, delicata, etc)
2 tablespoons butter
1 tablespoon brown sugar, or more, to taste (optional; omit if squash is very sweet)
Salt and pepper, to taste

Cut squash in half, lengthwise, and remove seeds and stringy pulp. Then cut crosswise into large chunks. (The chunks are easier to peel than a whole squash.) Peel and cut squash meat into 1/2-inch cubes. Over medium heat, melt butter in a large skillet. When hot, add squash cubes in a single layer and cook without stirring for about 5 minutes, to brown the bottom sides. Stir to turn cubes and cook another 5 minutes. Sprinkle on brown sugar, if using, stir to mix well, and cook 5 minutes or until squash is tender. Add salt and pepper to taste. Serve warm.

Categories : Blogroll, CSA Newsletter, Farm News & Updates, Recipe

CSA News: Week 29- December 1 to December 7

Posted by sio@dmin on
 November 25, 2009

This Week Share

  • Cabbage
  • Carrots
  • Garlic
  • Kale
  • Onions, storage
  • Parsnips
  • Winter Squash, Hubbard

Share Notes

  • Winter Squash: Some of you may be starting to accumulate a surplus of winter squash, and with that in mind we want to remind you of the suggested order of eating based on length of storage time. Its best to start by eating any pumpkins and acorn squash first, followed by any  delicata, butternut, or hubbard.

Sign-up for 2010

Just one more week left in the 2009 CSA Season. For those of you already longing for fresh spring greens, crisp radishes, and pungent garlic scapes you can sign up for your share of the 2010 season now. Complete and submit the Community Farm Agreement at http://sauvieislandorganics.com/join.php and send in your $100 deposit to secure your spot.

Make sure to sign-up and send your $100 deposit by January 1 to guarantee the $875 share price. We can’ wait to see you next season!

Recipes

Whole Roasted Chicken with Root Vegetables
From Francesca Benedetti (CSA Coordinator)

Note: This is one of my favorite things to do because you get a delicious main dish and a side dish all in one. Add a fresh cabbage slaw, kale or green salad and your set. The vegetables you can roast in the pan with the chicken can be interchanged freely. I love using beets, leeks, or celeriac as well, so if you have any of those still around try it out.

1 (3½ -5 pound) whole chicken, gizzards removed (can save to make stock)
2 lemons, cut into quarter
2-4 tablespoons butter
2-4 sprigs of fresh rosemary
salt and pepper to taste
1 onion, peeled, cut in half, and cut into quarters
2-3 carrots, cut into 1-inch rounds
2-3 parsnips, cut into 1-inch rounds
2-3 medium potatoes (5-6 small), cut into quarters or eighths
1 cup chicken broth

Preheat oven to 350˚F. Rinse and clean chicken and pat dry. Prepare chicken for roasting by sliding slices of butter and sprigs of rosemary under skin. Salt and pepper all of chicken, and stuff 2-3 lemons slices inside the chicken. Choose a pan for  roasting (I like to use a deep roasting dish or a roasting pan that has a rack layer and shallow drip pan is rests on putting the veggies under the roasting chicken in the drip pan. Depending on which way you choose to roast you will either place the chicken in the deep roasting pan and spread the chopped vegetables and lemon slices in the pan around the chicken or you will place the vegetables in the bottom drip pan, place the rack layer on top and place the chicken on top of that. Which ever method you choose make sure salt, pepper, and drizzle olive oil over the vegetables and baste with chicken broth at the beginning and every 20 minutes or so while its roasting. Roast at 350˚F for at least and hour, longer if it’s larger chicken. Turn up the oven to 400˚F for the last 15-25 minutes of roasting, basting at least once during that time. Remove the roasting pan from the oven when chicken is cooked through (I check internal temperature with a meat thermometer). Let chicken and vegetables rest for at least 10 minutes before cutting and serving.

Cabbage Recipe

Curried Cabbage
From Vegetable Love by Barbara Kafka

1 tablespoon vegetable oil
1½ teaspoons curry powder
1 cup onion, thinly sliced
4 cups shredded green cabbage
1½ teaspoons fresh lemon or lime juice
2 tablespoons regular or nonfat yogurt

Heat the oil in a 10-inch to 11-inch skillet over medium heat. Add the curry powder. Cook for 30 seconds, just until fragrant. Add the onion. Cook until translucent. Add the cabbage. Cook, stirring occasionally, until wilted and soft to the bite. Remove the heat. Stir in the lemon juice and yogurt until the cabbage is coated. Serve hot. Serves 4 as a side dish.

Kale Recipe

Sauteed Kale
Recipe submitted by Member Brandy Benedict (from Gourmet, November 2003)

8 cups kale, cut into 1-inch-wide strips (tough stems and center ribs discarded)
2 tablespoons olive oil
1 small red onion, halved lengthwise and thinly sliced crosswise
1 garlic clove, minced
Pinch of dried hot red pepper flakes
1 tablespoon red-wine or balsamic vinegar, or to taste
1/4 teaspoon salt

Cook kale in a 6-quart pot of boiling salted water, uncovered, stirring occasionally, until just tender, about 10 minutes, then drain in a colander. Heat oil in a 12-inch heavy skillet over moderately high heat until hot but not smoking, then sauté onion, stirring occasionally, until softened, 6 to 8 minutes. Add garlic and red pepper flakes and sauté, stirring, until garlic is fragrant, about 1 minute. Reduce heat to moderate, then add kale and cook, stirring occasionally, until heated through. Remove from heat and stir in vinegar and salt. Sautéed kale keeps 3 days chilled in an airtight container.

Parsnips Recipe

Maple Glazed Parsnips and Carrots
Adapted from Simply in Season by Mary Beth Lind and Cathleen Hockman-Wert

Note: You can use this same recipe using all parnips or all carrots, but its fun to use them together

1 cup parsnips, peeled and cut into ½-inch rounds
1 cup carrots, peeled and cut into ½-inch rounds
½ teaspoon butter, melted
2 tablespoons walnuts, chopped and toasted

Preheat oven to 400˚F. Spray a baking pan with oil. Place the parsnips and carrot rounds in a single layer on a pan and spray lightly with oil. Sprinkle with salt. Bake until soft, 30 minutes. Combine maple syrup and butter and pour over the cooked parsnips Top with walnuts and serve.

Winter Squash Recipe

Hubbard Squash Risotto
From Vegetable Love by Barbara Kafka

1½ pounds Hubbard squash (or 1¼ pounds butternut squash), peeled, seeds and fibers removed
1 tablespoon unsalted butter
1 tablespoon olive oil
2 cups Arborio or other risotto rice
½ cup chopped onion
1 clove garlic, smashed, peeled and chopped
1 cup dry vermouth
4½ to 5 cups beef stock or beef broth
1½ tablespoons kosher salt, plus more to taste
Freshly grated nutmeg to taste
½ cup chopped fresh parsley (optional)
Freshly ground black pepper to taste
Freshly grated Parmesan cheese for serving

Grate enough of the squash (about ¾ pound) to get 3 cups. Cut the remaining squash into ¼-inch cubes. Melt the butter with oil in a large shallow pan. Add the rice. Cook over medium-high heat, stirring continuously, for 3 minutes, or until rice turns white and loses translucence. Add the onion and garlic. Reduce the heat slightly and cook for 1 minute. Add the grated squash. Stirring continuously, turning up the rice from the bottom, cook for 5 minutes. Add the vermouth. Reduce heat to medium and cook until the vermouth is absorbed. Increase heat to medium-high and add ½-cup stock. Cook, stirring well, until the rice has absorbed most of the stock. Add another ½-cup stock and repeat the process, making sure the stock is mostly absorbed before each addition. Continue until the rice has cooked about 15 minutes and absorbed 4 cups stock. Add the salt and nutmeg then parsley, if using. . Add the squash cubes and ½ cup more stock, or 1 cup stock for looser risotto. Cook, stirring, for 10 minutes, until creamy with a slight chew. Season with pepper, and if necessary, salt. Serve with Parmesan on top. Makes 6½ cups.

Categories : Blogroll, CSA Newsletter, Farm News & Updates, Recipe

CSA New: Week 28 – November 23 to November 25

Posted by sio@dmin on
 November 23, 2009

This Week’s Share

  • Brussels Sprouts
  • Carrots
  • Celeriac
  • Garlic
  • Kale
  • Onions, Copra
  • Pie Pumpkins, Baby Bear
  • Potatoes
  • Shallots

Share Notes

  • Brussels Sprouts: This week in your share you will receive your sprouts on the stalk. As we continue to struggle with aphids in the field, you may notice some stalks show residual damage. For preparing them first pop them off the stalk, then slice off the base of each sprout in order to easily peel off and remove the outer layers of damaged and dirty leaves.
  • Celeriac: This season we learned our celeriac crop was impacted by a soil born fungus that causes the flesh of the bulb to have some discoloration or hollowing in the center. Much of the celeriac is still edible and tasty, and that is why we decided to distribute it despite its imperfections. You can cut around any affected areas and discard them.
  • Kale: This week in your share you will receive a beautiful bunch of Rainbow Lacinato kale. This particular variety was developed by local seed developer Frank Morton of Wild Garden Seed.

Thanksgiving Thoughts

We would like to remind you of the changes to CSA pick-ups for this week.

At the Farm: Tuesday, November 24-shares ready for pick-up by 4:30pm
SE Elliot: Tuesday, November 24- 5:30-7:00pm
Friendly House: Tuesday, November 24- 4:30-6:30pm
EcoTrust Building: Wednesday, November 25- delivered by 1pm
Metro Building: Wednesday, November 25- delivered by 2pm
Portland State Office Building: Wednesday, November 25- delivered by 2pm
Providence Medical Center: Wednesday, November 25- delivered by 2pm
NW Pump: Tuesday, November 24- delivered by 3:00pm

Warm Wishes this Thanksgiving

As you get together with friends and family this holiday and give thanks for the bounty that the harvest season has to provide we at Sauvie Island Organics want to give you a BIG THANK YOU for supporting community agriculture. We have just two more weeks of the season together. To sign up for the 2010 season you can go to http://www.sauvieislandorganics.com/join.php, fill out the community farm agreement, pay the deposit and reserve your share of the harvest.

Recipes

Brussels Sprouts Recipes

Brussels Sprouts with Chestnuts and Sage
From Eating Well in Season by Jesse Price

2 pounds Brussels sprouts, trimmed and halved
1 tablespoon butter
1 tablespoon extra-virgin olive oil
3 tablespoons chicken broth or water
3/4 cup coarsely chopped cooked chestnuts (about 4oz.)
2 teaspoons chopped fresh sage
1/2 teaspoon salt
Freshly ground pepper to taste

Bring a large saucepan of water to a boil. Add Brussels sprouts and cook until bright green and just tender, 6 to 8 minutes. Drain well. Melt butter with oil and broth (or water) in a large skillet over medium heat. Add Brussels sprouts, chestnuts and sage and cook, stirring often, until heated through, 2 to 4 minutes. Season with salt and pepper. Serve warm or at room temperature.

Sweet and Sour Glazed Brussels Sprouts
Recipe submitted by CSA Member Jessica Roberts (from Cook’s Country)

4 tablespoons unsalted butter
1 1/2 tablespoons light brown sugar
2 pounds Brussels sprouts, trimmed and halved through core if large
12 small shallots, halved lengthwise
1 tablespoon cider vinegar

Adjust oven rack to middle position and heat oven to 400˚F degrees. Melt butter and sugar together in microwave. Toss Brussels sprouts, shallots, butter mixture, vinegar, 3/4 teaspoon salt, and 1/2 teaspoon pepper in large bowl. Scatter on rimmed baking sheet and roast until golden brown, about 30 minutes, shaking pan every 10 minutes to redistribute vegetables. Serves 8

Kale Recipe

Sage and Kale Cornbread Dressing (Stuffing)
From Jackie Benedetti (CSA Coordinator Francesca’s Aunt)

5 cups coarse crumbled cornbread (See recipe below for Black Pepper Cornbread (below)
7 tablespoons butter
3 large celery stalks, chopped
2 medium onions, chopped
5 large kale leaves, center spine removed, slivered (about 6 cups)
3 tablespoons chopped fresh sage or 1 tablespoon dried, crumbled
1/4 teaspoon salt
1/2 teaspoon pepper
4 cups 1/2 inch cubes white bread
1/4 cup chicken stock or canned low-salt broth
1 egg, beaten to blend

Crumble cornbread coarsely onto large cookie sheet. Let stand uncovered at room temp overnight to dry. Melt butter in heavy large skillet over medium heat. Add celery and onion and cook until tender, stirring frequently, about 12 min. Add kale and cook until kale wilts, about 5 min. Transfer mixture to large bowl. Mix in sage, salt and pepper. (can be prepared 1 day ahead. Cover and refrigerate.) Add cornbread crumbs and bread cubes to vegetables. Mix stock with egg in small bowl. Stir into dressing. You can stuff into the turkey and/or cook in a ovenproof dish and bake at 350°F for 45 minutes to and hour. Makes about 11 cups.

Black Pepper Cornbread (enough for 5 cups as called for above)

3/4 cup flour
3/4 cup yellow cornmeal
1 1/2 tablespoons sugar
1 Tbs baking powder
1/2 tsp salt
1/2 tsp pepper
3/4 cup milk
1 egg
2 Tbs butter, melted

Preheat oven to 400. Butter an 8-inch square baking pan. Mix together first 6 ingredients in large bowl. Mix milk with egg and butter, and pour over dry ingredients, stir until just moistened; do not over mix. Spoon batter into pan, bake until light brown, about 15 min.

Pie Pumpkin Recipes

Homemade Pumpkin Pie

Don’t just use those Baby Bear pumpkins as a Thanksgiving table centerpiece (although their beauty merits that honor). Put them to good and tasty use in a homemade pumpkin pie. For this recipe I am including a link to a page I found last year when making my first pumpkin pie from scratch. The directions are very clear and even have a photograph to accompany each step. The pie is delicious! A crust recipe is included below in case you don’t have your own. Click on the link below and scroll down to view the step-by-step recipe http://www.pumpkinpatchesandmore.org/pumpkinpie.php

Homemade Pie Crust
Adapted from the Joy of Cooking

Note: This is a very basic pie crust recipe, and with some trial and error can be perfected to your own tastes. I prefer to use a blend of vegetable shortening and butter, but I encourage you to figure out what works for you. Joy of Cooking also suggests using lard, which I have yet to experiment with, but have been told makes the best flaky pie crust. This recipe yields two 9-inch pie crusts.

2 1/2 cups all-purpose flour
1 teaspoon white sugar or 1 tablespoon powdered sugar
1 teaspoon salt
1 cup solid vegetable shortening (or 1/2 cup solid vegetable shortening and 1 stick cold unsalted butter)
1/3 cups plus 1 tablespoon ice water (must be ice water, its important!)

Premix the dry ingredients in medium to large bowl. Add the vegetable shortening and/or butter and cut into flour with a pastry cutter or two knives until pea-sized and cornmeal size chunks are achieved. Add ice water in tablespoon size portions, cutting in to dry ingredients until small balls form. If the balls stick together when pressed its ready, if not add an additional 1 to 2 tablespoons ice water. Refrigerate at least 30 minutes and for up to 2 days, or crust dough can be wrapped airtight and frozen for up to 6 months. After dough has chilled separate into two equal size balls. Flour a large flat surface and roll out each ball into a round large enough to cover a pie pan. Continue to fill with pumpkin pie filling (or other pie filling) as directed.

Fresh Pumpkin Bread
From www.dianasdesserts.com

1/2 cup (1 stick/4 oz.) butter
2 cups all-purpose flour
1 tsp. baking soda
1/2 tsp. salt
1/2 tsp. ground cinnamon
1/2 tsp. ground nutmeg
1 cup honey
1 cup fresh puréed pumpkin* (See Preparing Fresh Pumpkin below)
2 eggs
2 tsp. lemon juice
1 tsp. vanilla extract

Preheat oven to 350 degrees F/180 degrees C. Grease a 9 x 5-inch loaf pan and line bottom of pan with parchment paper. Grease parchment paper also. Whisk together flour, baking soda, salt, ground cinnamon and ground nutmeg in a medium bowl to blend. Using an electric mixer, beat butter in large bowl until fluffy. Gradually add honey, beating until blended. Beat in eggs, 1 at a time. Beat in pumpkin, lemon juice and vanilla. Stir in dry ingredients. Transfer mixture to prepared loaf pan. Bake in preheated oven for 75 to 90 minutes, or until a toothpick inserted in center of bread comes out clean. Cool bread in pan for 10 minutes, then remove from pan and let cool completely on a wire rack. (Can be made 2 days ahead. Wrap and store at room temperature.)

Preparing Fresh Pumpkin Puree

Remove the pulp and seed from your pumpkin(s). You can steam your pumpkin in the microwave or bake it in the oven, but it needs to be cooked until tender and soft. After its cooked let it cool until you can handle and then scrape out the pumpkin flesh into a bowl. Using processor, blender, immersion/stick blender, or even a potato masher and a fork make a puree with the pumpkin. Transfer the puree to a large sieve or colander lined with over lapping coffee filters and set over a large bowl. Cover the surface of the purée with plastic wrap and let the purée drain, chilled, overnight. Use 1 cup drained puréed pumpkin in above recipe.

Categories : Blogroll, CSA Newsletter, Farm News & Updates, Recipe

CSA News: Week 27-November 17 to November 23

Posted by sio@dmin on
 November 17, 2009

This Week’s Share

  • Cabbage
  • Carrots
  • Garlic
  • Kale, Lacinato
  • Onions, Copra
  • Parsnips
  • Sweet Peppers
  • Winter Squash, Delicata

Share Notes:

  • Cabbage: This week in your share you will receive a beautiful Savoy cabbage. You may notice some minor frost damage to the outer leaves, so be sure to remove those before using.
  • Sweet Peppers: Surprise! One last week of peppers. They will be yellow to light orange in color and you can try leaving them on the counter for a couple days to color up.

Sign-up for Next Season

It’s hard to believe the end of the season is just around the corner, and with 3 more weeks left in the 2009 season it’s time to start planning for next year. To sign up for the 2010 season you can go to http://www.sauvieislandorganics.com/join.php, fill out the community farm agreement, pay the deposit and reserve your share of the harvest for next season. The rest of November is only open for current members to sign-up, and then beginning in December we open sign-up to new members. Be sure to sign-up and send your deposit by January 1, 2010 in order to guarantee the $875 share price.

Thanksgiving Week Delivery Information

We would like to remind you of the changes to all CSA pick-ups for the week of Thanksgiving.

At the Farm: Tuesday, November 24-shares ready for pick-up by 4:30pm

SE Ankeny: Tuesday, November 24- 5:00pm-7:00pm (No changes)

SE Elliot: Tuesday, November 24- 5:30-7:00pm

Friendly House: Tuesday, November 24- 4:30-6:30pm

EcoTrust Building: Wednesday, November 25- delivered by 1pm

Metro Building: Wednesday, November 25- delivered by 2pm

Portland State Office Building: Wednesday, November 25- delivered by 2pm

Providence Medical Center: Wednesday, November 25- delivered by 2pm

NW Pump: Tuesday, November 24- delivered by 3:00pm

PGP (SE 46th and Harrison): No changes

All Monday Pick-up Sites: No changes – In order for Monday site to receive the Thanksgiving Share prior to the holiday you will receive your Thanksgiving Share (Week 28) on Monday Nov. 23 and your Week 27 Share on Monday Nov. 30.

For those of you menu planning and making your shopping lists we are providing a preview of the share.

  • Brussels Sprouts (approximately 2 pounds)
  • Carrots (1 pound minimum)
  • Garlic (1 head)
  • Kale, Rainbow (1 bunch)
  • Onions, Copra (2)
  • Potatoes (4 pounds)
  • Pie Pumpkins, Baby Bear variety (2)
  • Shallots (4 minimum)

Recipes

Parsnip Recipes

Kale and Parsnips
From www.astray.com/recipes

1 cup onion, sliced
1 cup parsnips, halved & sliced
1 tablespoon corn oil
1 cup water
2 tablespoons ginger, minced
4 cups chopped kale, tough center ribs removed

Saute the onions and parsnips in oil for about 5 minutes, stirring occasionally to prevent burning. Add the water and ginger. Cover and simmer for 4 to 5 minutes. Add the kale and continue cooking 4 to 5 minutes longer. Stir occasionally but keep the saucepan covered otherwise. When kale is tender (but not overcooked) its ready to serve.

Parsnip Oven-Fries with Yogurt-Curry Dipping Sauce
From http://fooddownunder.com

1 pound parsnips
1 tablespoon vegetable oil
1 teaspoon ground cumin
1 teaspoon ground coriander
¼ teaspoon salt
¼ teaspoon pepper
½ cup low-fat plain yogurt
¼ teaspoon curry paste
1 small green onion, minced

Peel parsnips. Cut into 2 inch x 1/2-inch sticks. In bowl, toss together parsnips, oil, cumin, coriander, salt and pepper. Bake on greased baking sheet in 425˚ F oven, turning occasionally, for 30 to 40 minutes or until browned and tender. In small bowl, stir together yogurt, curry paste, and green onion. Serve sauce with parsnip fries.

Cabbage Recipe

Tangy (No Mayo) Cabbage Slaw
From Matt Uddenberg (CSA Coordinator Francesca’s close friend)

1/2 head cabbage, sliced thin
1 carrot, grated
1 tablespoon whole cardamom seed
1/2 teaspoon whole coriander seed1/2 teaspoon whole mustard seed
2 teaspoons red wine vinegar (rice wine or apple cider vinegar also work)
2 teaspoons fresh lemon juice (or a few drop of bottled)
1 teaspoon-1 tablespoon salad oil or olive oil (amount depends on your preference)
salt and fresh ground pepper to taste

Place the cabbage and carrot in a salad bowl. Using a mortar and pestle (or other method for grinding the seeds) grind the whole coriander and mustard seed together until it is a coarse texture (you don’t want to grind it down to fine) and add it to the bowl. Add the vinegar, lemon juice, oil. Toss and combine in the bowl until everything is evenly mixed and coated with spices and dressing. Salt and pepper to taste. It develops better flavor if you let it stand in the refrigerator for 15-30 minutes, but can be eaten right away. This is a great one to make the day before for a dinner or to take with lunch because it tastes even better the next day.

Winter Squash Recipe

Winter Squash and Sweet Pepper Soup
Adapted from the American Institute of Cancer Research

1 Tbsp. extra virgin olive oil
1 medium onion (or a leek from last week) chopped
2 sweet peppers, seeded and diced
4 cups diced winter squash (any of the kinds you may have will work great, even pumpkin)
Salt and freshly ground black pepper, to taste
1 tsp. chopped garlic
1 tsp. sweet Hungarian paprika
3 cups chicken or vegetable broth
1/4 cup orange juice
1/4 cup raw pumpkin or other winter squash seeds, crushed (for garnish)
1/8 tsp. Spanish paprika, smoked or dulce (sweet), optional, for garnish

Heat oil in medium Dutch oven or heavy, large saucepan over medium-high heat. Sauté onions (or leeks) until translucent, 4 minutes. Add bell pepper, squash and pinch of salt, stirring to coat with oil. Reduce heat, cover and cook vegetables gently to release juices, 10 minutes. Stir in garlic and paprika for 30 seconds, until fragrant. Add broth, increase heat and bring liquid to a boil. Reduce heat, cover and simmer soup until vegetables are soft, about 20 minutes. Uncover, and let soup cool for 10 minutes. Adjust seasoning to taste. Transfer soup to blender, cover and whirl soup to a velvety puree. Or, using an immersion blender, puree in the pot. Blend in orange juice and season to taste with salt and pepper. To serve, divide soup among four soup bowls. Place pumpkin seeds in a dry skillet over medium-high heat and cook, shaking and swirling the pan, until seeds are plump and mostly golden. Crush seeds and add to soup as garnish. If using, sprinkle Spanish paprika. Serve immediately.

Wild Things: Adventures of a Grassroots Environmentalist

by Donna Matrazzo

2009 Oregon Book Awards finalist

SIO member and one of the founders of the Sauvie Island Conservancy,
Donna Matrazzo weaves an entertaining and inspiring tale of growing up
in a Pennsylvania milltown devoid of nature, moving to Oregon and
falling in love with Sauvie Island, helping to save the island from development,
and getting roped into the dogged exploits of Portland’s greenspaces pioneers.

“The planet needs more friends like Donna Matrazzo-and
it needs more books like this one, which remind us that
we’re all quite capable of making big and useful change”
— Bill McKibben, author, The End of Nature

“Simply lovely.  A personal encounter with the world, a
woman’s eye, a fine prose voice.”
— Luis Alberto Urrea, author, The Hummingbird’s Daughter

Available at St. Johns Booksellers, Powells, Broadway Books, Kruger Farms, Cistus
Nursery, amazon.com. For signed copies, contact Donna at matrazzo@msn.com.
Check out her website at www.donnamatrazzo.com

Categories : Blogroll, CSA Newsletter, Farm News & Updates, Recipe

CSA News: Week 26-November 10 to November 16

Posted by sio@dmin on
 November 10, 2009

This Week’s Share

  • Brussels Sprouts
  • Celeriac
  • Collard Greens
  • Escarole
  • Garlic
  • Leeks
  • Potatoes, Sangre
  • Sweet Peppers
  • Winter Squash, Butternut

Share Notes

  • Brussels sprouts: Frost sweetened sprouts are in! This week in your share you will receive your sprouts on the stalk. For preparing them first pop them off the stalk, then slice off the base of each sprout in order to easily peel off and remove the outer layers of damaged and dirty leaves.
  • Celeriac: Also called celery root, celeriac is late fall crop that despite its gnarled appearance offers a fresh and crisp flavor chopped or grated in raw dishes and savory celery flavor to cooked dishes. While considerably less starchy than some of the other root vegetables, its great in soups and stews, as well as boiled and mashed or in gratins and other bakes dishes.
  • Sweet Peppers: It’s likely the last week for sweet peppers, and some of your peppers will be varying degrees of yellow, orange, and red. You can leave them on the counter for a couple days to color up or eat them as is. They all taste delicious, so enjoy the last of this season’s crop.

Recipes

Brussels Sprouts Recipe

Becker Brussels Sprouts
From The Joy of Cooking

12 Brussels sprouts, trimmed and sliced in half lengthwise
3 tablespoons butter (or half butter, half olive oil)
1-2 garlic cloves, crushed
Grate Parmesan cheese (optional)

In a medium skillet heat the butter/olive oil over medium-low heat. Add the garlic, stirring, until beginning to brown. Remove the garlic and discard. Place the sprouts cut side down in the garlic butter, cover, and cook over low heat until tender, 15 to 20 minutes. Arrange the sprouts on a warm platter and drizzle any remaining butter on top. Serve with grated Parmesan if desired.


Collard Green Recipe

Pasta with Hearty Greens and Beans
From The Passionate Vegetarian by Crescent Dragonwagon

8 oz. fettucine
1 bunch collard greens (or kale or chard), washed, any tough center ribs removed
1 tablespoon olive oil
1 can cannellini, navy or other white beans, rinsed and very well drained
3 cloves garlic, pressed
Salt and freshly ground pepper
1/2 lemon (optional)
Dried chilled (optional

Start the fettucine in vigorously boiling water. Heat the oil over medium-high heat in a skillet. Stir the greens in the oil for  2 minutes, cover, and let them steam for 2 to 3 minutes, until tender but not overdone. Place the beans, garlic, and a bit of salt and a lot of pepper in a bowl. Add the green and pasta when they are done and toss. Add a squeeze of lemon, if you like. You may also have dried chiles available for crushing over plates of pasta.

Leek Recipes

Potato, Leek & Celeriac Soup
From www.astray.com/recipes

1/4 cup butter
4 leeks, roots & tops removed
3 medium potatoes, scrubbed and cut into 1/2-inch slices
1 celeriac bulb, peeled and cut into 1-inch chunks
4 cups Chicken or vegetable stock
Thyme, basil and/or marjoram (preferably Fresh), to taste

Melt butter in stockpot. Slice leeks into 1/4-inch slices and add to stockpot. Saute for 5 minutes until golden. Add potatoes and celeriac and saute for 5 minutes. Cover and cook for 3 minutes. Stir in 1 cup stock, cover and continue to cook until potatoes are tender, about 25 minutes. Remove from heat. For a chunkier soup mash up cooked vegetables with a potato masher. For smoother soup pour vegetables and stock into a food processor or blender and puree or puree with a hand blender in the pot. Return soup to stockpot (if removed) and add remaining stock and herbs. Cover and simmer for 15 to 20 minutes.

Leek Tart
Adapted from The Joy of Cooking

For Tart:

1 9-inch pie crust (recipe below, or you can use pre-made)
1 egg yolk, beaten
2 tablespoons butter
4 leeks, white and tender green parts only, cut into 1/4-inch slices
1 medium onion, sliced
1/2 teaspoon salt
Black pepper to taste
2 eggs
1/2 cup heavy cream or half-and-half
1/4 teaspoon grated or ground nutmeg
Salt and pepper to taste

Prepare and a crust into a 9-inch quiche, tart, or pie pan. Brush the dough with beaten egg yolk. Refrigerate the brushed dough. Melt 2 tablespoons of butter in a medium skillet of medium heat and add the sliced leeks and onion, salt and pepper. Cover and cook, stirring occasionally and reducing the heat as the leeks cook, until they are very soft, about 30 minutes. Meanwhile preheat the oven to 400°F. In a medium bowl beat together the eggs, cream, nutmeg and salt and pepper until well combined. When leeks are done, add to the custard. Transfer to prepared pastry shell. Bake until the top is golden and the custard is set, 20 to 30 minutes. Let rest for 10 minutes.

For Crust:

1 1/4 cups all-purpose flour
1/2 teaspoon salt
1/3 cup chilled lard or vegetable shortening
2 tablespoon cold unsalted butter
3 tablespoons, plus 1 teaspoon ice water (very important that its ice cold)

Sift together the flour and salt. Add the lard/shortening and butter and cut into the flour until cornmeal to pea-sized chunks are formed. Sprinkle the dough with 3 tablespoons ice water. Blend the water gently into the dough until it just holds together. If necessary to hold the ingredients add another 1 teaspoon of water. You may need to wrap the dough in plastic wrap and place in freezer to chill for a few minutes before rolling it out.

Winter Squash Recipe

Butternut Squash Rounds with Dates and Pistachios
From Local Flavors by Deborah Madison

1  butternut squash
3 tablespoons olive oil
Sea salt and freshly ground black pepper
2 tablespoons unsalted butter
2 shallots (or 1 small onion), finely diced, about 1/3 cup
2 garlic cloves, minced
1/ 3 cup slivered almonds
1/3 cup peeled pistachios, preferably unsalted, slivered or chopped
1 tablespoon grated zest from 1 Meyer lemon or orange
6 dates, pitted and chopped
2 tablespoons finely chopped parsley
1 tablespoon chopped mint
1/4 teaspoon ground cinnamon
juice of 1 Meyer lemon or 1 Persian lemon

Preheat the oven to 400°F. Lightly butter a large baking dish. Peel the neck of the squash and slice into rounds about 1/3 inch thick. Heat the olive oil in a wide nonstick skillet. Add the squash in a single layer and cook over medium heat until golden, then turn and brown the other side, 8 to 10 minutes per side. When the pan becomes dry add 1/3 cup water. Cover the pan and steam the squash until tender when pierced with a knife, about 10 minutes. Check while it’s cooking and add more water as needed. Season with salt and pepper. Melt the butter in a medium skillet over medium-low heat. Add the shallots (or onion) and garlic and cook without browning, stirring occasionally, for 5 to 7 minutes. Ad the nuts, zest, dates, herbs, and cinnamon and raise the heat. Season with 1/2 teaspoon salt and some pepper. Cook, stirring frequently, for 2 minutes, then add lemon juice, cook for 1 minute more, and turn off heat. Arrange squash rounds in the baking dish and scatter the dates and nuts over them. Add 1/4 cup water and bake until heated through and the topping is barely crisped, about 15 minutes.

Categories : Blogroll, CSA Newsletter, Farm News & Updates, Recipe

CSA News: Week 25-November 3 to November 9

Posted by sio@dmin on
 November 3, 2009

This Week’s Share

  • Beets
  • Escarole
  • Garlic
  • Kale
  • Onions, Copra
  • Parsnips
  • Sweet Peppers
  • Winter Squash, Delicata

Share Notes

  • Onions: Storage onions are harvested in late August and cured, then given out throughout the rest of the season in your shares. Whole onions are best kept in a cool, dark part of the kitchen, where they will last for many weeks. Leftover pieces of onion can be stored in the refrigerator for several days.
  • Parsnips: If you are not familiar with parsnips, you may quickly grow to love this wonderful winter vegetable. We harvest parsnips in late fall, after the cool weather has made these roots nice and sweet. Try pan frying them for a twist on a French fry. Also delicious roasted, or boiled and mashed.

Thoughts for Thanksgiving

The big meal is just around the corner and in preparation we here at Sauvie Island Organics have some thoughts to share. As a member of a local CSA you may already be aware that you are helping support a local food system, and the 100-Mile Thanksgiving encourages you to join and share with other people and families around the country who are also eating local this holiday season. Visit http://100milediet.org/thanksgiving to join the movement and show your support for delicious local food and passionate local farmers this Thanksgiving.

And now you are wondering what is in my share for the week of Thanksgiving? For those of you menu planning and making your shopping lists we are providing a preview of the share.

  • Brussels Sprouts (approximately 2 pounds)
  • Carrots (1 pound minimum)
  • Celeriac (2 bulbs)
  • Garlic (1 head)
  • Onions, Copra (2)
  • Potatoes (4 pounds)
  • Pie Pumpkins, Baby Bear variety (2)
  • Shallots (4 minimum)

We would like to notify you of the changes to all CSA pick-ups for the week of Thanksgiving.

At the Farm: Tuesday, November 24-shares ready for pick-up by 4:30pm

SE Ankeny: Tuesday, November 24- 5:00pm-7:00pm (No changes)

SE Elliot: Tuesday, November 24- 5:30-7:00pm

Friendly House: Tuesday, November 24- 4:30-6:30pm

EcoTrust Building: Wednesday, November 25- delivered by noon

Metro Building: Wednesday, November 25- delivered by noon

Portland State Office Building: Wednesday, November 25- delivered by noon

Providence Medical Center: Wednesday, November 25- delivered by noon

NW Pump: Tuesday, November 24- delivered by 3:00pm

PGP (SE 46th and Harrison): No changes

All Monday Pick-up Sites: No changes – In order for Monday site to receive the Thanksgiving Share prior to the holiday you will receive your Thanksgiving Share (Week 28) on Monday Nov. 23 and your Week 27 Share on Monday Nov. 30.

Recipes

Escarole Recipes

Escarole Salad Dressings

Honey Mustard Dressing
From www.allrecipes.com

1/4 cup mayonnaise
1 tablespoon prepared mustard
1 tablespoon honey
1/2 tablespoon lemon juice

In a small bowl, whisk together the mayonnaise, mustard, honey, and lemon juice. Store covered in the refrigerator until ready to use.

Creamy Blue Cheese Dressing
From www.allrecipes.com

2 1/2 ounces blue cheese
3 tablespoons buttermilk (can substitute for whole milk)
3 tablespoons sour cream
2 tablespoons mayonnaise
2 teaspoons white wine vinegar
1/4 teaspoon sugar
1/8 teaspoon garlic powder
salt and freshly ground black pepper

In a small bowl, mash blue cheese and buttermilk together with a fork until mixture resembles large-curd cottage cheese. Stir in sour cream, mayonnaise, vinegar, sugar, and garlic powder until well blended. Season to taste with salt and pepper. Dressing may be refrigerated in an air-tight container for up to two weeks.

Wilted Winter Greens & Black-Eyed Peas
From Eating Well in Season by Jesse Price


8 ounces dried black-eyed peas (1 1/3 cups)
¼ teaspoon salt
2 heads escarole, trimmed, washed and sliced  crosswise into ¼ inch-wide strips
1 tablespoon canola oil
2 ounces country ham or proscuitto, diced (about ½ cup)
2 tablespoons red-wine vinegar, or to taste
Freshly ground pepper, to taste

Soak peas overnight in cold water (Alternatively, place peas in a large saucepan, cover with water and bring to a simmer. Cook for 2 minutes. Remove from heat and let stand for 1 hour). Drain the peas, rinse well, and place in a large saucepan. Add water to cover and bring to a boil. Reduce heat to medium; cook, stirring occasionally, until tender, about 45 minutes. Add salt. Let sit, covered, for ½ hour, then drain and rinse. Heat oil in a large skillet over high heat. Add ham (or prosciutto) and cook, stirring, until lightly browned, about 2 minutes. Add the greens and cook, stirring constantly, until wilted, 5 to 10 minutes, adding more water if necessary. Add the reserved black-eyed peas and heat through. Season with vinegar, salt, and pepper and serve.

Parsnip Recipes

Parsnip Pancakes
From http://fooddownunder.com

1 pound parsnips
½ pound potatoes (use some from last week’s share)
1 small onion
1 large egg, beaten lightly
1/8 tsp Cayenne
1 pinch freshly grated nutmeg
1/8 teaspoon freshly ground pepper
½ teaspoon coarse salt
¼ cup all-purpose flour
¼ cup olive oil
1 tablespoon unsalted butter

Peel parsnips and potatoes. In a large saucepan bring 2 quarts salted water to a boil and add parsnips and potatoes. Return water to a boil and boil parsnips 3 minutes. Drain parsnips well. In a food processor fitted with coarse grating disk or on a hand grater grate parsnips and onion coarse. Line a baking sheet with wax. In a bowl stir together parsnips, onion, and egg and stir in spices and salt. Add flour, stirring until just combined, and form mixture into eight 1/2-inch-thick cakes (each about 3 inches in diameter), transferring them as formed to prepared baking sheet. In a large heavy skillet heat oil and butter over moderately high heat until foam subsides and saute pancakes in 2 batches until golden, about 5 minutes on each side, transferring them cooked to paper towels to drain. Pancakes may be kept warm 15 minutes in a 200 degree oven. Yields 8 pancakes.

Parsnip Galette with Greens
From Local Flavors by Deborah Madison

1/2 pound (2 or 3) parsnips
sea salt and freshly ground pepper
4 cups chopped kale leaves and/or beet greens
2 eggs
1 tablespoon all-purpose flour
1/4 cup freshly grated pecorino Romano or Parmesan cheese
2 tablespoons unsalted butter
1/2 cup chopped fresh sage
/12 cup finely chopped walnuts
sunflower or olive oil for frying

Heat a large pot of water for the greens. White it’s heating peel the parsnips, then grate them lightly, stopping when you get to the core, which is visible. You should have about 2 cups. Set aside. When the water comes to a boil, add salt, plunge in the greens, and cook until tender, about 5 minutes. Taste to be sure. Drain, press out much of the moisture, then chop coarsely. Beat the eggs, then whisk in the flour and 1 teaspoon salt. Stir in the parsnips, greens, and cheese. Season with pepper. Melt the butter in an 8-inch nonstick skillet. Add the sage and walnuts and cook stirring frequently, until they smell toasty and good, after just a few minutes. Add them to the parsnip mixture. Wipe out the skillet and add enough oil to coat lightly. When hot, add the parsnip mixture and pat it evenly into the pan. Reduce the heat to medium-low and cook until golden, about 5 minutes. Slide the galette onto a plate, place the skillet over it, and grasping both plate and skillet, flip them over. Cook the second side until golden and crisp, then slide the galette onto a counter, cut into pieces, and serve.

Sweet Pepper Recipe

Roasted Red Pepper Spread
Adapted from Vegetarian Cooking for Everyone by Deborah Madison

2 red sweet peppers
2 small garlic cloves
2 tablespoons extra-virgin olive oil
Dash of red wine vinegar
Salt and freshly-ground black pepper

Preheat oven to 400F. Cut off the tops of the peppers and slice in half lengthwise. Remove seeds and pale membranes, and press down to flatten. Brush skin sides with oil and place skin side up on a baking sheet. Bake in preheated oven for 10 to 20 minutes, until skins are wrinkled. Remove peppers from oven and stack on top of each other, allowing to steam for 15 minutes. Rub off skins using your hands or a paper towel. Place peppers, garlic, cashews/pumpkin seeds (if using) and oil in a blender and puree. Season to taste with vinegar, salt, and pepper. Makes about 1 cup.

Categories : Blogroll, CSA Newsletter, Farm News & Updates, Recipe
« Previous Page
Next Page »

Recent Posts

  • CSA Week #22: October 31st & November 2nd
  • CSA Week #21: October 24th & 26th
  • CSA Week #20: October 17th & 19th
  • CSA Week #19: October 10th & 12th
  • CSA Week #18: October 3rd & 5th

Archives

Sauvie Island Organics | © 2025 All Rights Reserved
iThemes Builder by iThemes | Powered by WordPress | Site by LRP