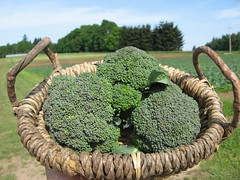
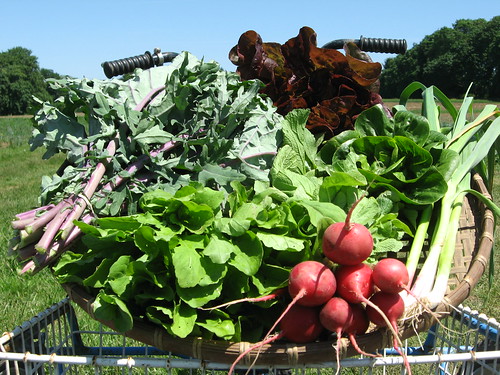
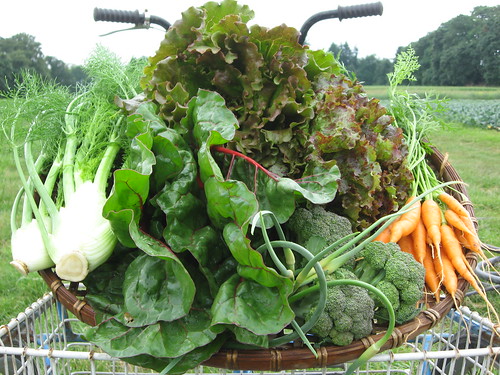
Image

Archive for Blogroll – Page 18

CSA News: Week 5- June 16 to June 22

Posted by sio@dmin on
 June 16, 2009

This Week’s Share

  • Broccoli
  • Carrots
  • Chard
  • Fennel
  • Garlic Scapes
  • Lettuce

Recipes


Fennel Recipes

Pasta with Fennel and Chard
Adapted from Riverland Farm in Sunderland MA, www.riverlandfarm.com

Note: Sweet fennel pairs nicely with bitter greens
Ingredients

1/2 cup olive oil
1 onion, minced
1 medium fennel bulb fronds removed and set aside, halved and thinly sliced
salt and pepper
2 tablespoons balsamic vinegar
1 lb spaghetti
1 bunch chard or (other cooking green), washed and chopped
1 cup grated parmesan cheese

Heat oil in a large braising pan or skillet with a cover. Add onion; sauté over medium heat until softened, about 5 minutes. Stir in fennel; sauté until golden, about 10 minutes. Add 1/2 cup water and season to taste with salt and pepper. Cover and simmer over medium-low heat until fennel is tender, about 8 minutes longer. Stir in vinegar; simmer to blend flavors, 1 minute longer. Season to taste. Meanwhile, bring 4 quarts water to boil in large pot. Add 1 tablespoon salt and the pasta; return to boil. Add the chopped chard to boiling pasta and continue to cook until pasta is al dente, about 7 minutes. Drain pasta and greens, then toss with fennel mixture and cheese. Transfer portions to warm pasta bowls. Garnish with reserved minced fennel fronds. Serve immediately with more cheese passed separately.

Fennel, Mushroom and Parmesan Cheese Salad
Adapted from The Kitchen Garden Cookbook by Sylvia Thompson

Note: You can prepare the dressing an hour or two in advance, but the salad ingredients won’t keep pristine for more than half an hour.

For Dressing:
1/3 cup mild olive oil
2 tablespoons fresh lemon juice
1 tablespoons finely packed fennel leaves, finely chopped
salt & freshly ground white pepper to taste
a tiny pinch of nutmeg

For Salad:
2  fennel bulbs, sliced paper-thin
1 oz. Parmesan cheese, shaved paper-thin
4 plump mushrooms, about 1 oz each, sliced paper-thin
freshly ground white pepper to taste

Use a fork to blend the dressing ingredients in a small bowl.  Taste for seasoning.  Cover and keep in a cool place. Combine the thin sliced fennel and cheese in a mixing bowl.  Beat the dressing to blend it and add 1/4 cup to the bowl.  Blend carefully with your hands – the cheese tends to sink to the bottom, and you don’t want to end up with just crumbles. Spread a handful of this mixture on 4 salad plates, filling the plates.  Heap the mushroom slices lightly over the fennel, leaving a curly border of the fennel.  Beat the dressing again and spoon 1 Tbsp. over the mushrooms on each plate.  Grind pepper over the salads and serve at once as a separate course with bread.

Chard Recipes

Swiss Chard with Raisins and Pine Nuts
Adapted from Food to Live By, by Myra Goodman

1 bunch Swiss chard
2 tablespoons olive oil
3 tablespoons garlic scapes, minced
grated zest of 1 lemon
1/4 cup raisins (golden raisins have a nice flavor, but any kind will do)
1/2 cup toasted pine nuts
coarse salt and freshly ground black pepper

Rinse the chard and cut the ribs off the leaves. Cut the ribs into 1/2 inch dice and set aside. Stack the leaves and cut them into 1/2 inch strips. Set the leaves aside separately. Heat olive oil over medium heat in large, heavy pot or large, deep skillet with a tight fitting lid. Add the garlic scapes and chard ribs and cook, uncovered, until soft, about 5 minutes. Add the chard leaves and cook, stirring frequently, about 1 minute. Add 2 tablespoons water, most of the lemon zest, and the raisins. Cover the pot and cook, stirring occasionally, until the chard is tender and the water has almost evaporated, 4 to 8 minutes. If the water evaporates before the chard is tender, add an additional splash of water. Remove the pot from the heat. Stir in the pine nuts, and season the chard with salt and pepper to taste. Serve immediately garnished with remaining lemon zest.


Pasta with Fennel and Chard

(see above in Fennel Recipes)

Carrot Recipes

Carrot Broccoli Salad
Adapted from allrecipes.com

2 cups fresh broccoli florets
1 cup shredded carrot
1/2 cup sunflower kernels
1/2 cup dried cranberries
1/2 cup coleslaw dressing (recipe below, or you can purchase at the store)

In a small bowl combine all ingredients and mix well. Serve or refrigerate.

Basic Coleslaw Dressing:

Note: This is just a good basic dressing, but you can spice it up however you wish.
Mix it at least 24 hours ahead of time and refrigerate.

1/2 cup mayonnaise
2 tablespoons cider vinegar
1 teaspoon sugar (more or less depending on personal taste)
2 tablespoons milk
1 tablespoon celery seed

Mix all together, preferably in a glass container. Stir and taste a few times in 24 hours of time it is sitting.

Farmer in Training (FIT) Spotlight: Katie

Q: What fruit of vegetalbe would you be and why? A: Cherry, because theyre so sweet.

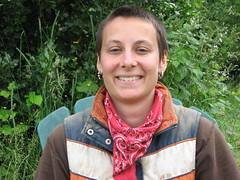
After finishing her undergraduate degree in Landscape Architecture at the University of Oregon and working with the Urban Farm Program on the U of O campus, Katie went to Arco Santi, an alternative and sustainable living community in the high desert of Arizona, earning her Permaculture Certificate. Katie then returned to Portland and worked as the Youth Educator Coordinator for the Sauvie Island Center. For two years she helped educate first through fifth graders about where their food comes from. During this time she also worked for Pistil’s Nursery. Despite her love for Sauvie Island and the Northwest, the world abroad was calling her, and Thailand is where Katie ended up. In Thailand she had the opportunity to farm, learn seed-saving methods, participate in natural building projects and gain overall skills in rural self-sufficiency. After Thailand Katie made her way back to Portland and decided it was time to gain experience in production farming and learn what it really means to have 400+ people rely on you to bring them their food each week. So far her favorite jobs on the farm are planting tomatoes and making compost piles. She enjoys both because of the way they embody the cyclical nature of life and the ability to experience the process from beginning to end.

Sauvie Island Center Summer Celebration


Sauvie Island Organics is a proud partner of the Sauvie Island Center. Using our farm fields for their field trips, The Sauvie Island Center serves elementary school youth of Portland by providing hands-on
education about food, farming and the land.


On July 26th from 4:30-7:30 the Sauvie Island Center  will host a Summer Celebration at Howell Territorial Park (just adjacent to Sauvie Island Organics).  Come see the farm, experience educational programs, and enjoy live music on the grass.


4:30-5:30 pm Field trips in action. Children’s activities.
5:45 pm Welcome/Introduction of Center’s work
6:00-7:30 pm Picnic, music, dessert
7:30 pm Evening ends


This event is free of charge but donations to the Sauvie Island Center will be accepted.


You bring: friends and family, a picnic supper, a blanket, your checkbook.
Sauvie Island Center will provide: lemonade and dessert, live music, friendly tour guides.


RSVPs appreciated to info@sauvieislandcenter.org or (503) 231-2757.


Categories : Blogroll, CSA Newsletter, Farm News & Updates, Recipe

CSA News: Week 4- June 9 to June15, 2009

Posted by sio@dmin on
 June 8, 2009

This Week’s Share

  • Dill
  • Fuyo Shomi
  • Garlic Scapes
  • Kale
  • Lettuce
  • Spring Onions, Walla Walla Sweets
  • Turnips, Hakurei


On Rotation:

  • Broccoli

Meet Our Farmer In Training Crew

Left to Right: Jeramy, Melissa, Carol, Caitlyn, Katie, Kristin, Justin, and Meryl


The Farmer in Training (FIT) Program at SIO is for individuals with a serious interest in gaining the skills necessary to farm. The program provides each participant with the opportunity to spend a season working and learning on SIO’s well-established 16-acre vegetable farm. The majority of the educational component is based on learning from the experience of working, but the FIT participants also attend monthly workshops covering crop planning, soils and fertility, irrigation, beneficial insects and pests, farm equipment, and business planning and marketing.

This season we have 8 enthusiastic, unique, and energetic Farmers In Training. They started here with us the first week of May and will be here through October seeding, planting, harvesting, weeding, washing in the barn, moving irrigation pipe, and taking part in all the day-to-day work that allows SIO to provide you with your weekly farm share. Throughout the season we will do individual spotlights of each of the FIT participants so you can get a closer look at all the wonderful and hard working people that help grow your food.

Recipes


Kale Recipes

Farm Fresh Kale Salad with Pine Nuts and Raisins
Recipe adapted from The Oregonian: FOODay

Note: This recipe yields ¼ cup dressing and can be prepared 1 day ahead; cover and refrigerate. Bring to room temperature 30 minutes before using.

Dressing:

2 tablespoons olive oil
1 tablespoon lemon juice
2 teaspoons maple syrup
1 teaspoon Dijon mustard
½ teaspoon kosher salt
½ teaspoon (or less) crushed red pepper flakes
¼ teaspoon freshly ground black pepper

Salad:

½ bunch kale
¼ golden raisins (other raisins or dried cranberries also work)
¼ cup pine nuts, toasted

Whisk together olive oil, lemon juice, syrup, mustard, salt, red pepper flakes and black pepper (set aside, or refrigerate if making ahead of time).

To toast the pine nuts place in a heavy dark skillet over medium heat and cook, stirring until light brown (4-5 minutes or less). Watch carefully, as they burn easily. Once toasted set aside.

Remove and discard the stems and center veins from the kale leaves. Then cut the leaves crosswise into ½-inch-wide strips to yield 6 well-packed cups of kale. Place the dressing in a salad bowl and whisk well. Add the kale and toss to coat greens thoroughly with dressing. Garnish salad with raisins and pine nuts.

Kale Chips

Note: This recipe is back by popular demand, so if you are an already seasoned kale chip lover spread the word to the newbies that it is definitely worth a try, especially if you have kale skeptic children in the house.

Kale (as much or as little as you like)
1-2 tablespoons olive oil
salt, to taste,
pepper, to taste (opitional)

Wash kale and remove center stems. Tear kale into roughly chip size pieces. Toss with olive oil and salt. Place kale ‘chips’ in a single layer on a baking sheet and put in a hot oven, 400˚-450˚F. Bake watching closely, you may have to turn a few chips to make crisp on each side…Voila, Salty Kale chip snacks!

Spring Onions Recipe

Grilled Spring Onions . . . Salad
Adapted from The Oregonian: FOODay

Note: These grilled spring onions are delicious as a side dish, but also can be used in fresh salad where they will add some punch and crunch to the mix.

4 tablespoons olive oil, plus more for oiling grill grates
1-2 sweet spring onions (as a side dish halve two onions, for the salad option cut one onion through the root end into 8 wedges.
Coarse salt and freshly ground black pepper
1-2 teaspoons soy sauce (tamari), red wine or balsamic vinegar (for side dish option)

Additions for Salad Option:

2 tablespoons lemon juice (fresh is always better)
1 head lettuce, chopped or torn into salad-sized pieces
2 garlic scapes, minced
2 sprigs fresh dill, chopped
4 ounces soft goat cheese, crumbled

For Grilled Onions:

When grilling onions keeping a bit of the root end and a good portion of the green tops attached prevents the onion layers from falling apart. Heat grill to medium. Lightly oil grill grates. In a small bowl, gently toss the cut onion with 1 tablespoon oil (and soy sauce or vinegar for side dish option). Season with salt and pepper. Grill onion halves or wedges, turning occasionally until soft, 15-20 minutes.

For Salad:

Grill onions as directed above. In a large bowl, whisk together lemon juice, remaining 3 tablespoons oil, minced garlic scapes, and chopped dill. Season with salt and pepper. Add lettuce and toss to coat. Serve topped with grilled onion wedges and cheese.

Dill Recipe

Soft Herb Roll (for Busy Cooks)
Recipe adapted from www.bigoven.com

Note: These rolls are so good you could eat a dozen! So if you are having company double the recipe.

1 package active dry yeast (about 1 tbsp.)
3 tablespoons sugar
1 teaspoon table salt
1-2 tablespoon fresh dill, minced
1 tablespoon fresh rosemary, minced
1 tablespoon fresh chives, minced
1 tablespoon garlic scapes, minced (optional)
1 tablespoon melted butter
1 large egg (for dough)
1 egg, beaten (for brushing rolls before baking)
1 cup milk or half-and-half
3½  cups all-purpose flour
1 tablespoon coarse salt

In a large bowl sprinkle yeast over ¼ cup cool (70°) water. Let stand until dissolved 5 minutes. Stir in sugar, table salt, herbs, butter, whole egg, and milk; add 3¼ cups flour and stir to moisten. Knead dough on a lightly floured board until elastic and not sticky) 15 minutes; add flour as needed to prevent sticking. Shape into 12 equal size balls; place in a well-buttered 9 by 13 inch pan. Let dough rise in a warm place until doubled (45 to 60 minutes). Meanwhile, preheat oven to 350°. Brush rolls with beaten egg and sprinkle with coarse salt. Bake until deep golden, 25 to 30 minutes.

Fuyo Shomi Recipe

Radiant Fuyo Shomi
Adapted from Vegetable Love by Barbara Kafka

1 tablespoon canola oil
2 tablespoons turmeric
1 tablespoon coarse salt
2 heads fuyo shomi, halved lengthwise
1 can coconut milk, plus enough water to make 2 cups liquid
1 tablespoon fresh lime juice or 4 lime wedges (optional)

In an 8- or 9-inch saucepan, heat the oil over low heat. Stir in the turmeric and salt and cook for about 1 minute. Add the pieces of fuyo shomi, laying them on their sides and cramming them in so as to make them as compact as possible. Pour in coconut-water mixture, cover the pan and bring to a boil over medium heat. Cook for 6 minutes. The fuyo shomi should sink into the sauce and cook evenly. If some of the fuyo shomi is not covered with liquid, turn the pieces. Re-cover and cook for 6 minutes. Stir in the lime juice, if using (or serve hot with lime wedges if desired). This is also good tepid.

Categories : Blogroll, CSA Newsletter, Farm News & Updates, Recipe

CSA News: Week 3- June 2 to June 8, 2009

Posted by sio@dmin on
 June 2, 2009

This Week’s Share

  • Braising Mix
  • Green Garlic
  • Lettuce
  • Mizuna
  • Radishes or Turnips
  • Spinach


On Rotation

  • Broccoli

Recipes


Braising Mix Recipes

Our braising mix is one of our signature recipes at Sauvie Island Organics, arriving in your share during the cooler months of spring and fall when the many varieties of kale, mustard, and Asian chois that make up this mix thrive. You will enjoy green and red mustards, red choi, white steamed pac choi, yukina savoy (tatsoi) and Red Russian kale in this flavorful mix of “greens”.

Although all of these leafy greens can be eaten raw, as the name suggests, they are perhaps best lightly braised, steamed, or stir-fried. The recipes below offer ways to use them outside of a standard stir-fry or braised side dish. A quick and easy preparation is to sautee your green garlic until soft, adding in any other vegetables you want to use at the same time as the green garlic. Throw in the braising mix in the last few minutes of cooking with some soy sauce and rice vinegar and any other seasoning that you choose.

White Cheddar Polenta with Braised Greens, Spring Morels, and Pancetta
Recipe from Emily Thomson at Full Circle Farm, http://www.fullcirclefarm.com

½ pound fresh wild morels (or other seasonal mushroom), cleaned and sliced in half
3-4 tablespoons olive oil
1-2 stems green garlic, thinly sliced
¼ pound pancetta (Italian cured bacon), sliced
4 cups water
1½ teaspoons salt
1 cup polenta (coarse cornmeal)
¾ cup grated white Cheddar cheese
¼ cup butter
1 pound braising mix, washed and torn into bite size pieces
Salt and pepper, to taste
¼ cup freshly grated Parmiggiano-Reggiano cheese

Combine 4 cups water and 1½ teaspoons salt in large saucepan. Bring to boil. Gradually whisk in polenta. Reduce heat to low. Cook until polenta thickens and begins to pull away from sides of pan, whisking often, about 25 minutes. Whisk in the grated Cheddar and the butter. Adjust seasoning if necessary. Turn off heat, cover and set aside.

Meanwhile, rinse the braising mix in cold water and set in a colander. In a large, heavy pan, heat the olive oil and sauté the green garlic and pancetta until lightly colored. Toss in the morels and cook for 5-6 minutes. Turn heat to high and add the washed greens; the water that clings to them will create the braising liquid. Toss with tongs until slightly wilted, then turn heat to low, cover, and braise for 5-6 minutes.

Stir the polenta and spoon onto plates. Top with the greens and morel mixture and scatter the rest of the grated cheese over the top. Finish the dish with freshly ground pepper and a drizzle of olive oil.

Mess o’ Greens Salad with Warm Pecan Dressing
Adapted from www.seasonalchef.com

1 lb braising mix
2 tablespoons balsamic vinegar
2 teaspoons honey
1 tablespoon Dijon mustard
2 teaspoons oil (vegetable, olive, peanut, etc.)
½ cup pecans, roughly chopped or broken

Wash greens, dry thoroughly, and remove and discard the long stems. Tear the greens into salad-size pieces and place in a large bowl. In a small bowl, combine the vinegar, honey and mustard. Set aside. Heat the oil in a small skillet until hot but not smoking. Add the vinegar mixture and pecans and cook, stirring regularly, for 2 to 3 minutes. Pour over the greens and serve at once.

Spinach Recipes

Spinach and Lentil Salad with Balsamic Vinaigrette
Recipe adapted from www.1001recipe.com

2 cups spinach
3-5 radishes or turnips, grated (optional)
½ cup mushrooms, sliced
¼ cup lentils
1 tablespoon balsamic vinegar
2 tablespoons olive oil
Salt, to taste
Pepper, to taste

Cook lentils with some salt in boiling water for 20 minutes, or until done. Rinse with cold water. To make the vinaigrette, whisk thoroughly olive oil and balsamic vinegar with some salt and pepper, or use vinaigrette recipe from below. Combine spinach, grated radish or turnip, chopped mushrooms, and cooked lentils. Pour the vinaigrette on and toss before serving.

Spinach and Mizuna Salad with Baked Goat Cheese Rounds
Recipe adapted from the Culinary School of the Rockies Staff

2 cups spinach
½ bunch mizuna
8-ounce goat cheese log
Vinaigrette (recipe below) or bottled Italian dressing
½ cup breadcrumbs

Preheat oven to 400 degrees. Rinse and dry mizuna and spinach and arrange on a platter or place in a salad bowl. Cut goat cheese log into eight ½ inch slices. Lightly brush goat cheese slices with some of the vinaigrette or salad dressing. Place breadcrumbs on a plate and thoroughly coat goat cheese slices in breadcrumbs. Place on a baking sheet and bake in oven for 10 minutes. Remove carefully from baking sheet. Place the baked goat cheese slices around the edges of the salad on the platter or on top of the salad in the bowl. Dress as desired and serve.

Note: Feel free to add whatever fresh sliced vegetables to the salad as you wish. Also try olives, fresh or roasted peppers, walnuts or almonds.

Basic Vinaigrette Recipe
Recipe adapted from the Culinary School of the Rockies Staff

Note: This recipe is given in terms of proportions so you can make as little or as much as you want.

3 parts acid such as vinegar or lemon juice.
1 part Dijon-style mustard
9 parts oil — vegetable (safflower, canola, etc.) or olive oils
Salt and freshly ground pepper, to taste

Whisk the acid, mustard, salt and pepper together until dissolved. Add the oil very slowly, by droplets, whisking continuously until emulsified.

Mizuna Recipes

Soba Noodle Salad with Mizuna
Recipe adapted from Dani Spies, www.danispies.com

2 cups mizuna leaves, washed, stemmed, and chopped
4-5 radishes or turnips, thinly sliced
2-4 scallions, thinly sliced (optional)
2 carrots, cut into diagonal slices (optional)
2 cups of cooked Soba noodles
2 stems green garlic, thinly sliced
1 tsp ground ginger
1 tablespoon of toasted sesame oil
2 tbsp low-sodium soy sauce
2 tbsp sesame seeds

Combine mizuna, radishes or turnips, green garlic, carrots, scallions and noodles in a large bowl. In a separate bowl, combine garlic, ginger, oil, and soy sauce. Whisk together and pour over noodles. Top with sesame seeds and enjoy. Serves 3.

Spinach and Mizuna Salad with Baked Goat Cheese Rounds
(see above in Spinach Recipes)

What can I put in my SIO Compost Bucket?


If you’re at one of the bulk pick-up sites you can participate in our compost bucket exchange. Take a clean bucket and bring it back the following week with whatever compost you generate that week.

Here are the basic guidelines for what can go in the buckets: Any vegetable material, including coffee grounds, citrus, etc., also egg shells, and small amounts of oils, fats, and dairy are fine. Just please no meat in your buckets. We don’t like plastic bags in the buckets; they’re hard to clean out. Please don’t put rubber bands or other non-degradable items in the bucket, we end up having to sift them out and throw them away.

The most important thing is that you don’t hold onto a bucket for more than a week (and try to keep it in a cool place, out of the sun, during the week). After a week they start to get pretty smelly and that means they’re running out of air. This makes the compost from them less valuable.

Categories : Blogroll, CSA Newsletter, Farm News & Updates, Recipe

CSA News: Week 2- May 26 to June 1, 2009

Posted by sio@dmin on
 May 26, 2009

This Week’s Share

  • Arugula
  • Green Garlic
  • Kale, Red Russian
  • Lettuce
  • Radishes, Cherry Belle
  • Tomato Plant, Cherry

Cherry Tomato Plants


Note: This week each share will recieve a cherry tomato plant.  If you are splitting a share you and your share partner(s) can decide which home it will go to.

Cherry tomatoes are wonderful snacks and great on salads. They are easy to grow and fun to pick in small quantities. However, they are very labor intensive to pick on a larger scale. For this reason we are giving you your own plant to enjoy. We concentrate on growing many different varieties of slicing, saucing and heirloom tomatoes, which you will see in your shares starting at the end of July.

Tomatoes appreciate full sun, and plenty of space to climb. Bury the plants deep so that only a little stem and the newest leaves are showing. Water them deeply. This will help to encourage a strong root system. They like a trellis to keep their leaves and fruit off the ground. Once established, tomatoes do not need to be watered more then once a week. Use about 5 gallons of water per plant. Tomatoes don’t like wet leaves so try to keep the leaves dry when you water.

If you do not have room to plant the tomato outside you can plant it in a five-gallon bucket with a drain hole. Keep it in a sunny space and remember to water frequently as container plants tend to dry out quickly.

Recipes


Radish Recipes

Beijing Radish Salad
From Marquita Farm in Watsonville, CA, www.marquita.com

1 bunch radishes
2 tablespoons rice or balsamic vinegar (or a combination)
1 tablespoon soy sauce
1 teaspoon sugar
2 teaspoons sesame oil
1 stem green garlic, finely chopped

Wash and julienne (cut into thin matchstick size sticks) radishes. You can use a mandolin to do the julienning if you have one, you can use a grater, or you can cut them into matchstick size pieces. Mix together the rest of the ingredients in small bowl and dress the radishes with the dressing.

Sauteed Radish and Arugula
Adapted from recipesource.com

4 tablespoons butter

1 bunch radishes, halved or quartered depending on size

2 cups arugula


Wash the radishes and arugula. Melt butter in a sauté pan, add radishes and cook over medium heat about 4 minutes. Transfer cooked radishes to a bowl. Add the arugula to the skillet and sauté 3 minutes, until wilted. Return the radishes to the skillet and toss together with the arugula, heat briefly. Serve hot.

Arugula Recipes

Arugula-Green Garlic Pesto Pasta

Adapted from the Seacoast Eat Local Blog, http://blog.seacoasteatlocal.org

2 cups arugula, washed

3-4 stalks green garlic, root removed

½ cup pine nuts (cashews, almonds, or walnuts also work)

4-6 oz. chevre, gorgonzola or other soft salty cheese

2 tablespoons parmesan cheese

2-3 tablespoons extra-virgin olive oil

1 lb. fresh pasta (found at all grocery stores in the pasta refrigerator case, or make your own if you know how)


Start a large pot of boiling water for pasta. Meanwhile, toast the pine nuts in a dry pan over medium low heat, tossing frequently until mostly golden brown. In a food processor or blender pulse the arugula and green garlic. Add pine nuts, olive oil, and cheese and process until there are no large chunks remaining. Boil pasta per package directions. Before draining, reserve 1 cup cooking liquid. Drain the pasta. Add about ¼ cup of the pasta cooking water to the pesto and pulse one last time. Toss pesto with pasta, adding additional cooking water if desired to achieve a more smooth consistency. Serves 4.

Note: You may also use this recipe as a general use pesto by not adding the additional pasta water at the end of the process. It’s great on sandwiches, in salad dressing, or any other use you may find for it. It will keep fresh covered in the refrigerator for 7-10 days, or freeze for up to 6 months (or freeze up to a year if no cheese is added).

Sauteed Radish and Arugula

(see recipe above in Radish Recipes)

Kale Recipe

Kale & Mushroom Risotto

Adapted from a recipe by Ben Watson at the Riverford Farm Shop in the United Kingdon, http://www.riverford.co.uk/

½ cup mushrooms, sliced (porcini, portobello, or any other kind that is in season at the market)

½ bunch kale, stems removed

½ bottle red wine

2-3 cups vegetable/chicken stock or broth

3 medium onions, finely chopped

2-3 stems green garlic (or 5 cloves garlic), finely chopped

1 tablespoon fennel seeds

2 strips bacon, coarsely chopped (optional)

1 ½ cups Arborio rice

2 tablespoons olive oil

balsamic vinegar, to taste

black pepper, to taste

1-2 cups parmesan cheese, grated (really you can use as much or a little as you like)

1-2 tablespoons butter


Soak the mushrooms in water. Coarsely chop the kale leaves and blanch for 7 minutes. Combine the red wine, the mushroom soaking water, and strengthen with stock/broth to make up to 5 cups total. Heat up the pot of liquid so it will already be hot when you start adding it to the rice.

While the liquid is heating add 2 tablespoons olive oil to a sauté pan and fry the finely chopped onions, green garlic, fennel seeds and chopped bacon for 5 minutes. Add the Arborio rice and stir until well coated. Turn down the heat and start adding the already heated liquid approximately ½ -1 cup at a time . Keep stirring and adding the liquid as it is absorbed by the rice.

After about 10 minutes add the kale and continue stirring and adding liquid as it is absorbed. After another 3-6 minutes add the mushrooms. When all the liquid is gone or the rice is cooked (whichever happens first) add a splash of balsamic vinegar and plenty of black pepper. Stir in the grated parmesan cheese and butter and serve. Serves 4.

Categories : Blogroll, CSA Newsletter, Farm News & Updates, Recipe

CSA News: Week 1- May 19 to May 25, 2009

Posted by sio@dmin on
 May 19, 2009

This Week’s Share

  • Lettuce
  • Asian Greens, Joi Choi
  • Green Garlic
  • Radishes
  • Turnips, Hakurei
  • Mizuna

On Rotation

  • Broccoli

Note: All CSA members will receive the same quantity of broccoli during the course of the season, although some pick-up sites may receive their first share of broccoli during Week 1 and some may receive their first share in Week 2. Throughout the season we distribute several of our crops on a rotation schedule because of how they mature for harvest.

Welcome

Welcome to the first week of the CSA season. Each week we will post a CSA Newsletter to the blog that includes a photo and a list of the share, 3-5 recipes that correspond to the share for the week, and any farm news or community updates. We hope you use the blog as a tool for connecting with the farm, finding new and creative ways to use your share, and looking ahead to what vegetables you will be receiving for the week. If you have any favorite recipes you want to share please email them to siorganics@aol.com and we will include them in the blog when appropriate. In the share list for most items you can click on the name and it will show you a photo and give you general information, cooking and storage tips, history, and any interesting field notes for that vegetable.  Thanks so much for joining us this season, we look forward to growing for you these next 30 weeks.

Recipes

Hakurei Turnip Recipes

These little gems are enjoyed both fresh and cooked. Sliced and mixed in with a lettuce and mizuna salad is a quick and tasty way to use them.

Fresh Greens Salad with Hakurei Turnips
From the Sauvie Island Organics Crew

1 head lettuce (may increase or decrease quantity depending on needs)
1 bunch mizuna (may increase or decrease quantity depending on needs)
2-3 Hakurei turnips, sliced
2 tablespoons sunflower seeds, toasted and chopped nuts (optional)
2-3 tablespoons of Asian Salad Dressing (recipe below) or dressing of your choice

Wash lettuce, mizuna, and turnips. Leave the mizuna whole, and tear or chop lettuce into smaller pieces and place in salad bowl. After slicing the Hakurei turnips place them in the salad bowl as well. Add seeds or nuts as desired, dress, and toss.


All-purpose Asian Salad Dressing/ Marinade

Adapted from Astray Recipes, www.astray.com

This dressing is great with fresh greens, sautéed greens, steamed vegetables, and cold meats as well as any other applications you may create for it.

2 tablespoons white vinegar
1½ tablespoons soy sauce
1 tablespoon plus 1 teaspoon sugar
1½ sesame oil
½ teaspoon fresh ginger, grated
1 tablespoon cilantro, chopped
a few drops of hot pepper oil (optional for those with aversions to spiciness)

Place all ingredients in a container for mixing. You may use a blender or food processor to mix to your desired consistency or shake vigorously in a liquid tight container.

Curried Hakurei Turnips
Adapted from The Veggie Project: Cooking Family-Friendly Meals with Local Produce, http://veggieproject.blogspot.com/2008/07/curried-hakurei-turnips_01.html

2 stems green garlic, chopped
2 tablespoons oil
5-6 Hakurei turnips, sliced thin
2 teaspoons curry powder
1 teaspoon salt
one lemon, cut into wedges

Sauté the chopped green garlic in the oil for a few minutes until translucent. Add the turnips, the curry powder and salt and cook until everything is tender, about 10 minutes. Squeeze some lemon juice over the dish before serving and serve with extra lemon wedges.

Joi Choi Recipe

Joi Choi, Radish, and Broccoli Stir-Fry

Adapted from Aspargus to Zucchini: A Guide to Farm Fresh Produce by the Madison Area Community Supported Agriculture Coalition

2 tablespoons peanut oil
¼ -½ teaspoon hot pepper oil (optional, but good addition if you like spiciness)
1 bunch radishes, topped and quartered
2 stems green garlic, chopped
2 cups broccoli florets and stems (chopped)
1 three-inch piece of ginger, grated
pinch of salt and pepper
2 heads joi choi, shredded
3 tablespoons rice wine vinegar (or 3 tablespoons dry sherry) with 1 teaspoon sugar mixed in
1-2 tablespoons soy sauce
1-2 cups rice, cooked (optional)

If you are serving this with rice get the rice started before making the stir-fry. Heat oil in wok or deep skillet. Stir-fry radishes, green garlic, broccoli, ginger, salt and pepper until radishes and broccoli softens slightly, 3-4 minutes. Add joi choi and rice wine vinegar mixture; cook 2 minutes. Sprinkle with soy sauce. Serve immediately over rice. Serves 4 if paired with rice.

Green Garlic Recipe

Note: Green garlic is featured in some of the other recipes above, but the recipe below calls for the entire 4 stems included in your share for this week.

Green Garlic Pesto
Adapted from www.culinate.com

4 stems green garlic, roots removed
1 cup raw walnuts, or other nuts you have available
1 to 2 oz. hard, salty cheese (romano, ricotta salata, parmesan, etc.)
2/3 cup extra virgin olive oil
½ teaspoon salt (sea salt and kosher have best flavor)

Cut root ends of green garlic and discard. Cut into 1-inch lengths, discarding the tougher green portions on top. In a saucepan over medium heat toast walnuts by cooking for several minutes, stirring constantly until they start browning. Place nuts and green garlic into a food processor or blender and pulse/process on low until roughly chopped. Cut cheese into chunks, add to blender/processor, and process. In a steady stream while blender/processor is running, add olive oil until desired consistency is reached. Salt to taste and keep in an airtight container in the refrigerator until ready to use. Use with pasta, served over fish, spread on bread, or in whatever way pleases your pallet. If you have to much to use for one meal you can keep in a covered container in the fridge for 7-1o days, or freeze for up 6 months (will freeze up to a year with no cheese added).

Categories : Blogroll, CSA Newsletter, Farm News & Updates, Recipe
« Previous Page

Recent Posts

  • CSA Week #22: October 31st & November 2nd
  • CSA Week #21: October 24th & 26th
  • CSA Week #20: October 17th & 19th
  • CSA Week #19: October 10th & 12th
  • CSA Week #18: October 3rd & 5th

Archives

Sauvie Island Organics | © 2026 All Rights Reserved
iThemes Builder by iThemes | Powered by WordPress | Site by LRP