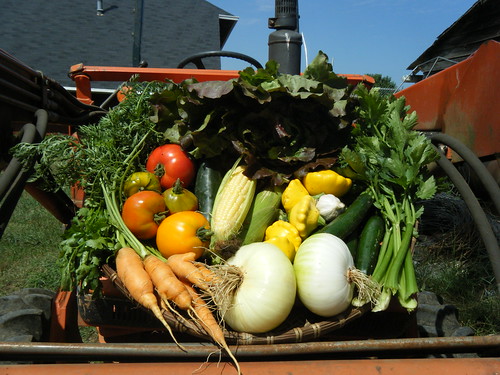
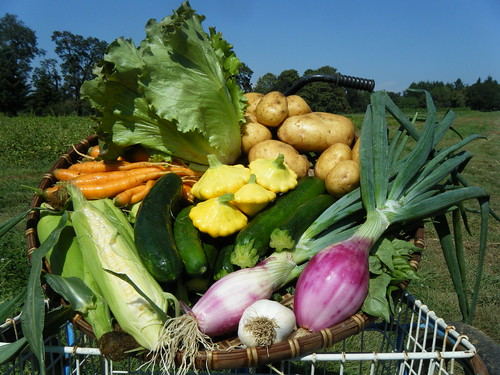
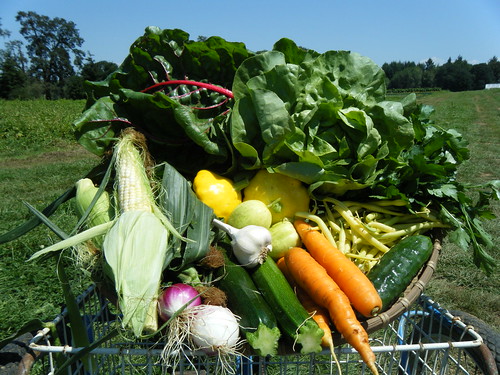
Image

Author Archive for sio@dmin – Page 6

CSA News: Week 18- September 15 to September 21

Posted by sio@dmin on
 September 15, 2009

This Week’ Share

  • Beans
  • Beets
  • Celery
  • Fennel
  • Garlic
  • Kale, Lacinato
  • Lettuce
  • Onions, Red Wing
  • Summer Squash
  • Tomatoes

On Rotation

  • Eggplant

Share Notes

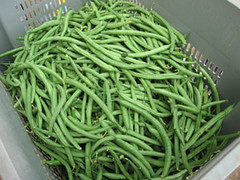
  • Beans: Staring in your shares this week you will start to see either Strike green beans or Dragons Tongue beans, which are green beans with beautiful reddish purple coloring.
  • Kale: Lacinato kale, also know as Dinosaur kale or cavolo nero in Italian is an black Italian kale variety with deep blue-green ovular leaves.

Recipes

Beet Recipes

Note: Make sure to look at last week’s Blog for a beet recipe from Lincoln Restaurant’s Jenn Louis in the Chef’s Corner.

Beets with Fennel
From www.comingfordinner.com
Note: You can make this and then let it cool, and when you’re getting ready to eat, put the heat back under it to warm it up again.

4-6 beets (depending on size)
2 fennel bulbs
1 onion
Juice from 1 lemon
1/3 cup white wine
2 tablespoons whole grain Dijon mustard
2 tablespoons olive oil
2 tablespoons butter
Salt
Black pepper

Bring a pot of water to a boil. Peel the beets and put into the boiling water. You’ll want to let them cook for about 15 – 20 minutes (when a knife easily goes into them). Once they’ve cooked, drain them and set them aside to cool. Cut your onion in half, and cut those halves into slices. Do the same with your fennel and your beets. Put your olive oil and butter into a medium stock pot and set it over medium heat. Add in your onion, fennel, salt, and pepper, and cook for 5 minutes. After 5 minutes, add in your white wine, mustard, and lemon juice. After another 5 minutes, add in your beets. Cook for another 5 minutes.

Roasted Beet Crostini
From Eating Well in Season by Jessie Price

Note: This is a tasty and colorful starter for entertaining or just fixing up for a pre-dinner delight. Note that you will end up with some left over cooked beets that you can you use in a side dish or salad, or any other way you please.

1 bunch beets with greens attached
16 ½-inch thick slices baguette, preferably whole-grain cut on the diagonal
2 tablespoons extra virgin olive oil, divided
6 cloves garlic, minced
1 tablespoon sherry vinegar or red-wine vinegar
2 tablespoons water
¼ teaspoons salt
4 ounces creamy goat cheese
¼ teaspoon freshly ground pepper

Preheat oven to 400˚F. Trim greens from beets, reserving stems and greens. Place the beets in a baking pan, cover with foil and roast until very tender when pierced with a knife, 45 minutes to 1½ hours depending on the size of the beets. Uncover and let cool. Reduce oven temperature to 350˚F. While the beets cool, arrange baguette slices in a single layer on a large baking sheet. Bake, turning the slices over once halfway through, until toasted but not browned, about 14 minutes. Thinly slice the beet green stems and finely chop the leaves; keep the stems and leaves separate. Heat 1 tablespoon olive oil in a large skillet over medium heat. Add the stems and cook, stirring occasionally, until tender, about 3 minutes. Add the remaining 1 tablespoon oil and garlic and cook, stirring, until fragrant, about 15 seconds. Add the greens, vinegar and water and cook, stirring occasionally, until greens are tender and liquid has evaporated, 4 to 5 minutes. Stir in salt and remove from heat. Peel the cooled beets and cut into 1-inch pieces. Place ¾ cup beet pieces, goat cheese and pepper in a food processor or blender and puree until smooth (reserve the remaining beets for another use). To assemble crostini, spread about 2 tablespoons beet-cheese spread on each slice of toasted baguette and top with sautéed greens. Makes 16 crostini.

Fennel Recipes

Greek Fennel Skillet
From Simply in Season by Mary Beth Lind and Cathleen Hockman Wert

Note: Serve plain as a side dish or make it a meal by serving this savory sauté over pasta or polenta. It can also top Italian bread which has been brushed with olive oil and toasted.

2 cloves garlic, minced
2 fennel bulbs, julienned
1 large onion, julienned
1 tablespoon lemon juice
3 medium tomatoes, chopped
Salt and pepper, to taste
1½ cups feta cheese, crumbled or Mozzarella, shredded
½ cup black olives, optional

In a medium skillet sauté minced garlic in 2 tablespoons olive oil for 1 minute. Add and the fennel and onions and sauté until tender, 5 to 10 minutes. Add the lemon juice and tomatoes and cook over medium heat until part of the liquid evaporates, 10 minutes. Add salt and pepper to taste. Stir in the cheese and black olives and serve.

Beets with Fennel

(see above in Beet Recipes)

Kale Recipe

Summer Lasagna
Adapted from the Rolling Prairie Cookbook by Nancy O’ Connor

1 tablespoon olive oil
2 to 4 cloves garlic, minced or pressed
1 medium onion, chopped
2 smaller zucchini or patty pan squash, chopped
1 tablespoon fresh basil (or 1 teaspoon dried)
1 quart pasta sauce (homemade recipe below in Tomato Recipes, or already prepared works too)
9 lasagna noodles (approximately ½ pound)
1 bunch Lacinato kale
1½ cups low-fat Ricotta or cottage cheese
1 beaten egg white
¼ teaspoon salt
freshly ground black pepper
½ pound Mozzarella, grated
½ cup grated Parmesan

Heat oil in a large saucepan or deep skillet over medium heat and sauté garlic, onion, and summer squash until just barely tender. Stir in basil and pasta sauce and allow to simmer over low heat while you prepare the rest of the lasagna. Cook lasagna noodles in boiling water until just barely tender. Drain and rinse with cold water (I like to lay my cooked noodles out on the counter so they won’t stick together). Wash kale well, trim the tough stems, and steam or boil whole leaves until they are just tender. Drain leaves well, squeeze out excess water, and chop. Mix Ricotta/cottage cheese and egg white together thoroughly. Season with salt and pepper. Blend in kale. Now you are ready to assemble. Preheat oven to 350˚F. Place ¼ cup of the sauce in the bottom of a 9 x 13-inch baking pan. Line the bottom of the pan with 3 of the cooked lasagna noodles. Spread half of the Ricotta/cottage cheese mixture on the top of the noodles. Cover this with half of the Mozzarella. Top this with a third of the sauce, spreading as evenly as possible. Repeat with 3 more noodles, the remaining Ricotta/cottage cheese, the remaining Mozzarella, approximately half of the sauce you have left, and cover all this with the last 3 noodles. You should have just enough sauce to cover the top of the noodles. Sprinkle with Parmesan. Cover the pan with foil and bake for 40 minutes. Remove the foil and bake for another 10 to 15 minutes, uncovered. Remove from the oven and allow to sit several minutes before serving. Serves 8.

Tomato Recipe

Note: Make sure to look at last week’s Blog for a tomato recipe from Lincoln Restaurant’s Jenn Louis in the Chef’s Corner

Basic Tomato Sauce
Adapted from The San Francisco Chronicle, www.sfgate.com

Note: If you are making this for use in the Summer Lasagna recipe included above you can make the sauce up to 5 days ahead of time and store in the refrigerator until you are ready to use in the lasagna.  If you are using Roma-type tomatoes (San Marzano Paste Tomatoes from your share), the cooking time will be less. Use on pizza, polenta, pasta, pan-seared steak or any time tomato sauce is required.

2 tablespoons extra-virgin olive oil
¼ cup minced onion
3 stalks celery with leaves, chopped
2 cloves garlic, minced
5 pounds medium to large juicy tomatoes, any variety, cored, peeled (optional) and coarsely chopped
1 tablespoon minced fresh thyme
1 tablespoon minced fresh rosemary
2 bay leaves, fresh if possible
Kosher or sea salt and pepper, to taste

In a large pot, heat the olive oil over medium high heat. When warm, add the onions celery and cook until translucent, 2 to 3 minutes. Add the garlic and cook another minute, until softened. Add the tomatoes, increase the heat to high and bring to a boil, stirring occasionally. Add the thyme, rosemary and bay leaves. Reduce the heat to medium and cook, stirring from time to time, until the sauce has thickened so much you can almost stand a wooden spoon upright in it, about 1½ hours. You will hear the bubbling as it thickens, indicating it is almost ready. To finish, reduce the heat to low, and simmer, stirring until the desired thickness. Be careful not to burn the sauce. Taste, and add salt and pepper as desired. Puree or leave chunky, whichever you prefer. Cool and store up to 5 days in the refrigerator, or freeze. Makes 1½  quarts.

Greek Fennel Skillet
(see above in Fennel Recipes)

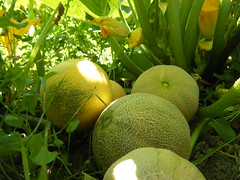
FIT Spotlight: Justin

Justin moved to Portland to be closer to family and found that he loved Portland, especially the outdoors. After spending a year doing salmon habitat restoration through AmeriCorps, and becoming an enthusiastic gardener in his free time, Justin wanted to learn more about sustainable food systems and local agriculture. Justin found both the community component of the SIO FIT Program and the accessible location of Sauvie Island appealing, and joined the crew in May. Out at the farm Justin enjoys harvesting melons because, “the smell in the field is amazing and you bring back so much bounty in one trip.” Since working at the farm Justin feels he better understands the, ‘”full value of farming,” and all of the hard work it takes to get to the harvesting of the crops. He enjoys positive work environment, especially working with the crew and “having fresh food at your fingertips!”

Categories : Blogroll, CSA Newsletter, Farm News & Updates, Recipe

CSA News: Week 17- September 8 to September 14

Posted by sio@dmin on
 September 8, 2009

This Week’s Share

  • Basil
  • Beans
  • Carrots
  • Chard
  • Corn
  • Lettuce, Mixed varieties from Seeds of Change Trial
  • Garlic
  • Onions, Copra
  • Summer Squash
  • Tomatoes


On Rotation

  • Cucumbers
  • Eggplant
  • Melons

Share Notes

  • Basil: This is your second large distribution of basil and is great used fresh in soups, sauces, salads, sandwiches, or of course to make a delicious batch of pesto (recipe below).
  • Corn: Out at the farm we are always at the whims of the weather, and unfortunately the weekend’s high winds and record rainfall completely knocked down our final corn planting, making this your final week of corn. This final planting of Silver Queen corn was exceptionally tall and heavy with maturing ears, making it more susceptible to lodging.
  • Cucumbers: The height of the cucumber season is passed and cucumbers are now on their last round of rotation. Enjoy them while they last, as they will be rotating through your shares for the next couple weeks.
  • Lettuce: This week you will receive two heads of lettuce from the Seeds of Change trial beds. This season we worked with Seeds of Change (an organic seed company) to plant over 96 lettuce varieties, many of which are unique or rare and not yet available for seed in the United States. This trial aimed to identify which of these varieties do best in our climate.
  • Melons: A this point in the season you have received several distributions of melons in your shares. The height of the melon season is passed and they are now on their last round of harvest. Enjoy them while they last, as they will be in your shares on rotation for the next couple weeks.

Chef’s Corner: September


In addition to the crops SIO grows for our 400 member CSA program, we also grown and sell produce to over 40 different Portland area restaurants and kitchens, and this season at SIO we decided to partner with some of those restaurants for some culinary inspiration. We have been picking the brains of some of the areas most talented chefs and restaurant owners, and have asked them to provide us with recipes and general cooking techniques based on the crops that you receive in your shares. Out at the farm we crop plan separately for both our CSA program and restaurant sales, so you don’t have to worry that part of your share may be going the restaurant down the street. For the month of September our featured restaurant is Lincoln, located in North Portland at  3808 N. Williams.

By Jenn Louis, Chef and Owner at Lincoln Restaurant and Culinary Artistry and Commercial


I have been working with SIO products since my days at Wildwood (1998 and 1999). I have worked a few Plate and Pitchfork dinners at SIO and really love that we are working with your produce at Lincoln and Culinary Artistry! Here are some recipes I came up with, I hope they work well for the home cook.

Salad

Lettuce Salad with Plums, Pine Nuts and Balsamic Vinaigrette

1 large head lettuce, cleaned and leaves separated.
2 Italian plums (at your local farmers market, or possibly in nearby tree in your neighborhood)
2 tablespoons red onion, thinly sliced
3 tablespoons toasted pine nuts
3 tablespoons olive oil
2 tablespoons good balsamic vinegar
freshly shaved pecorino (a hard salty Italian cheese made from sheep’s milk)

Drizzle olive oil and balsamic vinegar into bowl and toss with lettuce, slices of plum, sliced onion, and toasted pine nuts. Season with kosher or sea salt and black pepper and shave pecorino over salad.

Tomatoes

Tomato Conserva

1/4 cup sugar
1/4 cup sherry vinegar
4-6 tomatoes, cut into quarters or sixths and most of juice drained
2 tablespoons minced red onion
1 medium clove garlic, minced
1 tablespoon yellow mustard seeds
3 tablespoons basil, sliced in ribbons
Salt and black pepper

Caramelize sugar, dry, in heavy-bottomed pan. When sugar turns golden, add vinegar and tomatoes and allow tomatoes to wilt and pop. Add onion, mustard seeds and garlic and cook for a couple minutes to allow flavors to marry. Cool conserva. Add basil and season with salt and pepper. Serve on grilled bread with goat cheese or ricotta cheese.

Beets

Beets with Blue Cheese and Hazelnuts

1 pound beets, (small- about golf ball size, work best)
2 tablespoons olive oil
2 tablespoons water
salt and pepper
2-4 oz. blue cheese
1/4 to ½ cup hazelnuts
sea salt
olive oil

Toss beets with olive oil and water, season with salt and pepper. Put into oven-proof roasting dish and cover with foil. Roast at 350 degrees, about 45 minutes, or until beets become soft, or able to be pierced with a skewer. Cool beets and peel skin off. Halve beets and lay on a plate. Scatter crumbled blue cheese and hazelnuts over beets. Drizzle olive oil and scatter sea salt to taste over beets, nuts and cheese.

Leeks

Soft Scrambled Eggs with Leeks on Toast


2 leeks, white part only
2 tablespoons butter
2 eggs
2 tablespoons cream
buttered warm toast, baguette or brioche work well here
1 tablespoon chopped parsley
salt and pepper

Slice leeks into half-moons, about 1/4-inch pieces. Melt butter in pan over medium heat and add leeks. Cook leeks until they are wilted and cooked through. In a small bowl, whisk eggs with cream. Pour over leeks and stir with a spatula until the eggs are softly cooked. Season with salt and pepper and place cooked eggs over toast. Sprinkle with coarse sea salt and chopped parsley. If you have a nub of Parmigiano reggiano, grate some over the top!

Jenn Louis

Lincoln Restaurant

503.288.6200

3808 N Williams No. 127,

Portland OR 97227

lincolnpdx.com

and…

Culinary Artistry and Commercial

503.232.4675

culinaryartistry.net

Recipes


Chard Recipe

Swiss Chard with Bacon and Mustard Sauce

From Fresh from the Garden Cookbook by Ann Lovejoy

Note: This same recipe works equally as well with spinach or kale, as well as with fennel and mushrooms.

4 slices lean bacon (preferably peppered), chopped into 1-inch pieces
1 small onion, chopped into medium dice
1 teaspoon fresh marjoram or thyme leaves
2 fresh sage leave, shredded
1 tablespoon red wine vinegar or cider vinegar
1 tablespoon stone-ground, Dijon, or any sharp mustard
8 cups shredded Swiss chard

In a large saucepan, cook the bacon over medium-high heat until golden but soft. Remove to drain on a paper towel. Add the onion, marjoram, and sage to the pan and cook stirring often, over medium heat until onion is pale golden, about 10 minutes. Add the vinegar and stir to deglaze the pan, loosening any stuck bits. Add the mustard and stir until smooth. Bringing the sauce to a gentle boil over medium-high heat, add the chard without stirring, and cover tightly. Reduce heat to medium and cook, covered, until chard is limp, 3 to 4 minutes. Stir the chard into the sauce and serve at once, garnished with bacon. Serves 4 as a side dish.

Tomato Recipes

Slow-Roasted Tomatoes
From Local Flavors by Deborah Madison

Note: Slow roasting tomatoes is not very hard and results in a delicious flavor that can be used with vegetables or meats, and will freeze well for use in winter soups and stews.

1 1/2 pounds paste tomatoes
2 to 3 tablespoons olive oil
sea salt and freshly ground pepper
1 teaspoon chopped oregano, thyme or marjoram
1 garlic clove, minced.

Preheat oven to 300°F. Lightly oil a large shallow baking dish. Slice the tomatoes in half lengthwise. Set them cut side up in the dish, then brush the tops with oil, using about a tablespoon in all. Sprinkle with salt and pepper and add the herb and garlic. Bake, uncovered, for about 2 hours. Check after an hour and drizzle a little more oil over the surfaces if they look dry. If you don’t plan to use the tomatoes right away, store them in the refrigerator, or freeze.


Tomato Tart with Pesto and Goat Cheese

From Francesca’s (CSA Coordinator) close friend Nina Lang

1 9-inch piecrust (store bought pie crust or homemade both work)
Pesto (make prior to starting tart, homemade recipe included below)
4 oz. of goat cheese (It is up to you whether you would like to use more than 4 oz, I usually stick to that.  It’s doable, but barely.)
1 large yellow onion, thinly sliced
2 to 3 cups tomatoes chopped into bite-sized pieces, some juice removed depending on how juicy (San Marzanos work great, and they have minimal juice)
10-15 basil leaves, chopped
salt, to taste
pepper, to taste

Preheat the oven to 350° F. Slice the onions and begin sautéing over medium heat. After the onions are started, fold out your piecrust onto a flat baking tray (you may need seal any cracks with some water). Poke holes around the crust with a fork, and place in the oven for 4-8 minutes to crisp (when its very lightly browned). Set crust aside. After the onions are browned, cut the tomatoes into bite sized pieces.  It is best to let them onions cool before you really get started with the assembly. For assembly,  spread a layer of pesto (recipe below) on the tart (as thin or thick as you want it). Next, apply a layer of the onions (again, as thin or as thick as you want). Crumble the goat cheese on top of the onions to cover as best you can.  Next, put a layer of tomatoes on top of the goat cheese (you may not need to use all of the tomatoes you chopped).  Sprinkle with a little basil and some salt and pepper. Put in the oven at 350° F for 20 minutes, or until the tomatoes are soft.


Basil Pesto

Recipe from Francesca Benedetti (CSA Coordinator at SIO)


Note:
If you have never made fresh pesto you are truly in for a treat. Its easy, delicious, and can keep for up to 6 months in the freezer (or up to a year if you don’t add the cheese before freezing).

2 cups basil, thick longer stems removes
3-4 cloves garlic
1/3 cup toasted pine nuts, cashews, sunflower seeds, or pecans
¼-½  cup olive oil (how much depends on your preferred pesto consistency)
½ cup grated Parmesan cheese (asiago, pecorino, etc.)
1 tablespoon lemon juice (optional)
salt and pepper to taste

Put basil and garlic in a blender or food processor and pulse until coarsely chopped. Add the toasted nuts and pulse a few more times. Now pour the olive oil into the blender/processor relatively slow with the blender/processor going until a paste is formed. Add the Parmesan cheese and continue adding oil (up to 1/2 cup) until your desired pesto consistency is achieved. Add salt and pepper to taste. You may also add in 1-2 tablespoons lemon juice near the end for a more tangy flavor. Makes approximately 1 cup pesto. Great on pasta, sandwiches, vegetable dishes, corn on the cob, toast, and many more things.

Summer Squash Recipe


Zucchini Cakes

From Nourishing Traditions by Sally Fallon

4 cups grated summer squash (yellow or green)
1 tablespoon sea salt
4 eggs, lightly beaten
1 small onion, finely chopped
2 cups whole grain bread crumbs
sea salt and pepper
1/4 teaspoon cayenne pepper
1/2 cup parmesan cheese
4 tablespoons butter
4 tablespoons extra virgin olive oil

Mix zucchini with salt and let stand 1/2 hour. Rinse well with filtered water and squeeze dry in a tea towel. Mix with eggs, onion, breadcrumbs, cheese, and cayenne pepper and season to taste. Form into cakes and sauté a few at a time in butter and olive oil.

Categories : Blogroll, CSA Newsletter, Farm News & Updates, Recipe

CSA News: Week 16- September 1 to September 7

Posted by sio@dmin on
 September 1, 2009

This Week’s Share

  • Beans
  • Corn
  • Cucumbers, Slicing and Lemon
  • Garlic
  • Kale, Rainbow Lacinato
  • Lettuce
  • Onions, Copra
  • Parsley
  • Potatoes, Sangre
  • Summer Squash
  • Tomatoes


On Rotation

  • Eggplant

Share Notes:

  • Lettuce: Make sure to give your beautiful head of lettuce some extra washing this week to remove any soil that may be lingering at the base of the leaves.
  • Onions: At SIO we grow several varieties of onions that can be used fresh, or cured and used as a storage onion. This week in your share you will receive your first distribution of  yellow Copra onions. At this point they are not fully cured, so we would recommend refrigerating them and using them as a fresh onion. Later in the season you will receive Copras that are fully cured and fit for dry storage.
  • Tomatoes: Out here on the farm we grow three types of tomatoes. These are slicing tomatoes, heirloom tomatoes, and San Marzano paste tomatoes. Throughout the season you will receive all three types of tomatoes in your share. We have planned for each share to receive two distributions of 5 pounds of San Marzano Paste Tomatoes (great for making sauces or cooking), and you can look forward to those showing up over the next several weeks.
  • Coming Soon: Right now we have our new 180ft. unheated green house bursting with gypsy peppers, and you will begin to see those in a few weeks as they begin to color-up. Next week you can look forward to your second 8 oz. distribution of basil, so get ready to make some pesto.

Recipes


Kale Recipe

Lulu Wilson Kale Salad
From Lulu Wilson Restaurant in Aspen, CO

Note: The chef that provided this recipe recommends using a very sharp knife when cutting the kale. A dull knife will crush the kale and make the salad soggy.

1/2 bunch kale, stems removed
3 tablespoons olive oil
2 tablespoons lemon juice
1/3 cup currants
1/3 cup grated parmesan cheese
1/3 cup pine nuts, not toasted

Using a very sharp knife, cut away the kale leaves’ though center stems. Roll the leaves like a cigar and cut them into very fines slices, about 1/8th- inch wide. Put the kale and olive oil into a bowl and toss by hand. Add the lemon juice and toss again. Add the currants, Parmesan, and pine nuts and toss by hand until the mixture is soft. Taste and adjust quantities if needed. Serve on a cold plate.

Parsley Recipe

Parsley Pesto
Author Unknown

Note: This simple recipe can be used on pasta, potatoes, bread, cooked vegetables and many other things.

1 cup Italian Flat Leaf Parsley, de-stemmed
2 tablespoons lemon juice
1/4 cup pine nuts, toasted
1 clove garlic, minced
up to 1/4 cup Parmesan or Asiago cheese, grated (optional)
1 tsp. Olive Oil
1/4 teaspoon salt, or to taste

Heat pine nuts in a dry pan on medium heat until browned, being careful not to burn. Cool on a plate. Remove parsley leaves from stems. Once pine nuts have cooled, combine all ingredients in food processor and process until smooth. Serve.

Potato Recipe

Samosas
From The New Moosewood Cookbook by Molly Katzen

Note: Samosas are flaky pastries filled with spicy potatoes and peas. In traditional Indian cuisine, they are deep-fried (and that is still and option). But baking them works very well, and is easier and more healthful. All components can be made well ahead of time. Finished Samosas can be stored for days in the refrigerator or freezer. Make the Dipping Sauce while the Samosas bake. Serve Samosas with any curry, or as a simple supper with soup.

The Dough

2 1/2 cups flour
1/2 teaspoon salt
1 cup buttermilk or yogurt
extra flour, as needed

Place the flour in a medium-sized bowl. Mix in the salt. Make a well in the center, and add the buttermilk or yogurt. Mix first with a spoon and then with your hand, to make a smooth dough. Add extra flour, as needed, to keep the dough from being sticky. The dough will be quite soft. Knead in the bowl for about 5 minutes. Cover tightly and refrigerate until you are ready assemble the pastries.

The Filling

2 large potatoes (fist size)
1 tablespoon butter
1 cup finely minced onion
2 medium cloves garlic, minced
1 tablespoon freshly grated ginger
1 teaspoon mustard seed
1 teaspoon dried coriander (if available)
3/4 teaspoon salt
1 1/2 cups uncooked fresh corn, off the cob (or you can use the traditional green peas, fresh or frozen, or a combination of the two)
2 tablespoons lemon juice
cayenne, to taste

Peel the potatoes and chop them into 1-inch pieces. Place in a sauce pan, cover with water, and boil until very soft. Drain and transfer to a medium-sized bowl. Mash and set aside. Melt the butter in a heavy skillet. Add onion, garlic, ginger, mustard seeds, coriander, and salt. Saute over medium heat about 8 to 10 minutes, or until the onions are quite soft. Add this to the mashed potatoes, along with the remaining ingredients. Mix well, but try not to smash the corn and/or peas. Cool for at least 15 minutes before filling the pastries.

The Dipping Sauce

1/2 cup cider vinegar
1/2 cup water
3 tablespoons brown sugar
1 small clove garlic, minced
1 teaspoon salt

Place all ingredients in a small sauce pan. Stir until sugar dissolves. Heat to boiling, then let simmer uncovered for about 10 minutes. It will reduce slightly. Serve warm or at room temperature with hot Samosas.


To Assemble and Bake


NOTE: If you are storing the Samosas to bake later on follow directions below and place them on a heavily floured plate or tray, dust the tops with more flour, and cover tightly. Store in the refrigerator or freezer until baking time.

Preheat oven to 425°F. Generously oil a baking sheet. Keep a small container of flour, a fork, a small bowl of water, and a pastry brush close at hand. Flour a clean surface, and, one by one, roll 1-inch balls of dough into 5-inch circles, using a rolling pin. Place approximately 1 1/2 tablespoons filling in the center of each circle, and fold over, just like a turnover. Brush the inside edges of each circle with a little water, and fold the edges together to make a small hem. Crimp the edges firmly with a fork. Place Samosas on the oiled baking sheet. Brush the tops with oil. Bake 15 minutes at 425°F, then reduce heat to 375°F and bake for 10 minutes more. For maximum crispness, turn the Samosas over when you turn the oven down. Serve within 15 minutes of baking, with Dipping Sauce.

Categories : Blogroll, CSA Newsletter, Farm News & Updates, Recipe

CSA News: Week 15-August 25 to August 31

Posted by sio@dmin on
 August 25, 2009

This Week’s Share

  • Carrots
  • Celery
  • Cilantro
  • Corn
  • Garlic
  • Lettuce
  • Onions, Siskiyou Sweets
  • Summer Squash
  • Tomatoes


On Rotation

  • Beans
  • Eggplant
  • Melons

Recipes


Celery Recipes

Braised Celery

Adapted from Recipes from America’s Small Farms by Joanne Lamb Hayes and Lori Stein

6-8 celery stalks (with leaves)

3 bacon slices, quartered, or 2 tablespoons unsalted butter

1 medium onion, coarsely chopped

¾ cup vegetable stock

1 tablespoon chopped fresh parsley, or 1 teaspoon dried

celery leaves, chopped

salt and freshly ground black pepper, to taste

Preheat the oven to 350˚F. Rinse, drain, and trim the celery; cut the stalks into 2 inch pieces and set leaves aside. Saute the bacon in a large, heavy, ovenproof skillet for 4 to 5 minutes, until it begins to brown. (Or melt the butter). Add the celery and onion and sauté until the onion begins to brown, 3 to 4 minutes. Pour the stock over the mixture. Cover the skillet with an ovenproof lid or aluminum foil and braise the vegetables in the oven for 20 to 25 minutes, until the celery is tender. Stir in the parsley and celery leaves; season with salt and pepper to taste and serve.

Cream of Celery Soup

Adapted from the Joy of Cooking

1 tablespoon butter

1 cup (or more) chopped celery with leaves

1/3 cup thin onion slices

2 cups chicken or vegetable stock

2 cups milk, divided

1 ½ tablespoons cornstarch

2 tablespoons chopped fresh parsley

Melt the butter in a saucepan, add celery and onion, and sauté 2 minutes. Add stock; simmer 10 minutes. Strain or puree soup. Return to heat, add 1½ cups of the milk and bring to a boil. Dissolve cornstarch in remaining ½ cup milk; stir gradually into hot soup. Bring to boil again; stir and cook about 1 minute. Sprinkle with parsley. Makes 4 cups.

Onion Recipes

Delicious Siskiyou Sweets Onion Rings

Recipe from Shannon Raider (SIO Alumni)

Oil for frying

2 large sweet onions

Salt

1½ cups all-purpose flour

1 tablespoon salt

½ cup Cornstarch

1 good cold beer (I prefer a Porter)

Pour oil for frying (canola, grapeseed or peanut) 2 in. deep into a cast iron skillet or your favorite frying vessel and heat to 350˚F. Slice onions crosswise to 1/4 in. thickness and separate rings. In a brown paper bag toss rings till dusted with cornstarch and set aside. Mix flour with salt and cornstarch. Quickly stir in 1 good COLD beer and stir till the lumps are pretty much gone. Set the bowl of batter in another bowl full of ice water. Keep batter cold while you dunk rings. Fry onions taking care not to crowd the pan. Too many will cool the oil and resulting in a less crisp ring. Lightly salt if preferred and indulge immediately.

Fresh Summer Salsa

(see Tomato Recipes below)


Tomato Recipe

Fresh Summer Salsa
Recipe from Francesca Benedetti (CSA Coordinator at SIO)

Note: I prefer intense and bold flavors in my salsa so I tend toward the higher amount suggested in the ingredients. Also, increase quantities proportionately for your desired amount of servings.

1-2 heirloom or slicing tomatoes

1/2 to 1 onion

2 to 4 cloves garlic, chopped

1 ear of sweet corn, kernels stripped from cob

2 to 4 tablespoons chopped cilantro

juice of 1/2 to 1 lime (can add some lime zest too for and extra pop)

1/2 to 1 hot pepper, minced (optional, but can use jalapeno, Serrano, Anaheim, Hungarian black, ancho, etc.)

salt and pepper to taste

Dice tomatoes and place in a medium size bowl, letting some of the juice drain as you are transferring them to the bowl. Chop the onions coarsely and mince the garlic and place in the bowl. Cut the corn from the cob by resting the cob over a plate or bowl and cutting the kernels off in strips (for even more flavor you can cut them off in two rounds, only cutting halfway down the kernels the first round and cutting down to the cob the second round). Add the corn to the bowl. Chop the cilantro and add to the bowl. Juice the lime either directly over the bowl, or into a separate container to remove any seeds if desired. You can also grate up some lime zest into the bowl at this point as well. Now mince your hot pepper (if using), and add to the bowl (be mindful not to touch your face or eyes until after thoroughly washing your hands, because the compounds that make peppers hot can also transfer to your skin and then to whatever other part of your body you touch ). Mix up all of the chopped ingredients in the bowl, and taste. Add salt and pepper as desired and any more of the already included ingredients as desired. Let sit for at least 10 minutes to allow flavors to settle. Eat with tortilla chips, quesodillas, tacos, on top of fish or chicken, or just by the spoonful.

FIT Spotlight: Kristin

First involved as a volunteer with a CSA Program in her home of Austin, TX, Kristin was inspired to learn more about farming. From there, Kristin and her partner decided to go WWOOF-ing (World Wide Opportunities on Organic Farms) and see the world together. After spending time at an egg farm in Western Colorado, a 16-acre asparagus and diversified vegetable farm in the United Kingdom, and another vegetable farm France they were ready to return stateside and settle in the Pacific Northwest. Kristin says she moved to Portland, “for the blackberries and cooler weather,” and remarks that, “farming in Texas is very different from farming in the NW.” Out at the farm her activities are direct seeding crops and harvesting everything. “I really wanted to experience a full growing season in Portland,” says Kristin, “SIO offers the big picture experience and a community.”

Categories : Blogroll, CSA Newsletter, Farm News & Updates, Recipe

CSA News: Week 14- August 18 to August 24

Posted by sio@dmin on
 August 18, 2009

This Week’s Share

  • Basil
  • Chard
  • Cucumbers, Slicing and Lemon
  • Onions, Torpedo
  • Potatoes, Sangre
  • Summer Squash
  • Sweet Corn
  • Tomatoes

On Rotation

  • Beans
  • Eggplant
  • Melon

Share Notes

  • Cucumbers: Here at SIO we grow a classic green cucumber and a lemon cucumber variety, which is round and yellow but tastes nothing like a lemon. Both can be used fresh sliced in salad and on sandwiches, for soups, lightly sautéing, and for sauces.
  • Potatoes: This week in your share you will receive 3 pounds of beautiful, large Sangre potatoes. As we allow your potatoes to size up the fields there is always some chance for small cosmetic damage. There is a possibility over the season you may see damage from wire worm  or scurf and the damage is usually to a small portion of the outer skin which can be easily peeled or cut off.
  • Tomatoes: Out here on the farm we grow three types of tomatoes. These are slicing tomatoes, heirloom tomatoes, and San Marzano paste tomatoes. Throughout the season you will receive all three types of tomatoes in your share.

Recipes

Basil Recipes

Basil Pesto
Recipe from Francesca Benedetti (CSA Coordinator at SIO)

Note: If you have never made fresh pesto you are truly in for a treat. Its easy, delicious, and can keep for up to 6 months in the freezer (or up to a year if you don’t add the cheese before freezing). You can look forward to another pesto size quantity of basil in a future share, so if you just can’t resist eating your whole batch at once you can do another round in a few weeks.

2 cups basil, thick longer stems removes
3-4 cloves garlic
1/3 cup toasted pine nuts, cashews, sunflower seeds, or pecans
¼-½  cup olive oil (how much depends on your preferred pesto consistency)
½ cup grated Parmesan cheese
1 tablespoon lemon juice (optional)
salt and pepper to taste

Put basil and garlic in a blender or food processor and pulse until coarsely chopped. Add the toasted nuts and pulse a few more times. Now pour the olive oil into the blender/processor relatively slow with the blender/processor going until a paste is formed. Add the Parmesan cheese and continue adding oil (up to 1/2 cup) until your desired pesto consistency is achieved. Add salt and pepper to taste. You may also add in 1-2 tablespoons lemon juice near the end for a more tangy flavor. Makes approximately 1 cup pesto. Great on pasta, sandwiches, vegetable dishes, corn on the cob, toast, and many more things.


Insalata Caprese

Recipe passed down through generations of Italians who have enjoyed this delicious combination of flavors fresh from their gardens’ for hundreds of years.

Note: This simple tomato, basil, and mozzarella salad originates from the island of Capri in the Campania region of Italy, and it is truly one of the most delicious ways to enjoy the flavors of summer. If you are up for a real treat try making your own 30-Minute Fresh Homemade Mozzarella (recipe below) to accompany the SIO grown tomatoes and basil.

1 slicing or heirloom tomato, sliced to ½ inch thickness
1 ball fresh mozzarella, sliced into ¼ inch thickness (make your own, recipe below)
10 leaves fresh basil, sliced into thin strips
1 tablespoon olive oil
salt and pepper to taste

*This recipe gives snack size quantities, but its very easy to double, triple, or increase at whatever proportion to meet your needs.

Fresh Homemade Mozzarella (in only 30 Minutes)
Adapted from Ricki Carroll, Author of Home Cheese Making

1 gallon whole (or 2%) cow milk (avoid ultra-pasteurized)
1 ½  tsp citric acid (found in the bulk spice section at New Season, Fred Meyer, etc.)
¼  tsp liquid rennet*
Cheese salt (any non-iodized salt, such as kosher, sea salt, or non-iodized table salt)
Cooking thermometer (a.k.a. Candy or cheese thermometer)
Cheese cloth (optional)

* Rennet is a natural complex of enzymes produced in any mammalian stomach to digest the mother’s milk, and is often used in the production of cheese. There are non-animal sources for rennet that are suitable for vegetarian consumption (Foster and Dobbs located in NE Portland and Kookoolan Farms in Yamhill both carry the animal and vegetarian liquid rennet, along with many other useful cheese making supplies).

Combine rennet and ¼ cup water in a small bowl and set aside. In another bowl, dissolve citric acid powder in ½ cup water and stir until dissolved. Pour citric acid into a very large pot. Add milk, stir, and heat moderately. Small clots starting to form and floating in the milk is normal.

Using a cooking thermometer, remove pot from heat when the milk reaches 88 degrees. Add rennet and stir for 30 seconds, then allow to set undisturbed for 6-8 minutes. The process is complete when the liquid milk has transformed into a semi-firm custard consistency.

While still in the pot, cut the curd gently with a knife. Drawing the knife through the curd from top to bottom and from side to side, you’ll end up with a checkerboard pattern in the surface of the curd. The liquid whey should be clear and slightly yellowish.

Scoop out the curd and put into a colander (or in cheese cloth in a bowl). Curds will be soft but should hold their shape. Drain curds briefly while gently pressing. Pour off pooling whey.

If you have a microwave, microwave curds on high for 1 minute. Drain off excess whey, then knead the curd the same way you would bread. Heat for 30 seconds, drain, and knead again. Repeat this process at least 3 times. Note that the cheese curd will become very warm, so you may want to wear rubber gloves. Incorporate salt in small amounts as you knead (not more than a teaspoon).

If you don’t have a microwave, heat a pot of water to near boiling-about 180 degrees. Dip the curd in the hot water for several seconds, remove, and knead. It’s helpful to divide the curd into several segments. Repeat the process about 3 times. Incorporate salt to taste.

Stretch! As you knead, the mozzarella will gradually become smooth and pliable, much like bread dough. When the curd stretches effortlessly like salt water taffy, shape the cheese in any manner you like (balls of any size, one large ball, or strands). Cool in ice water. Once cool, it’s ready to eat! Makes about 3/4 pound.

Corn Recipes

Note: Remember to look at the Chef’s Corner in the Week 12 blog post for corn ideas from Laurelhurst Markets’ David Kreifels.

Grilled Chicken & Corn Red Potato Salad with Jalapeno Vinaigrette
Recipes adapted from www.simplyscrupmptiousfoodie.com

Note: This salad can be made with or without the grilled chicken. If you do include the grilled chicken feel free to make it using your favorite recipe, or you can try out the Lime and Herb Grilled Chicken recipe included below.  Either way, make sure you enjoy this fun Southwest twist on potato salad.

Jalapeno Vinaigrette

1/2 cup plus 1 tablespoon extra-virgin olive oil
6 tablespoons red wine vinegar
1-1/2 teaspoons Dijon mustard
1/4 teaspoon pepper
a pinch of salt
3/4 cup finely chopped red onion
2 jalapeno chilies, seeded and finely chopped

Grilled Chicken & Corn Red Potato Salad

2 cups Grilled Chicken, chopped and diced (recipe below)
1 tablespoon extra virgin olive oil for drizzling on corn
5-7 red potatoes
2 fresh ears corn, with husked removed

Put the onions and jalapeno in a bowl. Add olive oil, vinegar, Dijon mustard, salt, and pepper. Then whisk until the vinaigrette becomes a smooth dressing. In a pot of salted water, bring the potatoes to a boil and cook until just tender, about 20 minutes. Drain the potatoes and set aside to cool, then cut into bite-size pieces. Grill the corn and keep turning until almost all sides have char marks, which should take about 10 minutes or less. Slice the kernels off the cobs. Add the corn to the potatoes. Then add the grilled chicken. Add the vinaigrette. Then toss to combine all of the ingredients. Serve as a side dish or have this yummy salad as a quick to-go lunch!

Lime and Herb Grilled Chicken

2 tablespoons lime juice
2 skinless, boneless chicken breasts (about 1 pound)
1 tablespoon extra-virgin olive oil
1 teaspoon onion powder
1 teaspoon garlic power
2 tablespoons parsley (could also use basil)
1 tablespoon rosemary
1 tablespoon sage
2 teaspoons freshly ground black pepper
1 teaspoon fresh garlic, minced

Place the chicken into a bowl and pour the lime juice over the chicken. Season with onion powder, garlic powder, parsley/basil, rosemary, sage, and black pepper. Drizzle the chicken with one tablespoon olive oil and turn to coat. Cover and let marinate in the fridge for an hour or two. Preheat a grilling pan or once again the beloved George Foreman grill. Place the chicken onto the grill. Grill for about 15 minutes, or until beautiful char marks have developed.

Summer Squash Recipe

Zucchini Provencal
From Herbs Love Tomatoes, Peppers, Onions and Zucchini by Ruth Bass

Note: Use the basil and garlic in whatever quantity you please.

1 pound zucchini (4-5 small, 2 medium, or one large)
2 tablespoons extra virgin olive oil
1 onion, thinly sliced
1 garlic clove, minced
1 large ripe tomato
2 teaspoons chopped fresh basil
2 teaspoons chopped fresh parsley
salt and freshly ground black pepper

Scrub the zucchini and slice into 1/4-inch rounds (if using medium or large size zucchini you may need to cut rounds into halves or quarters). Heat the oil in a large skillet. Add the onion and garlic and cook for 10 minutes over very low heat, taking care not to brown the onion. Core the tomato, halve crosswise and scoop out some of the seed with a melon baller or small spoon. Chop the tomato coarsely. Add the zucchini to the skillet and cook over low heat stirring frequently to prevent any vegetables from sticking. After 2 minutes, add the basil and parsley. When the zucchini is almost tender add the chopped tomato and salt and pepper to taste. Cover the skillet and continue cooking for 3-4 minutes. Serve immediately. Makes 4 servings.


Potato Recipe

Grilled Chicken & Corn Red Potato Salad with Jalapeno Vinaigrette
(see above in Corn Recipes)


Tomato Recipes

Insalata Caprese
(see above in Basil Recipes)

Zucchini Provencal
(see above in Summer Squash Recipe)

Categories : Blogroll, CSA Newsletter, Farm News & Updates, Recipe

CSA News: Week 13- August 11 to August 17

Posted by sio@dmin on
 August 11, 2009

This Week’s Share

  • Beets
  • Cucumbers
  • Dill
  • Garlic
  • Lettuce
  • Onions, Siskiyou Sweets
  • Summer Squash
  • Sweet Corn, Sugar Buns

On Rotation:

  • Eggplant
  • Melons
  • Tomatoes, Slicing

Recipes

Beet Recipe

Quick Pickled Beets
From American Wholefoods Cuisine by Nikki and David Goldbeck

Note: Picked beets are especially good with mild, creamy dishes, providing a contrast of taste and texture to foods sauced with yogurt, sour cream, cottage cheese, or a smooth gravy.

3-5 beets (approx. 1 pound), steamed*
1 small onion (or a portion of a larger onion)
1/4 cup cider vinegar
1/4 cup water (from steaming beets, or plain water)
1 tablespoon honey
1/2 teaspoon salt
4 whole cloves
1/2 bay leaf

When steamed beets are cool enough to handle, peel and slice. Cut each slice in half. Place in a shallow casserole or bowl. Combine remaining ingredients in a saucepan, bring to a boil, cover and cook for 5 minutes. Pour over beets. Chill for at least 1 hour before serving. To store, keep in a covered container in the refrigerator. Pickled beets will keep for 2 to 3 weeks in the refrigerator.

* To steam beets, scrub beets and remove tops and long roots. Steam whole until the bulb can be pierced. This will vary from 30 to 45 minutes, depending on the size and age of the beets. When beets are cool enough to handle, skin will slip off readily with gentle pressure.

Corn Recipes

Note: Remember to look at last week’s blog for corn ideas from Laurelhurst Markets’ David Kreifels.

Soft Delicate Corn Fritters
From The Victory Garden Cookbook by Marian Morash

Note: Serve these as a side dish with main-course meals; or sprinkle with powdered sugar and eat as a dessert. In this recipe the flour is only necessary if the corn is very milky. For the egg component you may do as directed below or you can also separate 3 eggs, using 2 of the yolks in the mixture, then beat the 3 egg whites and fold into batter before frying.

2 eggs
2 cups scraped* corn
1 teaspoon salt and freshly ground pepper
2 tablespoons flour (optional)
1 teaspoon sugar
1 tablespoon melted butter
vegetable oil or clarified butter, enough for frying in

Lightly beat eggs; mix with remaining ingredients except oil or clarified butter. Heat oil or clarified butter to a medium.  Drop fitter batter by spoonfuls into hot oil or butter, browning on both sides, 3-4 minutes per side. Makes 15-20 small fritters or patties.

*To scrap corn run a knife down the center of a row of kernels, slicing right down to the end of the ear. Continue until all the rows have been prepared. Place the sliced ear of corn over a bowl, then using the back of a knife push or “scrape” down on the kernels/ the flesh and “milk” will spurt out. Go back and forth up and down the ear until it’s finished.

Cucumber Recipe

Tzatziki Yogurt Sauce
Recipe from www.suite101.com

Note: Tzatziki sauce is served as a condiment along with Greek meals. Tsatziki is typically served on top of chicken, lamb and other meat dishes such as gyros. In addition to being used as a meat sauce, tzatziki can also be used to make potato salad, and as a dip along with pita bread and fresh vegetables, such as some sliced up cucumbers, carrots, broccoli, or any other veggie that sounds good.

1 16 oz. container Greek style yogurt
1 medium cucumber
3 cloves garlic, grated
2 tablespoons fresh dill, chopped fine
Zest from one lemon
3 tablespoons lemon juice
1 tablespoon extra virgin olive oil
1 teaspoon red wine vinegar
2 teaspoons salt

Peel the cucumber if desired. Cut the cucumber in half, and remove the seeds.
Use a hand grater, or food processor, to grate the cucumber. Place the grated cucumber in a double thickness paper towel, and gently squeeze out the moisture. Replace the wet paper towel with dry paper towel, and continue squeezing the cucumber until most of the moisture has been removed. Add the cucumber to a medium bowl. Stir in the garlic, dill, lemon zest, lemon juice, olive oil, vinegar and salt. Add the Greek yogurt and stir until well blended. Cover the tzatziki sauce and place in the refrigerator until ready to serve. Makes a total of 2 1/2 cups of tzatziki sauce.

Dill Recipes

Dill Cheese Spread
From the Moosewood Restaurant Kitchen Garden

1 1/2 cups grated firm cheese (Cheddar, Monterey Jack, Swiss, Jarlsberg, gouda)
2/3 cups cream cheese or cottage cheese (regular or low-fat)
1/4 cup or less chopped fresh dill (can also use this same recipe with other herbs)
2 to 3 tablespoons additional seasonings: chopped vegetables, chilies, nuts, garlic, or edible flowers)

Allow the grated cheese to soften at room temperature for easier mixing. Use a food processor or mixer to whip the cheeses together until smooth and well blended. Add the remaining ingredients. Makes about 2 1/2 cups.

Dilly Mayonnaise
From the Moosewood Restaurant Kitchen Garden

4 egg yolks
1 tablespoon cornstarch
1/4 cup vegetable oil (or use part olive oil)
2 tablespoons fresh lemon juice or herb vinegar
1/2 cup hot water
1/2 teaspoon Dijon mustard
salt and freshly ground black pepper to taste
2 to 3 tablespoons chopped fresh dill

Combine egg yolks and cornstarch in a small saucepan. Slowly whisk in the oil, followed by the lemon juice/herb vinegar and water. Cook over low heat, whisking constantly, until mixture thickens. Remove from heat and add mustard, salt, pepper, and dill. Transfer mayonnaise to a bowl, cover tightly, and refrigerate immediately. It will keep refrigerated for up to week. Makes 1 cup.

Tzatziki Yogurt Sauce

(see above in Cucumber Recipes)


Summer Squash Recipe

Lonnie’s Chocolate Zucchini Cake
Unknown Source

Note: Member Jennerifer Siebold brought this cake to the SIO Potato Harvest and French Fry Feast and it was a big hit. She says of the recipe, “I’d like to say Lonnie was my great grandmother and this was an old family recipe…but it isn’t and I have no idea who Lonnie is, except for a great cook!  At the SIO French Fry potluck I substituted gluten free flours, ghee, and milk & vinegar (for the butter milk), reduced the sugar to 1 cup and forgot the chips…so as you can see it is a pretty flexible and forgiving recipe–the best kind!  Enjoy!”

1/2 cup soft butter
1/2 cup cooking oil
2 eggs
1 1/2 cup sugar (can be reduced)
1 tsp vanilla
2 1/2 cups flour
1 tsp baking soda
1/2 tsp salt
1/2 cup chocolate chips
1/2 cup buttermik
4 tbsp cocoa
2 cups grated zucchini
1/4 cup nuts
1 tsp cinnamon

Mix oil, butter, eggs, sugar, vanilla, and milk together.  Add cocoa, baking soda, cinnamon, and salt.  Mix well. Add four and mix well. Add zucchini, chocolate chips and nuts and mix.  Divide the batter into two well greased loaf pans or one well greased 13×9 inch baking dish.  Bake for 350 for 45 minutes or until a tooth pick poked into the center comes out clean.

FIT Spotlight: Carol

Carol grew up in the Portland area and, “doesn’t plan on living anywhere else”. After graduating from the University of Oregon in 2003 with a degree in Environmental Studies Carol participated in an independent study on rural community life found her way to WWOOF-ing (World Wide Opportunities on Organic Farms) in France. Since then she has wanted to join a serious farm apprenticeship, and eventually found her way to the SIO FIT Program. The balance between country life, city life, and staying close to friends and family all created the ideal situation for Carol at SIO. She would like to have her own farm one day and already feels that the FIT Program is allowing her to gain the skills and confidence to do so.  Out at the farm Carol enjoys pinching basil, planting with the crew, and hanging out with the farm cats, and of course like any SIO employee she loves, “sharing in the harvest.”

Categories : Blogroll, CSA Newsletter, Farm News & Updates, Recipe

CSA New: Week 12- August 4 to August 10

Posted by sio@dmin on
 August 4, 2009

This Week’s Share

  • Basil
  • Carrots
  • Corn
  • Cucumbers
  • Garlic
  • Lettuce
  • Summer Squash
  • Onions, Torpedo
  • Potatoes, Bintje

Chef’s Corner: August


In addition to the crops SIO grows for our 400 member CSA program, we also grown and sell produce to 30-40 Portland area restaurants and kitchens, and this season at SIO we decided to partner with some of those restaurants for some culinary inspiration. We have been picking the brains of some of the areas most talented chefs and restaurant owners, and have asked them to provide us with recipes and general cooking techniques based on the crops that you receive in your shares. Out at the farm we crop plan separately for both our CSA program and restaurant sales, so you don’t have to worry that part of your share may be going the restaurant down the street. For the month of August our featured restaurant is Laurelhurst Market, located at  32nd and E. Burnside in the Laurelhurst neighborhood.

By David Kreifels, Co-Owner and Chef de Cuisine at Laurelhurst Market


Laurelhurst Market opened just this past May on 32nd and East Burnside St.  My business partners, Jason Owens, Ben Dyer, and myself transformed an old mini mart of the same name into a steakhouse/butcher shop with a focus on local and sustainably grown produce and meats. Sauvie Island Organics plays a large role with this.  I was introduced to SIO. a few years back by Troy McClarty, who was working with us at Simpatica at the time.

Establishing good relationships with farmers is such a key piece to the puzzle of running a successful kitchen and these guys made that process a breeze.  With any crazy request I made either came a “yes” or at least a good alternative.  And when running a catering company, those requests are frequent.

Here at Laurelhurst Market we’re currently using SIO’s salad greens, beets, kale, potatoes, and herbs, while looking forward to their amazing onions for a French Onion Soup in the fall.

Our hours for the butcher shop are 10:00 AM til 7 PM daily.  The restaurant opens at 5 PM for dinner service Wednesday through Monday.

Beans

I love green beans.  They can stand up to so many cooking methods and so many flavors.  I like them simply blanched on a Nicoise salad or stewed for an hour in olive oil with some onion and finished with some chopped nuts and mint.  Here at the restaurant we have a side of grilled green beans with grilled onions, pancetta, basil, dijon, and creme fraiche.  Here’s the recipe:

1 lb. green beans; stems removed
1 small sweet onion.  A torpedo or siskyou will work great.
4 oz. pancetta; diced medium  (I can recommend a good butcher shop!)
2 sprigs basil; torn
1 tbsp. dijon mustard
1/3 cup creme fraiche (sour cream mixed with a tablespoon of buttermilk would work in a pinch)
salt and pepper
1/2 lemon

-Blanch beans in heavily salted water for 45 seconds.  This gives them a head start so they wont burn on the grill. Lay out in a single layer and cool in the fridge.
-Slice the onion into 1/2 inch rounds.  On a plate, rub with canola oil, salt, and pepper.  Reserve.
-In a sauté pan, add diced pancetta and a few tablespoons of water.  Bring to a boil over med-high heat.  The water will evaporate while cooking the pancetta.  When all the water is gone, stir frequently until the pancetta gets crispy on the outside, tender in the middle.
-Drain onto a paper towell and save the fat for the dressing.
-Over hot coals, first grill the onions.  Remove from grill back to the plate and cover with plastic wrap.
-Next grill the beans.  I’ve found an upside down cooling rack helps them from falling through the grill.  Or, if you’re fancy, you can purchase one of those new pans meant for grilling vegetables.  Grill only for a couple minutes, tops.  Best for them not to get too black.
-In a big bowl, mix together the dijon, creme fraiche, and a squirt of lemon juice.  Break up the onion into individual rings and add them along with the beans, pancetta, and the torn basil.
-Finish with a little reserved pancetta fat, and some salt and pepper if you feel it needs it.

I like making this when the main course is coming from the grill too.  You can cook everything while the coals are raging and set it aside while you prepare the rest.  The salad holds well for an hour at least.

Corn

SIO grows some of the best corn I’ve tasted.  That said, simply throwing it on the grill still in it’s husk is great and totally satisfying.  However, it too is such a versatile vegetable that takes on other flavors so well.  I love it roasted in a chili releno or as a base for some hushpuppies.  (See Paul Prudhomme’s Louisiana Kitchen cookbook for a good recipe.)  This season in our kitchen we’re serving creamed corn with some of our housemade bacon.  It’s easy and packs a ton of flavor.  Goes great with a nice fatty rib eye too.  By the way, this creamed corn added to Mr. Prudhomme’s hushpuppy recipe is a winner.

4-5 ears corn
1 medium siskyou onion; small dice
2 cloves garlic; chopped
4 ounces bacon; small dice
2 cups cream
1/2 tsp. cayenne
1/2 tsp. black pepper
1 tsp. paprika
1 tsp. dried oregano
1 bay leaf
2 sprigs fresh thyme
1 tbsp. butter
salt

-cut corn off cob in two steps.  The first taking half the kernel off, and the second removing the remainder.  This opens up the kernel to release the starches and flavor better.  It’s a neat trick.
-cut the naked cobs into 6 or 7 pieces and place in a pot along with the cream and bay leaf.  Bring to a simmer and let it go for a few minutes.  There’s some good flavor that will be extracted.  Set aside.
-In a large sauté pan, preferably stainless steel, add bacon and render out the fat over medium heat, stirring often.
-When crispy, remove from pan and set aside, keeping the fat in the pan.
-Add butter and diced onions with a little salt.  Sweat them until translucent.
-Add spices and bloom for a minute.
-Add garlic and sautee a moment more; don’t brown it.
-Add thyme; then corn.  Sautee for 5 minutes, stirring.
-Strain in corn cream.  Bring it all to a boil, then turn down to simmer.
-Let go for 10 minutes.  Adjust seasoning with salt and pepper.  Add the bacon back in.
-Cool down for at least a few minutes before serving.

You can make this a day or two in advance and it’s just as good, if not a bit better.  Just re-warm over low heat.  You might add a bit more cream if it got too thick.

Tomatoes

Besides slathering them with Best Foods mayonnaise and a bit of salt and pepper I suppose there are a few other things to do with them… Like mix them with some room temperature roasted beets, some torn parsley and some sliced cucumber.  All that needs is some lemon and olive oil.

Once the bounty really hits, most people struggle to give them away.  That’s when a gazpacho comes in handy.  It takes a good amount of tomatoes to feed just a half dozen people.  At Laurelhurst Market, we’re serving ours with some poached Dungeness crab and fried croutons.

5 lbs tomatoes; early girl, roma, probably not cherry; peeled
a few slices crusty bread, crusts off
2 red bell peppers; seeded
1 small hot pepper such as a jalapeno
1/2 bulb fennel
1 cucumber, peeled and seeded
1/4 red onion
a few garlic cloves, smashed
a few sprigs basil
a few sprigs thyme
2 tablespoons paprika
1 tsp black pepper
1/4 cup sherry vinegar

-Rough chop everything and toss together in a bowl.  Let marinate for a few hours in the refrigerator or up to overnight.
-Puree in batches in a blender until very smooth
-In a large bowl, whisk in 1 cup extra virgin olive oil.  Soup should be emulsified.
-Adjust seasoning with salt, pepper, and sherry vinegar.
-Fry bite size pieces of bread in hot oil, then drain on paper towels.
-Serve the soup cold drizzled with a little extra virgin and the croutons.

You can put a number of seafood garnishes on gazpacho.  Crab is what we’re using.  Ceviche’ works great, so do seared scallops.  Sauteed squid sounds good… maybe next week’s menu?

Recipes


Corn Recipes


Succotash Chowder

Adapted from The New Moosewood Cookbook by Molly Katzen


Preparation:
Soak 1to1 1/2 cups dry baby lima beans in water for at least 4 hours. Cook in plenty of simmering- not rapidly boiling- water for 35 to 40 minutes or until perfectly tender. Try not to overcook the beans, or the soup will become gluey and lose its textural charm.

1 medium potato , diced (peeling optional)
1 tablespoon butter
2 cups chopped onion
3 to 4 cloves garlic, crushed or minced
3 stalks celery, minced
1 1/2 teaspoons salt
1 tablespoon fresh chopped basil
1/2 teaspoon thyme
3 cups fresh corn
2 to 3 cups cooked baby lima beans
4 cups milk (can be lowfat
a generous amount of black pepper
finely minced parsley, chives, or basil (optional)

Cook the diced potato in boiling water until just tender. Drain well, and set aside. Meanwhile, melt the butter in a kettle or Dutch oven. Add onion, garlic, celery, salt, and herbs. Saute over medium heat for about 10 minutes, or until the onion and celery are tender. Stir in the corn, and sauté for about 10 minutes more. Add the cooked beans.  At this point you can puree some of the sauté in a food processor or blender and return it to the kettle, as this will make for a thicker soup Add potatoes and milk. Season to taste with black pepper and salt. Serve very hot, topped with minced fresh herbs

Grilled Corn with Chipotle-Lime Butter
Adapted from EatingWell in Season by Jesse Price

Note: The chipotle-lime butter used in this recipe is also great melted on some grilled fish or chicken.

4 ears fresh sweet corn, husked
2 tablespoons butter, softened
1/4 teaspoon freshly grated lime zest
1 teaspoon lime juice
1/2 teaspoon minced chipotle chile in adobo sauce* plus 1/4 teaspoon adobo sauce or 1/4 teaspoon chipotle pepper
1/2 teaspoon kosher salt
2 oz queso fresco, crumbled (optional)

*Chipotle chiles in adobo sauce are smoked jalapenos packed in flavorful sauce. Look for the small can with the Mexican food in large supermarkets. Once opened, they’ll keep for up to 2 weeks in the refrigerator or 6 months in the freezer.

Preheat gill to high. Wrap each ear in foil. Place on the grill and cook, turning frequently for 10 minutes. Remove from grill and let stand in the foil while preparing butter. Combine butter, lime zest, chipotle and adobo sauce (or ground chipotle) and salt in a bowl. Carefully unwrap the corn. Serve with the butter, and top with queso fresco if desired.

Summer Squash Recipe

Cheesy Zucchini
Recipe

Note: Don’t be fooled by the title, using your yellow pattypan and green zucchini both in this recipe is delicious.

2 tablespoons extra-virgin olive oil
4 large cloves garlic, thinly sliced
1 1/2 pounds summer squash
1 tablespoon coarsely chopped flat-leaf parsley (from last week)
1 tablespoon coarsely chopped fresh basil
1/4 teaspoon salt
1/3 cup freshly grated Parmesan cheese
1/2 cup freshly grated mozzarella

Heat the olive oil in a large nonstick skillet over medium heat. Add the garlic and cook, stirring frequently until softened, 1-2 minutes. Add the squash and stir to coat it with the garlic-oil mixture. Cover the skillet and cook the squash, stirring occasionally, until it is glossy and tender but still crisp, 4-6 minutes. Sprinkle the basil/parsley and salt evenly over the squash and cook stirring frequently, until the basil/parsley wilts, about 1 minute. Stir in the Parmesan cheese and stir constantly until it melts, about 1 minute. Sprinkle the mozzarella cheese evenly over the squash, cover the skillet again, and remove it from the heat. Let the squash sit until the mozzarella cheese melts, 1 to 2 minutes.

Potato Recipe

Roasted Potatoes with Basil Vinaigrette
Adapted from www.kitchengardeners.org

Here’s an easy way to enjoy freshly-dug potatoes.

1 1/2 pounds potatoes
2 tablespoons olive oil
1/2 teaspoon salt
1 tablespoon fresh basil, minced (more if you prefer)
a drizzle of olive oil (just enough to mix with basil
a drizzle of balsamic (just enough to mix with basil)

Chop potatoes into larger bite-sized pieces and toss them with olive oil and salt. Roast in a 425 degree oven about 40 minutes or until the edges are brown, turning from time to time. Prepare a vinaigrette with the minced basil, balsamic vinegar, and olive oil. Toss while the potatoes are hot out of the oven. They will absorb the dressing so there shouldn’t be any left on the bottom of the bowl. Season with salt and pepper to taste.

Categories : Blogroll, CSA Newsletter, Farm News & Updates, Recipe

CSA News: Week 11-July 28 to August 3

Posted by sio@dmin on
 July 28, 2009

This Week’s Share

  • Chard
  • Carrots
  • Corn
  • Cucumbers
  • Garlic
  • Lettuce
  • Sweet Onions, Purplettes
  • Summer Squash
  • Parsley, Italian Flat Leaf


On Rotation:

  • Broccoli

Recipes


Parsley Recipe


Chimichurri Sauce
By Michael Chiarello, foodnetwork.com

Note: This blend of fresh herbs and spices is a classic Argentinean meat marinade and condiment. It can be used and served in any number of ways, but traditionally is paired with grilled meats.

1 bunch fresh flat-leaf parsley, finely chopped
2 bay leaves
6 cloves garlic, minced
1 1/2 teaspoons smoked paprika
1 tablespoon fresh oregano leaves, finely chopped
1/2 cup red wine vinegar
1 1/2 cups extra-virgin olive oil
1 teaspoon salt
1/2 teaspoon freshly ground black pepper

Place the parsley, bay leaves, garlic, paprika, oregano, vinegar, olive oil, salt, and pepper in a food processor. Pulse until combined. Put the sauce in a glass or plastic container, using as needed. Chimichurri will last for up to 1 month, refrigerated. Makes 2 1/2 cups.

Bean Recipe


Lemon-Rosemary Pickled Beans
Recipe adapted from Emerill Lagasse, www.foodnetwork.com

Note: This is my favorite pickling recipe and so when beans are in abundance I often make a batch. The green and yellow bean varieties work equally as well. Emerill Lagasse uses this pickled green bean recipe as a condiment for a Bloody Mary, and although I do enjoy them as an addition to that beverage they are absolutely delicious straight from the jar.

2 pounds beans
4 sprigs fresh rosemary
4 cloves garlic, peeled
4 (3-inch) strips lemon peel
2 1/2 cups water
2 1/2 cups white wine vinegar
3 tablespoons pickling salt
2 tablespoons sugar

Sterilize 4 pint-sized jars and their lids according to the manufacturer’s instructions.

Evenly trim the ends of the green beans to fit the jars. Divide and pack the green beans, rosemary, garlic, and lemon peels among the jars.

Bring a large pot or canner of water to a boil.

In a medium pot, combine the water, vinegar, salt, and sugar and bring to a boil. Simmer for 2 minutes, stirring to dissolve the sugar and salt. Ladle the hot mixture into the jars, leaving a 1/2-inch headspace. Wipe the rims with a clean cloth, affix the lids and seals, and seal tightly. Process the jars in the hot water bath for 15 minutes. Carefully remove with tongs and set aside to cool. Let sit in a cool, dark place for at least 3 weeks before opening. Yield 4 pints.

Cucumber Recipes

Ernest Hemingway’s Cold Cucumber Soup
From The Hemingway Cookbook, by Craig Boreth

Note: It is not necessary to peel the cucumbers grown at SIO because they are organically grown and unwaxed, but if you prefer a clean pale color for the soup than you should still peel them.

3 cucumbers
1 tablespoon butter
1 tablespoon chopped dill (or mint if you have some in your own garden)
¼ cup chopped onion (sweet or storage both work)
1 bay leaf
1 tablespoon all-purpose flour
2 cups fresh chicken/vegetable stock or canned broth
1 teaspoon salt, or to taste
1 cup half and half, milk, or soy milk (choose according to preference)
juice of ½ lemon, or 1 tablespoon bottled lemon juice
1 tablespoon honey
white pepper (optional)

Peel (optional) and slice two cucumbers. Peel (optional), seed and grate the remaining cucumber. Heat the butter in a large, heavy saucepan. Add the sliced cucumbers and cook over low heat for 3-4 minutes. Add the dill (or mint), onion, and bay leaf and cook over low heat until tender, about 20 minutes. Stir in the flour and cook for a few more minutes, stirring constantly. Add the stock and salt and simmer gently for 30 minutes. Remove the bay leaf and let the mixture cool slightly. Puree the mixture, half at a time, in a blender or food processor. Return to the pan and add the white pepper to taste. Add the half and half, lemon juice and honey; then taste and adjust seasoning your preference. Stir in the grated cucumber. Refrigerate several hours until very cold. Serve in a chilled bowl. Keep refrigerated until ready to serve. This is a great dish for making the night before.

Sweet & Sour Onions and Cucumbers
Recipe from Morris Farms in Uvalda, GA

3 cups peeled, seeded and thinly sliced cucumbers
1-1/2 cups thinly sliced sweet onions
1/2 cup grated carrot
1/2 cup white vinegar
1/4 cup sugar
2 tablespoons chopped fresh dill or 1 tablespoon dried dillweed
1/2 teaspoon salt
1/4 teaspoon ground black pepper

In a medium bowl toss together cucumbers, sweet onions and carrots, set aside. In a liquid measuring cup combine vinegar, sugar, dill, 2 tablespoons water, salt and black pepper. Pour over cucumber mixture, toss to coat. Serve immediately or cover and refrigerate until ready to serve. Makes 6 portions.

Squash Recipe

Note: These cookies are a great way to use up summer squash or zucchini while in season, and they happen to be quite delicious (as well as kid friendly). Donald Kotler of Toast Restaurant in Portland provided the recipe while visiting as a chef for Zenger Farm Cooking Camp last summer. They were a hit at camp and I continued to use it a handful of times more in the throughout the summer because they are so easy and delicious.


Squash Cookies

From Donald Kotler, Owner of Toast Restaurant
Provided for Zenger Farm Cooking Camp

¾ cup flour
3 tablespoons brown sugar
¼ teaspoon ginger
¼ teaspoon nutmeg
¼ teaspoon cinnamon
¼ teaspoon baking powder
3 tablespoons butter (soft)
1 egg
1 teaspoon vanilla
zest of ½ an orange
1 cup grated summer squash
Add chocolate chips, nuts, or raisins if desired

Preheat oven to 375˚F. Mix all the dry ingredients together in a large bowl. Add the eggs, butter, vanilla, and orange zest and mix until evenly combined. Add grated squash and mix. Then add chocolate chips, nuts, and/or raisins if desired. Scoop heaping tablespoons of dough onto a greased baking sheet and bake for 10-12 minutes. Let cool. For best results remove cookies from tray to a wire rack for cooling. Enjoy with a glass of milk!

Categories : Blogroll, CSA Newsletter, Farm News & Updates, Recipe

CSA News: Week 10- July 21 to July 27

Posted by sio@dmin on
 July 21, 2009

This Week’s Share

  • Beets
  • Carrots
  • Cabbage
  • Cilantro
  • Cucumbers
  • Garlic
  • Lettuce
  • Summer Squash

Recipes

Cabbage Recipe

Cabbage and Cilantro Slaw
Adapted from www.myrecipes.com

1 cabbage, shredded
1/3 cup chopped fresh cilantro
3 tablespoons lime juice
2 tablespoons vegetable oil
1/4 teaspoon hot chili flakes
Salt and pepper

In a large bowl, mix cabbage, cilantro, lime juice, vegetable oil, and chili flakes. Add salt and pepper to taste.

Beet Recipes

Balsamic Beets with Toasted Walnuts and Goat Cheese
Adapted from the mind of Shari Raider (SIO Owner)

1 bunch beets
olive oil, enough to coat whole beets
1/4 cup balsamic vinaigrette (recipe below, make your own version, or you can use store bought)
½ cup toasted* walnuts
4 oz. soft crumbly goat cheese (could use Feta if you prefer a saltier addition)
salt and pepper, to taste

Start by removing the tops from your beets (if the tops are in good condition you can save them to use as greens in another dish). Wash the whole beets, place in a bowl and lightly coat with olive oil. Roast the beets in the oven for 35-45 minutes, or until you can poke easily with a knife. Remove the beets from the oven when done and let cool until you are able to handle. Slip the skins off the beets and cut into larger bite-sized chunks and place in a medium sized bowl. Combine beets with balsamic and mix until coated. Then add toasted walnuts, crumble goat cheese, and season with salt and pepper to taste. Let mixture chill in the refrigerator and serve cold or at room temperature.

*To toast walnuts place in dry skillet over medium-high heat and stir frequently until walnuts begin to brown. Or you place them on a solid toaster oven tray and toast on the medium setting.

Balsamic Vinaigrette Recipe
Recipe from http://www.cdkitchen.com/

1/2 cup olive oil
1/4 cup balsamic vinegar
2 teaspoons fine Dijon mustard
1 teaspoon finely chopped fresh thyme leaves
1 teaspoon finely chopped fresh rosemary leaves
salt and freshly ground black pepper to taste

Combine vinegar, mustard and herbs. Slowly add oil and vigorously whisk until the mixture emulsifies. Add salt and pepper to taste. A pinch of brown sugar or honey may be added if the vinegar is too sharp. Makes: ¾ cup

Chocolate Beet Cake
From Recipes from America’s Small Farms by Joanne Lamb Hayes and Lori Stein

4 (1-ounce) squares unsweetened chocolate, cut into small pieces
4 large eggs
2 cups packed light brown sugar
½ cup canola oil
1 teaspoon vanilla extract
2 cups unbleached all-purpose flour
1½ teaspoons baking powder
1 teaspoon baking soda
½ teaspoon salt
4-5 beets, peeled and grated
About 1 ¾ cups cream cheese frosting or fudgy chocolate frosting

Preheat oven to 350˚F. Grease two 9-inch round cake pans; line the bottoms with circles of parchment or wax paper and grease the parchment. Melt the chocolate in the top of a double boiler, over gently boiling water; the upper pan should not touch the water. Keep warm. Whip the eggs and brown sugar with an electric mixer for about 5 minutes, or until the mixture is noticeably thicker. Add the oil, whipping until it is incorporated. Add the vanilla and melted chocolate and scrape the sides and bottom of the bowl.

Sift together the flour, baking powder, baking soda, and salt. Add to the egg mixture and mix on low speed until well combined, stopping to scrape the bowl. Add the beets and mix well. Pour into the prepared pans. Bake for 40 to 50 minutes, or until the centers spring back when gently pressed. Let cool completely in the pans on wire racks.

With a serrated knife, trim the dome from both cakes so they are flat, not rounded. Trim the sides of the cakes if they seem dry. If you wish, grind the cake trimmings in a food processor or blender and reserve them for garnishing the sides of the cake. Put one of the cake layers on the cardboard circle or a flat serving plate. Spread on ¾ cup of the frosting. Gently flatten the second cake layer on top. Frost the sides and top of the cake with the remaining 1 cup frosting. If desired, press some of the reserved cake crumbs onto the sides of the cake.


Cucumber Recipe

Short-Term Cucumber-Onion Pickles
From Local Flavors by Deborah Madison

Note: These sweet pickles keep for about 5 days in the refrigerator. Also the vinegar tends to dull the herbs, so you might refresh the pickles with a new sprig just before serving.

2/3 cup white wine or apple cider vinegar
1/3 cup sugar
pinch salt
2 shiny fresh red or white onions
2 cups thinly sliced cucumbers, peeled only if skins are tough
a few dill sprigs, fennel greens, or lovage leaves
1 teaspoon mixed whole peppercorns
3 tablespoons olive oil

Mix the vinegar, sugar, and salt and set aside, stirring occasionally, until the sugar is dissolved. Thinly slice the onions into rounds, then toss them with the cucumbers, herb, and peppercorns in a noncorrosive bowl. Add the oil to the vinegar, stir well, then pour over the vegetables. Toss well, then cover and refrigerate. It’s best if the pickles can sit a day before being used.

Summer Squash Recipes

Summer Squash Galette
Recipe from Ryan Galt and Eve Hightower

For Crust:

1¼ cups flour
¾ cup butter (cold)
¼ teaspoon salt
3 to 4 tablespoons water
1 teaspoon flour

For Filling:

½ teaspoon fresh thyme or Italian seasoning
½ teaspoon pepper
1 cup mozzarella
3 medium thinly sliced summer squash, such as zucchini

For the crust:

Preheat oven to 350 degrees. Mix the flour and salt in a large bowl. Take the butter from the refrigerator and immediately cut it into ¼-inch cubes. Blend this with the flour mixture, using your fingertips, until it has the consistency of coarse meal.
Add 1 tablespoon water and blend with a fork, adding water a tablespoon at a time as needed to form a workable dough. Gather it into a ball. Do not over-handle.
Add a little flour to a large work surface and roll the dough into a 14-inch circle. If you prefer a finished look, trim the circle edges with a knife. Fold the circle of dough in half, and then half again. Move this onto a baking pan that is at least 12 inches wide. Unfold it.

For the filling:

Sprinkle flour on top of the dough. Mix the seasonings and cheese in a bowl. Layer the squash slices and cheese mixture, keeping it about 2 inches from the side of the dough. Fold the 2 inches of dough on the sides into the center, thereby overlapping much of the mixture. Some of the mixture should remain exposed. Bake for 30 minutes. Let cool for five to 10 minutes. Serve immediately. Serves 8


Curried Summer Squash Soup With Yuba and Cilantro

Adapted from The New York Times, www.nytimes.com

1 tablespoon vegetable oil
1 medium yellow onion, sliced
1 teaspoon minced fresh ginger
1 teaspoon minced lemongrass
Salt
1 teaspoon curry powder
2 pounds (about 5 medium) summer squash, thinly sliced
1 cup coconut milk
1 sheet yuba (aka.tofu skin/dried beancurd), cut into pieces about 1/4 inch by 1/2 inch
1/4 cup chopped cilantro leaves

In a large saucepan, combine the oil, onion, ginger, lemongrass and a pinch of salt. Place over medium-low heat and sauté until the onion is tender. Add the curry powder and stir for 2 minutes. Add the squash, coconut milk and 3 cups of water. Season with salt. Cover and simmer until the squash is tender. Allow the soup to cool until no longer steaming. Working in batches, purée in a blender until smooth. Pass the soup through a fine-meshed strainer set over the saucepan and return to medium-low heat. Add the yuba and bring to a simmer. Remove from heat, stir in the cilantro and adjust salt to taste. Serves 4 to 6

Cilantro Recipes

Cabbage and Cilantro Slaw

(see above in Cabbage Recipes)

Curried Summer Squash Soup with Yuba and Cilantro

(see above in Summer Squash Recipes)

Farmer in Training Spotlight: Jeramy

Jeramy first heard about Sauvie Island in a song from band in Olympia, decided to look it up on google, and found the SIO FIT program. Prior to SIO Jeramy was working in environmental education and wilderness therapy in Olympia. In the future he hopes to create a combined farming and wilderness education program. After graduating from Evergreen State College Jeramy spent time as a garden coordinator for an elementary school, worked on Victory Gardens for All in Lane County, and lived at Rio Azul, a permaculture farm and community in northern Patagonia. After spending time at several smaller scale farming and gardening projects Jeramy wanted to learn about and experience a larger scale CSA farm, and that is how he found his way to SIO. Out at the farm Jeramy enjoys harvesting beets because you are cleaning the bed and taking larger beets to make space for the smaller ones.  He also enjoys harvesting summer squash because, “its cool to see how the plants change day to day.”

Categories : Blogroll, CSA Newsletter, Farm News & Updates, Recipe

CSA News: Week 9- July 14 to July 20

Posted by sio@dmin on
 July 14, 2009

This Week’s Share

  • Broccoli
  • Carrots
  • Cucumber
  • Dill
  • Garlic
  • Green Beans
  • Kale, Red Russian
  • Lettuce
  • Summer Squash

Save the Date


Your Invited to the SIO Annual Potato Harvest Work Party
Saturday August, 1 10am-2pm


Join us for our annual potato harvest work party and french fry feast. This is a very kid friendly event. Please bring a potluck dish to share. Join us anytime during the event even just for lunch!

Schedule of Events

  • 10-12:30 spuds harvest
  • 12:30-1pm farm tour
  • 1pm-2pm potluck lunch

Recipes


Summer Squash Recipes


Note: Remember to look at the last week’s blog for summer squash recipes from Park Kitchen chef de cuisine David Padberg.

Fritto Misto
Recipe from Rob Benedetti (CSA Coordinator Francesca’s Dad)

Note: This dish has been passed down through at least 4 generations of my food loving Italian family, and it is my favorite way to prepare summer squash. Fritto misto simply means fried food in Italian, and this recipe is incredibly versatile (both with the types veggies you can use and the flavors you doctor is up with). For this batch I call for using summer squash, but you could also try some of the green beans or you can also slice up potatoes, eggplant, yams, winter squash, and many other things and prepare them using the same method. Try the suggested combinations, or try something you come up with on your own, just make sure you have some fritto misto.

1-3 summer squash (zucchini or patty pan work), also a great recipe for using any over grown squash if you have any in your garden
olive oil, approximately ¼-½ cup
1 cup all-purpose flour
1-2 eggs
1-2 tablespoons milk, optional
salt
pepper
sugar
lemon
cinnamon

Slice up squash into rounds approximately 1/8”-1/4” thick. Do the same with potatoes, eggplant, or other vegetables if you are using them. Set aside. In a large frying pan or skillet pour in enough olive oil (¼-½ cup) to heavily coat the pan for frying in. Start heating the oil to a medium heat, and in the mean time take 2 shallow bowls place 1 cup of flour in one and crack the egg into other. Lightly beat the egg and add 1-2 tablespoons milk to thin it out if you want. If you are doing a large batch of veggies go ahead and mix up 2 eggs to start out, because you will likely need it.

Test the heat of the oil by dropping 1 to 2 drops of water in the pan, if it crackles gently you are at the right heat. If it crackles loudly and splatters the heat is too high, lower heat until you reach the gentle crackle point. If it doesn’t crackle at all or weakly, increase heat slightly until you reach the gentle crackle.

Next start by taking the squash slices and coating both sides with flour, then dipping them in the egg on both sides, then place them in the frying pan. Cook on first site 2-3 minutes (or until light golden brown), then flip and cook 2-3 minutes on other side. When cooked on both sides remove from the oil to a plate covered with a paper towel to drain. Sprinkle batches immediately with salt and pepper for savory flavors or sugar and lemon for sweet. My dad’s personal favorite is the sugar and lemon combination, and I think a little cinnamon is fun too. Just make sure you do it while they are still hot, that way they absorb the flavor more fully.

Kale Recipe

Gnocchi with Creamed Kale
Adapted from  www.cooklikemad.com


Note:
This recipe makes 2 servings, but you can easily double or triple for family sized quantities.

For Gnocchi:

1lb of potatoes (some from last weeks share would be great), peeled, cut in half lengthwise, and sliced thinly crosswise
1 egg yolk
1/3 cup plus 1 tablespoon all-purpose flour
pinch nutmeg
salt and pepper

For Creamed Kale:

2 cups half and half
2 cups chopped kale
pinch nutmeg
pinch cayenne or dried red pepper flakes
salt and pepper

Place sliced potato in a large pot and cover them with plenty of water (at least 1 1/2 quarts or 6 cups) and bring to a boil, covered, over high heat. Meanwhile, chop kale. When potatoes are very tender, easily pierced with a knife, and practically falling apart, drain them in the pot, and place the pot back on the stove for a few minutes just to evaporate any extra water. Do not let the potatoes brown.

Mash the dried potatoes with a potato masher, ricer, or food mill, and spread mash out on a plate to cool. Maximizing the surface area will help cool it faster. Once cooled (they don’t have to be cold, just not warmer than lukewarm, to avoid scrambling the eggs), dump the potato mash into a mixing bowl, add the egg yolk, nutmeg, salt and pepper, then the flour last, stirring just until the dough comes together, no more.

Bring a pot of salted water to a boil. Meanwhile, roll out gnocchi balls into ropes, about 3/4 inch thick. Using a small, sharp knife, cut gnocchi into dumplings, about 3/4 inch to 1 inch apart. If your knife begins to stick to the dough, take care to wash it off before continuing, or your gnocchi will look ragged. Let gnocchi sit out while you make the cream sauce.

Pour half and half, kale, nutmeg, cayenne, salt and pepper into a saucepan. Bring to a boil, reduce to a simmer, and let it reduce to sauce consistency. While it reduced, drop the gnocchi into the boiling water and cook uncovered. When the gnocchi rise to the top, they are done (it should take about 1 minute). Drain the gnocchi, place in the saucepan, which is now turned off, toss to coat, and spoon them into shallow bowls to serve. Enjoy!

Green Beans Recipe

Fresh Green Beans with Dill Butter
Adapted from www.real-restaurant-recipes.com

For Fresh Dill Butter:

Note: This recipe is enough dill butter for the green beans and then some.

1 stick softened butter
1/2-1 bunch dill, chopped (choose amount based on how dilly you want the butter)
1-2 cloves garlic, minced
1 teaspoon lemon juice

For Green Beans:

1 pound green beans
4-6 tablespoons Dill Butter (recipe above, or simply use regular butter and salt and pepper if you prefer)

Wash beans thoroughly in clear, cold water and trim the ends. You may want to cut the green beans into halves or thirds to make them more bite size. You can cut them straight across or at an angle or you can even slice them lengthwise (French cut) if you want. Place green beans in a pot of boiling water and blanch them for 3-4 minutes (Some people add a bit of salt to the boiling water, but this is optional and there should be plenty of room in the pot but don’t use more water than you have to. If you are cooking more beans than you have room for, it’s okay to cook them in batches.) Drain beans in a colander. Place your Dill Butter in a skillet or sauté pan over medium-low heat to melt the butter. Put beans in the pan with the Dill Butter and heat thoroughly, making sure the beans are re-heated but not over-cooked. Plate beans and serve.

Carrot Recipe

Pickled Carrot Spears with Dill
Recipe adapted from EdiblePortland, by Lucy Norris

Note: This recipe can is easily doubled to make 4 pints, but it does require 2 lbs. carrots, so if you want to do that you’ll have to save up for 2 week or harvest some from your own garden.

1 lb large carrots (peeled and cut into spears), or whole small carrots
2 garlic cloves (peeled)
2 whole small chili peppers
2 sprigs dill
1 tsp celery seed (1/2 tsp per jar)
1 1/4 cups white distilled vinegar
1 1/4 cups water
1/8 cup coarse salt (Kosher or pickling)
2 clean pint jars

1. Into each clean pint jar, place one clove of garlic, one chili, one sprig of dill, and 1/2 teaspoon celery seed. Then pack carrots vertically into jars (be careful not to handle mouth of jar).

2. Meanwhile, combine vinegar, water, and salt in a saucepan and bring to a boil. Pour hot liquid over vegetables, leaving at least a 1/4-inch head-space. Remove air bubbles.

3. Place lid over mouth of jar, screw on cap, and then process jars in a hot water bath for 10 minutes (longer for elevations over 1,000 ft).

4. Allow jars to cool, and store in a dark cupboard for at least three weeks before tasting. Once opened, store in refrigerator for up to six months (only using clean utensils when handling).

Makes 2 pints

Cucumber Recipe


Baja Style Cucumber Salad

From the fruit cart on Santa Maria Beach, Baja Cabo Sur, Mexico

Note: This is really more of a snack than a side to a dinner. It is a quick and flavorful way to enjoy the fresh crisp flavor of the season’s first cumbers.

1 cucumber
½ fresh lime
salt
cayenne
paprika

Slice up the cucumber into 1/8in. rounds. Sprinkle with salt to taste, cayenne to taste, and a dash of paprika. Squeeze the juice of 1 over the cucumber and spices, toss until coated, and enjoy. If you prefer more lime, then go ahead and use the other half as well.

Dill Recipes

Fresh Green Beans with Dill Butter

(see above in Dill Recipes)

Pickled Carrot Spears with Dill

(see above in Carrot Recipes)

Farmer in Training Spotlight: Caitlin


Caitlin’s interest in science started from the time she spent growing up in her grandmother’s garden all the way through graduating from Wesleyan University with a degree and Earth and Environmental Science. After college Caitlin spent some time in Findhorn, Scottland, an ecovillage where she worked in the garden, took some permaculture classes, and found her first inspiration toward sustainable food systems. After traveling she returned to her hometown of Quincy, MA with the desire to do the groundwork for the first community garden in that area. In order to have more influence on that project Caitlin wanted to gain more direct knowledge to share with the community back in Quincy. Moving to Portland, “the Mecca of local food systems,” was the first step in achieving that goal. After volunteering with SIO in the fall, Caitlin soon looked in to the FIT Program and accepted her offer to join our crew. Out at the farm she enjoys CSA box packing in the barn, racking garlic, and being Jedi (which at SIO means irrigation duty). As with so many farmers Caitlin also loves eating the food we grow and says one of her favorites activities is lunchtime because “it’s a really satisfying work environment and feel really grateful to be in it.”

Categories : Blogroll, CSA Newsletter, Farm News & Updates, Recipe
« Previous Page
Next Page »

Recent Posts

  • CSA Week #22: October 31st & November 2nd
  • CSA Week #21: October 24th & 26th
  • CSA Week #20: October 17th & 19th
  • CSA Week #19: October 10th & 12th
  • CSA Week #18: October 3rd & 5th

Archives

Sauvie Island Organics | © 2025 All Rights Reserved
iThemes Builder by iThemes | Powered by WordPress | Site by LRP