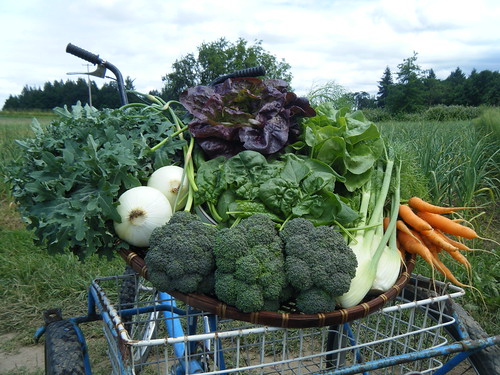
Image

Author Archive for sio@dmin – Page 4

CSA News: Week 6- June 22 to June 28

Posted by sio@dmin on
 June 22, 2010

This Week’s Share

  • Broccoli
  • Carrots
  • Fennel
  • Garlic Scapes
  • Kale, Red Ursa
  • Lettuce
  • Onions, Siskiyou Sweets
  • Spinach

Recipes

Note: Remember to check out Chef’s Corner for recipes using Carrots, Sweet Onions, and Spinach in the Week 5 blog post.

Broccoli Recipes

Curried Broccoli Soup
From the City Gardeners Cookbook

1 tablespoon butter
¾ cups onion, chopped
2 garlic scapes, minced
¾ teaspoon curry powder
1/8 teaspoon freshly ground pepper
2 cups vegetable stock
4 cups broccoli, chopped
1½ cups potatoes, cubed
1 cup milk

In a soup kettle melt butter and sauté onions and garlic until tender. Add curry powder, pepper, stock, and 2/3 cup water; bring to a boil. Stir in broccoli and potatoes. When mixture returns to boil, reduce heat, cover, and simmer until vegetables are tender, about 20 minutes. Puree soup (if desired) in batches in food processor. Return puree to soup kettle, stir in milk and heat slowly. Makes 6 servings.

Pasta with Broccoli Florets
From Madison Area CSA Coalition

2 to 4 cups broccoli florets (you decide how much broccoli you want in your pasta)
½ pound pasta
2 tablespoons olive oil
2 tablespoons butter
1 to 2 garlic scapes, minced
½ pounds mushrooms (whole, halved, or sliced)
¼ cup grated Parmesan cheese

Cook broccoli florets in boiling water 2 to 3 minutes. Remove with slotted spoon. Cook pasta in same water (or use fresh if you prefer). Meanwhile, heat olive oil and butter in a skillet. Saute garlic and mushrooms 3 to 4 minutes. Stir in broccoli. Drain pasta. Toss with broccoli and cheese. Makes 2 to 4 servings.

Fennel Recipes

Portobello Mushrooms Stuffed with Spinach, Parmesan, and Fennel
Adapted from Food to Live By by Myra Goodman

4 large Portobello mushroom caps (about 1½ pounds total)
¼ cup olive oil, plus more for oiling the baking dish
½ cup onion, finely minced
1½ cups fennel, finely minced
4 garlic scapes, finely minced (or 4 cloves of garlic)
6 ounces shiitake mushrooms, stems discarded, caps minced (about 1 cup)
12 ounces spinach, cut into ribbons (about 8 cups)
¼ cup fresh flat leaf parsley, minced
3 tablespoons fresh tarragon, minced
1 ¼ cups freshly grated Parmesan cheese
Salt and freshly ground black pepper, to taste

Wipe the Portobello mushroom caps clean with a damp towel. Using a paring knife or teaspoon, remove the gills to create a shallow depression for the stuffing. Place the portobellos on the lightly oiled baking dish and set aside. Position the rack in the center of the oven and preheat oven to 400˚F.

Heat the olive oil in a large skillet over medium-low heat. Add the onions and fennel and cook until soft, 8 to 10 minutes. Add the garlic scapes and shitake mushrooms and cook until the moisture has evaporated, about 10 minutes. Stir in the spinach and cook until it wilts, about 5 minutes, working in batches, in necessary. Add the parsley, tarragon, and ½-cup of Parmesan cheese and stir to combine. Cook until the cheese melts, about 1 minute. Season the filling with salt and pepper to taste.

Spoon the filling into the portobellos, mounding it slightly. Sprinkle 3 tablespoons of the remaining Parmesan cheese over each mushroom. (The mushrooms can be prepared up to this stage 4 hours ahead. Refrigerate them, covered until ready to bake). Bake the mushrooms until they are tender but not soggy and the cheese on the top has browned, 20 to 25 minutes. Serve immediately. Serves 4.

Fennel and Sweet Onion Salad
By Francesca Benedetti, CSA Coordinator at SIO

Note: The amount you use of each item (aside from the fennel) is up to you and your taste preference. I like to go heavy on everything because I like things with a lot flavor.

2 bulbs of fennel with tops, thinly sliced
½ to 1 sweet onion, thinly sliced
1 to 2 tablespoons olive oil
2 to 3 tablespoon fresh lemon juice
¼ to ½ cup shaved or shredded Parmesan cheese
Sea salt and freshly ground black pepper, to taste

Thinly slice the fennel, including the bulb and the stalk portion of the tops and place in medium size bowl. Reserve 1/3 to ½ of the fronds for later use. Thinly slice the sweet onion and add to the bowl. Chop up the reserved fennel fronds and add to the bowl. Add in the lemon juice, Parmesan cheese, and sea salt and pepper to taste. Toss everything together until evenly combined and let stand for at least 15-30 minutes (or up to 24 hours) before serving.

Spinach Recipe

Portobello Mushrooms Stuffed with Spinach, Parmesan, and Fennel
(see above in Fennel Recipes)

Categories : Blogroll, CSA Newsletter, Farm News & Updates, Recipe, Uncategorized

CSA News: Week 5- June 15 to June 21

Posted by sio@dmin on
 June 15, 2010

This Week’s Share

  • Arugula
  • Broccoli
  • Carrots
  • Dill
  • Lettuce
  • Garlic Scapes
  • Napa (Chinese) Cabbage
  • Turnips, Hakurei

Share Notes:

  • Broccoli: Broccoli is bountiful this week. If you find yourself with more than you can use this week try freezing some. For best freezing results cut into equal sized pieces, blanch in hot water for 1-2 minutes or until broccoli develops a bright green color. Cool under running water and put it in a plastic freezer bag.
  • Garlic Scapes: In the life cycle of garlic its attempt at flowering and producing seed creates what we know and enjoy as the “scape”. This long green scallion like shoot has a relatively short season, so enjoy them now  while they last. The entire scape is edible and delicious, from tip to stalk. They are great added fresh to salads, and can also be used as you would garlic cloves in almost any cooked dish.
  • Napa (Chinese) Cabbage: This Chinese type cabbage is exceptionally light, aromatic and sweet in flavor. The creamy white blanched interior is great cooked or raw.
  • Turnips, Hakurei: It’s the year of the turnip! This week we planned radishes for your share, but due to the persistent and heavy spring rains the radishes developed splits in the field. While the radishes struggle the Hakurei turnips have been thriving, and they are taking their place of radishes this week. Of course there are more turnip recipe ideas in the blog for those of you wondering what to do with all those turnips.

Recipes

Broccoli Recipe

Ginger Broccoli (and Napa Cabbage)
Adapted from Eating Well in Season by Jesse Price

Note: Originally this recipe calls for just broccoli, but Napa (Chinese) cabbage is also wonderful prepared this way. Try adding some sliced up Napa cabbage in with the broccoli, or you can use substitute a head of Napa cabbage for the broccoli to try it on its own.

1 tablespoon canola oil
2 tablespoons minced garlic scapes
4 teaspoons minced fresh ginger
6 cups broccoli crowns, trimmed and chopped (about 1 pound broccoli)
½ to 1 head Napa (Chinese) cabbage, cut into ½ strips
3 tablespoons water
1 tablespoon fish sauce (can substitute tamari soy sauce)
1 tablespoon rice vinegar

Heat oil in a large skillet over medium-high heat. Add garlic and ginger and cook until fragrant but not browned, 30 seconds to a minute. Add broccoli and cook, stirring, until the broccoli is bright green, 2 minutes. Add in Napa cabbage and drizzle water and fish sauce over the broccoli and cabbage; reduce heat to medium, cover and cook until the broccoli is just tender, about 3 minutes. Stir in vinegar just before serving. Makes 4 servings, about 1 cup each.

Dill Recipes

Dill Cheese Spread
From the Moosewood Restaurant Kitchen Garden by Molly Katzen

1½ cups grated firm cheese (Cheddar, Monterey Jack, Swiss, Jarlsberg, gouda)
2/3 cup cream cheese or cottage cheese (regular or low-fat)
¼ cup or less chopped fresh dill (can also use this same recipe with other herbs)
2 to 3 tablespoons additional seasonings: chopped vegetables, chilies, nuts, garlic, or edible flowers)

Allow the grated cheese to soften at room temperature for easier mixing. Use a food processor or mixer to whip the cheeses together until smooth and well blended. Add the remaining ingredients. Makes about 2½ cups.

Creamy Dill Dressing
From Asparagus to Zucchini: A Guide to Farm Fresh Produce by the Madison Area CSA Coalition

Note: This dressing is great with a quick green salad; you could use any combination of all the items in your share this week with lettuce, arugula, and/or Napa cabbage as the greens.

1 cup real mayonnaise
8 ounces sour cream
¼ cup milk
1½ tablespoons olive oil
1 tablespoon fresh dill
1 tablespoon wine vinegar
2 teaspoons paprika
¼ teaspoon white pepper
1/8 teaspoon garlic powder
1/8 teaspoon salt

Combine mayonnaise and sour cream; gradually stir in milk, mixing well. Stir in remaining ingredients. Cover and chill several hours. Serve with salad greens. Makes 2 cups dressing.

Napa (Chinese) Cabbage Recipe

Shredded Salad of Many Greens
Adapted from Local Flavors by Deborah Madison

3 cups finely shredded napa cabbage
3 cups finely shredded romaine, red leaf or butter lettuce
2 cup slivered arugula
½ cup slivered parsley (or half as much lovage)
1 shallot, finely sliced
2 teaspoons fresh lemon juice, plus 1 teaspoon grated zest and sea salt
4 to 5 tablespoons extra virgin olive oil

Wash and dry all the green, then toss them together in a bowl. Mix the shallot and lemon juice and zest with ¼ teaspoon salt, then whisk in oil to taste. Toss the greens with a few pinches of salt, then with the dressing. Mound onto plates and serve. Serves 4.

Ginger Broccoli (and Napa Cabbage)
(see above in Broccoli Recipes)

Turnip Recipe

Gratin of Hakurei Turnips
Recipe from Emily Thomson of Full Circle Farm in Carnation, WA http://www.fullcirclefarm.com

2 lb hakurei turnips, sliced ¼ inch thick (for larger turnips halve or quarter so all pieces are relatively the same size)
3 Tbsp unsalted butter
thin slices day-old baguette or other good white bread
salt and freshly ground pepper
1/4 cup heavy cream
1/2 cup freshly grated Parmesan cheese

In a saucepan of salted water, boil the turnip slices until tender, about 12 minutes. Preheat the oven to 325 degrees. Butter a deep gratin dish with 1 tablespoon of the butter and line it with the bread slices. Drain the turnip slices and arrange a layer of them over the bread slices. Salt lightly, grind some pepper over them, and sprinkle with some Parmesan cheese. Add a layer of bread slices, then turnips, then salt, pepper, and cheese. Repeat until all ingredients are used, ending with a layer of turnips, salt, pepper, and Parmesan. Drizzle the heavy cream over the entire dish. Break the remaining 2 tablespoons of butter into small bits and scatter over the top. Place into the oven and bake until golden, about 35 minutes.

Chef’s Corner: June

In order to offer you some additional culinary inspiration we have been picking the brains of some of the areas most talented chefs and restaurant owners. We have asked them to provide us with recipes and general cooking techniques based on the crops that you receive in your shares during the month of June. This month our featured chef is Katherine Deumling, owner of Cook with What You Have cooking school located in inner SE Portland.

Katherine in her kitchen

Katherine Deumling, Owner of Cook With What you Have

I have a small business called Cook With What You Have. I teach cooking classes primarily from my home in inner SE Portland. I help people build their skills, gain experience, learn to taste and improvise and learn how to stock their pantry and shop/source so that cooking is more of a pleasure and less of a chore. Local produce is the heart and soul of my work, rain or shine, June or January! My garden, my CSA share, and the farmers markets supply all of the produce for classes and daily meals for my family. Many more details and my summer class schedule at my website and my blog, where I post recipes weekly. And I am offering SIO members, $10 off my summer classes. Contact me at Katherine@cookwithwhatyouhave.com with any questions or for more information.

Through my work with Slow Food Portland, I have been familiar with, and a fan of, Sauvie Island Organics for many years. SIO has hosted some of the most memorable Slow Food Portland events-events in support of farmers and the critical work of advocating for and educating consumers about local farms and food.

I grew up in a creative family with a make-do-with-what-you-have mentality and we often lived far from the nearest grocery store. My mother always had a large and varied vegetable garden, and loaded shelves of home-canned goods. So I grew up cooking with what was in the kitchen, garden, and pantry most of the time. After years of cooking for my family (and now with a three-year-old underfoot) and friends, I have refined delicious, healthy, and often quick meals based on the abundance of wonderful produce and products in our regional foodshed.

I have studied food and culture in Italy and Mexico and grew up in Germany. I have also worked in restaurants. My primary experience comes from feeding groups of people on the fly in many settings with whatever is available. My cooking is mostly rooted in Italian cuisine and is influenced by German, Italian, Mexican, and Thai traditions.

RECIPES

Fava Beans with Feta and Mint

Carol Boutard of Ayers Creek Farm told me about this method of cooking fava beans which eliminates the time consuming step of peeling each individual bean. I don’t think I’ve ever gone back to the other way. This is an Iranian way of cooking favas.

2-3 pounds fava beans in their pods
¼ cup kosher salt
2 ounces feta, crumbled
10 or so fresh mint leaves
squeeze or two of lemon juice
2 tablespoons olive oil
freshly ground black pepper

Fill a six-quart pot (or slightly larger) three-quarters full of water. Add salt and bring to a boil. Put the whole fava beans, pods, stems and all in the boiling, heavily-salted water. Bring back to a boil then turn down to medium but keep the water at a lively boil. Occasionally press the fava beans down and move around a bit. Cook covered, until the pods start falling apart, between 20 and 30 minutes. Drain and fill pot of beans with cold water. This allows you to extract the beans more quickly. You can also just drain and let sit until cool. Remove beans from pods. There is no need to peel each individual bean. The skin should be tender and the beans perfectly seasoned. Toss beans with the remaining ingredients. Adjust seasoning to your liking. Enjoy as a side dish.

Fava beans cooked this way are delicious with pasta and a bit of parmesan, with boiled potatoes and parsley. The other night I added them to Israeli couscous with some mint and grated, hard cheese (Asiago Stella, I think).

Green Salad with Roasted Beets, Carrots, and Hard-boiled Egg

3 hard-boiled eggs
5 medium carrots (or however many you want to use, have, etc.), scrubbed and cut into 1 ½ inches chunks on the bias
4 smallish beats (or however many . . .. ), scrubbed and cut into small wedges (I don’t tend to peel beets if they’re fairly small)
8 cups of mixed greens (mache, arugula, butter lettuce, oak leaf, escarole, . . ..)

Vinaigrette:

1 stalk green garlic or 1 clove mature garlic, minced
1 teaspoon Dijon-style mustard
2-3 teaspoons lemon juice (to taste)
sprig or two of fresh thyme, tarragon or summer savory, finely chopped
3 tablespoons olive oil
salt & pepper

Spread carrots and beets on a rimmed baking sheet, sprinkle with salt and drizzle with olive oil and roast in a hot oven (425-450) for about 20 minutes until tender and slightly caramelized around the edges.

Meanwhile wash and dy the greens and roughly chop hard-boiled eggs. Mix all dressing ingredients well. Then toss the greens with the roasted veggies, eggs and dressing and enjoy as a light summer supper. We ate this recently with cheesy cornbread muffins. The muffins were an adaptation of a recipe from Michael Ableman’s Fields of Plenty. I added grated sharp cheddar, a pinch or two of chili flakes and a bunch of finely chopped chives.

Spinach Risotto

1 bunch spinach (thoroughly washed), roughly chopped
7 cups vegetable or chicken stock or broth (made with homemade veggie bouillon)
1 medium onion, finely chopped
3 tablespoons olive oil
2 cups arborio rice
1/2 cup dry white wine (optional)
1/2 cup freshly grated Parmesan cheese
3 Tbs butter
Freshly ground black pepper
1-2 tsp lemon juice (optional)
½ tsp lemon zest (optional)

In a saucepan bring 7 cups water with 10 tsps of homemade veggie bouillon to a boil and keep at a bare simmer (or just use a chicken or veggies stock of your choice.

In a large sauté pan cook onion in oil over medium heat, stirring, until softened. Stir in rice, stirring until each grain is coated with oil and cook for 2 minutes. Add wine (if using) and cook, over moderately high heat, stirring, until wine is absorbed. Add about 3/4 cup simmering broth and cook over moderately high heat, stirring frequently, until broth is absorbed. Continue adding broth, about 3/4 cup at a time, cooking, stirring and letting each addition be absorbed before adding the next, until about half of broth has been added. Continue adding broth in the same manner until rice is tender and creamy looking but still al dente, about 18 minutes. A few minutes before the rice is tender stir in the spinach and a cup of broth. Cook for a minute or two until spinach is wilted. Salt and pepper to taste. Add butter and parmesan and a little more broth is it looks a bit dry, mix well and remove pan from heat. Let rest for 5 minutes, covered, before serving.

Carrot Salad with Harissa, Feta and Mint
Adapted from Smittenkitchen.com

If you don’t happen to have feta and harissa on hand, I make a simpler version of this salad without those and if you have cooked chickpeas on hand, it makes for a nice hearty salad.

3/4 pound carrots, peeled, trimmed and coarsely grated
4 tablespoons olive oil
1 crushed clove of garlic
1/2 teaspoon ground caraway seeds
3/4 teaspoon ground cumin
1/2 teaspoon paprika
3/4 teaspoon harissa (for a solid kick of heat; adjust yours to taste, and to the heat level of your harissa)
1/2 teaspoon sugar
3 tablespoons lemon juice
3 tablespoons flat leaf parsley, finely chopped
2 tablespoons fresh mint, finely chopped
3 ounces feta, crumbled or chopped into bits

In a small sauté pan, cook the garlic, caraway, cumin, paprika, harissa and sugar in the oil until fragrant, about one to two minutes. Remove from heat and add the lemon juice and a pinch of salt. Pour over the carrots and mix. Add the herbs and mix. Leave to infuse for an hour if you have time, at least a 10 minutes, then add the feta before eating.

Harissa: Is a North African chile paste. There is almost nothing it doesn’t make more delicious: eggs, potatoes, stews, couscous, sandwiches and more, and there are almost as many recipes as there are people who consume it. Most boil down to hot chiles ground with garlic, cumin, coriander, caraway and olive oil, often with a smidge of sundried tomatoes. You can make your own or you can find it at Pastaworks or other local specialty stores.

Braised Chard
Adapted from Chez Panisse Vegetables by Alice Waters

Wash a large bunch of fresh chard. Separate the leaves from the stems and reserve stems for another use. Cut the leaves into 1-2 inch ribbons. Slice a large onion and begin stewing it in some olive oil in a good-sized pot or pan. When the onion has softened a bit add the chard, season with salt and pepper, cover and stew, stirring occasionally for 20-30 minutes. You can add garlic, bacon, or lemon zest but just by itself it is sweet and wonderful.

I’ve used this as a pizza topping with some feta or for a filling for a savory tart, as a pasta sauce or just a side to whatever else I made for dinner. Also wonderful with eggs.

Zwiebelkuchen

This is Southern German style tart/quiche/pizza is a mainstay in my family. Growing up in Germany we spent one year in a small village in Swabia (this was 1977 I think) that had a communal “backhaus” that was fired up with grape prunings once a week and everyone in the village would bring their tarts like this one, their breads for the week, etc. and take turns baking them in this wonderful big, ancient “baking house” – kind of like a giant wood-fired pizza oven.

This can easily be made vegetarian by omitting the bacon. You can also add herbs (parsley and/or thyme are particularly good) and change the cheese to suite your taste or what you have on hand.

Crust:

Scant 2 cups all-purpose flour (I’ve also used half whole-wheat pastry flour and half all-purpose and feel free to play around with other flour combinations)
1 teaspoon baking powder
½ tsp Kosher salt
3 tablespoons olive or vegetable oil
2 tablespoons water
½ cup sour cream or plain, whole-milk yogurt
1 egg

Topping:

2 lbs, or slightly more, sweet onions (or regular yellow, storage onions)
olive oil
3 ounces bacon, diced
4 ounces grated sharp cheddar, Emmentaler, etc.
2 eggs
½ cup sour cream or plain, whole-milk yogurt
salt and pepper to taste

Preheat the oven to 350 degrees.

For the crust, in the medium bowl beat the egg with the oil, water and sour cream (or yogurt) until just mixed. In another bowl mix the flour, salt and baking powder and stir into the wet ingredients with a fork or wooden spoon. Mix well – you may want to use your hands at this point-until it’s smooth. Place the dough in a 13 x 18 rimmed baking sheet (sheet pan) and roll it out to fit the pan. You may have to stretch it a bit with your hands to get it into the corners. It does not need to come up the sides at all.

For the filling, slice the onions in half and then into ¼ thin half rounds. Thinly coat a large sauté pan or pot with olive oil and heat it over med-high heat. Add the bacon and cook for a few minutes until the fat is partially rendered. Add the onions and a few generous pinches of salt. Cover and stir occasionally (and adjust heat if onions stick and brown) until the onions are quite soft and some of the liquid they’ve released has cooked off. This will take between 15 to 25 minutes depending on your onions. Ideally they don’t brown but no harm done if they do.

In a large bowl, beat the eggs with the sour cream (or yogurt), a few grinds of pepper. Add the grated cheese and the onion bacon mixture. Spread on the crust and bake for 35 to 45 minutes until the top is golden and the edges are starting to brown.

Eat warm or at room temperature. This is even better reheated the next day in a hot cast iron pan in a little bit of olive oil.

Categories : Blogroll, Chef's Corner, CSA Newsletter, Farm News & Updates, Recipe

CSA News: Week 4- June 8 to June 14

Posted by sio@dmin on
 June 8, 2010

This Week’s Share

  • Carrots
  • Fennel
  • Kale, Lacinato
  • Lettuce
  • Scallions (Green Onions)
  • Turnips, Hakurei

Share Notes

  • Carrots: Your beautiful, crisp, and sweet carrots were direct seeded into the fields back in late February in order to ensure an early harvest for your share this spring. Enjoy them fresh as a snack or in any of your favorite salads or cooked dishes.
  • Fennel: Fennel plants are cultivated for their bulbous and succulent base, and their feathery fronds are also edible and delicious used as an herb.
  • Kale, Lacinato: This deep blue-green kale, commonly known as Dino Kale or Italian Black Kale, is delicious in any dish that calls for kale.
  • Scallions: Scallions (a.k.a Green Onions) are back for a second season. These tasty shoots are a great addition to soups, salads, tacos, baked potatoes, or as a garnish for most dishes.
  • Turnips, Hakurei: This is the last time this spring you will see these sweet Japanese turnips. Enjoy them fresh or cooked, and look forward to seeing them in your shares again this fall.

Farm News

Excess Bag-gage

In 2008 SIO researched produce bag usage for the CSA program, and we were shocked to learn that SIO and its members used nearly 16,000 bags during that season. For the 2009 season SIO kicked-off its first campaign to try and reduce overall produce bag usage, and challenged our members to reduce our use by 25%. We are excited announce that during the 2009 season we reduced our usage by 27%. We’d first like to thank all of our members contributing to that overall reduction in bag use, it really did make a difference! Despite our overall reduction in use, as a community we still used approximately 13,000 produce bags during the 2009 season. That breaks down to 33 bags per share for the season, or 1 to 2 bags per share per pick-up. For the 2010 we again challenge our SIO members to reduce their produce bag use by 25% by bringing your own bags, using one bag for several items, and reusing produce bags when possible.

We will happily continue to provide produce and paper bags and at our bulk sites (and when needed in box shares) for the convenience of our members, but appreciate any efforts in reducing overall bag use at SIO. New this season, SIO has organic cotton canvas totes for sale for $6.00 (see in photo above). They are a great way to show your SIO pride, carry your produce in style, and reduce your overall bag use over the course of the season. If you are interested in purchasing a tote please email us or talk to Peter at your bulk pick-up site.

Recipes

Fennel Recipes

Fennel and Orange Salad
From Asparagus to Zucchini: A Guide to Farm-Fresh Seasonal Produce by the Madison Area Community Supported Agriculture Coalition

2 fennel bulbs
4 oranges
Juice of 1 lemon
2 tablespoons olive oil
Salt and pepper, to taste

Remove leafy tops of fennel bulbs. Slice trimmed bulb crosswise into thin, bite-sized slices; place in a bowl. Section oranges into a bowl, squeezing in extra juice as well. Stir in lemon juice, olive oil, salt and pepper to taste. Cover and refrigerate at least 20 minutes. Makes 4-6 servings.

Braised Fennel, Carrots & Pearl Onions
From Eating Well in Season by Jesse Price

2 fennel bulbs, stalks removed (reserve fronds for later use)
2 teaspoons butter, divided
1 teaspoon olive oil, divided
1 cup fresh pearl onions, peeled
½ teaspoon sugar
2 to 4 carrots, cut into matchsticks
½ to 1 cups chicken or vegetable broth
½ teaspoon salt
Freshly ground pepper, to taste
2 tablespoons finely chopped fennel fronds

Cut each fennel bulb into 8 wedges, but do not remove the core. Bring water to a boil in a large saucepan, add the fennel wedges and cook for 5 minutes. Remove with a slotted spoon and blot with a towel.

Heat butter and oil in a large cast-iron or nonstick skillet over medium-high heat. Reduce heat to medium; add the fennel and cook, stirring, until nicely browned on all sides, about 8 minutes. Transfer to a dish. Add the onions to the pan, sprinkle with sugar and cook, shaking the pan back and forth, until nicely browned, 4 to 6 minutes.

Return fennel to the pan along with the carrots and 1 cup broth. Season with salt and pepper and simmer, covered, until vegetables are tender, adding more broth as needed to keep the stew moist, 15 to 20 minutes. Garnish with fennel fronds. Serves 4 as a side dish.

Kale Recipe

Cannellini Beans and Wilted Greens
From Chez Panisse Vegetables by Alice Waters

2 cup dried cannellini beans
1 bay leaf (optional)
1 sprig of thyme (optional)
1 onion
1 carrot
6 cups of water or chicken stock
Salt and pepper
1 large bunch of kale (chard, spinach, or turnip greens could also be used as substitute or in addition to kale)
6 cloves garlic
5 to 6 tablespoons olive oil
1 tablespoon chopped rosemary leaves
Extra-virgin olive oil (for drizzling on top at the end)

Soak the beans overnight. Then next day drain them and put them into a heavy-bottomed pot with the bay leaf and thyme. Add the onion and carrot, peeled. Cover with water or stock and bring to a boil. Reduce to a simmer, skimming off any foam that forms on the surface. Cook the beans until very tender, from 45 minutes to 2 hours, depending on the age of the beans and how long they were soaked. Salt the beans generously once they start to soften. When fully cooked, remove from heat. While the beans are cooking, wash, trim, and chop the greens.

Finely chop the garlic cloves and gently sauté them in the olive oil with the rosemary, about 1 minute. Add the beans and about 1 cup of their cooking liquid, and simmer about 5 minutes, until some of the beans have crumbled apart. Add the greens to the beans, and stew together, uncovered, until the greens are wilted and tender. Add more of the bean liquid, if needed, to keep the vegetables moist and a little soupy. Taste for seasoning and grind in some pepper. Serve with extra-virgin olive oil drizzled over the surface. Serves 6 to 8 as a side dish. Also delicious served as a sauce with pasta.

Scallion Recipes

Scallions and Carrots
From Marquita Farm CSA in Watsonville, CA

1 bunch scallions, roots trimmed and white part cut into a 4-inch length
2 medium carrots, cut into sticks (peeled if desired)
1 tablespoon olive oil
1 tablespoon butter
¼ teaspoon sugar
2 tablespoons soy sauce

Sauté the scallions in the olive oil for 3 minutes. Add the carrots and continue cooking until vegetables begin to soften and turn golden. Add butter, soy sauce and sugar and cook 30 more seconds. Enjoy.

Shrimp a la Fein
From the Court of Two Sisters

Note: This recipe is incredibly delicious and very quick and easy (and a personal favorite of Francesca’s, SIO CSA Coordinator). It makes a great 15-minute meal when served over couscous. Recipe easily doubles to serve more people

½ pound medium raw shrimp
2 strips of bacon
4 to 5 scallions, chopped fine
juice of 1/2 lemon
salt, pepper and paprika to taste
1 tablespoon butter
Tabasco
Worcestershire Sauce

Dice bacon and sauté in a skillet until half cooked. Pour off excess fat. Lower flame. Add butter, peeled raw shrimp, scallions (chopped fine), and season and to taste with salt and pepper. When the shrimp are turning pink, add lemon juice and 2-5 dashes each of Tabasco and Worcestershire Sauce. Serve over couscous, quinoa, or pasta if desired.

Turnip Recipe

Oven-Roasted Carrots and Turnips
From Chez Panisse Vegetables by Alice Waters

4 medium carrots
6 medium turnips
¼ cup olive oil
Salt and pepper

Preheat oven to 400˚F. Prepare the carrots and turnips so they are about the same size and shape (you may leave up to a ¼-inch of their tops on if desired). Cut carrots into 1/8-inch slices on the diagonal. Halve or quarter the turnips lengthwise, and slice into 1/8-inch-thick pieces. In a large bowl, toss the carrots and turnips together with the olive oil, and season generously with salt and pepper. (Taste a raw vegetable to check seasoning.) Spread the vegetables evenly in a baking pan in a single layer, and roast, uncovered, stirring and tossing occasionally, until the vegetables are cooked through and caramelized, 20 to 45 minutes. Serve as a side dish with roasted meats or chicken, or on top of creamy polenta for a hearty vegetarian meal, sprinkled with fresh chopped herbs. Serves 4 to 6.

Categories : Blogroll, CSA Newsletter, Farm News & Updates, Recipe

CSA News: Week 3- June 1 to June 7

Posted by sio@dmin on
 June 1, 2010

This Week’s Share

  • Bok Choi, Red Choi
  • Chard
  • Mizuna
  • Onions, Siskiyou Sweets
  • Spinach
  • Turnips, Hakurei

Share Notes

  • Chard: Say hello to your first round of chard. You will see chard in the spring and fall. The chard plant is actually the same species as beets – Beta vulgaris. Chard varieties are bred for their leafy tops, while beets are bred for their roots.
  • Red Choi: These baby heads of red choi are a real spring treat. You may notice some have a budding stem. The stem and flower buds part are both edible, so try it out in your next stir-fry.
  • Onion, Siskiyou Sweets: Spring onions are here! For the first distribution you will receive Siskiyou Sweets (similar to Walla Walla Sweet Onions). Here at SIO your first distributions of onions were planted in early October from transplants started in the greenhouse in July. These onions are over-wintered in our fields so they are ready for early harvest in the spring. The flower stalk has started to form in the center, at the farm we call this bolting. We harvest these bolting onions for an early taste of onions in the share because there is still a usable portion of bulb around the flower stem. We have left a portion of the onion tops because you can use that too.
  • Spinach: You will receive a pound of beautiful and sweet spinach this week in your share. Use this for a delicious spinach salad, or in your favorite cooked spinach recipe. As usual, please be sure to wash thoroughly before eating.

Recipes

Chard Recipes

Chard and Feta Tart
Adapted from Eating Well in Season by Jesse Price

For the crust:

¾ cup whole-wheat pastry flour
¾ cup all-purpose flour
1½ tablespoons chopped fresh thyme or oregano (or ½ teaspoon dried)
¾ teaspoon salt
¾ teaspoon freshly ground pepper
1/3 cup olive oil
5 tablespoons cold water

Combine whole-wheat flour, all-purpose flour, thyme (or oregano), salt and pepper in a bowl. Make a well in the center and add the 1/3 cup oil and 5 tablespoons water. Gradually stir the wet ingredients into the dry to form a soft dough. Knead on a lightly floured surface until the dough comes together. Wrap in plastic and chill for 15 minutes

Pre-heat the oven to 400˚F. Coat a 9-inch tart pan with removable bottom with non-stick cooking spray/shortening/butter. Roll the dough into a 12-inch circle on a lightly floured surface. Transfer to the prepared pan and press into the bottom and up the sides. Trim any overhanging dough and use it to patch any spots that don’t come all the way up the sides. Prick the bottom and sides with a fork in a few places. Bake the crust until firm and lightly browned, 20-22 minutes. Let cool on a wire rack for at least 10  minutes.

For the filling:

2 teaspoons olive oil
6 cups chopped chard, leaves and stem separated
2 tablespoons garlic, minced (use green garlic if you have some)
2 spring onions, sliced
2 tablespoons water
2 large eggs
1 cup part-skim ricotta cheese
1 teaspoon freshly grated lemon zest
1/8 teaspoon freshly ground pepper
½ cup chopped pitted kalamata olives
1/3 cup crumbled feta cheese

While the crust is chilling and pre-baking, you can get started on the filling. Heat 2 tablespoons oil in a large skillet over medium heat. Add chard stems and cook, stirring, until just tender, about 2 minutes. Add garlic and onions and cook, stirring, until fragrant, about 15 seconds. Add chard leaves and 2 tablespoons water and cook, stirring, until leaves the leaves are just tender and the water has evaporated, 2-5 minutes. Transfer the greens to sieve over a bowl and let drain and cool for 5 minutes. Whisk eggs, ricotta, lemon zest and 1/8 teaspoon pepper in to a large bowl. Fold in the greens, olives, and feta. Spread the filling into the crust. Bake the tart until the top is lightly browned and a knife inserted in the center comes out clean, 30 to 35 minutes. Let cool for 10 minutes before cutting into wedges.

Spring Vegetable Braise
Adapted from Local Flavors by Deborah Madison

2-3 spring onions (could substitute green garlic if you have some left)
4 cloves of garlic, minced (use only if you are not including any green garlic)
6 carrots, 3-4 inches long (optional)
1 bunch hakurei turnips, with tops (also can use any radishes you may have left)
1-2 heads red choi, chopped into bite size pieces
8 chard leaves, sliced into strips (you many use the stem if desired)
sea salt and freshly ground pepper
2 tablespoons unsalted butter
2 tablespoons finely chopped parsley
1 tablespoon finely chopped tarragon
1 tablespoon fresh lemon juice

Slice the onions about ¼-inch wide. Cut all but ½-inch of the carrot greens off, peel the carrots, and slice them in half lengthwise. Leave ½-inch of the turnip/radish greens attached. Leave the smaller ones whole, and cut the larger ones into halves or quarters.

Bring 6 cups water to a boil and add 1 ½ teaspoons salt. Blanch the carrots (if using), turnips/radishes for 7 minutes, then scoop out and set aside (no need to rinse them). Keep the cooking water for using later. Melt half the butter in an 8- or 10-inch sauté pan. Add the onions and cover over medium heat for about 2 minutes, stirring frequently. Add ½-cup of the vegetable cooking water, the blanched vegetables, half the herbs, and ½-teaspoon salt. Simmer until the vegetables are fully tender, 10 to 15 minutes, adding water in 1/3 cup increments so that the pan doesn’t dry out. There should be a little sauce.

Add the remaining butter and lemon juice. Then add the red choi and chard and raise the heat and swirl the pan back and forth until the butter has melted in to the juice. Remove from the heat after 3-4 minutes, and add the rest of the herbs, season with pepper, and serve. This is great mixed in with pasta, or as side with fish or chicken.

Hakurei Recipes

Quick-Pickled Turnips
From The Joy of Picking by Linda Ziedrich

1 pound hakurei turnips (half your bunch this week), trimmed at the top and bottom
2 teaspoons pickling salt
1½ cups water
1 fresh red jalapeno pepper, seeded and minced, or 1 tablespoon minced pimiento
3 tablespoons sugar
1½ cups rice vinegar or white vinegar

Score each turnip several times at top and bottom. Put the turnips into a bowl. Dissolve the salt in the water, and pour the brine over the turnips. Let them stand for 30 minutes to an hour. Drain the turnips well, then return them to the bowl with the minced pepper, and toss well. Combine the sugar and vinegar, and stir until the sugar dissolves. Pour the liquid over the turnips. Cover the bowl with plastic wrap, and refrigerate and the turnips for two days, after which they will be ready to eat. Well covered and refrigerated, they will keep for several months.

Fresh Greens Salad with Hakurei Turnips
From the Sauvie Island Organics Crew

3 cups spinach, whole and lightly packed
1 bunch mizuna (may increase or decrease quantity depending on needs)
2-3 hakurei turnips, sliced
2 tablespoons sunflower seeds, toasted and chopped nuts (optional)
2-3 tablespoons of Asian Salad Dressing (recipe below) or dressing of your choice

Wash lettuce, mizuna, and turnips. Leave the mizuna whole, and tear or chop lettuce into smaller pieces and place in salad bowl. After slicing the Hakurei turnips place them in the salad bowl as well. Add seeds or nuts as desired, dress, and toss.

All-purpose Asian Salad Dressing/ Marinade
Adapted from Astray Recipes, www.astray.com

Note: This dressing is great with fresh greens, sautéed greens, steamed vegetables, and cold meats as well as any other applications you may create for it.

2 tablespoons white vinegar
1½ tablespoons soy sauce
1 tablespoon plus 1 teaspoon sugar
1½ sesame oil
½ teaspoon fresh ginger, grated
1 tablespoon cilantro, chopped
a few drops of hot pepper oil (optional for those with aversions to spiciness)

Place all ingredients in a bowl or salad dressing jar and mix or shake vigorously to ensure everything is well blended.  Use as desired.

Spring Vegetable Braise
(see above in Chard Recipes)

Spinach Recipes

Spinach Salad
Adapted from Territorial Seed Garden Cookbook

¼ oil
¼ cup vinegar
¼ cup sugar
1 teaspoon rosemary, chopped
½ teaspoons salt
2-4 turnips, sliced into ¼-inch rounds (could use radishes)
1-2 spring onions, sliced into rings
4-6 cups spinach, lightly packed

Make a marinate of the oil, vinegar, sugar, rosemary, and salt. Slice turnips (or radishes) and onions into rounds/rings, and soak in marinade for as long as possible. Clean spinach and tear into bite-sized pieces if needed. Drain off marinade (it can be reused if kept in the refrigerator) and add turnips and onions to spinach. Toss and serve.

Catalan Spinach
From Fresh from the Farmers’ Market by Janet Fletcher

2 teaspoons dried currants
1 tablespoon pine nuts
1 pound fresh spinach (your share this week)
2 tablespoon olive oil
1 large clove garlic (or 1 stem green garlic), minced
2 dried apricots, diced into 1/8-inch pieces
Salt and freshly ground black pepper

Place currants in a small bowl with warm water to cover and let stand for 30 minutes to soften, then drain. Preheat oven to 325˚F. Toast pine nuts on a baking sheet until they are golden brown and fragrant, 12 to 15 minutes. Wash spinach well in a sink filled with cold water. Remove and discard any thick stems, and drain leaves in a colander. Place spinach in a large pot with just the water clinging to the leaves from washing as the your cooking liquid. Cover and cook over moderate heat, stirring occasionally, until leaves are just wilted, 3 to 5 minutes. Drain in a sieve under cold running water. Squeeze between your hands to remove excess moisture.

Heat olive oil in a 10-inch skillet over moderate heat. Add garlic and sauté until it colors slightly, about 2 minutes. Add spinach, tossing to separate the leaves and coat them with oil. Add currants, pine nuts and dried apricots. Toss to distribute evenly. Season with salt and pepper. Cook, stirring occasionally, until spinach is hot throughout, 2 to 3 minutes. Serve immediately as a side dish.

Categories : CSA Newsletter

CSA News: Week 2- May 25 to May 31

Posted by sio@dmin on
 May 25, 2010

This Week’s Share

  • Arugula
  • Broccoli
  • Green Garlic
  • Kale, Red Russian
  • Lettuce
  • Radishes, Cherry Belle
  • Tomato Plant, Sungold Cherry Tomato

Share Notes

Cherry Tomato Plants: This week each share will receive a cherry tomato plant.
Cherry tomatoes are wonderful snacks and great in salads. They are easy to grow and fun to pick in small quantities. However, they are very labor intensive to pick on a larger scale. For this reason we are giving you your own plant to enjoy. We concentrate on growing many different varieties of slicing, saucing and heirloom tomatoes, which you will see in your shares starting at the end of July.

Tomatoes appreciate full sun, and plenty of space to climb. Bury the plants deep so that only a little stem and the newest leaves are showing. Water them deeply. This will help to encourage a strong root system. They like a trellis to keep their leaves and fruit off the ground. Once established, tomatoes do not need to be watered more then once a week. Use about 5 gallons of water per plant. Tomatoes don’t like wet leaves so try to keep the leaves dry when you water.

If you do not have room to plant the tomato outside you can plant it in a five-gallon bucket with a drain hole. Keep it in a sunny space and remember to water frequently as container plants tend to dry out quickly.

Recipes

Arugula Recipes

Arugula-Green Garlic Pesto
Adapted from the Seacoast Eat Local Blog, http://blog.seacoasteatlocal.org

2 cups arugula, washed
3-4 stalks green garlic, roots removed
1/2 cup pine nuts (cashews, almonds, or walnuts also work)
4-6 oz. chevre, gorgonzola or other soft salty cheese
2 tablespoons parmesan cheese
2-3 tablespoons extra-virgin olive oil

Toast the pine nuts in a dry pan over medium low heat, tossing frequently until mostly golden brown. In a food processor or blender pulse the arugula and green garlic. Add pine nuts, olive oil, and cheese and process until there are no large chunks remaining. Great mixed in with pasta, on sandwiches, or in homemade salad dressings. It will keep fresh covered in the refrigerator for 7-10 days, or freeze for up to 6 months (or freeze up to a year if no cheese is added).

Arugula Salad with Mushrooms
From Recipes from Americas Small Farms by Joanne Lamb Hayes and Lori Stein

1 bunch arugula (about 8 cups loosely packed), rinsed and drained
8 ounces white mushrooms, thinly sliced (you many substitute porcini mushrooms or other specialty mushrooms, but sauté them until tender and let cool to room temperature)
6 tablespoons olive oil (extra virgin recommended)
2 tablespoons balsamic vinegar
1/2 teaspoon Dijon mustard
Salt and freshly ground pepper
1 (6 ounce) piece of Parmigiano-Reggiano cheese, at room temperature

Combine the arugula and mushrooms in a bowl. Whisk together the oil, vinegar, and mustard. Add salt and pepper to taste. Drizzle mixture over the salad and toss to coat well. Shave thin strips of the cheese with a cheese shaver or vegetable peeler. Reserve your best strips for garnish if desired, and throw the rest into the salad and toss lightly. Serve at room temperature.

Green Garlic Recipes

Green Garlic Pesto
Adapted from www.culinate.com

4 stems green garlic, roots removed
1 cup raw walnuts, or other nuts you have available
1 to 2 oz. hard, salty cheese (romano, ricotta salata, parmesan, etc.)
2/3 cup extra virgin olive oil
1/2 teaspoon salt (sea salt and kosher have best flavor)

Cut root ends of green garlic and discard. Cut into 1-inch lengths, discarding the tougher green portions on top. In a saucepan over medium heat toast walnuts by cooking for several minutes, stirring constantly until they start browning. Place nuts and green garlic into a food processor or blender and pulse/process on low until roughly chopped. Cut cheese into chunks, add to blender/processor, and process. In a steady stream while blender/processor is running, add olive oil until desired consistency is reached. Salt to taste and keep in an airtight container in the refrigerator until ready to use. Use with pasta, served over fish, spread on bread, or in whatever way pleases your pallet. If you have to much to use for one meal you can keep in a covered container in the fridge for 7-1o days, or freeze for up 6 months (will freeze up to a year with no cheese added).

Arugula Green Garlic Pesto
(see above in Arugula Recipes)

Kale Recipe

Kale Chips

Note: If you are an already seasoned kale chip lover spread the word to the newbies that it is definitely worth a try, especially if you have kale skeptic children in the house.

Kale (as much or as little as you like)
1-2 tablespoons olive oil
salt, to taste,
pepper, to taste (opitional)

Wash kale and remove center stems. Tear kale into roughly chip size pieces. Toss with olive oil and salt. Place kale ‘chips’ in a single layer on a baking sheet and put in a hot oven, 400˚-450˚F. Bake watching closely, you may have to turn a few chips to make crisp on each side…Voila, Salty Kale chip snacks!

Radish Recipe

Radish Butter for Radish Sandwiches

From Local Flavors by Deborah Madison

A good radish sandwich can be nothing more than sweet butter on bread topped with sliced radishes and sea salt. This recipes gets right to business and brings your radishes and butter to your bread all in one step.

6 radishes
4 tablespoons unsalted butter
1 teaspoon finely grated lemon zest
sea salt

Wash and trim radishes. If the leaves are tender and fresh, set a dozen or so aside, stems removed. Slice the radishes into thin rounds, then crosswise into narrow strips. Each should be tipped with color. Chop the leaves. You should have about ½ cup. Mix the butter with the lemon zest until soft, then stir in the chopped radishes, radish leaves, and a pinch of salt. Spread on slices of crusty baguette and serve.

Categories : Blogroll, CSA Newsletter, Farm News & Updates, Recipe, Uncategorized

CSA News: Week 1- May 18 to May 24

Posted by sio@dmin on
 May 18, 2010

This Week’s Share

  • Bok choi, Joi choi
  • Broccoli
  • Green Garlic
  • Lettuce
  • Mizuna
  • Turnips, Hakurei

Share Notes

  • Green Garlic: This is a wonderful spring treat. Green garlic is tender young garlic harvested before the bulb is formed. Perfect either fresh or cooked, use the entire stem.
  • Lettuce: These small spring lettuce heads will make a wonderful salad. As the weeks go on the lettuce heads will get bigger and bigger.
  • Turnips, Hakurei: These little guys are great to snack on fresh or sliced up in salads, but they also lend themselves well to many cooked dishes. Don’t forget to use the greens, they are tasty as well.

Recipes

Broccoli Recipes

Terrific Teriyaki
Adapted from the Tassajara Recipe Book by Edward Espe Brown

Note: This teriyaki is simple to prepare and great as marinade for tofu, chicken or beef, then used to sauté with any combination of fresh vegetables: this week broccoli, joi choi, hakurei turnips and green garlic would all be great additions to the sauté.

Teriyaki Sauce:

1 cup soy sauce
½ cup sake or white wine
½ cup sugar (or part honey)
1 tablespoon fresh ginger, grated
3 stems green garlic, finely chopped
¼ cup sesame oil
1½ teaspoons dry mustard

For Teriyaki Dish:

1 ½ pounds tofu, chicken, or beef (marinated overnight)
5-6 cups chopped vegetables, try a combination of broccoli, joi choi, hakurei turnips, and green garlic

Combine all ingredients in a saucepan and heat to boiling, then simmer for 10 minutes. Marinate two blocks of drained and cubed tofu or 1 ½ pounds chicken or beef cut into ¾ inch pieces overnight. If using tofu pour the marinade over the tofu while still hot, let cool to room temperature and marinate in the refrigerator overnight. If using meat let the marinade cool some, then pour over uncooked chicken or beef and let marinate in the refrigerator overnight.

When ready to cook pour the marinated tofu/meat and all of the marinade into a large sauté pan or wok. Begin cooking over medium-high heat. When tofu/meat and marinade is completely heated and partially cooked add the vegetables (if using joi choi greens and/or turnip greens add those in the last 5-7 minutes of cooking so they don’t over cook). Cook in marinade for 10 minutes and check tenderness of vegetables. Add greens and cook for another 5 minutes or until all vegetables are tender and ready to eat. We suggest serving this dish over rice or soba noodles.

Cheese and Broccoli Soup
From Vegetables Soups by Deborah Madison

4-5 cups broccoli florets
1 cups chopped broccoli stems
Sea salt and freshly ground pepper
3 tablespoons butter or canola oil
1 onion, chopped
1 celery rib, diced and leaves chopped
½ pound yellow-fleshed potatoes (Yukon Gold or Yellow Finn work well), peeled if desired and diced
1 stem green garlic, chopped
1/8 teaspoon cayenne, or more to taste
1 teaspoon dried marjoram
1 bay leaf
1 pinch of dried thyme
1 tablespoon flour
½ cup light cream, milk, or reserved cooking water from broccoli
2 teaspoons Dijon-style mustard, or to taste
2 cups grated sharp Cheddar cheese
Rye or whole wheat bread, toasted

Separate the crowns from the broccoli stems (reserve stems for use), then separate the crowns into florets. Thickly peel the stems, quarter them, and chop into small pieces. Bring a quart of water to a boil and add 1 scant teaspoon salt and the broccoli florets. Cook for about 3 minutes, then scoop out the florets, reserving water. Rinse under cool water and set aside.

Melt the butter (or heat oil) in a soup pot and add onion, celery, potato, broccoli stems, garlic, cayenne, and herbs. Cook over medium-heat for about 5 minutes, stirring now and then. Add ½ teaspoon salt, stir in the flour, then pour in 3 cups of the reserved water from the broccoli, saving any remainder. Bring to a boil, lower heat, and simmer, covered, until the potato is tender, 10 to 12 minutes. Add the cream or additional broccoli water as needed to thin the soup. During the last few minutes, add the florets and allow them to heat through.

Remove the bay leaf, puree the soup (if desired), and return it to the pot. Stir in the mustard, then taste for salt and season with pepper. Just before serving, stir in the cheese, but don’t let the soup boil or the cheese will toughen. Serve with toast on the side or broken in the soup.

Green Garlic Recipes

Note: Green garlic is featured in some of the other recipes this week, but the recipes below calls for the entire 4 stems included in your share for this week.

Grilled Green Garlic
Recipe from Field of Greens by Annie Somerville

Note: The strong fresh flavor of green garlic hold up well on the grill.

4 stems green garlic, root and loose leaves removed
1 tablespoon olive oil
salt and pepper, to taste

Cut the loose leaves and roots of the green garlic (and save for making veggies stock if you wish). Brush green garlic with olive oil. Sprinkle with salt and pepper. When the grill is ready, brush with olive oil to prevent sticking. Grill until marks appear, then turn and grill the other side.

Terrific Teriyaki
(see recipe above in Broccoli Recipes)

Mizuna Recipe

Mizuna Salad with Roasted Portobello Mushrooms and Gouda
From Gourmet Magazine, August 2009

6 oz. slice Portobello mushrooms
¼ cup olive oil (extra virgin olive oil is recommended)
1 tbsp. plus 2 teaspoons red-wine vinegar
½ teaspoon Dijon mustard
1 bunch mizuna
½ cup coarsely grated aged Gouda cheese
salt and pepper

Preheat oven to 425˚F with rack in middle. Toss mushrooms with 1-2 tablespoons olive oil and 1/8 teaspoon each salt and pepper in a bowl. Roast in 1 layer in 4-sided sheet pan, turning once, until golden-brown and tender, about 15 minutes. Cool mushrooms.

Whisk together vinegar, mustard, 1/8 teaspoon salt, a dash of pepper, and remaining olive oil in a bowl until combined. Toss mushrooms, greens, and cheese with enough dressting to coat.

Hakurei Turnip Recipes

Turnip and Turnip Green Soup
From Chez Panisse Vegetables by Alice Waters

½ yellow onion
1 stem green garlic
2 teaspoons olive oil
½ tablespoon unsalted butter
1 bunch hakurei turnips with greens (about 1¼ pounds)
1 bay leaf
¼ teaspoon chopped thyme leaves
1 small piece prosciutto or smoked bacon (leave out for vegetarian)
4 cups rich chicken or vegetable stock
salt and pepper
Parmesan cheese

Peel and thinly slice the onion and green garlic. Put in a nonreactive pot with the olive oil and butter and 1 tablespoon of water and stew, covered, until they are soft and translucent. Trim off the stems and greens form the turnips and reserve the greens. There is no need to peel the turnips. Trim off their roots, slice he turnips thin and add them to the pot. Stew them for a few minutes, until they begin to soften. Add the bay leaf, thyme, proscuitto or bacon, stock, and salt and pepper. Cover and simmer over low heat form about ½ hour. Wash the turnip greens and cut them into ½ inch wide strips and stir them into the soup. Simmer the soup for another 10 minutes or so, until the greens are soft and tender. Garnish the soup with a few curls of shaved Parmesan.

Terrific Teriyaki
(see recipe above in Broccoli Recipes)

Categories : Blogroll, CSA Newsletter, Recipe

Spring Update: April 23, 2009

Posted by sio@dmin on
 April 23, 2010

Spring-ing Forward

The days are getting longer, the nights are getting warmer, and the SIO crew is working full time seeding, planting, weeding, and preparing. This year the farm invested in a new manual transplanting tool called a Paper Pot Transplanter. So far we have used it for transplanting scallions and onions (pictured above), and hope to use it for cut lettuce and corn as the season progresses. The transplanter allows the farm to save on overall labor hours with no increase in use of the tractors or fuel. We are still working out some of the initial kinks, but the excitement of increasing transplanting efficiencies is on the horizon!

Come Join Us

Earth Day Celebration

On Saturday April 24th Sauvie Island Organics (SIO) will be hosting a table at the City Repair Earth Day Celebration at the Washington High School Field located at SE 12th & Stark. The theme of this year’s event is, “Re-seeding Our World,” and with that in mind SIO will have ‘Seed Starting’ and ‘Guess that Veggie Start’ activities. Stop on by, say hello to the farm, and leave with a few starts for your garden. The event is from 10am-7pm, with live music, interactive art, a bike parade, and much more. Please visit http://cityrepair.org/projects/earthday/ for complete information.

Spring Farm Tour & Potluck

Join us Saturday, May 8th for a tour of the farm and a CSA Community Potluck. This event is from 11am to 2pm. Tours of the farm will happen at 11am & 1pm and we will share a potluck lunch at noon. Bring your family, friends, kids, neighbors, and anyone you think would enjoy a day on the farm.

Potato Harvest & French Fry Feast

Mark your calendars and join us Saturday, August 14 for a hands in the dirt event. This event is from 10am to 2pm. We will be harvesting potatoes from 10am to 12:30pm, at 12:30pm we will have a farm tour and at 1pm we will share in a French fry feast and community potluck. This is a family friendly event, so make sure to bring the kids.

Shares Still Available for 2010!-Sign-up Now

Tell your friends, tell your neighbors, its not to late to share in the harvest for 2010! As we are busy planning and preparing we want to remind you that sign-up for the 2010 season is open and we still have space available at all of our pick-up sites. Signing up is quick and easy! Just complete the Community Farm Agreement and submit on-line, then send in your payment and pick-up your first share the week of May 17th.

Categories : Blogroll, Farm News & Updates

Winter News Update: March 1, 2010

Posted by sio@dmin on
 March 1, 2010

Winter Happenings on the Farm

The Greenhouse Gets a Makeover

Spring is nearly upon us, and as you long for your first share to arrive you can rest at ease knowing we are already busy preparing for your shares out at the farm. Before many of your crops set their young roots in the fields, they take-in their first rays of light in our greenhouse. At Sauvie Island Organics we have one 20ft x 100ft heated greenhouse that we use for all our vegetables starts that we transplant out to the fields in the spring. Up until this winter the watering system for the greenhouse was completely manual, meaning someone had to water everything by hand. For 2010 we decided to take the leap and install an over-head watering system. The new system (pictured above) includes uniform misting nozzles that are attached to the top of the greenhouse and run along the length of the greenhouse tables. You can turn on one or all of the tables for watering with just the turn of a switch, and even set and automatic timer to turn the watering system on and off. With this new system we hope to save several hours a week from what used to be the long process of watering the greenhouse. In addition to the watering system, SIO also expanded the capacity of our greenhouse heat tables. Some plants prefer the soil temperature to be a little warmer than what it might be naturally in the spring and fall, and so in order to create those soil conditions we use a hydro-thermal tubing system on the tables. The new heat tables also include a valve controls (pictured below) so that certain tables can be isolated for heat or no heat.

Wolf Sighting!

Sauvie Island is home to the nearly 12,000 acres of preserved land know as the Sauvie Island Wildlife Area. This network of wilderness area provides habitat for deer, beavers, foxes, and large populations of migratory birds. While Sauvie Island Organics values its close and harmonious relationship with the wildlife in the area, from time to time we still have to take precautions to protect the fields and your crops from damage. As seen above, a silhouette of a wolf cut from plywood and painted black is one method SIO uses to keep large flocks of migratory geese from settling and eating all our winter cover crops from our fields. Thanks to the smart thinking of Field Assistant Brian Wood, SIO tested the wolves last season, and since placing them out we haven’t seen many geese land in the fields to graze. We also use flags (pictured below), metallic mylar ribbon, and other distraction methods to deter wildlife from settling in our fields.

Shares Still Available for 2010!–Sign-up Now

Tell your friends, tell your neighbors, its not to late to share in the harvest for 2010! As we are busy planning and preparing we want to remind you that sign-up for the 2010 season is open and we still have space available at all of our pick-up sites. Signing up is quick and easy! Just complete the Community Farm Agreement and submit on-line, then send in your $100 deposit to reserve your slot for the coming season.

Categories : Blogroll, CSA Newsletter, Farm News & Updates, Uncategorized

CSA News: Week 30- December 8 to December 14

Posted by sio@dmin on
 December 8, 2009

This Week’s Share

  • Carrots
  • Collard Greens
  • Garlic
  • Leeks
  • Onions
  • Potatoes, Sangre
  • Winter Squash, Assorted Varieties

Share Notes

  • Collard Greens/Kale: All shares will be receiving a cooking green this week Due to the sustained cold temperatures and variable thawing conditions in the fields some shares will be receiving collard greens and others may be receiving kale.
  • Leeks/Onions: The photo above shows 4 leeks and 2 onions, but due to the sustained cold temperatures and limited harvesting conditions shares this week will be receiving 2 leeks and 4 onions.
  • Potatoes: You may notice that your potatoes are unwashed this week, and that is because the sustained below freezing temperatures have limited our ability to wash produce without it coating with ice afterward. Simply scrub them clean under running water and use as usual.
  • Winter Squash: This week in your share you will receive 2-3 assorted winter squash. The varieties we will be distributing are Acorn, Butternut, Delicata, and Hubbard.

Recipes

Collard Greens/Kale Recipe

Citrus Collards with Raisins
From Recipes from America’s Small Farms by Joanne Lamb Hayes and Lori Stein

1 large bunch collard greens/kale
coarse sea salt
1/2 tablespoon olive oil
1 garlic clove, minced
1/3 cup raisins
2 medium oranges

Remove the stems from the collards/kale and discard. Stack four or five leaves on top of one another. Roll the leaves into a tight cylinder. Slice, crosswise, cutting the leave into thin strips. Rinse the leaves in cold water and drain in a colander. In a large pot over high heat, bring 3 quarts of water to a boil and add 3 teaspoons salt. Add the collards and cook, uncovered, 10 minutes. Removes, drain, and plunge into a bowl of ice water to stop the cooking and set the color of the greens. Drain. In a medium sauté pan, over medium heat, warm the oil. Add the garlic and sauté for 1 minute. Add the collards, raisins, and a pinch of salt. Saute for 3 minutes, stirring frequently. Section the oranges, reserving the juice. Add the oranges and juice and cook for an additional 30 seconds. Do not overcook  (collards should be bright green).

Potato Recipes

Blue Cheese Smashed Potatoes
From Food to Live By by Myra Goodman

2 pounds potatoes, washed (peeling is optional) and cut into 1/2-inch chunks
4 cloves garlic, peeled
1/4 cup whole or low-fat milk
2 tablespoons (1/4 stick) unsalted butter
3 to 4 ounces crumbled blue cheese (about 1 cup), at room temperature
Salt and freshly ground pepper, to taste

Place the potatoes, garlic, and 5 cups of water in a large saucepan and bring to a boil over high heat. Reduce the heat to  medium-low and let the potatoes simmer, covered, until tender about 15 minutes. Meanwhile, heat the milk and butter in a small saucepan over low heat. Keep warm. Drain the potatoes and garlic in a colander, then transfer them to a large bowl. Using a potato masher or large fork, coarsely mash the potatoes and garlic. Add the warm milk and butter mixture and the blue cheese and mash to combine.

Mashed Potatoes with Carrots and Leeks
From www.epicurious.com

Note: This recipe was inspired by stoemp, a Belgian dish of mashed potatoes with vegetables.

1 leek (white and pale green parts only), coarsely chopped
2 pounds potatoes, washed and cut into 2-inch pieces
2 carrots, cut into 1/2-inch chunks
1/2 stick (1/4 cup) unsalted butter
3/4 cup whole milk
3/4 teaspoon salt
1/4 teaspoon black pepper

Wash chopped leek well in a bowl of cold water, then lift out and drain well. Peel potatoes (if desired) and cut into 2-inch pieces. Cover with cold water in a 3- to 4-quart saucepan. Bring to a boil, then reduce heat and simmer, uncovered, until potatoes are tender, about 18 minutes. Drain and return to saucepan. While potatoes are simmering, cook carrots in a 1- to 1 1/2-quart saucepan of boiling salted water until just tender, 5 to 6 minutes, then drain. Cook leek in butter in a 10-inch skillet over moderately low heat, stirring occasionally, until very tender, about 6 minutes. Add milk, salt, and pepper and simmer, stirring, 2 minutes. Add leek mixture to potatoes and coarsely mash with a potato masher, then stir in carrots. Makes 4 servings.

Winter Squash Recipes

Roasted Butternut Squash and Caramelized Onion Tart
From Gourmet, November 1998

1- 11-inch Pastry dough (recipe below, or could use pre-made dough)
Pie weights or raw rice for weighting shell
1 small (or 1/2 of a large) butternut squash (about 1 pound)
1 1/2 teaspoons olive oil, plus about 2 teaspoons for brushing squash (optional, can just roast with some water in the pan)
2-3 onions, thinly sliced
1 1/2 tablespoons unsalted butter
1 whole large egg
1/2 large egg yolk (1/2 tablespoon)
1/3 cup heavy cream
1 cup grated Italian Fontina cheese (about 3 ounces)
1/2 cup freshly grated Parmesan (about 2 ounce)
1/2 cup crumbled mild soft goat cheese (about 2 ounce)
1 1/2 teaspoons minced fresh herbs such as rosemary, thyme, and marjoram leaves
1/2 teaspoon salt
freshly ground black pepper
1/3 cup fine fresh bread crumbs

On a lightly floured surface roll out dough into a 12-inch round (about 1/8 inch thick). Fit dough into an 11-inch tart pan with a removable fluted rim. Freeze shell 15 minutes.

Preheat oven to 375°F. Line shell with foil and fill with pie weights or raw rice. Bake shell in middle of oven until edge is pale golden, about 20 minutes. Carefully remove foil and weights or rice and bake shell 10 minutes more, or until bottom is golden. Leave oven on. Cool shell in pan on a rack.

Halve squash and scoop out seeds. Lightly brush each cut side with about 1 teaspoon oil and on a baking sheet roast squash, cut sides down, in middle of oven 40 minutes, or until soft. While squash is roasting, thinly slice onions and in a heavy skillet cook in 1/2 tablespoon butter and remaining 1 1/2 teaspoons oil over moderate heat, stirring occasionally, until soft and golden brown, about 20 minutes. Cool squash and scoop out flesh. In a food processor purée squash. Add whole egg, egg yolk, and cream and blend well. Transfer mixture to a large bowl and stir in cheeses, herbs, onion, salt, and pepper to taste. Pour filling into shell, smoothing top.

In a small skillet melt remaining tablespoon butter and stir in bread crumbs until combined well. Sprinkle breadcrumb mixture evenly over filling. Bake tart in middle of oven 40 minutes, or until filling is set. Cool tart in pan on rack 10 minutes and carefully remove rim. Serves 6 to 8.

Pastry Dough
From www.simplyrecipes.com

Note: This recipe makes enough for a double pastry crust, so you will only need to use one of the two disks of dough right away. You can save the other disk in the fridge for up to 2 days or in the freezer for much longer (weeks to months).

2 1/2 cups all purpose flour
1 1/2 teaspoon salt
1 Tablespoons sugar
3/4 cup (a stick and a half) unsalted butter, chilled, cut into 1/4 inch cubes
1/2 cup of all-vegetable shortening (8 Tbsp)
6-8 Tablespoons ice water

Combine flour, salt, and sugar in a food processor and pulse to mix. Add the butter and pulse 4 times. Add shortening in tablespoon sized chunks, and pulse 4 more times. The mixture should resemble coarse cornmeal, with butter bits no bigger than peas. Sprinkle 6 tablespoons of ice water over flour mixture. Pulse a couple times. If you pinch some of the crumbly dough and it holds together, it’s ready. If the dough doesn’t hold together, keep adding water, a tablespoon at a time, pulsing once after each addition, until the mixture just begins to clump together.

Remove dough from machine and place in a mound on a clean surface. Divide the dough into 2 balls and flatten each into 4 inch wide disks. Do not over-knead the dough! Dust the disks lightly with flour, wrap each in plastic, and refrigerate for at least an hour, or up to 2 days before rolling out.

After the dough has chilled in the refrigerator for an hour, you can take it out to roll. If it is too stiff, you may need to let it sit for 5-10 minutes at room temperature before rolling. Sprinkle a little flour on a flat, clean work surface and on top of the disk of dough you intend to roll out. Using a rolling pin, apply light pressure while rolling outwards from the center of the dough. Every once in a while you may need to gently lift under the dough to make sure it is not sticking. Roll to desired thickness and size. Makes 1 double 9 or 10-inch pie crust.

Easy Sautéed Winter Squash Recipe
From www.recipetips.com

Note: Remember that roasted squash seeds make a nutritious and tasty snack. Just wash and scatter on a baking sheet to dry. Sprinkle with olive oil salt and pepper (or any other preferred spices) and pop in a 400°F oven for 10 minutes, or place in the toaster oven on medium-dark setting. They are done with just crisp and golden.

1 winter squash, about 2 lbs, preferably smooth skinned (butternut, delicata, etc)
2 tablespoons butter
1 tablespoon brown sugar, or more, to taste (optional; omit if squash is very sweet)
Salt and pepper, to taste

Cut squash in half, lengthwise, and remove seeds and stringy pulp. Then cut crosswise into large chunks. (The chunks are easier to peel than a whole squash.) Peel and cut squash meat into 1/2-inch cubes. Over medium heat, melt butter in a large skillet. When hot, add squash cubes in a single layer and cook without stirring for about 5 minutes, to brown the bottom sides. Stir to turn cubes and cook another 5 minutes. Sprinkle on brown sugar, if using, stir to mix well, and cook 5 minutes or until squash is tender. Add salt and pepper to taste. Serve warm.

Categories : Blogroll, CSA Newsletter, Farm News & Updates, Recipe

CSA News: Week 29- December 1 to December 7

Posted by sio@dmin on
 November 25, 2009

This Week Share

  • Cabbage
  • Carrots
  • Garlic
  • Kale
  • Onions, storage
  • Parsnips
  • Winter Squash, Hubbard

Share Notes

  • Winter Squash: Some of you may be starting to accumulate a surplus of winter squash, and with that in mind we want to remind you of the suggested order of eating based on length of storage time. Its best to start by eating any pumpkins and acorn squash first, followed by any  delicata, butternut, or hubbard.

Sign-up for 2010

Just one more week left in the 2009 CSA Season. For those of you already longing for fresh spring greens, crisp radishes, and pungent garlic scapes you can sign up for your share of the 2010 season now. Complete and submit the Community Farm Agreement at http://sauvieislandorganics.com/join.php and send in your $100 deposit to secure your spot.

Make sure to sign-up and send your $100 deposit by January 1 to guarantee the $875 share price. We can’ wait to see you next season!

Recipes

Whole Roasted Chicken with Root Vegetables
From Francesca Benedetti (CSA Coordinator)

Note: This is one of my favorite things to do because you get a delicious main dish and a side dish all in one. Add a fresh cabbage slaw, kale or green salad and your set. The vegetables you can roast in the pan with the chicken can be interchanged freely. I love using beets, leeks, or celeriac as well, so if you have any of those still around try it out.

1 (3½ -5 pound) whole chicken, gizzards removed (can save to make stock)
2 lemons, cut into quarter
2-4 tablespoons butter
2-4 sprigs of fresh rosemary
salt and pepper to taste
1 onion, peeled, cut in half, and cut into quarters
2-3 carrots, cut into 1-inch rounds
2-3 parsnips, cut into 1-inch rounds
2-3 medium potatoes (5-6 small), cut into quarters or eighths
1 cup chicken broth

Preheat oven to 350˚F. Rinse and clean chicken and pat dry. Prepare chicken for roasting by sliding slices of butter and sprigs of rosemary under skin. Salt and pepper all of chicken, and stuff 2-3 lemons slices inside the chicken. Choose a pan for  roasting (I like to use a deep roasting dish or a roasting pan that has a rack layer and shallow drip pan is rests on putting the veggies under the roasting chicken in the drip pan. Depending on which way you choose to roast you will either place the chicken in the deep roasting pan and spread the chopped vegetables and lemon slices in the pan around the chicken or you will place the vegetables in the bottom drip pan, place the rack layer on top and place the chicken on top of that. Which ever method you choose make sure salt, pepper, and drizzle olive oil over the vegetables and baste with chicken broth at the beginning and every 20 minutes or so while its roasting. Roast at 350˚F for at least and hour, longer if it’s larger chicken. Turn up the oven to 400˚F for the last 15-25 minutes of roasting, basting at least once during that time. Remove the roasting pan from the oven when chicken is cooked through (I check internal temperature with a meat thermometer). Let chicken and vegetables rest for at least 10 minutes before cutting and serving.

Cabbage Recipe

Curried Cabbage
From Vegetable Love by Barbara Kafka

1 tablespoon vegetable oil
1½ teaspoons curry powder
1 cup onion, thinly sliced
4 cups shredded green cabbage
1½ teaspoons fresh lemon or lime juice
2 tablespoons regular or nonfat yogurt

Heat the oil in a 10-inch to 11-inch skillet over medium heat. Add the curry powder. Cook for 30 seconds, just until fragrant. Add the onion. Cook until translucent. Add the cabbage. Cook, stirring occasionally, until wilted and soft to the bite. Remove the heat. Stir in the lemon juice and yogurt until the cabbage is coated. Serve hot. Serves 4 as a side dish.

Kale Recipe

Sauteed Kale
Recipe submitted by Member Brandy Benedict (from Gourmet, November 2003)

8 cups kale, cut into 1-inch-wide strips (tough stems and center ribs discarded)
2 tablespoons olive oil
1 small red onion, halved lengthwise and thinly sliced crosswise
1 garlic clove, minced
Pinch of dried hot red pepper flakes
1 tablespoon red-wine or balsamic vinegar, or to taste
1/4 teaspoon salt

Cook kale in a 6-quart pot of boiling salted water, uncovered, stirring occasionally, until just tender, about 10 minutes, then drain in a colander. Heat oil in a 12-inch heavy skillet over moderately high heat until hot but not smoking, then sauté onion, stirring occasionally, until softened, 6 to 8 minutes. Add garlic and red pepper flakes and sauté, stirring, until garlic is fragrant, about 1 minute. Reduce heat to moderate, then add kale and cook, stirring occasionally, until heated through. Remove from heat and stir in vinegar and salt. Sautéed kale keeps 3 days chilled in an airtight container.

Parsnips Recipe

Maple Glazed Parsnips and Carrots
Adapted from Simply in Season by Mary Beth Lind and Cathleen Hockman-Wert

Note: You can use this same recipe using all parnips or all carrots, but its fun to use them together

1 cup parsnips, peeled and cut into ½-inch rounds
1 cup carrots, peeled and cut into ½-inch rounds
½ teaspoon butter, melted
2 tablespoons walnuts, chopped and toasted

Preheat oven to 400˚F. Spray a baking pan with oil. Place the parsnips and carrot rounds in a single layer on a pan and spray lightly with oil. Sprinkle with salt. Bake until soft, 30 minutes. Combine maple syrup and butter and pour over the cooked parsnips Top with walnuts and serve.

Winter Squash Recipe

Hubbard Squash Risotto
From Vegetable Love by Barbara Kafka

1½ pounds Hubbard squash (or 1¼ pounds butternut squash), peeled, seeds and fibers removed
1 tablespoon unsalted butter
1 tablespoon olive oil
2 cups Arborio or other risotto rice
½ cup chopped onion
1 clove garlic, smashed, peeled and chopped
1 cup dry vermouth
4½ to 5 cups beef stock or beef broth
1½ tablespoons kosher salt, plus more to taste
Freshly grated nutmeg to taste
½ cup chopped fresh parsley (optional)
Freshly ground black pepper to taste
Freshly grated Parmesan cheese for serving

Grate enough of the squash (about ¾ pound) to get 3 cups. Cut the remaining squash into ¼-inch cubes. Melt the butter with oil in a large shallow pan. Add the rice. Cook over medium-high heat, stirring continuously, for 3 minutes, or until rice turns white and loses translucence. Add the onion and garlic. Reduce the heat slightly and cook for 1 minute. Add the grated squash. Stirring continuously, turning up the rice from the bottom, cook for 5 minutes. Add the vermouth. Reduce heat to medium and cook until the vermouth is absorbed. Increase heat to medium-high and add ½-cup stock. Cook, stirring well, until the rice has absorbed most of the stock. Add another ½-cup stock and repeat the process, making sure the stock is mostly absorbed before each addition. Continue until the rice has cooked about 15 minutes and absorbed 4 cups stock. Add the salt and nutmeg then parsley, if using. . Add the squash cubes and ½ cup more stock, or 1 cup stock for looser risotto. Cook, stirring, for 10 minutes, until creamy with a slight chew. Season with pepper, and if necessary, salt. Serve with Parmesan on top. Makes 6½ cups.

Categories : Blogroll, CSA Newsletter, Farm News & Updates, Recipe
« Previous Page
Next Page »

Recent Posts

  • CSA Week #22: October 31st & November 2nd
  • CSA Week #21: October 24th & 26th
  • CSA Week #20: October 17th & 19th
  • CSA Week #19: October 10th & 12th
  • CSA Week #18: October 3rd & 5th

Archives

Sauvie Island Organics | © 2025 All Rights Reserved
iThemes Builder by iThemes | Powered by WordPress | Site by LRP