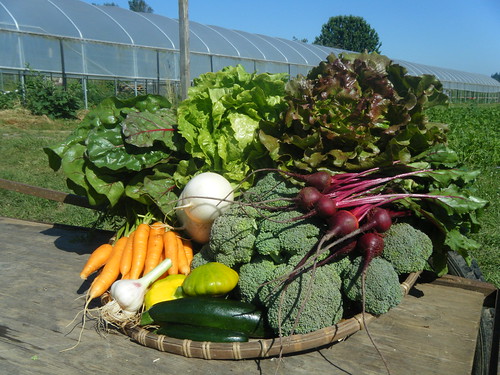
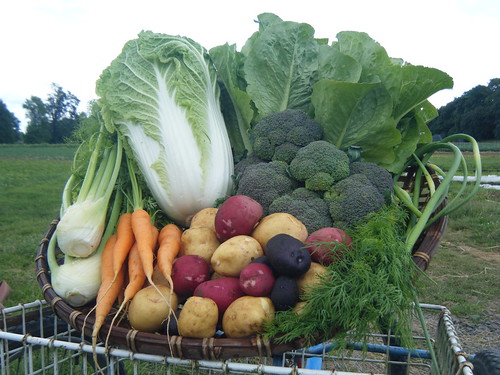
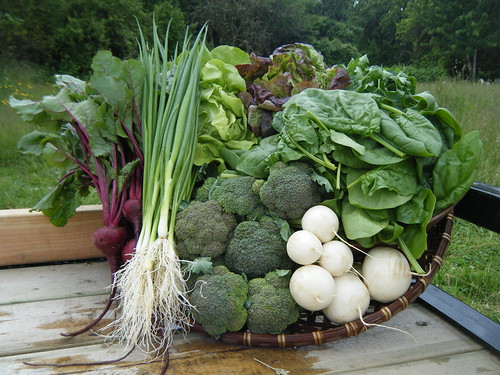
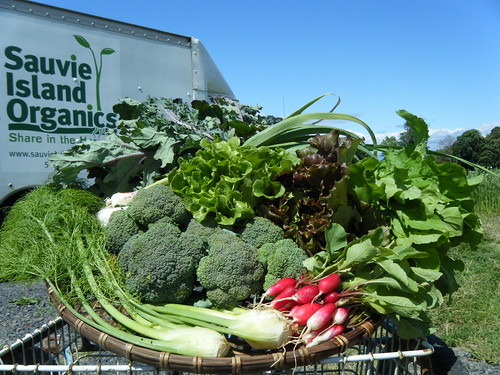
Image

Author Archive for csa – Page 21

CSA News: Week 7- July 12 to July 18

Posted by csa on
 July 12, 2011


week7_share_11

This Week’s Share

Crop

Family Share

Individual Share

Carrots 1 bunch 1 bunch
Dill 1 bunch ——-
Fava Beans 5 pounds 3 pounds
Fresh Garlic 1 bulb ——-
Lettuce 2 heads 1 head
Napa Cabbage 1 head 1 head
Potatoes, Yukon Gold 3 pounds 2 pounds
Summer Squash 1 1/4 pounds ——-


Share Notes

  • Fava Beans: Warning— There is a rare genetic deficiency that affects some people and can lead to health problems if they eat fava beans. This condition is relatively rare and usually detected by childhood, but if you have never eaten fava beans before we recommend you check out www.g6pd.org to learn more.
  • Fresh Garlic: The garlic in your share this week is mature, but not cured (dried for storage). Store your uncured garlic in the crisper drawer of your refrigerator for best results.
  • Potatoes, Yukon Gold: Your Yukon Gold’s this week are young with tender skins. You may notice the potatoes are unwashed, and that is because we didn’t want to further peel their delicate young skins. Also, make sure to keep them refrigerated as they have not yet developed a thick and protective skin.

Chef’s Corner: July

In addition to the crops SIO grows for our CSA program, we also grown and sell produce to 30-40 Portland area restaurants and kitchens, and this season at SIO we are partnering with some of those restaurants for some culinary inspiration. We have been picking the brains of some of the areas most talented chefs and restaurant owners, and have asked them to provide us with recipes and general cooking techniques based on the crops that you receive in your shares. Out at the farm we crop plan separately for both our CSA program and restaurant sales, so you don’t have to worry that part of your share may be going to the restaurant down the street. The recipes that the chefs will feature include a variety of vegetables that you will see in your shares throughout the month, so remember to look back at the Chef’s Corner weekly. For the month of July our featured Chef is David Anderson of both Genoa & Accanto, on SE Belmont in Portland’s Sunnyside neighborhood.


David Anderson, Executive Chef and Owner at Genoa & Accanto

David Anderson, 32, is the Executive Chef of not one, but two, critically praised restaurants – the elegant prix fixe classic, Genoa, as well as the Italian café Accanto, its more relaxed next door sibling.

David came to Portland from Ketchikan, Alaska in 2000 and worked his way up through some of this city’s finest kitchens –including Café Azul, Southpark, Lauro and Vindalho. From the beginning, he has been recognized as one of Portland’s best young chefs, with Willamette Week honoring his work as Chef de Cuisine at Lauro Kitchen by naming it “Restaurant of the Year” in 2004. Moving on to Vindalho in 2005 he was featured in Gourmet Magazine, the New York Times and the Wall Street Journal. His commitment to the culinary arts also garnered accolades from the Oregonian’s Diner Issue in 2007, where he was called out as one of Portland’s “Rising Stars”. In 2008, David was crowned as the champion of “Iron Chef Portland”.

David’s second decade in Portland promises to be just as exciting. In addition to the reinvention of Genoa, one of Portland’s most significant culinary icons, perhaps his most significant achievement has been the commitment to highlighting the work of our community’snumerous charitable foundations. David credits his first Share Our Strength’s “Taste of the Nation” nine years ago, for introducing him to the power of food-related philanthropic events.

Under his stewardship, Genoa and Accanto have been involved in well over three dozen charity events, raising money and awareness for local and national organizations addressing issues such as; hunger, healthcare, homelessness, HIV/AIDS, and education for our community’s disenfranchised youth. Chances are that if you’ve dined at either Genoa or Accanto a percentage of your dining-dollars have gone directly to those in our community in need.

-1


Recipes for Sauvie Island Organics by David Anderson

Chilled Cucumber Gazpacho
Serves 6-8

6 cucumbers peeled and seeded
2 cloves of garlic
2 oz dry country bread (one thick slice) crust removed
1 cup milk
1/2 cup yogurt
1 cup extra virgin olive oil
1 teaspoon each mint, dill, cilantro minced
Salt and pepper to taste
Pinch Piment d’esplette or smoked paprika garnish


1. In a dry skillet lightly toast the almonds and bread. Remove to a bowl and soak with the milk. Allow to soak for at least a half an hour.

2. In a blender combine the rest of the ingredients except the olive oil. Puree until very smooth slowly drizzling in the oil until emulsified. Add a few cubes of if too thick.

3. Season to taste and chill in the fridge for about an hour. Taste again for seasoning and serve in chilled bowls garnished with the piment or paprika.

Cannelloni di erbette
Serves 6-8

3 bunches chard, stems removed and finely chopped
2 tablespoons extra virgin olive oil
1 spring onion, minced
1 clove garlic, minced
1 pound ricotta
Juice and zest of one lemon
1/2 cup pine nuts, lightly toasted
Salt and pepper to taste
1 pound pasta dough rolled to the last setting and cut into large rectangles or prepared sheets of pasta
2 cups heavy cream
1/2 cup parmesan, grated


1. Make the filling: Heat the olive oil in a wide skilled. Add the onion, garlic and chard stems and saute lightly until softened. Roughly chop the chard leaves and add to the skillets and cook until wilted and soft careful not to overcook. Remove from the pan and drain in a colander. Allow to cool for a few minutes

2. Add the cooked chard to a food processor along with the ricotta lemon juice and zest and puree. Season to taste and stir in the pine nuts.

3. Blanch the pasta sheets in plenty of salted water one at a time then remove to an ice bath. Toss lightly with oil and set aside in a single layer.

4. Pipe or spoon a line of filling a half an inch above the edge of the pasta sheet and roll up into tubes. Continue until all the filling is used up. Chill for about an hour.

5. Cut the tube of pasta into equal lengths about 4 inches long.

6. Line the cannelloni in a baking dish. Pour the cream over the cannelloni and top with the grated parmesan. Bake in a 400 degree oven until bubbling and hot all the way through. Serve immediately.
Summer Vegetable Curry
Serves 6-8

2 cups summer beans (green or yellow)
1/2 pound new potatoes
1 pound summer squash, diced
1 head napa cabbage, chopped
1 large onion, chopped
2 cloves garlic
1/2-inch stick of fresh ginger
1 cup chopped tomatoes (fresh or organic canned)
1/4 cup vegetable oil
1 stick cinnamon
3 cloves
8 peppercorns
1 tablespoon coriander seed
1 teaspoon cumin seed
1/2 teaspoon turmeric
1/2 teaspoon cayenne
1/4 cup yogurt
Salt and pepper to taste


1. Boil the potatoes in their skin until tender. Drain and cool. Half or quarter and set aside.

2. In a dry skillet lightly toast the coriander and cumin. Cool slightly and grind. Combine with the turmeric and cayenne.

3. Heat the oil in a wide skillet. Add the cinnamon, clove and peppercorns and lightly fry for a few seconds. Add the potatoes, beans and summer squash and sautÈ for a few minutes until lightly colored. Add the cabbage, onion, garlic and ginger and sautÈ for a few more minutes until softened.

4. Add the spices and chopped tomatoes and bring to a simmer. Turn the heat down and simmer for about a half an hour.

5. Stir in the yogurt and season with salt and pepper. Serve hot with basmati rice.

If you have any questions about the recipes David has offered his e-mail contact: david@genoarestaurant.com.


Recipes

Carrot Recipes

Carrot Puree or Sauce
From Vegetable Love by Barbara Kafka

Note: Great on cauliflower, fish, or chicken

3/4 cup chicken stock or broth
2 cups carrots, peeled, trimmed, and cut across into 1-inch rounds
Kosher or sea salt, to taste
A squeeze of lemon (optional)

Put the stock/broth in a medium saucepan and bring to a boil. Add the carrots. Cover, reduce the heat and simmer for 30 minutes, or until very tender. Transfer to a blender/food processor and puree until smooth. Season with salt and the lemon juice, if using. Makes about 1 cup.
Fresh and Tangy Napa Cabbage Salad
(see below in Napa Cabbage recipes)


Marinated Tofu and Vegetables
(see below in Summer Squash Recipes)


Fava Bean Recipes

Warning: There is a rare genetic deficiency that affects some people and can lead to health problems if they eat fava beans. This condition is relatively rare and usually detected by childhood, but if you have never eaten fava beans before we recommend you check out www.g6pd.org to learn more.

Grilled Fava Beans
Recipe adapted from The Food Section

Olive oil, enough to coat pods generously
Salt, use generously
Fava bean pods, as many as you want to grill (I recommend a large number because they are so delicious and so easy to make)

Season the raw bean pods generously with salt and toss with extra virgin olive oil. Place the pods on the grill and cook until blackened and soft. As the pods pop and blister on the outside, they steam within. When they have sufficiently charred on both sides, remove the pods from the grill, let cool, and then pry them open to reveal the beans, which may be slipped from their thin skins or eaten whole, skin and all. The salty, meaty beans are as tasty as they are easy to prepare.


Fresh Fava Bean Falafel
Source unknown

2 lbs of fresh Fava Beans in the shell, or 2 cups of shelled fava beans
1/2 of a medium onion, finely chopped (could use a food processor)
3 cloves of garlic, finely minced
1/2 cup each of minced parsley and cilantro
1 1/2 teaspoons toasted coriander seeds, ground
2 teaspoons toasted cumin seeds, ground
Large pinch of cayenne pepper
2 large pinches of kosher salt, or to taste
Large pinch of ground black pepper
1 teaspoon of baking powder

Shell and prepare the fava beans. You only need to shell them from the pod and you can leave the outer layer on the beans because it will be blended into a paste in a food processor.  Collect all ingredients with the exception of the beans, and mince to a fine paste in food processor.  Add beans and process to a medium fine paste.  Do not over-grind the beans, as they will not hold their shape in the oil if too fine.  Refrigerate for about 1 hour to allow the mixture to firm up.  Heat 3-4 tablespoons of olive oil in a pan, more if desired, and making small patties with the mixture, fry until the sides are well browned. Serve with pita bread, chopped lettuce, dill dressing (recipe below), and other veggies of your choice for falafel gyros.


Creamy Dill Dressing
From Asparagus to Zucchini: A Guide to Farm Fresh Produce by the Madison Area CSA Coalition

1 cup mayonnaise
8 ounces sour cream
1/4 cup milk
1 1/2 tablespoons olive oil
1 tablespoon fresh dill
1 tablespoon wine vinegar
2 teaspoons paprika
1/4 teaspoon white pepper
1/8 teaspoon garlic powder
1/8 teaspoon salt

Combine mayonnaise and sour cream; gradually stir in milk, mixing well. Stir in remaining ingredients. Cover and chill several hours. Use as a dressing for falafel gyros, or to dress salad greens. Makes 2 cups dressing.


Marinated Tofu and Vegetables
(see below in Summer Squash Recipes)


Napa Cabbage Recipe
Fresh and Tangy Napa Cabbage Salad
By Francesca Benedetti (SIO CSA Coordinator)

Note: This recipe can easily be halved for less servings.

1 head of Napa Cabbage, sliced into 1/2-inch ribbon (you can choose weather to include the crisp white stems, or reserve them for using later in a stir-fry)
1/2 red onion, sliced very thin
1/3 cup green garlic, garlic scapes, or scallions, chopped small (optional)
2 carrots, grated
2-3 tablespoon olive oil, more to taste if desired
1 tablespoon red wine vinegar, more to taste if desired
1 tablespoon rice wine vinegar or apple cider vinegar, more to taste if desired
1 tablespoon lemon juice, more to taste if desired
1 tablespoon coriander seeds
1 tablespoon mustard seeds (black or yellow work)
Salt and fresh ground pepper, to taste

Prepare and place all the vegetables in a large bowl.  Sprinkle olive oil, vinegars, and lemon juice evenly over the top of the vegetables. With a mortar and pestle (or food processor, or other method for griding) grind the coriander and mustard seeds into course powder. Sprinkle the ground spice mixture over the top of the veggies. Sprinkle with salt and freshly ground pepper to taste. Mix well using your bare hands making sure to combine all the ingredients at the bottom of the bowl as well. Taste, and adjust seasoning as desired. Let sit for at least 15 minutes (and up to 24 hours) before serving. Serves 8 as a side.


Summer Squash Recipe

Marinated Tofu and Vegetables
From Simply in Season by Mary Beth Lind and Cathleen Hockman-Wert

1/2 cup vinegar or white wine vinegar
1/3 cup soy sauce
6 tablespoons olive oil
2 tablespoons sesame oil
2 tablespoons ginger root, peeled and minced
1 tablespoon brown sugar
2 cloves garlic, minced
2 teaspoons hot sauce
2 blocks firm tofu
7 cups fresh vegetables (such as summer squash, potatoes, carrots, shelled fava beans, onion, mushrooms, etc.)

Mix together vinegar, soy sauce, olive oil, sesame oil, ginger, brown sugar, garlic and hot sauce and divide between two shallow pans. Drain and slice the tofu into 1/4 inch slices. Place slices in one pan of marinade, making sure all sides are covered with liquid. Slice up the vegetables. Add all the vegetables to the other pan of marinade, stir to coat and refrigerate (if using potatoes and carrots they should be precooked 5 minutes before adding to the marinade). Marinate both the tofu and vegetables in the refrigerator 8-24 hours; the longer the tofu is in the marinade the more flavorful it will be. Remove the tofu from marinade and fry in a fry-pan over medium heat until lightly browned (the oil in the marinade will prevent sticking without adding more to the pan). Set cooked tofu aside. Drain off excess marinade and cook marinated vegetables by grilling in a non-stick grill pan until crisp-tender, roasting in a single layer at 425˚F until tender, or stir-fry on stovetop. Combine cooked vegetables and tofu and serve. May also serve with brown rice, quinoa, or Asian noodles.

Categories : Blogroll, Chef's Corner, CSA Newsletter, Farm News & Updates, Recipe, Uncategorized

CSA News: Week 6- July 5 to July 11

Posted by csa on
 July 5, 2011

week6_share_11

This Week’s Share

Crop

Family Share

Individual Share

Beets 1 bunch ——-
Broccoli 4 pounds 2 pounds
Carrots 1 bunch 1 bunch
Chard 1 bunch 1 bunch
Fresh Garlic 1 head ——-
Hakurei Turnips 2 1/2 pounds 2 1/2 pounds
Lettuce 2 heads 1 head
Summer Squash 1 pound ——-

Share Notes:

  • Broccoli: This is the last week for spring/summer season broccoli and we are going big! Broccoli will return again in the fall. We’ve included several recipes but if you have more than you can eat this week try blanching it for 2-3 minutes, then freezing for later use (cut down to preferred size before blanching). Blanched frozen broccoli keeps for up to 12 months.
  • Fresh Garlic: The garlic in your share this week is mature, but not cured (dried for storage). Store your uncured garlic in the crisper drawer of your refrigerator for best results.
  • Hakurei Turnips: This week’s turnips are big and tasty. Try using them in a gratin, mash, or slicing them thin and small for a salad.

Recipes

Beet Recipe

Basic Baked Beets
From Passionate Vegetarian by Crescent Dragonwagon

Whole fresh beets, all about the same size, green removed but “tails” and 3/4 inch of stem intact, very well scrubbed and dried
Mild vegetable oil, such as corn, canola, or peanut

Preheat oven to 350°F. Lightly coat each beet with oil. Individually wrap the oiled beets in sheets of foil. Place the beets in the preheated oven. Bake until done, testing with a fork (the fork should go in easily, but the beet should still offer a tiny bit of resistance). This could be as little as 35 minutes if beets are very small, up to 90 minutes if they are large. Remove from the oven and let cool. When the beets are cool enough to handle, unwrap and, if desired, slip the skins off (they will come off easily). Cut large beets into eighths, medium into quarters or halve or slice crosswise; small ones can be left whole. Refrigerate for later use or finish as directed in a specific recipe, such as the one below.


Scallioned Beets and their Greens in Herbed Mustard Sauce
From Passionate Vegetarian by Crescent Dragonwagon

1 teaspoon cornstarch
1/2 cup vegetable stock
3 tablespoons coarse-ground Dijon mustard
1/4 cup Yogurt Sour Cream, tofu sour cream, reduced-fat sour cream or the real thing
2 teaspoons butter (or olive oil or vegetable margarine)
3 to 4 scallions, roots and wilted greens removed, finely diced
1 to 2 bunches beet greens (whatever came off the baked beets), washed, stems finely diced, leaves stacked and sliced in 1/4 inch ribbons
8-10 small-medium baked beets (see recipe above), halved or 4 to 5 large baked beets cut into wedges
2 to 4 cloves garlic, pressed
2 tablespoons minced Italian parsley
1 tablespoon minced fresh basil or 1 teaspoon dried basil
Salt and freshly ground black pepper to taste

Combine cornstarch with 1 tablespoon of stock in a small bowl. Smush together with your fingertips to dissolve the cornstarch, then whisk in the remaining stock, along with the mustard and yogurt sour cream. Set aside. Melt the butter in a large skillet over medium heat. Add the scallions and beet greens and sauté for 1 minute, then cover and cook for 3 minutes. Uncover and add the beets and garlic to the pan and toss until just heated through, about 1 minute. Whisk the mustard mixture. Quickly stir it into beets. Cook, stirring constantly, until the sauce is hot and thick, 1 minute at most. Stir in the parsley and basil. Taste. If there is a raw cornstarch taste, cook a minute longer. Serve immediately.

Broccoli Recipes

Broccoli with Sun-Dried Tomatoes and Pine Nuts
From Fields of Greens by Anne Sommerville

1 pound of broccoli
3 tablespoons balsamic vinegar
1 small garlic clove, finely chopped
5 tablespoons olive oil
Salt and pepper
2 sun-dried tomatoes packed in oil, drained and thinly sliced
1 tablespoons pine nuts, toasted
Champagne vinegar (can substitute white wine or rice vinegar)

Cut the broccoli tops in to florets about 1 1/2 inches long. Peel the broccoli stems, cut in half lengthwise, and slice 1/2 inch thick on the diagonal. In a small bowl, whisk together the balsamic vinegar, garlic, oil, 1/2 teaspoon salt, and a few pinches of pepper. Bring a medium size pot of water to boil and add 1/2 teaspoon salt. Drop in the broccoli stems and cook for about 3 minutes, adding the florets for the last minute. The broccoli should be bright green and slightly crisp. Pour it into a colander, rinse under cold water, and drain thoroughly. Toss the broccoli with the sun-dried tomatoes, pine nuts, and vinaigrette. Add salt and pepper to taste and a splash of Champagne vinegar to heighten the flavor.


Broccoli Salads
From Recipes from Americas Small Farms by Joanne Lamb Hayes and Lori Stein

Note: Here are few simple and delicious broccoli salad recipes to try. For each salad start by slicing 1 1/2 pounds fresh broccoli and cooking until crisp-tender using the method of your choice (boiling, steaming, roasting, sautéing, etc.). All salads serve approximately four.

Bacon & Onion Broccoli Salad

1 1/2 pounds broccoli, sliced and cooked until crisp-tender
4 slices bacon
2/3 cup olive oil
3 tabelspoons red wine vinegar
1 cup red onion, chopped
Salt and fresh ground pepper, to taste
Sunflower seeds

Cook the bacon until crisp. Let cool, then crumble. Whisk together olive oil and red wine vinegar until blended. Then add the chopped onions. Season with salt and fresh ground pepper to taste. Toss the mixture together with the broccoli and bacon until well coated. Garnish with sunflower seeds.

Sesame Broccoli Salad

1 1/2 pounds broccoli, sliced and cooked until crisp tender
2 tablespoons soy sauce
2 tablespoons rice wine vinegar
2 tablespoons sesame oil
2 tablespoon honey
1/2 cup sesame seeds, toasted

Whisk together the soy sauce, rice wine vinegar, sesame oil and honey in a large bowl. Mix the broccoli and half of the sesame seeds in the dressing. Marinate at room temperature for 30 minutes to 2 hours, tossing occasionally. Transfer the broccoli to a platter, pour the dressing over, and sprinkle with the remaining sesame seeds.

Chicken-Herb Broccoli Salad

1 1/2 pounds broccoli, sliced and cooked until crisp tender
3 cups chopped/shredded cooked chicken
1/4 cup fresh parsley or dill, chopped
1/4 cup sour cream
Salt and pepper to taste

Mix the broccoli with cooked chicken, fresh herbs, and sour cream. Sprinkle with salt and pepper to taste.


Chard Recipe

Greens Braised with Ginger, Cilantro and RiceFrom Local Flavors by Deborah Madison

Note: This recipe was submitted by CSA member Jessica and she suggests eating it, “over baked potatoes and topped with yogurt.” It’s a perfect way to use your turnip greens, beet greens, and chard from your share this week.

2 bunches greens (turnip greens, beets greens, and/or chard), stems removed
3 tablespoons vegetable oil
1 onion, diced
1/4 cup white rice
2 tablespoons finely chopped ginger
1 teaspoon ground cumin
1 teaspoon paprika
1 cup cilantro stems and leaves
Sea salt
Plain yogurt

Wash the mustard greens well, then chop, but don’t dry them. Heat the oil in a wide, heavy pot over medium heat. Add the onion, rice, ginger, cumin and paprika. Stir to coat with the oil. Cook for 2 minutes, then add cilantro and the turnip/beets greens and chard. Sprinkle with 1 tsp salt, cover the pan and cook until the volume has reduced, 10-15 minutes. Give everything a stir, then reduce the heat to low, re-cover and cook slowly for 40 minutes. There should be ample moisture in the pot, but check once or twice to make sure that nothing is sticking on the bottom.  If the pan seems dry, add a few tablespoons of water. Cook until the greens are really tender, 10-15 minutes more.  Serve warm or at room temperature, with yogurt spooned over the top or a squeeze of fresh lemon.


Hakurei Turnip Recipes

Quick-Pickled Baby Turnips
From The Joy of Picking by Linda Ziedrich

1 pound Hakurei Turnips (half your bunch this week), trimmed at the top and bottom
2 teaspoons pickling salt
1 1/2 cups water
1 fresh red jalapeno pepper, seeded and minced, or 1 tablespoon minced pimiento
3 tablespoons sugar
1 1/2 cups rice vinegar or white vinegar

If turnips are large cut into desired size for pickling. Score each turnip several times at top and bottom.  Put the turnips into a bowl. Dissolve the salt in the water, and pour the brine over the turnips. Let them stand for 30 minutes to an hour. Drain the turnips well, then return them to the bowl with the minced pepper, and toss well. Combine the sugar and vinegar, and stir until the sugar dissolves. Pour the liquid over the turnips. Cover the bowl with plastic wrap, and refrigerate and the turnips for two days, after which they will be ready to eat. Well covered and refrigerated, they will keep for several months.


Gratin of Hakurei Turnips
Recipe from Emily Thomson of Full Circle Farm in Carnation, WA http://www.fullcirclefarm.com

2 pounds Hakurei Turnips, sliced 1/4-inch thick (for larger turnips halve or quarter so all pieces are relatively the same size)
3 tablespoons unsalted butter
Thin slices day-old baguette or other good white bread
Salt and freshly ground pepper
1/4 cup heavy cream
1/2 cup freshly grated Parmesan cheese

In a saucepan of salted water, boil the turnip slices until tender, about 12 minutes. Preheat the oven to 325 degrees. Butter a deep gratin dish with 1 tablespoon of the butter and line it with the bread slices. Drain the turnip slices and arrange a layer of them over the bread slices. Salt lightly, grind some pepper over them, and sprinkle with some Parmesan cheese. Add a layer of bread slices, then turnips, then salt, pepper, and cheese. Repeat until all ingredients are used, ending with a layer of turnips, salt, pepper, and Parmesan. Drizzle the heavy cream over the entire dish. Break the remaining 2 tablespoons of butter into small bits and scatter over the top. Place into the oven and bake until golden, about 35 minutes.

Categories : Blogroll, CSA Newsletter, Farm News & Updates, Recipe, Uncategorized

CSA News: Week 5- June 28 to July 4

Posted by csa on
 June 27, 2011

week5_share_2011

This Week’s Share

Crop

Family Share

Individual Share

Broccoli 2 pounds 1 pound
Carrots 1 bunch 1 bunch
Dill 1 bunch ——-
Fennel 2 bulbs ——-
Garlic Scapes 2 ounces ——-
Lettuce, Romaine 2 heads 1 head
Napa Cabbage 1 head 1 head
New Potatoes 3 pounds 2 pounds


Share Notes

  • Broccoli: Enjoy the abundance of broccoli while its here, just a couple more rounds before its gone until the fall.
  • Napa Cabbage: This crunchy and delicious treat is great fresh or cooked, so try it in a salad, sauté it up, or throw it in a soup to enjoy is mild and sweet flavor.
  • New Potatoes: Just in time for 4th of July are the red, white, and blue new potatoes. Make a festive salad for your holiday BBQ, or just enjoy them for their brilliant hues. You may notice the potatoes are unwashed, and that is because we didn’t want to further peel their delicate “new” skins. Also, make sure to keep them refrigerated as they have not yet developed a thick and protective skin.


Recipes

Broccoli Recipes

Ginger Broccoli (and Napa Cabbage)
Adapted from Eating Well in Season by Jesse Price

Note: Originally this recipe calls for just broccoli, but Napa (Chinese) cabbage is also wonderful prepared this way. Try adding some sliced up Napa cabbage in with the broccoli, or you can substitute a head of Napa cabbage for the broccoli to try it on its own. Also great over rice to make a meal out of it.

1 tablespoon canola oil
2 tablespoons garlic scapes (or regular garlic), minced
4 teaspoons minced fresh ginger
6 cups broccoli crowns, trimmed and chopped (about 1 pound broccoli)
1/2 to 1 head Napa (Chinese) cabbage, cut into 1/2-inch strips
3 tablespoons water
1 tablespoon fish sauce (can substitute tamari soy sauce)
1 tablespoon rice vinegar

Heat oil in a large skillet over medium-high heat. Add garlic and ginger and cook until fragrant but not browned, 30 seconds to a minute. Add broccoli and cook, stirring, until the broccoli is bright green, 2 minutes. Add in Napa cabbage and drizzle water and fish sauce over the broccoli and cabbage; reduce heat to medium, cover and cook until the broccoli is just tender, about 3 minutes. Stir in vinegar just before serving. Makes 4 servings, about 1 cup each.


Humble Vegetable Casserole
From The Enchanted Broccoli Forest by Molly Katzen

2 tablespoons butter
1/2 cup sliced onion
1/2 pound sliced mushrooms
1 pound of broccoli, chopped
2 medium (or 4-6 smaller) potatoes, thinly sliced
3/4 teaspoon salt
Fresh ground black pepper, to taste
1 teaspoon fresh dill, minced
2 hard boiled eggs, chopped
1/2 cup chopped sweet pickle
1 1/2 packed cups grated cheddar cheese
1 teaspoon caraway seeds
3/4 cup milk
Paprika

Preheat oven to 350˚F. In a large heavy skillet, cook the onions over very low heat in the butter until they begin to soften, 3-5 minutes. Add the mushrooms, broccoli, potato slices, and salt. Stir and cover. Continue cooking over medium-low heat until the potato slices are just tender (8-10 minutes). Don’t overcook, as this will cause the vegetables to become boring.  Season the cooked vegetables with pepper and dill, stirring to well-acquaint everything with everything else.

In a separate bowl toss together the chopped egg, pickle, grated cheese and caraway seeds. Spread half the cooked vegetable mixture into the bottom of your buttered deep-dish casserole. Sprinkle half the egg-cheese mixture over the vegetable layer, distributing it evenly and unimaginatively. Spread the second half of the vegetable mixture, then sprinkle the other half of the egg-cheese mixture. Pour the milk over the top of the casserole, and dust with paprika. Cover, and bake for 30 minutes.


Roasted Baby Potatoes & Broccoli
From http://fortheloveofcooking-recipes.blogspot.com

6-8 small/baby potatoes
2 cups broccoli florets
2-3 tablespoons soy sauce
1 tablespoon butter
2 teaspoons olive oil
Sea salt and fresh ground black pepper
2-3 tablespoons fresh parsley, chopped

Preheat the oven to 350˚F. Boil a large pot of water and boil the potatoes for 4-5 minutes. Remove from water and let cool. Once cooled, slice in half and combine soy sauce, broccoli florets, butter, olive oil, sea salt and black pepper along with half of the parsley. Mix thoroughly and place in an oiled baking. Place into the oven and roast for 20-25 minutes. Remove from the oven and taste, re season with sea salt, cracked pepper, butter or soy sauce if needed. Enjoy.


Napa (Chinese) Cabbage Recipes

Chinese Noodle Soup with Cabbage
From Serving up the Harvest by Andrea Chesman

8 cups chicken/vegetable broth
1/4 cup soy sauce, or to taste
1 tablespoon Chinese rice wine or sherry
6-12 mushrooms, chopped if large
2 tablespoons fresh ginger, minced
3 garlic scapes (or cloves), minced
3 scallions, finely chopped
Salt & freshly ground black pepper
3/4 pound Chinese egg noodles
1 tablespoon dark sesame oil
2 cups chopped cooked chicken, chopped (or 1 pound tofu, cubed)
4-6 cups Napa Cabbage, chopped
1 carrot, julienned
Chinese chili paste with garlic (optional)

Combine broth, soy sauce, rice wine, mushrooms, ginger, garlic, and scallions in a large saucepan. Season with salt and pepper. Simmer for 25 minutes. Meanwhile, bring a large pot of salted water to a boil. Add the noodles and sesame oil and cook until the noodles are barely tender. Drain well and return the noodles to the pot to keep warm. Add the chicken/tofu, cabbage, and carrots to the broth and simmer for another 10 minutes, until the carrots are tender. To serve, place a nest of noodles in each bowl. Ladle the broth, vegetables, and chicken/tofu over the noodles and serve hot, passing the chili paste at the table for those who like a little spice in everything they eat.


Ginger Broccoli (and Napa Cabbage)
(see above in Broccoli Recipes)


New Potato Recipes

Herbed New Potatoes
From Serving up the Harvest by Andrea Chesman

2 pounds new potatoes, washed
3 tablespoons butter, melted
3 tablespoons chopped fresh herbs (dill, oregano, chives, savory, chervil, tarragon, parsley, marjoram, alone or in any combination)
Sea salt and freshly ground black pepper

Bring about an inch of water to a boil in a saucepan. Add the potatoes in a steaming basket, cover, and steam for 25 to 35 minutes, until the potatoes are tender when pierced with a knife. Transfer the potatoes to a warmed serving bowl. Pour in the butter, and sprinkle the herbs and salt and pepper over the butter. Toss gently. Serve immediately.


Carrot, Fennel, & Potato Medley
From What’s Cooking Vegetarian by Jenny Stacy

For Vegetables:
2 tablespoons olive oil
3/4 pound potatoes, cut into thin strips
1 fennel bulb, cut into thin strips
2 carrots, grated
1 red onion, cut into thin strips
Chopped chives and fennel fronds, to garnish

For Dressing:
3 tablespoons olive oil
1 tablespoon garlic wine vinegar
1 garlic scape (or clove), chopped
1 teaspoon Dijon mustard
2 teaspoons clear honey
Salt and pepper

Heat the olive oil in a skillet, add the potato and fennel slices, and cook for 2-3 minutes, until beginning to brown. Remove the vegetables from the skillet with a slotted spoon and drain on paper towels.

Arrange the carrot, red onion, and potato/fennel mixture in separate piles on a serving platter. Mix the dressing and pour over the vegetables. Sprinkle with chopped chives and fennel and serve immediately or leave in the refrigerator until required. Delicious served with crusty bread to mop up the dressing.


Roasted Baby Potatoes & Broccoli
(see above in Broccoli Recipes)


Humble Vegetable Casserole
(see above in Broccoli Recipes)


Romaine Lettuce Recipe

Caesar Salad
From Shannon Raider, a former SIO Farmer

Note: If you like a little less intensity you can adjust the taste, just put in less garlic and anchovy.

1-2 head(s) romaine lettuce, washed and torn into salad-size pieces
3 garlic scapes (or cloves)
2 tablespoons olive oil, plus 3/4 cup olive oil
1/2 tin of whole anchovy fillets
1 tablespoon dry mustard
2-6 shakes of Tabasco sauce
2 tablespoons Worcester sauce
1 raw egg yolk or 1 coddled egg yolk*
1/4 cup lime juice
1/4-1/2 cup grated parmesan cheese
Salt and fresh ground black pepper, to taste

In the bottom of the bowl that you will serve your salad into, work 3 scapes/cloves of garlic into a paste with 2 tablespoons olive oil and pinch of salt using two forks. Next, add half a tin (or one of those tiny jars) of whole anchovy fillets into the garlic paste in the same fashion. Adjust anchovy amount to your liking. Then add 1 tablespoon dry mustard, 2-6 shakes of Tabasco sauce and 2 tablespoons Worcester sauce. ( Whisk in the raw egg yolk or coddled egg yolk*. Whisk in 3/4 cup olive oil and 1/4 cup lime juice. ( Stir in grated Parmesan Cheese (at least a 1/4 cup, but I like a lot of cheese). ( Add salt and generous amounts of ground black pepper to taste. ( Pour dressing into a jar and toss salad in the well seasoned bowl, toss with as much dressing as you like. ( Extra dressing can be stored for up to one week in the refrigerator.

*Coddling causes the egg white to cook and leaves the yolk liquid. This sterilizes the egg of any bacteria that could contaminate. Bring egg to room temperature. Place the egg in a small bowl or mug and pour boiling water around the egg until it is covered. Let stand for exactly 1 minute. Immediately run cold water into the bowl.

Categories : Blogroll, CSA Newsletter, Farm News & Updates, Recipe

CSA News: Week 4- June 22 to June 27

Posted by csa on
 June 21, 2011

week4_share_11

This Week’s Share

Crop

Family Share

Individual Share

Beets 1 1/2 pound 1 1/2 pounds
Broccoli 2 pounds 2 pounds
Hakurei Turnips 1 1/2 pounds 1 1/2 pounds
Lettuce 2 heads 1 head
Parsley 1 bunch ——-
Scallions (Green Onions) 1 bunch ——-
Spinach 1 pound 1/2 pound

Share Notes

  • Beets: Your beets this week come with their beautiful crisp green attached, and you may use these as you would chard in salad and sautés.

Recipes

Beet Recipes

Roasted Beet Crostini
From Eating Well in Season by Jessie Price

Note: This is a tasty and colorful starter for entertaining or just fixing up for a pre-dinner delight. Note that you will end up with some left over cooked beets that you can you use in a side dish or salad, or any other way you please.

1 bunch beets with greens attached
16 1/2-inch thick slices baguette, preferably whole-grain cut on the diagonal
2 tablespoons extra virgin olive oil, divided
6 cloves garlic, minced
1 tablespoon sherry vinegar or red-wine vinegar
2 tablespoons water
1/4 teaspoons salt
4 ounces creamy goat cheese
1/4 teaspoon freshly ground pepper

Preheat oven to 400˚F. Trim green from beets, reserving stems and greens. Place the beets in a baking pan, cover with foil and roast until very tender when pierced with a knife, 45 minutes to 1 1/2 hours depending on the size of the beets. Uncover and let cool. Reduce oven temperature to 350˚F. While the beets cool, arrange baguette slices in a single layer on a large baking sheet. Bake, turning the slices over once halfway through, until toasted but not browned, about 14 minutes. Thinly slice the beet green stems and finely chop the leaves; keep the stems and leaves separate. Heat 1 tablespoon olive oil in a large skillet over medium heat. Add the stems and cook, stirring occasionally, until tender, about 3 minutes. Add the remaining 1 tablespoon oil and garlic and cook, stirring, until fragrant, about 15 seconds. Add the greens, vinegar and water and cook, stirring occasionally, until greens are tender and liquid has evaporated, 4 to 5 minutes. Stir in salt and remove from heat. Peel the cooled beets and cut into 1-inch pieces. Place 3/4 cup beet pieces, goat cheese and pepper in a food processor or blender and puree until smooth (reserve the remaining beets for another use). To assemble crostini, spread about 2 tablespoons beet-cheese spread on each slice of toasted baguette and top with sautéed greens. Makes 16 crostini.


Roasted Beet and Spinach Salad
By Whole Foods Market, www.wholefoodsmarket.com/recipes

Note: You’ll find that many different cheeses go well with sweet, roasted beets. Try using crumbled goat cheese, Gorgonzola or feta cheese as alternatives.

1 pound beets, stems trimmed (reserve greens for using in another dish)
1-2 tablespoon scallions, finely chopped
3 tablespoons lemon juice
1/2 teaspoon Dijon mustard
1/4 cup extra virgin olive oil
Salt and pepper to taste
3 to 4 cups spinach leaves
1/4 pound crumbled Roquefort cheese

Preheat oven to 400°F. Wash beets then wrap in parchment-lined aluminum foil and roast in center of oven until tender, 45 to 60 minutes. Cool, then peel and halve (or quarter depending on size). Meanwhile, whisk together scallions, lemon juice and mustard. Whisk in oil until emulsified and season with salt and pepper. Add beets and toss gently to coat. Arrange spinach on a large platter. Using a slotted spoon, transfer beets to plates, arranging them on top of the spinach. Top with cheese, drizzle lightly with some of the remaining dressing and serve, with more dressing on the side, if you like. Serves 4 to 6.


Broccoli Recipe

Pasta with Garlicky Broccoli
From Fine Cooking In Season

3-6 cups broccoli florets (really you can decide how much broccoli you want in your pasta)
2 tablespoons olive oil
2-6 cloves garlic, finely chopped (you can also decide how garlicky you want this dish)
1-2 teaspoons crushed red pepper flakes
Salt and pepper, to taste
1 package of pasta
1/2 teaspoon lemon zest (optional, use if you have a lemon on hand)
Parmesan, to taste

Bring a large pot of water to a boil. Add the pasta to the large pot once it’s at a rapid boil. While the large pot is heating up bring a medium size pot with a few centimeters of water to a slow boil for steaming. Steam the broccoli until just tender, 2-4 minutes. Then sauté the steamed broccoli in a large pan with chopped garlic, crushed red pepper, and salt and pepper to taste. Chop the sautéed mixture more if you prefer a smaller size for mixing with your pasta. Cook the pasta until al dente, then drain and return to the pot or a large bowl for mixing (reserve a small amount of the pasta water for mixing). Add the broccoli sauté mixture to the pasta, along with a little of the pasta water, lemon zest (if using), and lots of Parmesan. Enjoy on it’s own, or with a fresh green salad.


Hakurei Turnip Recipes

Lebanese Pickled Turnips
From Eating Local by Janet Fletcher

Pickling mixture:
1 3/4 cups water
1 tablespoon plus 1 teaspoon kosher/pickling/sea salt
1 clove garlic, halved
1 small dried red chile (optional)
1/2 cup white wine vinegar

For the pickles:
1 pound Hakurei Turnips, green removed (greens can be saved for later use if desired)
1 small red beet (peeled)

To make the picking mixture combine the water, salt, garlic, and chile in a small saucepan. Set over moderate heat and stir until the salt dissolves. Set aside to cool. When cool, stir in the vinegar.

Scrub the turnips well and quarter them through the stem end (or cut into sixths if larger). Cut the beet into approximately the same size pieces as the turnips. Pack the vegetables into a clean 1-quart jar. Pour the pickling mixture over them, tucking the garlic halves and chile down into the jar. Cover and refrigerate for 1 week before tasting. The pickled turnips will keep at least for 2 weeks or longer.


Turnip and Turnip Green Soup
From Chez Panisse Vegetables by Alice Waters

1/2 yellow onion
1 clove garlic
2 teaspoons olive oil
1/2 tablespoon unsalted butter
1 bunch Hakurei Turnips with greens (about 1 1/2 pounds)
1 bay leaf
1/2 teaspoon chopped thyme leaves
1 small piece prosciutto or smoked bacon (leave out for vegetarian)
4 cups rich chicken or vegetable stock
Salt and pepper
Parmesan cheese

Peel and thinly slice the onion and garlic. Put in a nonreactive pot with the olive oil and butter and 1 tablespoon of water and stew over medium-low heat, covered, until they are soft and translucent. Trim off the stems and greens form the turnips and reserve the greens. There is no need to peel the turnips. Trim off their roots, slice he turnips thin and add them to the pot. Stew them for a few minutes, until they begin to soften. Add the bay leaf, thyme, proscuitto or bacon, stock, and salt and pepper. Cover and simmer over low heat for about 1/2 hour. Wash the turnip greens and cut them into 1/2-inch wide strips and stir them into the soup. Simmer the soup for another 10 minutes or so, until the greens are soft and tender. Garnish the soup with a few curls of shaved Parmesan.


Parsley Recipe

Chimichurri Sauce
Recipe by Michael Chiarello, foodnetwork.com

Note: This blend of fresh herbs and spices is a classic Argentinean meat marinade and condiment. It can be used and served in any number of ways, but traditionally is paired with grilled meats.

1 bunch fresh flat-leaf parsley, finely chopped
2 bay leaves
6 cloves garlic, minced
1 1/2 teaspoons smoked paprika
1 tablespoon fresh oregano leaves, finely chopped
1/2 cup red wine vinegar
1 1/2 cups extra-virgin olive oil
1 teaspoon salt
1/2 teaspoon freshly ground black pepper

Place the parsley, bay leaves, garlic, paprika, oregano, vinegar, olive oil, salt, and pepper in a food processor. Pulse until combined. Put the sauce in a glass or plastic container, using as needed. Chimichurri will last for up to 1 month, refrigerated. Makes 2 1/2 cups.

Spanakopita (Spinach Pie)
(see below in Spinach Recipes)


Scallion Recipe

Shrimp a la Fein
From the Court of Two Sisters

Note: This recipe is incredibly delicious and very quick and easy. It makes a great 15 minute meal when served over couscous.

1/2 lb medium raw shrimp
2 strips of bacon
3-4 scallions
juice of 1/2 lemon
salt, pepper and paprika to taste
1 tablespoon butter
Tabasco
Worcestershire Sauce

Dice bacon and sauté in a skillet until half cooked. Pour off excess fat. Lower flame. Add butter, peeled raw shrimp, scallions (chopped fine), and season and to taste with salt and pepper. When the shrimp are turning pink, add lemon juice and 2-5 dashes each of Tabasco and Worcestershire Sauce. Serve over couscous, quinoa, or pasta if desired.


Spinach Recipes

Spanakopita (Greek Spinach Pie)
From www.allrecipes.com

Note: This recipe calls for 2 pounds spinach. Your Family Share this week includes 1 pound (Individual Share include 1/2 pound), but you can supplement spinach with the beet greens and turnips greens from your share this week to make the 2nd pound of greens. It’s a great way to use the greens from those roots and tastes just as delicious, if not better.

3 tablespoons olive oil
1 large onion, chopped
1 bunch scallions, chopped
2 cloves garlic, minced
2 pounds spinach, rinsed and chopped
1/2 cup chopped fresh parsley
2 eggs, lightly beaten
1/2 cup ricotta cheese
1 cup crumbled feta cheese
8 sheets phyllo dough (found in the freezer department of the grocery store)
1/4 cup olive oil

Preheat oven to 350 degrees F (175 degrees C). Lightly oil a 9×9 inch square baking pan.

Then heat 3 tablespoons olive oil in a large skillet over medium heat. Saute onion, green onions and garlic, until soft and lightly browned. Stir in spinach and parsley, and continue to sauté until spinach is limp, about 2 minutes. Remove from heat and set aside to cool.

In a medium bowl, mix together eggs, ricotta, and feta. Stir in spinach mixture. Lay 1 sheet of phyllo dough in prepared baking pan, and brush lightly with olive oil. Lay another sheet of phyllo dough on top, brush with olive oil, and repeat process with two more sheets of phyllo. The sheets will overlap the pan. Spread spinach and cheese mixture into pan and fold overhanging dough over filling. Brush with oil, then layer remaining 4 sheets of phyllo dough, brushing each with oil. Tuck overhanging dough into pan to seal filling. Bake in preheated oven for 30 to 40 minutes, until golden brown. Cut into squares and serve while hot.


Roasted Beet and Spinach Salad
(see above in Beet Recipes)

Categories : Blogroll, CSA Newsletter, Farm News & Updates, Recipe, Uncategorized

CSA News: Week 3- June 14 to June 20

Posted by csa on
 June 14, 2011

week3_share_11

This Week’s Share:

Crop

Family Share

Individual Share

Arugula 1 bunch ——–
Broccoli 2 pounds 1 pound
Fennel 2 bulbs 1 bulb
Green Garlic 2 stems ——–
Kale, Red Ursa 1 bunch 1 bunch
Lettuce 2 heads 1 head
Radishes, mixed varieties 1 bunch 1 bunch

Share Notes

  • Fennel: You can make use of your whole fennel bulb, fronds and all. Try chopping up the feathery greens and add to salad or salad dressing, or just add them as you would and her to any of your favorite dishes.

Farm News

The Soil Is Heating Up at SIO


Here at SIO we always work to improve our growing systems and make the most out of the season’s growing conditions. After several seasons of cool wet springs, extended and cooler night temperatures we decided to add a tool that will help us provide more consistent yields with our warm weather crops; that tool is a plastic mulch layer. This tool attaches to the back of the tractor and lays both drip irrigation tape and a thin sheet of black plastic. We then plant heat-loving crops such as tomatoes, peppers, summer squash, melons, cucumbers, and eggplant into holes made in the plastic. This thin layer of plastic creates a significantly warmer environment that encourages the growth of these heat loving crops. Whenever we consider using more plastic on the farm it is not done lightly, but the added benefit of more reliable yields as well as giving us more flexibility in rotating crops throughout our fields weighed in and tipped the scale in favor of adding this tool to our farming system. Above is a video of the plastic mulch layer at work. Below is a photo of cucumbers recently planted using the plastic mulch.plastic_mulch

Recipes

Broccoli Recipe

Fresh Broccoli Soup
From Recipes from America’s Small Farms by Joanne Lamb Hayes and Lori Stein

1 to 1 1/2 pounds broccoli
2 tablespoons olive oil
1 medium to large onion
1-2 stems green garlic, chopped
3 cups boiling water
2 tablespoon lemon juice
1/2 teaspoon dried thyme
1/2 teaspoon salt
1/2 teaspoon freshly ground black pepper
2 cups chicken or vegetable broth
1 cup whole milk
1/2 teaspoon ground nutmeg
Chopped fresh scallions or chives, for garnish (optional)

Cut the tops of the broccoli into florets; peel the stems and cut into 1/4-inch slices. Heat the oil in a large, heavy saucepan over medium heat. Add the broccoli, onion, green garlic; sauté until the onion is slightly softened, about 3 minutes. Add the water, lemon juice, thyme, salt, and pepper. Cover and cook until the broccoli is very tender, about 10 minutes.

Add the broth/stock and puree with a hand blender, or transfer into a blender/food processor and puree. After pureeing, add the milk and nutmeg, and heat through bu do not boil. Taste and adjust seasoning, if necessary. Garnish with chopped scallions or chives if desired.


Fennel Recipe

Hot Chicken Noodle Salad
From Fresh from the Garden Cookbook by Ann Lovejoy

“When you can only spare half an hour for making dinner, try this hot chicken noodle salad. The savory sour cream is vibrant with the fennel and dried apricots. Substitute thin strips of pork if you prefer, and use dried red currants in place of apricots. Both versions are simple yet sumptuous.”

8 to 9 ounces fresh noodles
2 tablespoons olive oil
1 dried hot red chile
1 stem green garlic (or 2 cloves garlic), chopped
1 teaspoon fresh rosemary leaves
2 skinless, boneless chicken breast halves (1 whole breast), thinly sliced, or 1 pound lean boneless pork, thinly sliced
1/2 teaspoon sea salt
1/2 teaspoon freshly ground black pepper
Juice and zest of 1 organic orange
2 bulbs fennel, thinly sliced
1/4 cup chopped dried apricots
2 cups stemmed kale, shredded (can substitute chard also)
2 cups steamed arugula (or spinach)
1 cups sour cream (nonfat works fine)
Parsley, for garnish (optional)

Cook the fresh noodles according to package directions. In a saucepan, heat the olive oil over medium-high heat. Add the chile, and brown on all sides to flavor the oil. Remove and discard the chile. Add the green garlic, rosemary, and chicken. Sprinke with the salt, ground pepper, and orange zest and cook, stirring often, until chicken is opaque, 8 to 10 minutes. Add the fennel, stir to coat, and cook until fennel is barely soft, 6 to 7 minutes. Add the apricots, orange juice, kale, arugula, cover the pan, reduce the heat to medium-low, and cook until the greens are lightly wilted. Stir in the sour cream and heat through, 1 to 2 minutes. Toss with the hot noodles and serve garnish with parsley if desired. Makes 4 servings. Recipe is easily halved or doubled depending of your needs.


Frittata with Green Garlic (or Leek), Fennel and Goat Cheese
From The Local Kitchen by Katie Rose Lamb

Make this quick and delicious dish for breakfast, lunch, or dinner.

1 tablespoon butter
1 1/2 cups sliced fennel
2 stems green garlic, halved, washed, and sliced (or 1 leek)
4 large eggs
1/4 teaspoon
Pepper, to taste
2 ounces crumbled or grated goat cheese, plus more for topping

Preheat an oven to broil. Over medium heat melt the butter in an 8-inch skillet and roll it around to coat the sides. Add the fennel and sauté until tender, about 8 minutes. Stir in the green garlic (or leek) and cook, stirring often, until soft, about 10 minutes.

In a medium bowl or large measuring cup beat the eggs thoroughly. Add the salt, pepper, and cheese and stir very gently to keep the cheese in separate pieces. When vegetables are cooked, reduce the heat to low. Carefully pour the egg mixture and stir gently to incorporate it. Cook slowly until the eggs are almost set, about 15 minutes. Transfer the pan to the oven and leave on a top rack to brown for 3 minutes. Grate or crumble more of the goat cheese on top, return to the oven for one more minute, then serve. Serves 2.


Kale Recipe

Kale Chips

Note: This recipe is back by popular demand, so if you are an already seasoned kale chip lover spread the word to the newbies that it is definitely worth a try, especially if you have kale skeptic children in the house. You can also change it up a bit and sprinkle with any type of seasoning you like. Spice it up with some curry powder or cayenne pepper, or give it some Asian flare with seasame oil, sesame seeds, and a few splashes or soy sauce.

Kale (as much or as little as you like)
1-2 tablespoons olive oil
Salt, to taste,
Pepper, to taste (optional)

Wash kale and remove tough center stems. Tear kale into roughly chip size pieces. Toss with olive oil and salt. You could spray with one of those aerosol oil things since you don’t want to soak the leaves in too much oil. Place kale ‘chips’ in a single layer on a baking sheet and put in a hot oven, 400˚-450˚F. Bake watching closely, you may have to turn a few chips to make crisp on each side…Voila, salty kale chip snacks!


Garlic Sauteed Kale with Cajun Spiced Candied Pecans
(from the June Chef’s Corner by Grace Pae)


Lettuce Recipe

Arugula Salad with Cherry-Chive Vinaigrette
From Fresh from the Garden Cookbook by Ann Lovejoy

5 cups salad greens/lettuce
2 cups shredded arugula

1/4 cup olive oil
2 tablespoons sweet brown rice vinegar (can substitute balsamic or apple cider vinegar)
1 stem green garlic (2 cloves garlic), minced
1 tablespoon chives, finely chopped
1/4 teaspoon sea salt
1/4 teaspoon freshly ground pepper
2 tablespoons dried tart cherries

To prepare the Cherry-Chive Vinaigrette combine all the ingredients except the vinegar in a jar; then add the vinegar to taste, starting with 1 tablespoon. Cap tightly and shake well to emulsify. Place the salad greens and arugual in a salad bowl. Drizzle vinaigrette over the greens, toss, and serve.

Categories : Blogroll, Chef's Corner, CSA Newsletter, Farm News & Updates, Recipe, Uncategorized

CSA News: Week 30- December 7 to December 13

Posted by csa on
 December 7, 2010

week30_share_2010

This Week’s Share

  • Cabbage, Savoy
  • Carrots
  • Onions, Copra
  • Parsnips
  • Potatoes
  • Winter Squash, Delicata

2010 Season Comes to a Close: Thank You & See you Next Season

That’s right, it’s here, the last week of the 2010 CSA season has arrived. Thank you to you, our members, for another great season. Thank you to our generous and patient site hosts and site coordinators for offering their space and time for another season of successful pick-ups. And thank you to our awesome and hard working crew for seeding, planting, weeding, harvesting, irrigating, tractoring, washing, packing, and delivering all season long  in order to bring you your share of the harvest each week. You too can say thank you, just sign-up for next season because it’ll be just around the corner before you know it.

Also, a final reminder to box share members to please return your final empty bin (and any others you may have collected) to your site within 1 week of your final pick-up. We will be by to collect them on your usual delivery day next week.

From the Farm Owner Shari:

As you enjoy the last harvest of the season I would like to say thank you for another great season together. We are proud to be your farmers; to nourish you and your families. As you know, when you eat locally you help preserve farmland, create jobs, build community and above all eat well. Being a CSA member increases your sense of place by intimately connecting you to the land and weather of the greater Portland area.
We are already busy planning for the 2011 and could use your help in several ways:

  • Email us with any thoughts you would like to share with us about the 2010 season. We appreciate your feedback.
  • Please let friends, family and co-workers know about the joys of being a SIO CSA member. We did not sellout in 2010 and hope to reach our 400 member goal in 2011.
  • Consider signing up early. This saves you money and helps us to know how much energy we need to put into marketing our 2011 shares.
  • If your budget allows, paying early helps us cover our winter expenses.

We at SIO wish you and your family a happy and peace filled New Year. We look forward to growing for you in 2011.

Shari Raider & the SIO Crew

Recipes

Cabbage Recipes

White Bean and Cabbage Soup
From Serving Up the Harvest by Andrea Chesman

2 tablespoons olive oil
6-8 cups green or savoy cabbage, thinly sliced
1 onion, halved and thinly sliced
6 cups chicken or vegetable broth
½ pound thin-skinned potatoes, unpeeled, cut into 1-inch cubes
8 ounces Spanish chorizo, andouille, or other full-flavored, fully cooked sausage
1½ cups cooked white beans
Salt and freshly ground black pepper

Heat the oil in a large saucepan over medium heat. Add the cabbage and onion and sauté until beginning to color, about 10 minutes. Add the broth, potatoes, and sausage. Bring to a boil, then reduce the heat and simmer until the potatoes are tender, about 30 minutes. Stir in the beans and simmer until heated through, about 10 minutes. Season with salt and pepper, and serve hot. Serves 6-8.

Caramelized Cabbage and Onion Tart
From Recipes from the Root Cellar by Andrea Chesman

2 tablespoons olive oil
½ head green or savoy cabbage, thinly sliced
1 onion, thinly sliced
1 teaspoon dried thyme
Salt and freshly ground black pepper
1 cup lightly packed grated cheddar cheese
1 (9-inch) pre-baked single pie-crust pie shell (recipe below)
2 eggs
1 cup milk

Heat oil in a large saucepan over medium heat. Add the cabbage and onion and sauté until the cabbage is completely wilted and the onion is golden, about 25 minutes. Add the thyme and season with salt and pepper.

Preheat oven to 375˚F. Sprinkle half the cheese into the pie shell. Arrange a layer of the vegetables on top of the cheese. Beat the eggs and milk together and pour over the vegetables. Sprinkle the remaining cheese on top. Bake for 30 to 35 minutes, until puffed and browned. Let stand to set for at least 10 minutes. Serve warm or at room temperature.

Basic Pie Pastry

2 cups all-purpose unbleached flour
1 teaspoon salt
2/3 cup butter or vegetable shortening
6-7 tablespoons ice cold water

Stir together four and salt. Cut the butter into the flour with a pastry blender or two knives until the mixture resembles coarse crumbs. Sprinkle the water over the flour mixture and stir together. Press the mixture into two disks, wrap each in plastic wrap, and refrigerate for 30 minutes.

To make a pre-baked single-crust pie shell  preheat the oven to 450˚F. Roll out one ball of dough, working from the center out in all directions until you have a 12-inch round. Fold the dough in a half and ease into the pie pan, with the fold in the center. Unfold the dough and trim it to overhang the edge of the pie pan about 1 inch. Trim and crimp edges. Prick the dough with a fork, covering the surface with tiny holes. Bake for 10 to 15 minutes, until golden. Cool on a wire rack. Fill the pie shell and bake as directed in the recipe.

Carrots Recipe

Hutspot
From Simply in Season by Mary Beth Lind and Cathleen Hockman-Wert

Note: This beautifully colored dish is served in Holland especially on a day of special celebration for the House of Orange.

1 pound boneless beef chuck or venison round steak
2 cups water
½ teaspoon salt
6 large potatoes, chopped
6 carrots, chopped
1 cup onion, chopped
1/3 to ½ cup milk
2 tablespoons butter or margerine
¼ teaspoon pepper

Simmer the beef/venison, water and salt together for about 2 hours. Add the potatoes, carrots, and onion and boil about 30 minutes. Remove meat, slice, and set aside. Drain and reserve the broth. Mash the vegetables together. Gradually beat the milk into the vegetables. Add the butter/margarine and pepper, and beat vigorously until light and fluffy. Serve with sliced meat. Vegetables may be cooked separately from the meat. Make gravy from the broth or save it for soup.

Potato Recipe

Latkes: Potato Pancake with Eggs and Onions
From Vegetarian Cooking for Everyone by Deborah Madison

2½ pounds potatoes, peeled
3 eggs and 2 egg whites, beaten
1 onion, grated or very finely chopped
¼ cup flour, toasted bread crumbs or cracker crumbs
Salt and freshly milled pepper
3 tablespoon clarified butter, vegetable oil or a mixture

Peel the potatoes and coarsely grate them by hand or in a food processor. Put them in a bowl of water as you work. When ready to cook, drain the potatoes and wrap them in a towel to squeeze out the excess water. Return the potatoes to the bowl and add the eggs, onion, flour, and 2 teaspoons salt, and pepper to taste.

Preheat oven to 200˚F. Film a heavy skillet with some of the butter and set it over medium-high heat. When hot, drop in the batter by spoonfuls and cook over medium heat until browned, about 6 minutes. Repeat on the second side. Put the finished ones on a plate and keep them in the oven until all are done. Serve with sour cream and applesauce or sour cream covered with a sprinkling of snipped chives.

Winter Squash Recipes

Chili-Brown Sugar Delicata Squash with Pears
From EatingWell (November/December 2010)

1 pound delicata squash (about 1 large)
2 medium ripe but firm pears, sliced
2 teaspoons extra-virgin olive oil
1/4 teaspoon salt
1/4 teaspoon freshly ground pepper
2 slices bacon
2 tablespoons water
1 tablespoon light brown sugar
1 teaspoon chili powder

Preheat oven to 425°F. Cut squash in half lengthwise; scoop out the seeds. Cut crosswise into 1/4-inch slices. Toss in a large bowl with pears, oil, salt and pepper. Spread on a large baking sheet. Roast the squash and pears until just tender, stirring once or twice, 20 to 25 minutes.

Meanwhile, cook bacon in a large nonstick skillet over medium heat until crisp, 4 to 6 minutes. Transfer to a paper towel-lined plate. Discard all but 2 teaspoons fat from the pan. Over medium heat, stir in water, brown sugar and chili powder. Add the squash and pears; toss to coat. Crumble the bacon on top.

Savory Tempeh and Vegetables
From Simply in Season by Mary Beth Lind and Cathleen Hockman-Wert

2 tablespoons butter
2 tablespoons olive oil
4- 3 to 4 inch strips kombu seaweed, broken into 1-inch pieces
3 cloves garlic, minced
1 tablespoon ginger root, peeled and minced
2 sprigs fresh rosemary or sage
16 ounces tempeh, cut into 1 inch squares
1 cup water
2 tablespoons soy sauce
1 tablespoon maple syrup
2 medium onions, cut into ½ inch slices
1½ pounds winter squash, seeded and cut into 2-inch pieces (delicata from this week work great)
2 medium parsnips, peeled and cut in ½-inch slices
2 large carrots, peeled and cut in ½-inch slices
1½ cups cold water
2 tablespoons soy sauce
2 tablespoon arrowroot powder or cornstarch

Melt butter and oil together in an ovenproof Dutch oven over medium heat. Add seaweed, garlic, ginger, and rosemary/sage and sauté for 2 minutes. Arrange the cut tempeh in a layer on top. Whisk water, soy sauce, and maple syrup in a small bowl and pour over the tempeh. Layer the cut vegetables on top of the tempeh in this order: onions, winter squash, parsnips, and finally carrots. Sprinkle with coarse salt. Cover and bring to a boil. Transfer to a preheated oven an bake at 400˚F until vegetables are tender, about 25 minutes. With a slotted spoon, transfer vegetables and tempeh to a serving bowl. Drain back any juices into the Dutch oven and place over medium heat. In a small bowl combine cold water, soy sauce, and arrowroot powder and mid until dissolved. Whisk into juices. Simmer, stirring constantly, until sauce thickens. Pour sauce over the tempeh and vegetables. If desired, gently fold in 2 thinly sliced green onions. Serve immediately over rice or bulgur.

Categories : Blogroll, CSA Newsletter, Farm News & Updates, Recipe, Uncategorized

Winter Update: January 26, 2009

Posted by csa on
 January 28, 2009


Happy winter! The snow has melted and it is a new year. Despite all the obstacles the weather has thrown our way we are continuing to plug away at winter maintenance, including the construction of a new unheated greenhouse where this coming season’s gypsy peppers will set their roots. Of course we are busy planning and preparing for the 2009 CSA season and with that in mind, we want to remind you that sign-up for the 2009 season is open and we still have space available at all of our pick-up sites. Signing up is quick and easy! Just complete the Community Farm Agreement and submit on-line, then send in your $100 deposit to reserve your slot for the 2009 season.

As always, the farm is open for visits. During the winter months please call the field office (503) 621-6921 and check to make sure we will be here. You can find directions to the farm on our website.

Keep warm, stay dry, and hang on just a few more months because fresh vegetables are on the way!

Categories : CSA Newsletter

CSA Newsletter: Week 29- December 1, 2008

Posted by csa on
 December 1, 2008


This Week’s Share


  • Brussels sprouts
  • Cabbage, Savoy
  • Carrots
  • Celeriac
  • Garlic, Silver Rose
  • Kale
  • Onions, Copra
  • Potatoes
  • Winter squash, Acorn
  • Winter squash, Delicata

Prepare for your Last Share

Bring an extra bag or box for this week’s pick-up because there will be some larger quantities of more heavy things and we want to make sure all of it makes it home safely. Also take notice of some tips about storage for produce in this week’s share and from some vegetables that you may still have around.

End of the Season Reflections
(by SIO Farm Manager Tanya Murray)


As farmers, we live each season three times. First there’s the planning life of the season. We look ahead, our hands intimate with the keyboard of the computer. Winter squash and broccoli smile back at us from the glossy pages of seed catalogues, perfect specimens of the vegetables they promise to be. The tillage, seeding, and planting schedule all orchestrated perfectly between the straight gridlines of spreadsheets.

Then there’s the delicious, calloused handed, life of the season. We make plans each day and change them with the weather. Vegetables that had once been innocent lists on seeding charts come to life. There are 32,460 onions to plant; the Arkansas Traveler tomatoes need to be trellised, and eventually the Maverick melons are ready to harvest. We weed and water and eat what we envisioned and planned for months earlier.

Finally there’s looking back, the time that’s upon us now, a vegetable day of reckoning of sorts. We reflect on the season with gratitude, pride, and awe. The seeds that were delivered by the UPS truck in early spring have amounted to meals on our table and yours. We look at records of yields and dates, taking notes on what worked well and what we could have done better at. And then, without much of a pause, we open up the next seasons planning charts and begin again.

The 2008 season came with the usual mix of challenges and successes in the field. The most notable challenge this year was the cool spring that extended into a cool summer. For some crops, there were few repercussions, but peppers and eggplants like it hot. To compound this, the crop rotation put these crops in a field that already has its own cooler micro-climate. And so despite our best efforts, we did not have the bountiful harvest of these crops we had planned on. We are considering our options to insure a better harvest in 2009. Plastic ground cover is used on many northern farms to warm up the soil for heat loving crops. While we are not a plastic-free farm, we put careful consideration into its use. Plastic row cover is not easily re-used after one season, making its life span short. We will experiment in 2009 with planting some peppers in unheated hoop houses. The hoop houses are made of plastic but are multi purpose structures that get many seasons of use. This year we did make the choice to grow heirloom and sauce tomatoes exclusively in unheated plastic hoop houses. After too many seasons of finding ourselves harvesting perfectly ripe tomatoes, split from late summer rains, we enjoyed harvesting over two tons this year.

Alliums were also a big success this year. We saved enough garlic seed to plant our 2009 crop and to distribute a few extra bulbs in our last share. The leek planting method that we experimented with in 2007 was fully implemented in 2008. The leeks were easier to weed and had over ten inches of blanched shaft. We were pleased with the Cipollini onion varieties that we trialed, and plan to grow them again next year.

Spinach is an ever elusive crop for us. We should be able to grow it easily in our cool, damp springs. Struggles with germination led us to starting seedlings in the greenhouse and transplanting 3600 plants per planting. If this was working it might be worth the time it takes, but so far we have still not had the yields we’d like on spinach. Experiments with soaking the seed before planting did seem to increase germination rates. We will continue experimenting with this along with more successive seedings.

A new walk behind seeder that drops seeds with greater precision made our fall Hakurei turnip crop a great success. Last winter’s investment in a root crop washer made our potato and carrot washing system more efficient and it also uses less water.

Our broccoli yields this season were not as high as we had hoped. Our earliest plantings were likely set back by the freezing temperatures we had in early April this year. We have also continued to have challenges with symphylans, an arthropod that is infamous for feeding on the root hairs of young plants. We will be participating in a research project with Oregon State University beginning this December that will likely help us hone our broccoli growing skills and increase our yields in future seasons.

In 2007 we had a big problem with carrot rust fly and the damage this pest did to our carrot crop. This season, we covered each of our carrot seedings with floating row cover to act as a physical barrier between the crop and the carrot rust fly. Although using this strategy has meant more time both covering beds and hand weeding, we have seen little to no damage on the carrots this year.

In summary, when you’re growing over fifty different vegetables any given year is bound to be good for some crops and not for others. There is always more to learn, skills to hone, and improvements to be made based on the previous season. For over 15 years Sauvie Island Organics has been doing just this and we will continue fine tuning our systems to bring you the most bounty nature will allow.

We hope your reflections on the 2008 season conjure up delighted taste buds and a full belly. Maybe you are a new member who was introduced to celeriac for the first time. Or maybe you’ve been with the farm for years and are raising SIO fed kids. While we may not be able to grow the perfect quantity of beets to suit everyone’s tastes, we are always happy to hear your feedback and take it into account as we plan for seasons ahead.

We also hope your reflections on the season will connect you back to the reasons you chose to support a local, organic farm. Because Michael Pollan has provided inspiration for many people to think about how they eat, we’re including a link to a recent letter he wrote to the future president elect.

As you may already know, we are growing an additional five acres of vegetables in 2009. Our increasingly long waiting list suggested that more people want to have the direct relationship with their food that CSA provides. Getting bigger is also an economic decision. There are efficiencies to be gained with increasing acreage. Take seeding carrots for example. The time it takes to get the seeder set up and walk out to the carrot field is about equal to the time to seed a carrot bed. Seeding a couple more beds once you’re set up and out there makes the time spent setting up more worthwhile. These small savings in efficiencies add up. These savings increases the bottom line and allow us to employee more permanent, year round staff on the farm. The longer people stay with us at SIO the smarter and more efficient we get at farming. The more efficient we become, the closer we can come to providing jobs that pay truly livable wages. Now that is sustainable agriculture.

We’ve been asked about our choice to expand in tough economic times. Our hope is that people will continue to invest in our local food economy. A reporter recently interviewed us about this subject and asked if we promote what a savings CSA is when we are selling CSA shares. The answer was a resounding no. Choosing to support a CSA should not be seen as the “cheap” option. We do recognize the cost of a CSA share is not accessible to everyone. We have made efforts to increase it’s accessibility through our CSA Scholarship Fund. Thanks to many of you who have made generous donations to this fund that covers up to half the cost of a share for low-income families. Over the years we have continued to donate foods to local food banks and soup kitchens. These are small solutions to our national problem of food security that cannot be solved by the farmer alone. Cheap food is not the solution. When the fossil fuel dependence, environmental degradation, and health costs that make cheap food possible are taken into account, we have to ask whether cheap food is really worth its ultimately high cost. We recently received a CSA membership renewal check in the mail with a note that said “Even though we are young-ish and poor-ish artists, we feel like it was the best use of our money.” We appreciate that you as CSA members recognize the true value of the food we grow.

We hold on to our values as we take the step of getting bigger and we proceed with caution and limits. We will not become the industrial scale of agriculture that has made food cheap at a high cost. We are committed to growing a wide diversity of high quality vegetables for our local market. The diversity of what we grow means we do not face the challenges of mono cropping that are often met with increased pesticide usage. This diversity of crops also puts a healthy limit on our use of fossil fueled mechanization. While we do use tractors for tillage and cultivation, we still hand harvest everything we grow, with the exception digging potatoes, and those still need to be picked up. We plant cover crops to feed the soil, increase organic matter, and prevent erosion. The food we harvest travels 15 miles or less from the farm to your CSA pick up site – using less fuel and arriving with less packaging, higher nutritional value, and better overall quality. We are committed to having a direct relationship with you, as eaters and community members, and as always welcome you to visit the farm. And as Community Supported Agriculture really is about this relationship, our commitments are only possible with your reciprocal commitment to us. Thank you for your continued support and we look forward to growing for you in 2009.

Recipes


Celeriac Recipes

Celery Root and Wild Rice Chowder
Adapted from Local Flavors by Deborah Madison

½ cup wild rice
2 celery root

2 large leeks, white parts only (or if you don’t have any leeks left you can substitute with 1½ large onions or 2-3 shallots)
2 tablespoons unsalted butter (or butter substitute)
1 cup thinly sliced potatoes (russet variety from this weeks share work great)
¼ cup chopped parsley, plus extra for garnish
1 bay leaf
1 large thyme sprig
sea salt and freshly ground pepper
2 cups vegetable stock, chicken stock, or water
2 cups half-and-half or milk


Cover the wild rice with 5 cups water in a small saucepan. Bring to a boil, then lower the heat. Cover and simmer for about 45 minutes or until tender.

Thickly cut away the celery root skins, then quarter and chop the root into bite-sized pieces. Chop and wash leeks (or onions or shallots).


Melt the butter in a soup pot. Add the vegetables, parsley, bay leaf, thyme, and 1½ teaspoons salt. Cook over medium-high heat for about 5 minutes, then add the stock. Bring to a boil, reduce the head to low, and simmer for 20 minutes. Add the half-and-half and simmer until the vegetables are tender. Taste for salt and season with pepper. To give the soup a creamy background, puree a cup of the vegetables and return then to the pot. If the soup is too thick, thin it with some of the rice water or additional stock.


Divide the soup among 4 or 6 bowls and then add a mound of the wild rice to each. Garnish each bowl with parsley and serve.


Celeriac and Carrot Gratin
Adapted from Taunton’s Kitchen Gardener: The Vegetable and Herb Gardening Journal

1 tablespoon olive oil
2 medium onions
3 to 4 medium carrots
1 large celeriac root, sliced
Acidulated water (2 tablespoons vinegar or lemon juice to 4 cups water)
1 teaspoon dried tarragon
salt and freshly ground pepper
1 to 1 ½ cups half-and-half


Preheat the oven to 375˚F. Heat the olive oil in a large non-stick frying pan over low heat. Peel and slice the onions and sauté them in the olive oil until golden yellow. Set aside.


Peel and cut the carrots into 1/8-inch thick slices, and set aside. Peel and quarter the celeriac and cut into 1/8-inch thick slices, immersing it into acidulated water as you go.


To assemble the gratin, drain the celeriac and rinse it under cold water. Arrange half of it evenly in a 2-quart baking dish and sprinkle with ½ teaspoon of the tarragon and some salt and pepper. Arrange the remaining celeriac evenly over the carrot layer. Sprinkle the remaining tarragon and salt and pepper to taste. Top with onions and add enough half-and-half to come just below the top of the final celeriac layer. Cover the gratin with aluminum foil, place on a baking sheet, and bake for 30 minutes. Remove the aluminum foil and press down the layers to base the top layer. Continue baking for 30 minutes more, or until cooked through. Serve warm. Makes 4 servings


Brussels Sprouts Recipe


Brussels Sprouts with Mustard-Caper Butter
Adapted from Local Flavors by Deborah Madison

Note: This recipe originally calls for 1 pound of Brussels sprouts, 1 small head cauliflower (chopped) and 1 small head of Romanesco (chopped). If you have either cauliflower or Romanesco available please feel free to substitute them in appropriate quantities for an equally delicious dish. The main difference in the cooking process is adding the cauliflower and Romanesco to the boiling water 3 minutes after the Brussels sprouts, then continue to boil for another five minutes. Aside from that all directions are the same.


For the Mustard-Caper Butter:

2 garlic cloves
sea salt and freshly ground pepper
6 tablespoons unsalted butter (or butter substitute), at room temperature
2 teaspoons Dijon-style mustard, can use more or less depending on personal taste
¼ cup drained small capers, rinsed
zest of 1 lemon
3 tablespoons chopped fresh marjoram (3 teaspoons dried marjoram)


Pound the garlic with ½ teaspoon salt in a mortar until smooth, then stir it into the butter with the mustard, capers, lemon zest, and marjoram. Season with pepper. The butter can be made a day ahead and refrigerated. Bring back to room temperature before serving.


For the Brussels Sprouts:

2½ pounds Brussels sprouts (all three stalks from this weeks share, sprouts stripped off the stalk)
sea salt and freshly ground pepper


Trim the base off the sprouts, then slice in half or, if large, into quarters. Bring a large pot of water to a boil and add salt. Add the Brussels sprouts and cook for 6-8 minutes, or until the sprouts are tender. Drain, shake off any excess water, then toss with the Mustard-Caper Butter. Taste for salt, season with pepper and toss again.


Cabbage Recipe


White Beans with Kale and Savoy Cabbage
Adapted from Local Flavors by Deborah Madison

1 cup dried cannelloni, navy or gigantes, soaked for 4 hours or overnight
sea salt and freshly ground pepper
1 large onion, finely diced
2 leeks, white parts only, diced (can omit and use another onion or shallot if you don’t have any leeks)
7-10 leaves kale
1 small Savoy cabbage (or half of a large one), quartered, cored, and chopped
2 plump garlic cloves, minced or pounded with a pinch of salt
½ cup chopped parsley
2 tablespoons olive oil, plus extra to finish


Drain the soaked beans, then put them in a pot and cover with cold water. Bring to a boil, add ½ teaspoon salt, then lower the heat and simmer, partially covered, until the beans are tender, about 1½ hours.


While the beans are cooking, chop all the vegetables. Rinse the leeks (if using), kale, and cabbage, but don’t dry them. Warm 2 tablespoons of the olive oil in a heavy wide skillet. Add the onion and leeks and cook over medium-low heat until the onion is soft but not browned, about 12 minutes. Add the kale, cabbage, garlic, parsley and 2 tablespoons salt. Cook with the heat on low and the pan covered until vegetables are soft and the volume greatly reduced, about 30 minutes.


When the beans are done, add them, along with a cup or two of their cooking liquid, to the pot. Simmer until the greens are completely tender. Taste for salt and season with pepper. This is very tasty served with, or over, garlic-rubbed toast drizzled with olive oil.


Winter Squash Recipes


Quinoa Stuffed Squash

Adapted from UCSC Farm and Garden Field Notes


Quinoa (pronounced keen-wa) is a fluffy, high-protein grain from South America. Look for it in natural foods stores in the grains section or in the bulk bins. You may also substitute a nutty blend of brown and wild rice.

2 Delicata (or Acorn) squash, split lengthwise and seeds scooped out
1 cup quinoa
1 tablespoon olive oil or butter
1 medium onion, chopped
2 cloves garlic, chopped
8 to 10 fresh mushrooms, sliced (optional)
¼ cup chopped parsley (may omit or used dried if you don’t have fresh available)
½ cup chopped walnuts
3-4 pinches of nutmeg
1-2 pinches of thyme
salt and pepper
1 cup grated cheddar cheese


Preheat oven to 350˚F. Place squash cut sides down on a lightly oiled baking sheet. Bake until just tender, about 20-25 minutes. Remove from oven and set aside. While squash is baking, bring 1½ cups water to a boil. Add dry quinoa. Reduce heat, cover and let simmer for 15-18 minutes, until all water is absorbed. Remove from heat and set aside. In a large skillet over medium heat add oil or butter and sauté onions, garlic, and mushrooms until soft and starting to brown. Remove from heat. Stir in parsley, walnuts, quinoa, and seasonings (nutmeg, thyme, salt and pepper). Add ½ cup cheese. Divide mixture between squash, topping each half with a sprinkle of the remaining cheese. Return to the oven for 10-15 minutes, until the stuffing is heated through and the cheese is melted and bubbly. Serves 4 as an entrée.


Baked Acorn Squash with Maple Syrup and Balsamic Vinegar
Adapted from The Oregonian FOODay


Note: Do not try and substitute red wine vinegar for the balsamic in this recipe, it doesn’t work. Although, both younger less expensive and finer aged balsamic vinegars will work. Also, this recipe works well with all winter squash and is easily doubled, so if you are wanting to use up more squash just increase the ingredients to whatever ratio you are using and continue as usual.

2 acorn squash, halved lengthwise and seeds scooped out
¼ cup maple syrup
1/8 cup balsamic vinegar
1 tablespoon fresh lemon juice
4 teaspoons unsalted butter (or butter substitute)
freshly grated nutmeg (or already ground)


Preheat oven to 375˚F. Place the squash halves, cut side up, in a large baking dish. In a small bowl, stir together the maple syrup, balsamic vinegar, and lemon juice. Using a pastry brush, brush some of the mixture over the cut surfaces of the squash. Bake for about 20 minutes, then brush the squash again with the maple syrup mixture. Divide any remaining mixture among the squash cavities and add 1 teaspoon butter to each. Sprinkle nutmeg lightly over squash. Return to the oven and bake until the squash are tender when pierced with a knife, about 1 hour longer, basting two or three times. Serve warm. Makes 4 servings.

Storage Tips

Here are some suggestions about storing the produce you will be receiving in this week’s share. This information, and more, can also be found by accessing the pop-up links provided in the share list.


Brussels Sprouts: Do not wash sprouts prior to storing. Snap sprouts off the stem and discard the stems. Keep the sprouts in a plastic or paper bag in the refrigerator for 4-6 days.

Cabbage: Savoy cabbage is the most tender of cabbages and as such is them most fragile in terms of storage. Tightly wrap the cabbage in plastic and refrigerate, it will keep for under a month. For other less delicate red and green cabbages they keep very well in the refrigerator, or other cool places (like the garage, back porch or the basement). With the outside leaves left on and prevented from drying out, it should do well for many weeks.

Carrots: Run the roots under cold water to clean and store in a bag in your refrigerator. They should store for a couple of weeks in ideal conditions.

Celeriac (Celery Root): Trim off the top leaves if any are still remaining, and store celeriac in the refrigerator (in a plastic bag is good because it creates an environment with higher humidity). Protected by its tough rind, it will keep for several weeks.

Garlic: Don’t refrigerate your garlic heads. The Silver Rose variety is the longest storing of those we grow, so store them in a cool and dry spot in your kitchen away from direct sunlight. If stored well, garlic should keep for many weeks.

Kale: Store kale in a plastic bag in your refrigerator where it will remain moist. If it is not allowed to dry out, kale should keep for about a week. If you are looking to preserve it for a longer period of time you can try blanching and freezing it.

Onions (storage varieties): Whole onions are best kept in a cool, dark part of the kitchen, where they will last for many weeks. Leftover pieces of onion can be stored in the refrigerator for several days, in an airtight container so as not to contaminate other foods with the smell they release.

Potatoes: Potatoes should be stored in a cool dark part of the kitchen away from any light, or in the refrigerator. Potatoes should be wiped clean but not washed before storing. Any moisture will tend to rot them. In ideal conditions, they will keep for many weeks.

Winter Squash: Winter squashes were bred for storage. Most can be stored in a cool place for up to 6 months. Among the exceptions are Delicata, which should keep for several weeks in a cool and dry part of the kitchen away from direct sunlight. Store squashes that have been cut open in the refrigerator for several days. Also the Butternut from this years harvest needs to be used fairly soon due to some freezing damage experienced while out in the fields.

CSA Season Comes to a Close

As the saying goes, time sure flies when you are having fun (and eating well)! That said, this week 29 is the last week of CSA. This season was planned for 29 weeks with the idea of a big finish on Thanksgiving. Because of the long, cool, wet spring we started a week late making our finish the first week of December. In 2009 we have planned for a 30 week season and this is reflected in the price increase for 2009. We look forward to starting the cycle over again with you in May. We have a last few reminders and thoughts for you before saying goodbye for the 2008 season:

  • Please return any and all box bins you may have in your possession so we can put them back to use again for the next CSA season. We will be returing to Metro, PSOB, Ecotrust, and St Johns next Wednesday to pick up bins.

  • We will be opening up the 2009 season with our annual onion planting party in the April, so keep you calendars open because you won’t want to miss it!
Categories : CSA Newsletter, Farm News & Updates, Recipe

CSA Newsletter: Week 28- November 24, 2008

Posted by csa on
 November 24, 2008


This Week’s Share

  • Carrots
  • Collard Greens
  • Garlic
  • Onions, Copra
  • Parsnips
  • Pie Pumpkins, Baby Bear
  • Potatoes
  • Shallots
  • Turnips, Scarlet Queen
  • Winter Squash, Hubbard


We would like to remind you of the changes to all CSA pick-ups for the week of Thanksgiving.


At the Farm: Tuesday, November 25- available for pick-up starting at 4:30pm
SE Ankeny: Tuesday, November 25- 5:00pm-7:00pm
SE Elliot: Tuesday, November 25- 5:30-6:30pm
Friendly House: Tuesday, November 25- 5:00-7:00pm
Ecotrust Building: Wednesday, November 26- available by noon
Metro Building: Wednesday, November 26- available by noon
Portland State Office Building: Wednesday, November 26- available by noon
St John’s: Wednesday, November 26- available for pick-up starting at noon

Recipes

By now you likely have your main dish in order for Thanksgiving Day, but what about all those side dishes to accompany the main attraction? Here are some recipe ideas to assist you while you are creating your beautiful and delicious Thanksgiving feast!

Root Recipes

Here are a few different options for the variety of root crops you will be receiving in your Thanksgiving share this week.


Parsnips and Carrots with Orange Butter

Adapted from UCSC Farm and Garden Field Notes

Note: It is very easy to adjust the size of this recipe to meet your portion requirements, just increase all ingredients to whatever ratio fits your needs.

1 cups water
3 small to medium size parsnips, peeled, halved lengthwise and cut crosswise into ¼ inch thick pieces
3 medium size carrots, halved lengthwise and cut crosswise into ¼ inch thick pieces
1/3 cup fresh orange juice (2-3 oranges juiced)
1/8 teaspoon freshly grated orange zest (after acquiring the zest from the orange you can juice it for the orange juice required above)
1 tablespoon unsalted butter or non-dairy equivalent
salt (to taste)


In a skillet combine the water, already cut parsnips and carrots, and your desired amount of salt. Simmer the vegetables for 15 minutes, or until they are just tender, and stir in the orange juice. Simmer the mixture for another 5 minutes, or until all vegetables are tender. Transfer vegetables to bowl using a slotted spoon so that the water drains and remains in the skillet. Boil the liquid remaining in the skillet until it is reduced to about 2 tablespoons. Remove the skillet from the heat and stir in the orange zest and butter, stirring until the butter is melted. Spoon the sauce over the vegetables and its ready to serve.


Old Fashioned Root Bake
Adapted from UCSC Farm and Garden CSA Field Notes

This recipe is so easy that you may feel selfish having saved yourself so much time and energy in the kitchen this Thanksgiving, but go on treat yourself and your guests to this delicious and simple dish. It is tasty as-is or complemented well with the addition of some Thanksgiving gravy or cranberry sauce!

Note: You may use any combination of the root crops listed below, or all of them together. You also can choose how much of each to use depending on how much you have or which ones you like the most.

parsnips
carrots
potatoes
turnips
onion
beets (if you have any left)
olive oil
salt and pepper


Preheat the oven to 375˚F. Prepare all of the roots the same way by peeling those you want to peel and cutting them into small cube pieces (even sizes are the best for uniform cooking time). Place the cubed roots into a baking sheet and cover them in salt, olive oil, pepper, and/or any other spices and herbs you want to season them with. Mix it around well so there is oil and spice on everything. Bake at for approximately 40 minutes or until roots are soft when poked with a fork.

Oven-Braised Turnips with Garlic
Adapted from Vegetable Love, by Barbara Kafka

Let your Thanksgiving table shine bright this year, because as the author of Vegetable Love Barbara Kafka says, “This takes turnips from a boring slightly woody vegetable to a star.”

1 pound turnips, trimmed and cut into ½-inch wedges
1½ tablespoons olive oil
1 head of garlic, separated into cloves, smashed and peeled
2 bay leaves, whole leaves broken in half
1 cup beef stock (or vegetable broth for vegetarian option)
¼ teaspoon dried thyme (or ¾ teaspoon fresh thyme)
¼ teaspoon rubbed (crumbled) sage (or ¾ teaspoon fresh finely chopped sage)
¼ teaspoon dried oregano (or ¾ teaspoon fresh finely chopped oregano)
½ teaspoon kosher salt, or to taste
Freshly ground black pepper to taste


Place a rack in the center of the oven. Preheat oven to 500˚F. Place the prepared turnips in a roasting pan and coat with oil and spread out in a single layer. Roast for 15 minutes checking once or twice. Flip the turnips and rotate the pan. Add the garlic. Roast for 5 minutes. Flip the turnips and garlic over and rotate the pan. Tuck the bay leaves under the turnips. Add the stock (or broth) and herbs. Roast for 10 minutes. Flip the turnips and garlic over and rotate the pan. Roast for 10 more minutes. The liquid will be mostly absorbed. Remove the bay leaves. Add the salt and pepper to taste. Makes 3 cups.

Squash Recipes

Thanksgiving Squash Muffins
Adapted from Vegetable Love, by Barbara Kafka

1 pound winter squash, this is about ½ of a squash (original recipe calls for Butternut squash, so if you have one use it. Hubbard from this weeks share will work great as well!)
9 tablespoons unsalted butter, slightly softened (can use butter substitute for vegan)
1½ cups plus 2 tablespoons cake flour (if you don’t have cake flour you can create your own using 1½ cups sifted all-purpose flour with the addition of 4 tablespoons of cornstarch)
1 teaspoon baking soda and
½ teaspoon baking powder
½ teaspoon allspice
2/3 teaspoon ground cinnamon
½ teaspoon kosher salt
1¼ cups packed brown sugar (only 1 cup if using Butternut squash)
1/3 cup milk (or soy milk for vegan option)
1 teaspoon vanilla extract
2 large eggs (1/4 cup applesauce per egg for vegan option)


Scoop out the seeds from the portion of squash you are using. Peel the squash and cut into chunks. Place in a food processor and puree until smooth, stopping occasionally to scrape down the bowl. Allow to cool. (Makes 1 cup puree)

Place a rack in the center of the oven. Preheat oven to 350˚F. Grease and flour one 12-cup or two 6-cup muffin tins, using 1-tablespoon butter, margarine or shortening and 2 tablespoons flour. Place in the refrigerator until needed.


In a small bowl whisk together the 1½ cups flour, the baking soda, baking powder, spices and salt.


Using a mixer set on medium speed beat the remaining 8 tablespoons butter and the sugar in a large bowl until fluffy. Add the squash puree, milk and vanilla. Mix until well combined, scrapping down the sides of the bowl as necessary. Add the eggs (or applesauce) one at a time, mixing well after each addition. Stir in the dry ingredients by hand until just combined, being careful not to over mix.


Spoon the batter into the prepared tin(s). Bake for 30 minutes, or until a tester inserted in a muffin comes out clean. Loosen the muffins from the tin(s) while still warm and cool in the tin(s) or on a rack. Serve, or wrap well and freeze. If frozen, defrost and serve at room temperature. Makes 12 muffins.


Winter Squash with Caramelized Onions
Adapted from UCSC Farm and Garden Field Notes

1 winter squash (approximately 2 pounds, your Hubbard from this week’s share is the perfect size), peeled, seeded and cut into 2-inch pieces
3 tablespoons vegetable oil
¼ cup (about 1 ounce) slivered almonds
2 large onions, thinly sliced
2 shallots, thinly sliced
¼ cup sugar
2 teaspoons ground cinnamon
½ cup raisins, plumped in warm water and drained
Salt and freshly ground black pepper


Preheat the oven to 375˚F. Place the squash in a baking dish and bake until tender, 50 to 60 minutes.

Meanwhile, in a skillet, heat the oil over medium-high heat. Add the almonds and fry until golden, 3 to 4 minutes. With a slotted spoon transfer the nuts to paper towels and drain.


Add the onions to the oil in the skillet. Cook 8-10 minutes or until soft, stirring occasionally. Add the sugar and cinnamon, decrease the heat to medium, and continue cooking until the onions turn brown, about 20 to 25 minutes. Add the raisins and season to taste with salt and pepper. Cook, stirring, until heated through. Transfer the squash to a warm serving platter. Spread the onion and shallot mixture evenly over the squash, sprinkle with the fried almonds and serve.


Homemade Pumpkin Pie

Don’t just use those Baby Bear pumpkins as a Thanksgiving table centerpiece (although their beauty merits that honor). Put them to good and tasty use in a homemade pumpkin pie. For this recipe I am including a link to a page I found last year when making my first pumpkin pie from scratch. The directions are very clear and even have a photograph to accompany each step. The pie is delicious! A crust recipe is included below in case you don’t have your own. Click on the link below and scroll down to view the recipe http://www.pumpkinpatchesandmore.org/pumpkinpie.php

Homemade Pie Crust
Adapted from the Joy of Cooking

This is a very basic pie crust recipe, and with some trial and error can be perfected to your own tastes. I prefer to use a blend of vegetable shortening and butter, but I encourage you to figure out what works for you. Joy of Cooking also suggests using lard, which I have yet to experiment with, but have been told makes the best flaky pie crust. This recipe yields 2 pie crusts.

2½ cups all-purpose flour
1 teaspoon white sugar or 1 tablespoon powdered sugar
1 teaspoon salt
1 cup solid vegetable shortening (or ½ cup solid vegetable shortening and 1 stick cold unsalted butter)
1/3 cups plus 1 tablespoon ice water (must be ice water, its important!)


Premix the dry ingredients in medium to large bowl. Add the vegetable shortening and/or butter and cut into flour with a pastry cutter or two knives until pea-sized and cornmeal size chunks are achieved.

Add ice water in tablespoon size portions, cutting in to dry ingredients until small balls form. If the balls stick together when pressed its ready, if not add an additional 1 to 2 tablespoons ice water. Refrigerate at least 30 minutes and for up to 2 days, or crust dough can be wrapped airtight and frozen for up to 6 months.

After dough has chilled separate into two equal size balls. Flour a large flat surface and roll out each ball into a round large enough to cover a pie pan. Continue to fill with pumpkin pie filling (or other pie filling) as directed.

Collard Greens Recipe


Easy Collard Greens with Shallots
Adapted from www.wholefoodsmarket.com/recipes

1½ tablespoons olive oil
3-4 shallots, finely chopped
10 leaves collard greens, thick stems removed and leaves thinly sliced
Salt and freshly ground pepper, to taste


Heat olive oil over medium heat in a large skillet. Add shallots and cook for 3 to 5 minutes or until translucent. Meanwhile, rinse sliced collards under water. Drain but do not dry. Add collards to the skillet with shallots and add salt and pepper. Cover and wilt the collards, stirring occasionally, until bright green and still tender, about 10 minutes. Serve immediately.

Warm Wishes this Thanksgiving

As you get together with friends and family this holiday and give thanks for the bounty that the harvest season has to provide we at Sauvie Island Organics want to give you a BIG THANK YOU for supporting community agriculture. Next week will be the last week of our season together. To sign up for the 2009 season you can go to http://www.sauvieislandorganics.com/join.php, fill out the community farm agreement, pay the deposit and reserve your share of the harvest.

Categories : CSA Newsletter, Recipe

CSA Newsletter: Week 27- November 17, 2008

Posted by csa on
 November 17, 2008

This Week’s Share


  • Brussels Sprouts
  • Carrots
  • Celeriac (Celery Root)
  • Escarole
  • Garlic 
  • Kale
  • Leeks
  • Winter squash, Butternut 

Declare Your Commitment to Local and Healthy Food

We at Sauvie Island Organics (SIO) know that healthy, locally grown, organic food is important to you, your family, and the environment. It is now time to let food policymakers hear your voice by endorsing the Declaration for Healthy Food and Agriculture. By visiting http://www.fooddeclaration.org you can read over the Food Declaration and click the link at the bottom to endorse and/or comment on the Draft Declaration.

Recipes


Celeriac Recipes


Quick and Simple Celeriac and Carrot Slaw
Adapted from the pallets of the SIO Crew


This is a favorite of Scott, Field Manager here at SIO. He likes to eat this with a sandwich or just on its own. This preparation lets the vegetables speak for themselves and takes less than 10 minutes.

1 head celeriac, grated
2 carrots, grated
Juice of 1 lemon (or 2-3 tablespoons bottled lemon juice)
2 tablespoons mayonnaise (optional)
1 tablespoon fresh herbs, chopped (or 1 tsp dried)

Salt and pepper (to taste)


Grate the celeriac and carrots in a medium size bowl. Add the lemon juice, mayonnaise, fresh or dried herbs, and salt and pepper to the bowl and mix until well combined. That’s it, you’re done!

Celeriac Rémoulade
Adapted from Gourmet, found at www.epicurious.com


This recipe is a favorite of Tanya, Farm Manager at SIO, and she enjoys the fresh flavors of this raw root crop dish. This rémoulade recipe speaks to the slaw above, but is a traditional French preparation using only celeriac. This recipe is used as a salad or side dish.

1/4 cup mayonnaise (or peanut oil)
2 tablespoons crème fraîche or sour cream (crème fraîche is a soured cream and is of French origin, it is less sour and thicker than traditional American sour cream)
1 tablespoon minced fresh parsley leaves (1 teaspoon dried)
2 teaspoons fresh lemon juice (may use bottled if you don’t have fresh lemons)
2 cornichons (sour gherkins), minced, or 1 tablespoon minced dill pickle (optional)
1/2 teaspoon drained bottled capers, minced (optional)
1/2 teaspoon Dijon mustard
1 pinch dried tarragon, crumbled
Salt and pepper (to taste)
2 celeriac heads, peeled and cut into matchstick pieces or shredded coarse


Place a large saucepan of salted water on the stove on high and bring to a boil.


While bringing water to a boil stir together in a small bowl mayonnaise, crème fraîche/sour cream, minced pickle, parsley, lemon juice, capers, mustard, tarragon, and salt and pepper to taste until combined well.


In the large saucepan of salted boiling water cook already cut/grated celery root 2 minutes. Drain celery root and refresh under cold water. Dry celery root completely. Add celery root to already prepared sauce and stir together. Chill until ready to serve.

Brussels Sprouts Recipe

Brussels sprouts, also called mini cabbages, are one of the crops that really tastes sweeter after a hard frost. Most of the commercial Brussels sprout production in this country is done in coastal California, where temperatures are cool, but where it also rarely frosts. This is too bad because it means most people will never get to experience the frost sweetened sprouts you have in your share this week.


Brussels Sprouts with Leeks

Adapted from Simply in Season, by Mary Beth Lind and Cathleen Hockman-Wert


Brussels sprouts are one of my (Francesca’s) personal favorites, especially when paired with some crisp bacon pieces. For vegetarians this recipe is equally as delicious without the addition of bacon, so omnivores and vegetarians alike indulge yourselves.

1 pound Brussels sprouts (about half your share this week) sliced in thirds       

2 leeks, thinly sliced (or 1 onion chopped) 

2-3 cloves of garlic minced
1 tablespoon olive oil

1 tablespoon butter
1/4 cup water
2 tablespoons mixed fresh seasonal herbs such as thyme, rosemary, sage, and/or parsley chopped (or 2 teaspoons dried blend of basil, oregano, thyme, and rosemary).
2-4 strips of bacon, chopped into smaller pieces (optional)

1 tablespoon lemon juice (optional)


Start by slicing the Brussels sprouts and leeks. In a large frying pan add 1 tablespoon olive oil and 1 tablespoon of butter together and heat to medium-high. Add the sliced sprouts and leeks, herbs and water and cook until the sprouts are tender, about 10 minutes. If including bacon add in for the last 5 minutes of cooking and turn heat to high for the last two minutes. If adding lemon juice do that in the last 2 minutes as well.

Winter Squash Recipe


Squash Gratin
Adapted from Bon Appétit, found at www.epicurious.com

I discovered this recipe last winter when I had an over abundance of winter squash and wanted to try something new. I brought the dish to a potluck and it was gone in a flash. I have made it for family and friends in different variations and using different squash types since then and had the same ‘quickly emptied pan’ response. This is a warm and cozy recipe, good for the cold days ahead!


1 large butternut squash peeled, seeded, quartered and sliced into 1/4 inch thick slices (you can use the Acorn or Delicata varieties if you still have them around)

1 tablespoons olive oil
4 tablespoons (1/2 stick) butter

1 medium-large leek, sliced
2 cloves minced garlic (optional)
2 tablespoons chopped fresh sage (2 teaspoons dried)
1 log (5.5 oz. ) soft fresh goat cheese (can use a blend of any cheese you have around as well, about to 2 cups grated)
1 cup heavy cream
Salt and pepper to taste
1/2 cup fresh or prepared bread crumbs
1/2 cup hazelnuts, toasted, husked, coarsely chopped (optional)


Place butternut squash slices and olive oil in large bowl; sprinkle with salt and ground pepper and toss to coat. Set aside.


Use 1 tablespoon of butter to grease an 11×7-inch baking dish or casserole. Set aside.


Melt the remaining 3 tablespoons butter in heavy medium skillet over medium-low heat. Add sliced leeks and chopped sage; sprinkle with salt and pepper. Sauté until tender but not brown, about 15 minutes. Coat 11×7-inch baking dish with remaining 1 tablespoon butter. Spread half of leek mixture over bottom of prepared baking dish. Layer half the prepared squash on top of leek layer and sprinkle half of cheese. Repeat layering with leeks, squash, and cheese. (Can be made 1 day ahead. Cover and chill. )


Preheat oven to 375°F. Pour cream evenly over gratin. Sprinkle with toasted chopped hazelnuts and bread crumbs. Bake uncovered until gratin is heated through, browned and crisp on top and and cream is bubbling, about 45 minutes (about and hour if previously chilled).

Farm News and Updates

Thoughts for Thanksgiving

The big meal is just around the corner and in preparation we here at Sauvie Island Organics have some thoughts to share. As a member of a local CSA you may already be aware that you are helping support a local food system, and the 100-Mile Thanksgiving encourages you to join and share with other people and families around the country who are also eating local this holiday season. Visit http://100milediet.org/thanksgiving to join the movement and show your support for delicious local food and passionate local farmers this Thankgiving.


And now you are wondering what is in my share for the week of Thanksgiving? For those of you menu planning and making your shopping lists we are providing a preview of the share.


Carrots (1 pound)
Collards (10 leaves)
Garlic (1 head)
Onions, Copra (2)
Potatoes (4 pounds)
Pie Pumpkins, Baby Bear variety (2)
Shallots (4 minimum)
Squash, Hubbard (1)
Turnips, Scarlet Queen (1 pound)


We would like to remind you of the changes to all CSA pick-ups for the week of Thanksgiving.

At the Farm: Tuesday, November 25- by 4:30pm  

SE Ankeny: Tuesday, November 25- 5:00pm-7:00pm

SE Elliot:  Tuesday, November 25- 5:30-6:30pm

Friendly House: Tuesday, November 25- 5:00-7:00pm

Ecotrust Building: Wednesday, November 26- by noon

Metro Building: Wednesday, November 26- by noon

Portland State Office Building: Wednesday, November 26- by noon

St John’s: Wednesday, November 26- by noon

Dry Beans Available

Select from 15 varieties of beautiful and tasty heirloom bean (descriptions below) organically grown on Sauvie Island by former SIO apprentice Amber Baker. Each variety has been carefully grown and processed by hand and comes in a one-pound bag. $6.00/bag. Email SIO (siorganics@aol.com) with your order including varieties you would like and how many pounds of each by November 28. We will have them available for pick-up the week of December 1, 2007. Please make checks payable to Amber Baker and mail to 8955 N Portsmouth Ave Portland, OR 97203.


Golden Appaloosa
This full kidney shaped bean comes to our farm from a seed exchange in California. Enjoy its rich golden color and hearty flavor.
Black Calypso
Sometimes called “yin-yang” for its distinct markings or “Orcas” for its signature “eyes.” A round coco-shaped bean, perfect in cold salads or baked.
Vermont Cranberry Mix
A usual standard, this season’s Vermont cranberries mixed with several of our trial varieties yielding a beautiful array of beans you’ve never seen before. A ready-made mix of soup beans.
Black Coco
A large oval round very shiny black bean. This variety is good for making a rich and hearty black bean soup.
Tongue of Fire
A large kidney-shaped bean with a fresh green bean flavor. Try this one as a bed for your next meat or vegetable entrée.
Monos Negros
A smaller bean than the Black Coco, this variety is more of a deep dark purple. Use this in your fresh corn and bean salad or blended into a black bean spread.
Lowe’s Champion
A round red bean brighter than the normal kidney. Try this variety in place of kidneys in all of your favorite recipes.
Indian Woman Yellow
A round red bean brighter than the normal kidney. Try this variety in place of kidneys in all of your favorite recipes.
Peregion
A native to Oregon this bean has a full nutty flavor that makes it one of our favorites. These multi-patterned beans hold their markings through cooking.
Jacob’s Cattle Bean
With a creamy texture this burgundy and white mottled bean is known for its ability to absorb flavors.
Main Yellow Eye
New Variety for 2008! A white bean with a golden eye. These beans hold their shape well and have a subtle sweet flavor.
Black Valentine
New Variety for 2008! This small black bean is one of our favorites with its meaty texture. A go-to chili bean or good mashed into a black bean dip.
Norwegian Yellow
New Variety for 2008! A slender golden brown bean to add to your favorite winter soup or served cold in a bean salad.
Carioka
New Variety for 2008! A Brazilian heirloom similar to Perigion but slightly smaller and pink in color.
Blue Tepary
New Variety for 2008! Tepary beans are native to the southwest but this variety has been growing well for us here in Portland. Tepary beans are known for their anti-diabetic properties and are wonderful in a fresh bean salsa or used as a bean spread.

Help the Farm, Return Your Bins!

It is almost the end of the CSA season and as such we ask that all box members please return any and all bins you may have at home. Thanks.

Categories : CSA Newsletter, Farm News & Updates, Recipe
« Previous Page
Next Page »

Recent Posts

  • CSA Week #22: October 31st & November 2nd
  • CSA Week #21: October 24th & 26th
  • CSA Week #20: October 17th & 19th
  • CSA Week #19: October 10th & 12th
  • CSA Week #18: October 3rd & 5th

Archives

Sauvie Island Organics | © 2025 All Rights Reserved
iThemes Builder by iThemes | Powered by WordPress | Site by LRP