Oh those beautiful heads of lettuce and scallions. . .. and everything else! That lettuce needs nothing but a good wash and the lightest of lemony vinaigrettes to be perfect. But there are some other ideas below. And if you’re feeling brave, make this (Ginger Scallion Sauce) with all of your scallions!
I included lots of salad recipes this week. If you want something warm and simple to do with the lovely Lacinato Kale, quickly braise it with a little garlic, maybe some red pepper flakes and serve drizzled with plenty of good olive oil. And pile that on a piece of toasted bread you’ve rubbed with a fresh garlic clove for a hearty snack or first course. Enjoy!
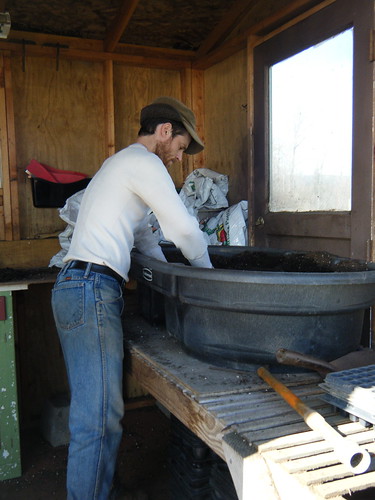
Vegetable Washing Notes
Thai Green Curry with Broccoli and Turnips
Chopped Salad with Cabbage, Mizuna and Tahini Yogurt Dressing
Flank Steak Salad with Greens
Kale and Avocado Salad
Grated Turnip Salad
Vegetable Washing Notes
It’s important to wash your vegetables well. Especially the lettuce, mizuna and kale need a careful rinse. Separate the leaves and wash both sides under running water. Shake off the water and wrap in a clean dishtowel to dry (or spin dry). I tend to wash the quantity I need for whatever I happen to be cooking. Greens stay fresher longer if only washed right before use in my experience.
Thai Green Curry with Broccoli, Turnips & Turnip Greens
Serves 4
I have made variations of this Thai-inspired curry for 15 years. It is not an authentic Green Curry but a tasty, quick adaptation. It is suitable to a wide variety of vegetables: asparagus, new potatoes and green onions in the spring; summer squash and peas in early summer; green beans and eggplant in late summer, and pumpkin, leeks and potatoes in the fall/winter. You can easily add chicken or tofu to it for an even heartier dish though it’s wonderfully rich and satisfying without as well. Veggies like asparagus and peas cook quickly, about 5 minutes in the hot broth, but some of the other combinations take longer so just taste frequently as your cooking it.
When basil is in season (or you have it on hand) you want to add 1/3 – 1/2 cup of roughly torn leaves to this and then it’s perfect!
3-4 cups bit-sized broccoli florets and pieces of tender stem
2-3 turnips, scrubbed and cut into bite-sized wedges or dice
Turnips greens, washed carefully and roughly chopped
1 medium potato, cut into small dice (optional)
1 – 2 inch chunk of ginger, peeled and minced (can omit if you’re in a hurry)
2 cloves garlic or 1 stalk of green garlic, minced (can omit if in a hurry)
5-6 Kaffir lime leaves (totally optional but wonderful if you have them—they freeze well and are sometimes available at New Seasons or Whole Foods or any Asian market—and add so much flavor and fragrance)
1 1/2 heaping tsp (or to taste) green curry paste (Thai & True is a wonderful locally made brand and Mae Ploy is a readily available brand)
2 tsps soy sauce
2 teaspoons fish sauce (can omit to make it vegetarian/vegan)
1 can coconut milk (full fat preferably but light will work too)
Juice of half a lemon or lime (optional)
White or brown cooked Jasmine or other long grain rice
Heat a large sauté pan over medium-high heat. Add ½ cup of coconut milk (use the thickest, part usually at the top of the can), the curry paste, garlic and ginger and fry it for about 3-4 minutes until it’s fragrant and the oil starts separating out a bit. Then add the remainder of the coconut milk plus ½ can’s worth of water, soy sauce and fish sauce. Bring to a boil and then turn down to a simmer and add the diced potato, if using, and cook for about 5 minutes. Then add the turnips and broccoli. Toss in the turnip greens just a few minutes before the other vegetables are tender. The aim is to have all the vegetables tender at more or less the same time. Adjust seasoning with more soy sauce and/or fish sauce if needed and finish with a generous squeeze of lime or lemon juice, if using. Serve hot over rice.
Chopped Salad with Cabbage, Mizuna and Tahini Yogurt Dressing
This is a robust, bright salad that is begging for seasonal adaptations, protein additions (leftover chicken, tofu, shrimp) etc. And it’s just as good if not better the next day. If you don’t have any cabbage you can omit it and just use much less dressing. You can add grated turnips to this as well or use those instead of the carrot.
¼ of large head of green cabbage (or about 3-4 cups, chopped)
4 cups, chopped mizuna
2 carrots, grated (on large hole of box grater)
2 green onions, thinly sliced
½ Serrano chili, minced (with or without seeds depending on how spice you like things) or ½ teaspoon or more red pepper flakes
2 tablespoons chopped mint (optional)
¼ cup toasted, chopped almonds or toasted sunflower seeds
Dressing
2 tablespoons Tahini (sesame paste)
2-3 tablespoons Greek Yogurt (or sour cream or mayonnaise)
1 teaspoon Dijon-style mustard
1 small clove of garlic, minced or mashed with side of knife
juice of 1 lemon (or lime)
salt and peppee
Place all chopped veggies in a large bowl. Whisk dressing ingredients until emulsified and smooth. Taste for seasoning. The dressing should be quite strong since it’s going to dress a lot of veggies. Toss veggies with dressing, mix well and adjust seasoning.
Flank Steak Salad with Greens
This is more of an idea than a real recipe. Grill or cook a flank or skirt steak to your liking. Let rest and cut against the grain into as thin a slices as possible.
Toss torn lettuce and mizuna and a bunch of thinly sliced green onions with a mustardy vinaigrette (Dijon-style mustard, minced garlic, lemon juice or vinegar, olive oil). Toss beef with a little dressing as well and toss with the greens. Add feta or blue cheese to this if you’d like and lots of roughly chopped parsley if you have it.
Raw Kale and Avocado Salad
This salad is also robust and begging for variations. Adjust quantities to your needs and taste. If you don’t have an avocado but have some feta, use that instead for a different but equally good effect.
5-6 cups Lacinato kale, well-washed, tough stems removed and finely chopped
1 diced avocado (see headnote)
2 scallions, thinly sliced
¼ cup toasted sunflower seeds or walnuts, broken up.
Dressing
¼ cup rice vinegar (not seasoned)
1 tablespoon grated onion
¼ cup finely grated peeled apple (use small holes of box grater)
4 teaspoon soy sauce or Tamari
1 teaspoon sugar or honey
3 tablespoons olive or vegetable oil
Mix all the dressing ingredients together thoroughly. Put the chopped kale in a large salad bowl and toss with the dressing and work it in well. Then add the avocado, onions and seeds or nuts, toss well and adjust seasoning to your liking.
Grated Turnip Salad
This is more of a garnish than a salad. It’s sweet and bright and a lovely refreshing addition to any grilled or roasted meat or fish or heartier, warm dish.
Scrub your turnips. Grate however many turnips you want to use. Sprinkle with sea salt and toss with a little rice or champagne vinegar or lemon juice or a combination. Toss in a bunch of finely chopped parsley if you have it and some chili flakes if you’d like. Adjust seasoning and add some freshly ground black pepper.